This is How the ‘Extended Low’ ISO Setting On Your Camera Works
Photographer Chris Lee of pal2tech has created a much-requested follow-up to his technical breakdown of how ISO works when you take a picture. The followup uses Fuji cameras as an example to explain how the Extended Low, or “L”, ISO setting on your camera functions.
This is a source of a lot of confusion among beginners, but it’s really quite simple. As Lee explains in the video, the Extended Low ISO setting works by simply shooting an image at Base ISO, and then post-processing the image in-camera to decrease exposure by one third, two thirds, or one full stop, depending on which Extended Low setting you’re using.
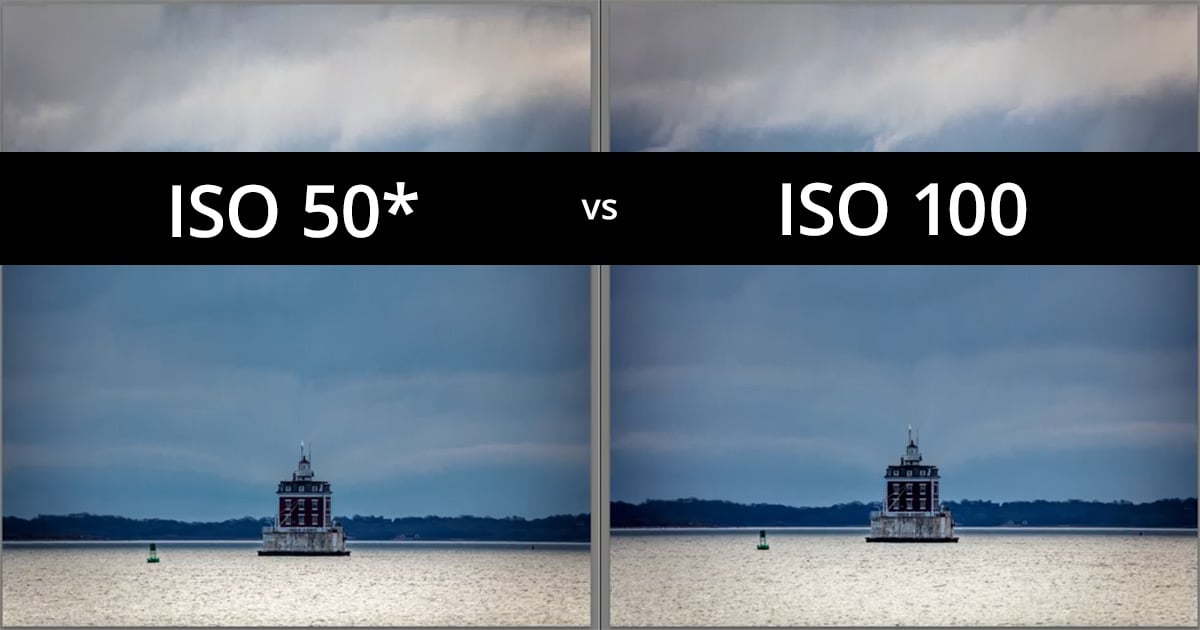
Let’s assume your camera’s Base ISO is 160 and you’re using an Extended Low ISO of 80.
If you’re shooting in full Manual and RAW, there should be no difference between using L to take a photo, or taking that same photo at Base ISO and then pulling down the exposure slider one stop in Lightroom, Bridge, or Capture One.
If you’re shooting in one of the auto-exposure modes, the camera will actually over-expose your photo by one stop—because it’s pretending that the ISO being used is a full stop lower than what is actually happening at the sensor level—and then post-processing down one stop in-camera before generating your file.
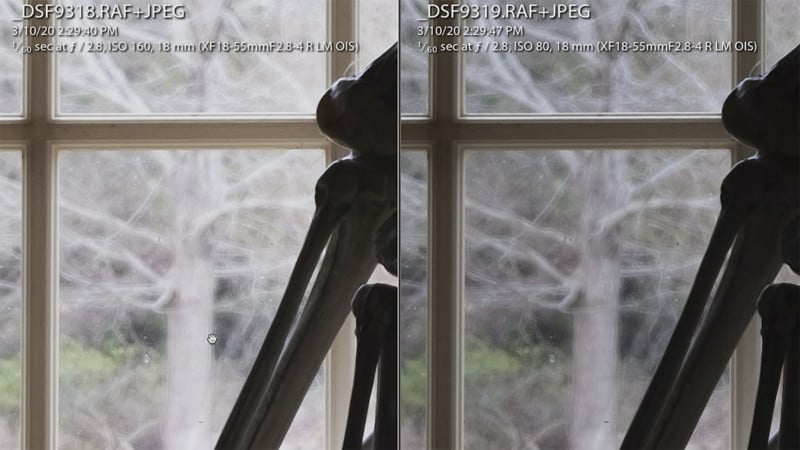
This can bring out more shadow detail at the cost of blowing out some of your highlights, as you can see in this comparison where some of the very slight branch detail is totally gone on the right (ISO 80) vs the left (ISO 160).
So when might you want to use this setting? Most photographers will probably tell you “never,” but if you shoot JPEG-only for convenience (or to make Fro mad), Extended Low is the only way to process the photo in-camera before it’s been converted into an 8-bit file. You’ll get better results than you would by editing the JPEG in Lightroom after the fact.
If, on the other hand, you shoot RAW, there’s nothing that the camera is doing that you can’t do for yourself in your favorite RAW photo editor.
Check out the full video up top for a more thorough explanation of how this works, complete with more examples, and if you can think of a different scenario where you might want to use the “L” setting in real life, let us know in the comments.