How to Fix Blown Out Areas Around the Sun
Shooting directly into the Sun, whether it is sunrise or sunset, often results in some areas around the Sun getting clipped, and we get these rather harsh edges in our sky. Even when shooting bracketed or underexposing for the highlights, we may not achieve a pleasing result around the strongest light in a scene.

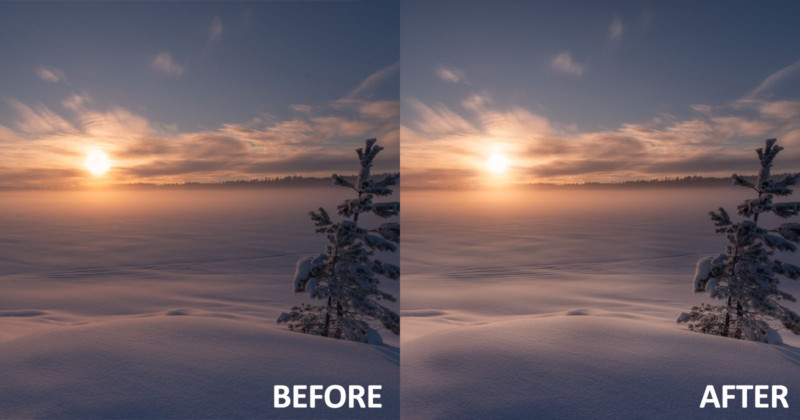
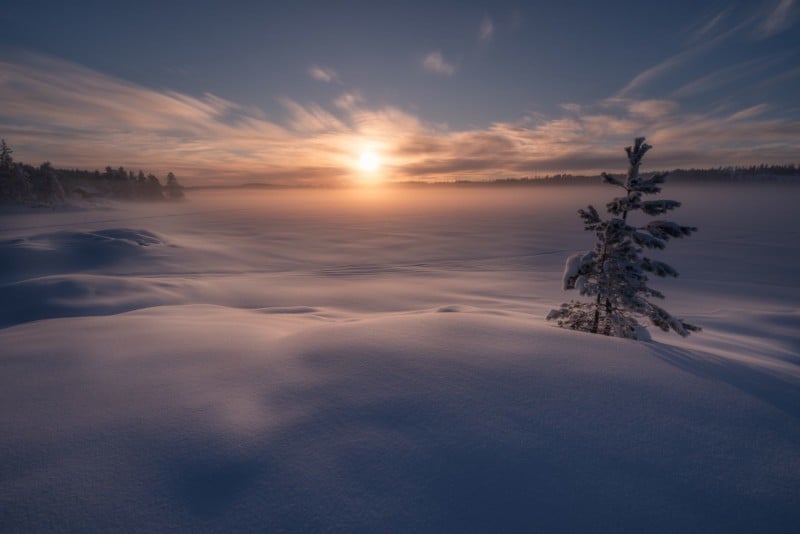
Some frost smoke and clouds diffused the light from the setting Sun. Upon closer examination of the area around the Sun, we will find a few areas that can be improved upon. The image isn’t a worst-case scenario, but it will nevertheless serve our purpose when it comes to showing the principles behind how we can fix hard edges and blown out areas around the Sun.

After opening up the image in Photoshop, I add a new blank layer before I pick the Elliptical Marquee tool. I place the cursor in the center of the Sun and by pressing down Shift+Alt (Windows), it is possible to drag a perfect circle.
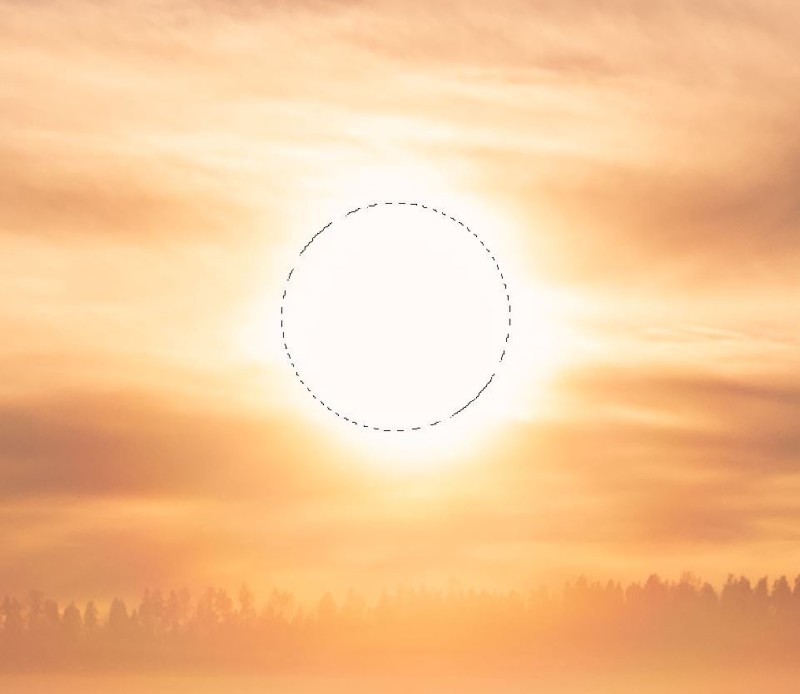
The next step is to blur the selection so that we avoid hard edges. Hit ‘q’ for the Quick Selection tool:

Then go to Filters and Gaussian Blur. I find that a blur around 5–10 px works fine. If we would like even softer edges we can, of course, increase the blur radius.
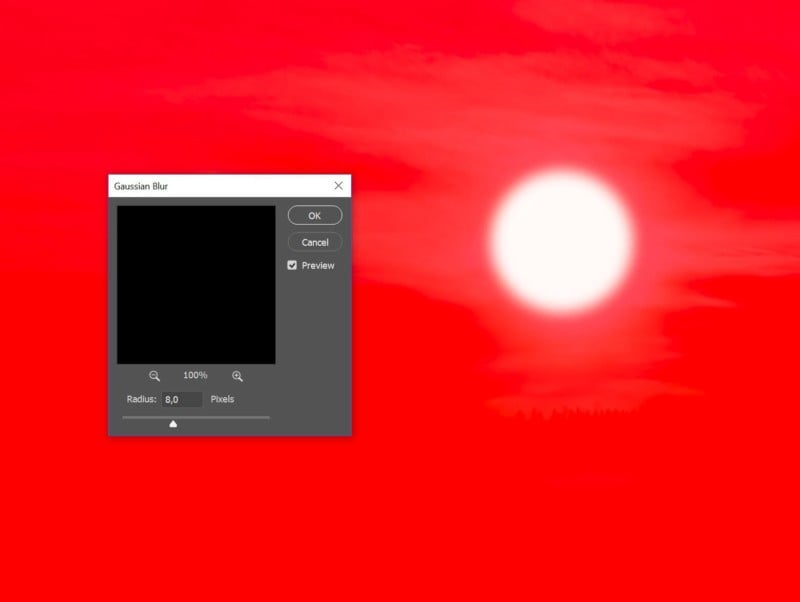
Hit ‘q’ again to leave the Quick Selection tool. The selection we just have created is for the inside of the circle so everything we do from now on will only affect that part of the circle, and that is not what we want. In other words, we need to Invert the selection. The Windows shortcut is Shift+Ctrl+i.
At 100% opacity and around 10% flow I use the clone stamp tool to fill in around the Sun by sampling from all around our selection.
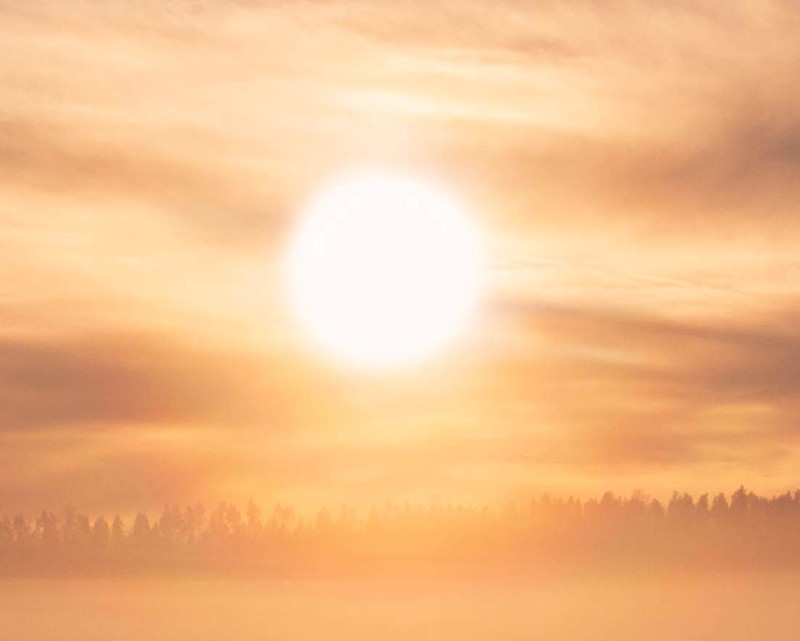
The final step is to add yet another blank layer, which I set to ‘Screen’. With a soft brush, I sample a color from outside the Sun and then at 100% opacity I click once with the brush to add the effect. I place the center of the brush approximately in the center of the Sun, but the brush size is a tad larger than the Sun. Next, I adjust the opacity of the layer until I have something that works in my eyes. The ‘Screen’ layer adds light and further softens what we just did with the clone stamp tool.
Below is the improved image. From here I will continue my editing in Photoshop.
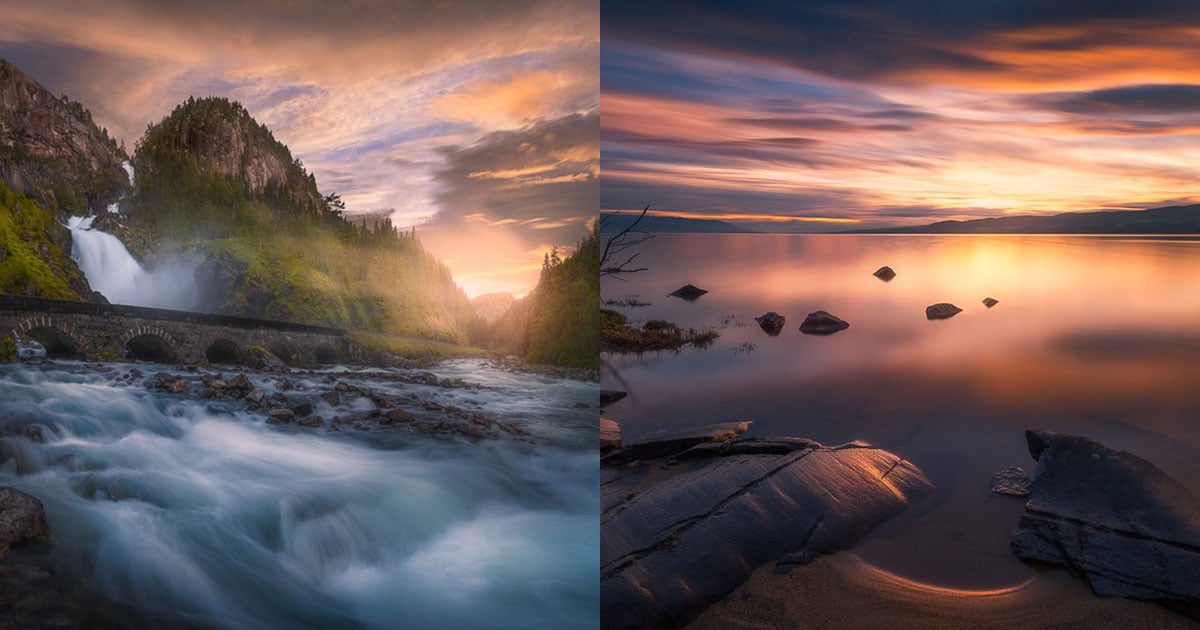
About the author: Ole Henrik Skjelstad is a landscape photographer and math teacher from Norway. The opinions expressed in this article are solely those of the author. You can find more of Skjelstad’s work on his website, Flickr, 500px, and Instagram. This article was also published here.