When and How to Use a Polarizing Filter
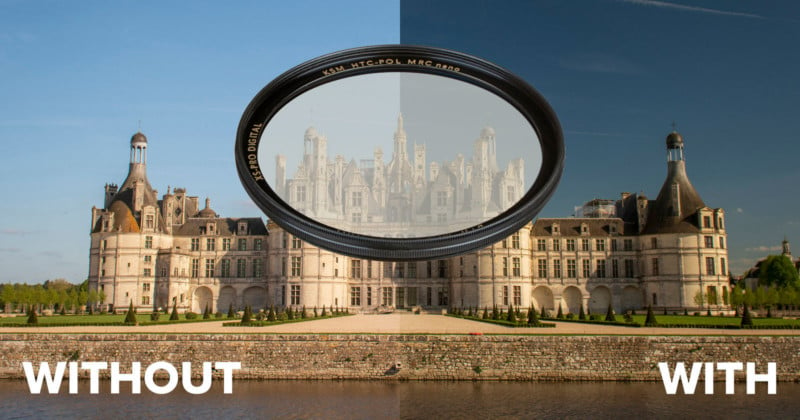
Reflections are often unwanted, and glare will wash out an image. Polarizing filters counter the reflective measures and will deepen blues and add contrast to skies, reduce or remove reflections from water and windows, and increase contrast and saturation.
There was once when a photographer would be foolish not to be armed to the teeth with a selection of colored, warming and cooling, graduated, and specialty filters, but editing software has primarily made most of these photography filters superfluous. I would argue that a photographer needs no more than an ND filter and a polarising filter these days, and here we will discuss the latter.
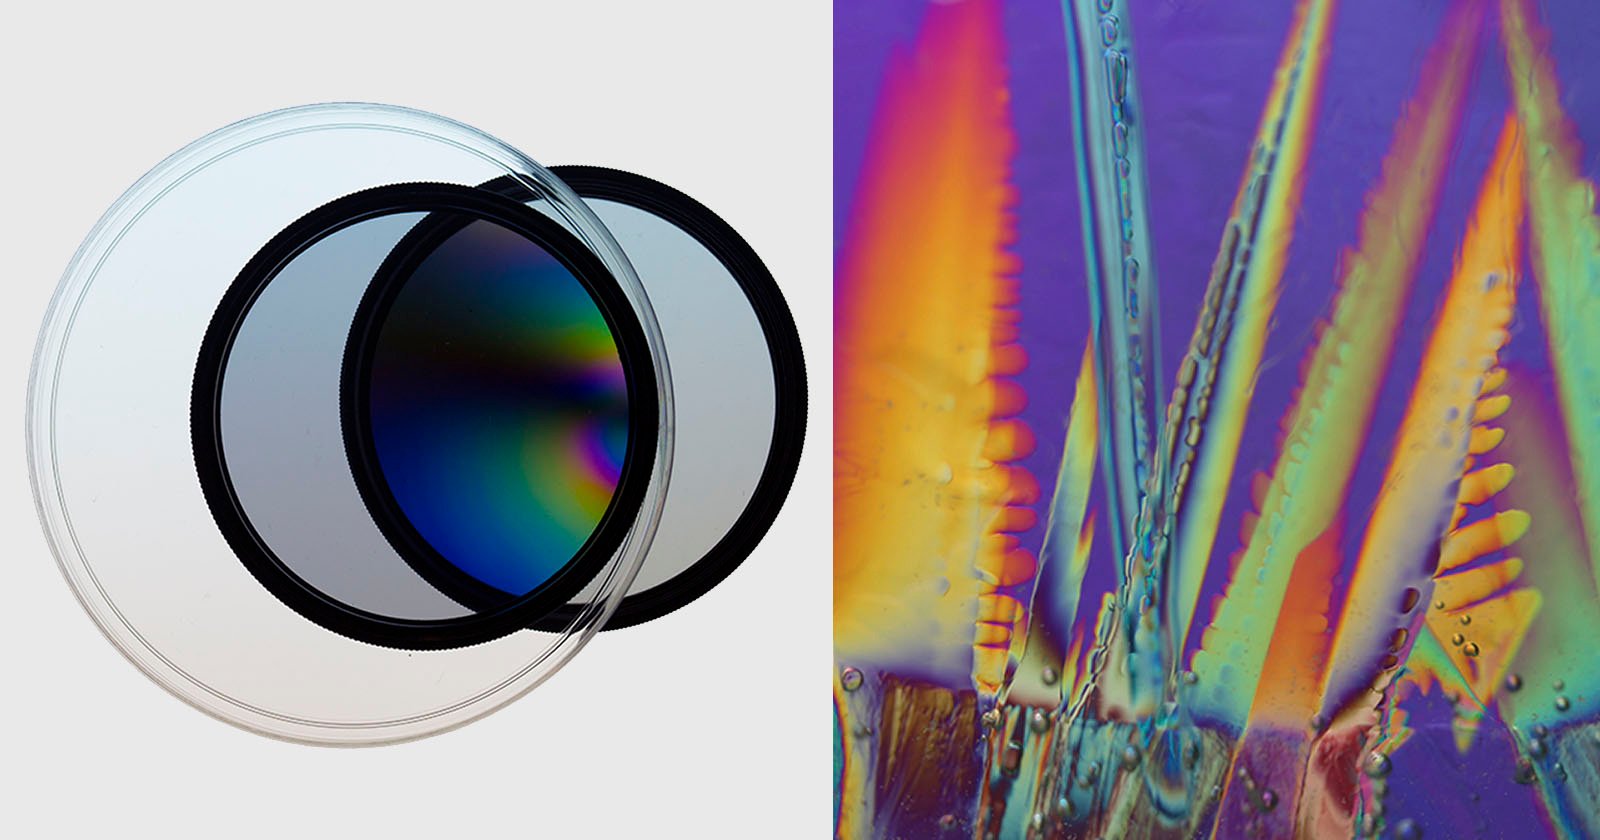
The most common polariser is the Circular Polariser or CPL, and if you have an autofocus camera (I would be surprised if you didn’t) then the circular polarizer is for you. It is comprised of two filters stuck together that can be rotated until it absorbs reflected sunrays and the desired effect can be obtained.
It is essential that you turn the filter each time you compose an image or shift from horizontal to vertical framing; merely putting the filter on the front is not enough. As you rotate it, it will cut specific waves of light that are reflected or refracted. The filter will remove about 1½ stops of light from your image, but your camera’s light meter will automatically adjust for this.
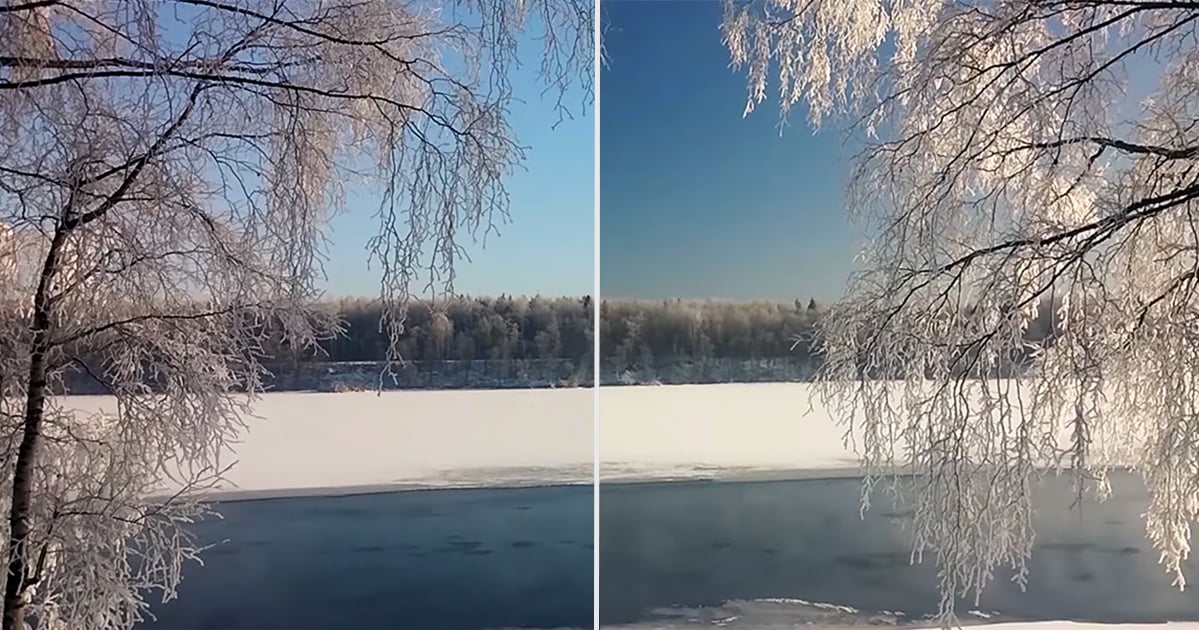
Deepen blues in skies
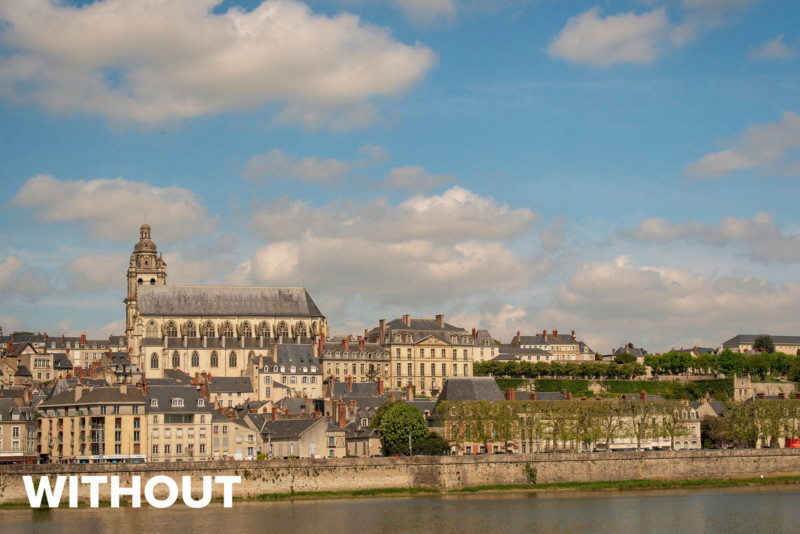
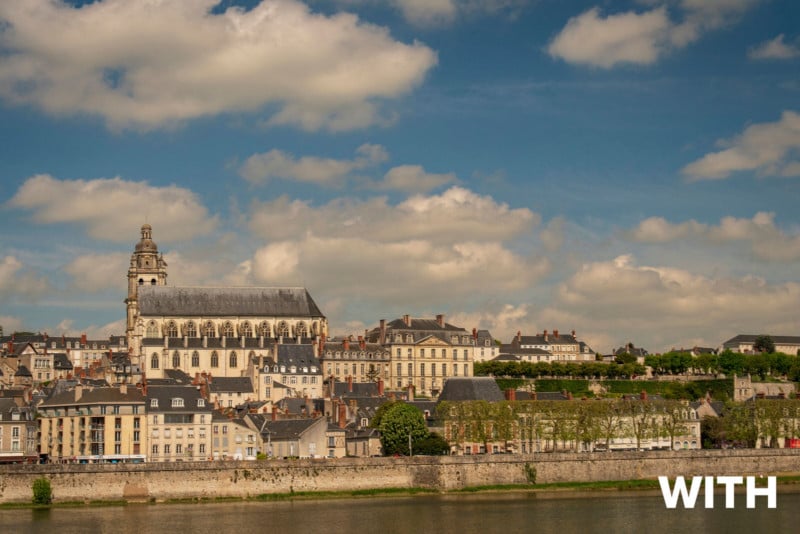
Polariser filters are fantastic for a sunny day outdoor photography and you can see why in the image above of Blois in the Loire Valley. It has deepened the blues which in turn has made the clouds stand out much more. The reflection from the slate roofing has also been reduced. The river too has become more solid.
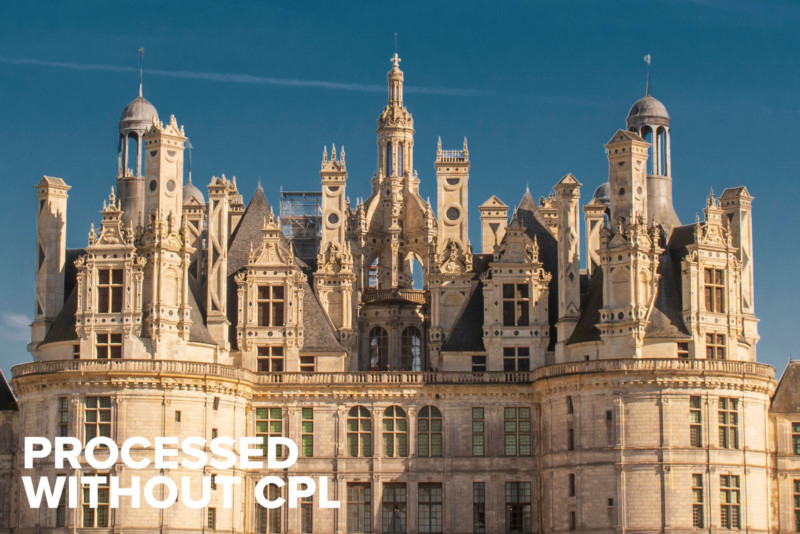
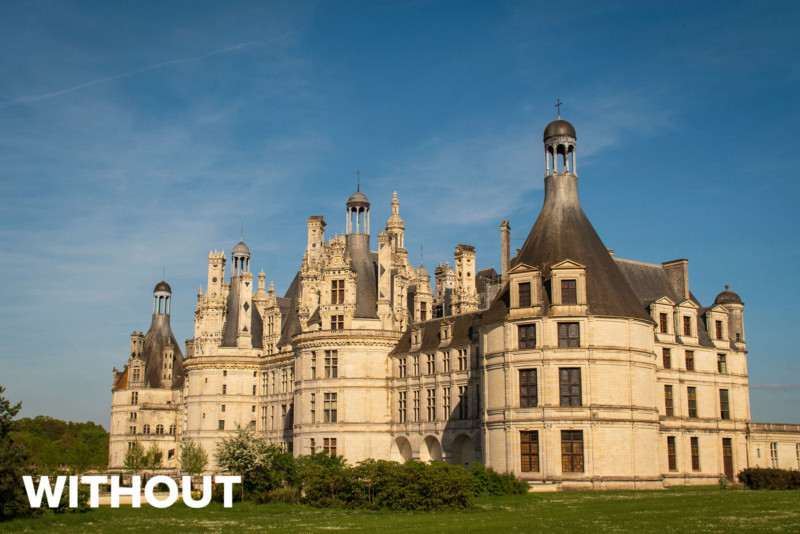
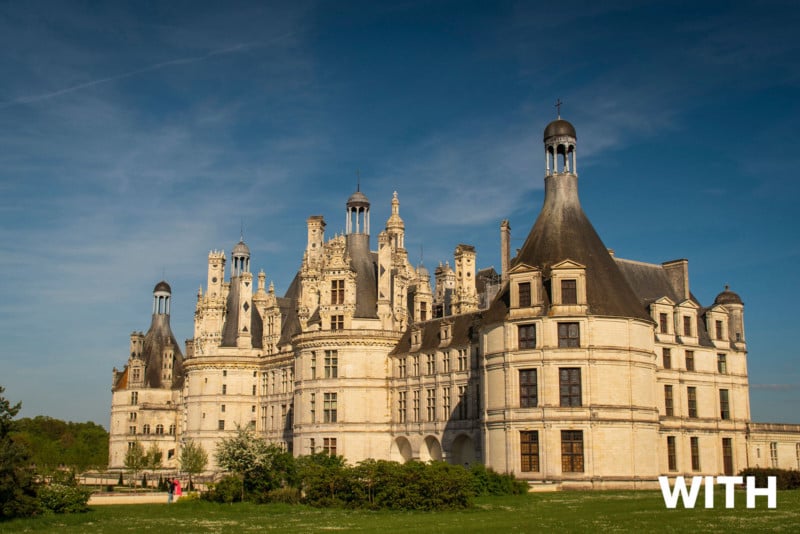
There are post-production techniques to achieve a similar result, but they are often time-consuming and result in artifacts, such as a halo on contrast points. In the image below of the Château de Chambord, I increased the saturation and reduced the luminosity of the blues. Note how there is a visible radiance around the edge of the top of the château where it meets the sky? One now could painfully go through and remove this with a lighter clone brush, or you can simply use the polarizer in the first place, get a richer more natural deep blue without the effort.

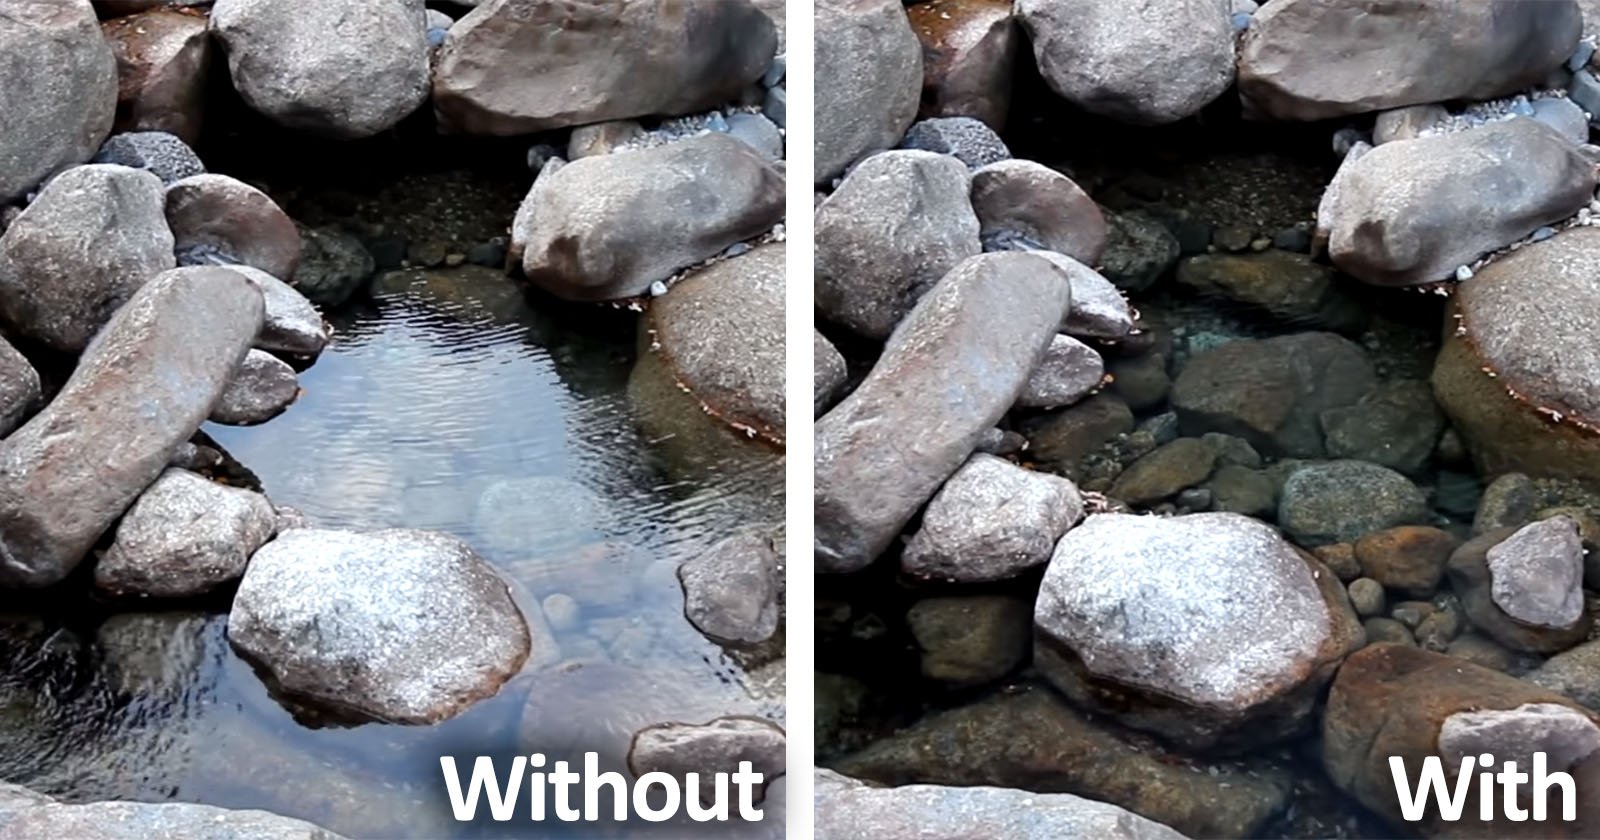
Removing reflections
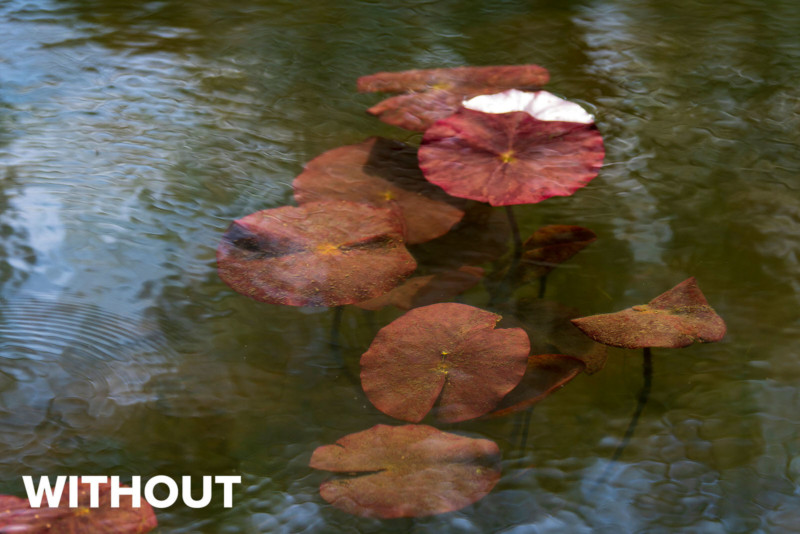
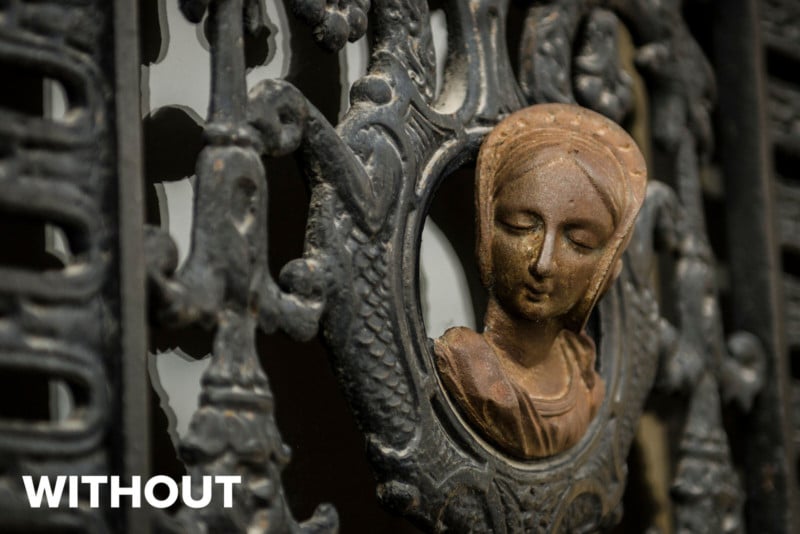
Reflections can be easily removed with a polarizer. Windows of a building, reflections in a car window, the shine on the top of a lake or river can all be reduced drastically by rotating your polariser filter to the precise angle. Below I managed to remove the glare from water that was sitting just on top of these water lilies in Monet’s Garden in Giverny, giving them back their color and form. Further below, I shot a decorative door ornament in Paris. The reflection of the sky in the glass behind the figure was distracting and unnecessary. The polarizer cuts it out completely.


Use in portraiture
Polarising filters are often thought of as outdoor, landscape photographers companion, but they have a practical purpose in portrait photography as well. While they do reduce the amount of light coming into your camera by about 1½ stops, they will also reduce unwanted reflections in glasses, and can reduce the shine on people’s skin, giving them an even illumination. In this image, look closely not only the spectacles but the forehead and the tip of the nose.


Quality and price
People have asked me what the difference between a $20 and $200 polariser filter and the answer lies in the quality of the glass. Photography is all about the glass; it would be disappointing to put a cheap filter over a superb lens; it is akin to shooting through a dirty window. The higher quality the filter is, the less color casting it will have, the less susceptible to scratches it will be, and the more robust the build quality will be. This being said, if you are a mid-level enthusiast and you treat your property well, there will be nothing wrong with the cheaper filter. It won’t be until you start pixel peeping that you will really see the difference. For those of you interested, these images have been shot using the Hoya Circular Polarising Filter on my Nikon D500 with an AF-S Nikkor 24-70mm 1:2.8G ED lens.
A polarising filter won’t work on every situation, the direction of the light needs to be at right angles to the source. Sunsets, where the sun is in the frame, or directly behind you, will do very little to your image. The best results come with side light or reflections at 90˚ angles and on polarized light. Try twisting it to see what it will look like on any given scene. Often things are more reflective than we think, like foliage in a garden, wooden table tops, skin and a whole lot more.
A polariser often is the difference between an average photograph and one that truly pops. Once you get the hang of them, you will wonder how you ever shot without them. Remember to take them off if they’re not giving you the desired effect, as they do rob you of about 1½ stops of light.
About the author: Alexander J.E. Bradley is the founder of Aperture Tours (formally Paris Photography Tours) and heads up the tours in Paris. A professional photographer for over a decade Alexander enjoys shooting the surreal by mixing dreamlike qualities into his conceptual images. You can view more of his work on his website.
You can find more photos and articles like this on the Aperture Tours website, or by following Aperture Tours on Facebook, Twitter, and Instagram. This post was originally published here.