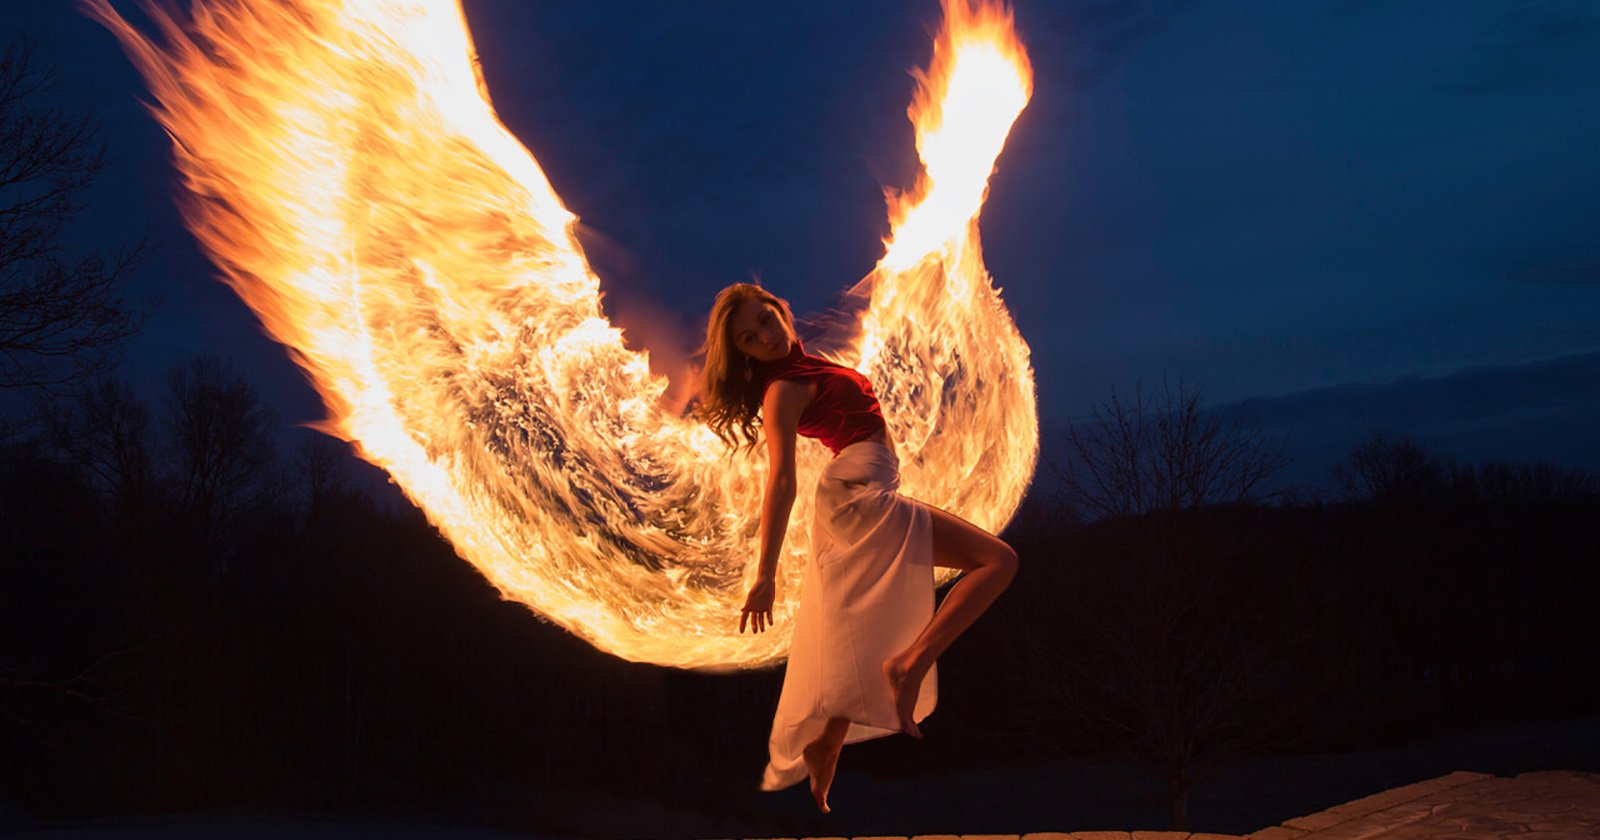
How I Shot a Light-Painting Levitation Portal Photo
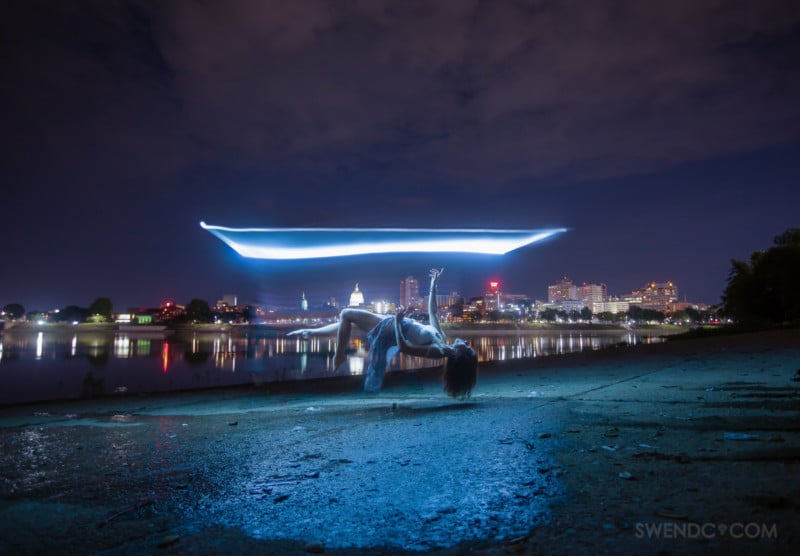
My Name is Swen Cubilette, and I’m a 34-year-old photographer living in the Central Pennsylvania area. I’ve been shooting photos for about 5 years. In this article, I’ll share how I shot this levitation portal photo.
To prep the scene, I used a bucket and filled it with water from the river in order to wet the ground as to get more reflection from the light painting and to make the elements in the photo look more appealing.
Now that I had set up the shot, I gathered 3 objects from the environment (usually random debris) to use as markers. One of the objects serves as a marker for my focal point. The other two objects I place to the left and the right of my focal point marker to get a reference on where to start and stop my light painting portal, I placed them about 4 feet on either side of the focal point marker to give me about an 8-foot light-painting portal.
I then go back to my camera to dial in my settings (settings will vary depending on the available light in your scene) and to make sure my lens is on manual focus. Since this is an image stack I have to make sure I used the same amount of light for each image, to do this I set my camera to manual and set my exposure time to about 2 seconds and adjust my ISO and F stop to balance out the exposure and to make sure that the background and scene will be properly exposed.
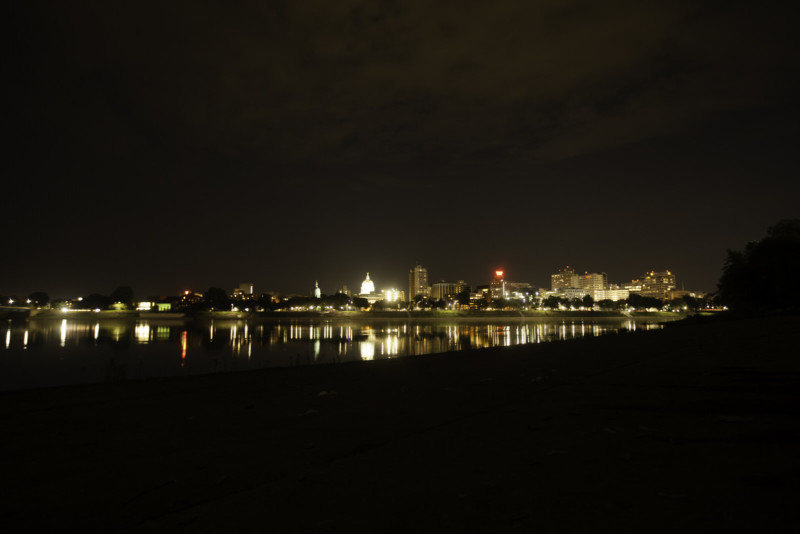
At this point, I’m ready to start capturing assets for the final composition. I took a total of about 3 images for this comp. The first image is a two-second exposure with no light painting to get a clean plate of my background in case I have to mask out some motion blurs of myself from when I light paint the portal.
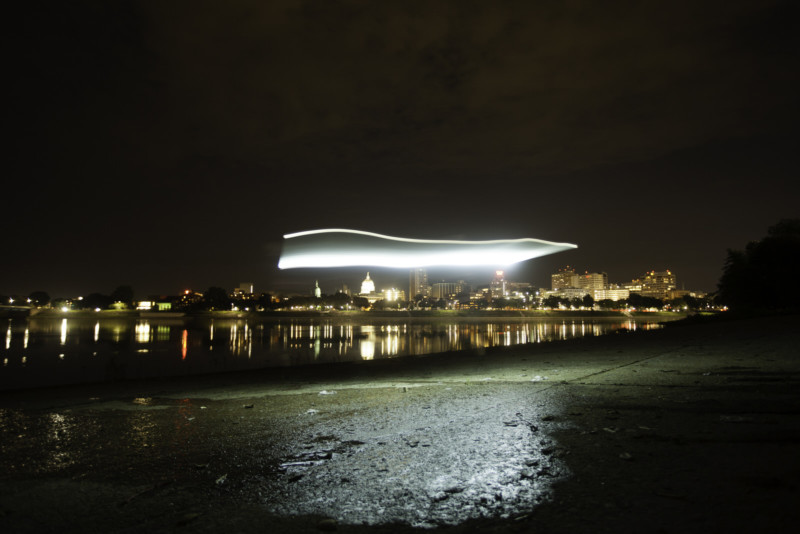
Then I take a second two sec capture of just me light painting a portal so I have a clean plate of the foreground elements with the proper lighting to use as a mask.
For the third image, I get a stool and place it right on my focal point marker and get my model to lay on the stool and pose in a way that makes it looks like she’s falling or being levitated.
With the model in position, I ask when she’s ready so that she can hold the pose for two seconds while I light paint a portal above. I take a couple captures with her in different poses to make sure I get a good solid capture of her to edit in post.

Now that I have my images to edit, I export everything into Lightroom and choose the 3 images I want to use for my edit and stack them. Once I have my images stack I send them to PS as layers and begin to create my masks. The first image is a clean plate with no lighting for the background which goes on the bottom of the layer stack, so I take that layer and mask out everything except for the city lights. The second layer is the clean plate shot with the just the lighting so mask out everything in that picture to prepare it so I can paint over the image with the model as to hide the stool and other elements that need to be edited out to create the levitation effect.

After finishing all the masking and I have the results I desired I save the file and go back into Lightroom to make some additional color edits and tweaks.
I used a Canon 5D Mark II, a Canon 16-35mm f/2.8L, a remote radio trigger, a tripod, an Eagletac D25 tactical flashlight, a blue acrylic fluorescent light tube guard, and a stool. The EXIF details of this photo are: f/2.8, ISO 400, 2s, and 23mm. The model was Shey Herrell.