How to Give Your Still Photos a 2.5D Parallax Effect in Photoshop
Did you know that Photoshop has built-in animation tools? In this 12-minute video from Peter McKinnon, learn how to utilize them to animate your photographs and create a 2.5D parallax effect.
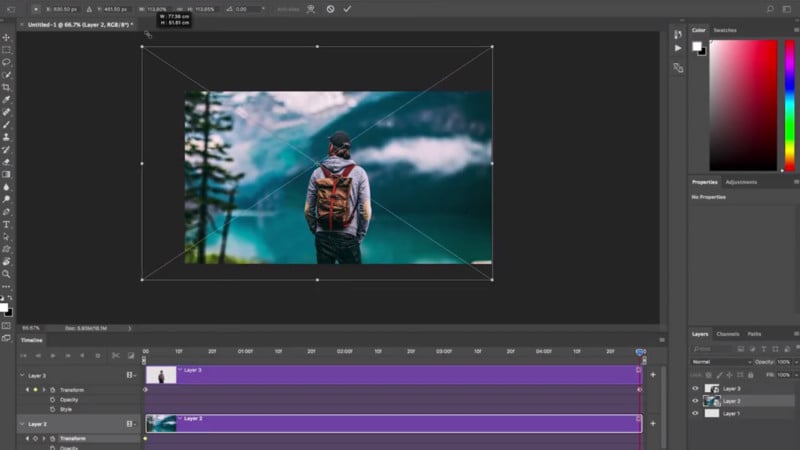
To create the effect, an image with a very clear foreground and background is easiest to use. The first step is to use the Pen Tool to trace your subject, and isolate it to a new layer by copy/pasting it. Keeping the background layer selected, use the Fill Tool to fill the subject with a Content-Aware Fill. You can stop there, or tidy it up by using the clone stamp tool to clean up the edges.

At this point, you will have your subject isolated on a new layer, and the background layer will look almost as though the subject never existed. Copy these layers and drop them in to a new document, convert them to Smart Objects, and pop open the Timeline (animation) panel from Window->Timeline.
By clicking the stopwatch next to the ‘Transform’ row on your subject layer, you’ll create a keyframe. Drag the timeline scrubber to the end of the video, transform your subject to a smaller size and re-center it. Now when you hit play, you’ll see your subject animate in size over the length of the animation.
Do the same thing with the background layer, scaling it up instead of down. Now when you press play you’ll get that dolly zoom/parallax style effect in your video.
Once you’re done, you can go to File->Export->Render Video. This will render out an .mp4 that you can cut together with your other footage or post on social media.
As McKinnon says, the cool thing is that this effect can be applied to anything in your back catalog of images. Have a flick through and find anything with a strong subject that would make a good candidate for animation, and give it a go!