Photog Cleverly Photoshops Kids Into a Family Photo from Early 1900s
Talented photographer and retoucher Karen Alsop recently decided to have some Photoshop fun with her friends and family. When her mom unearthed an old family photo from the 1900s, she added her kids into the shot and pretended it was an authentic photo of long lost relatives… and it worked!
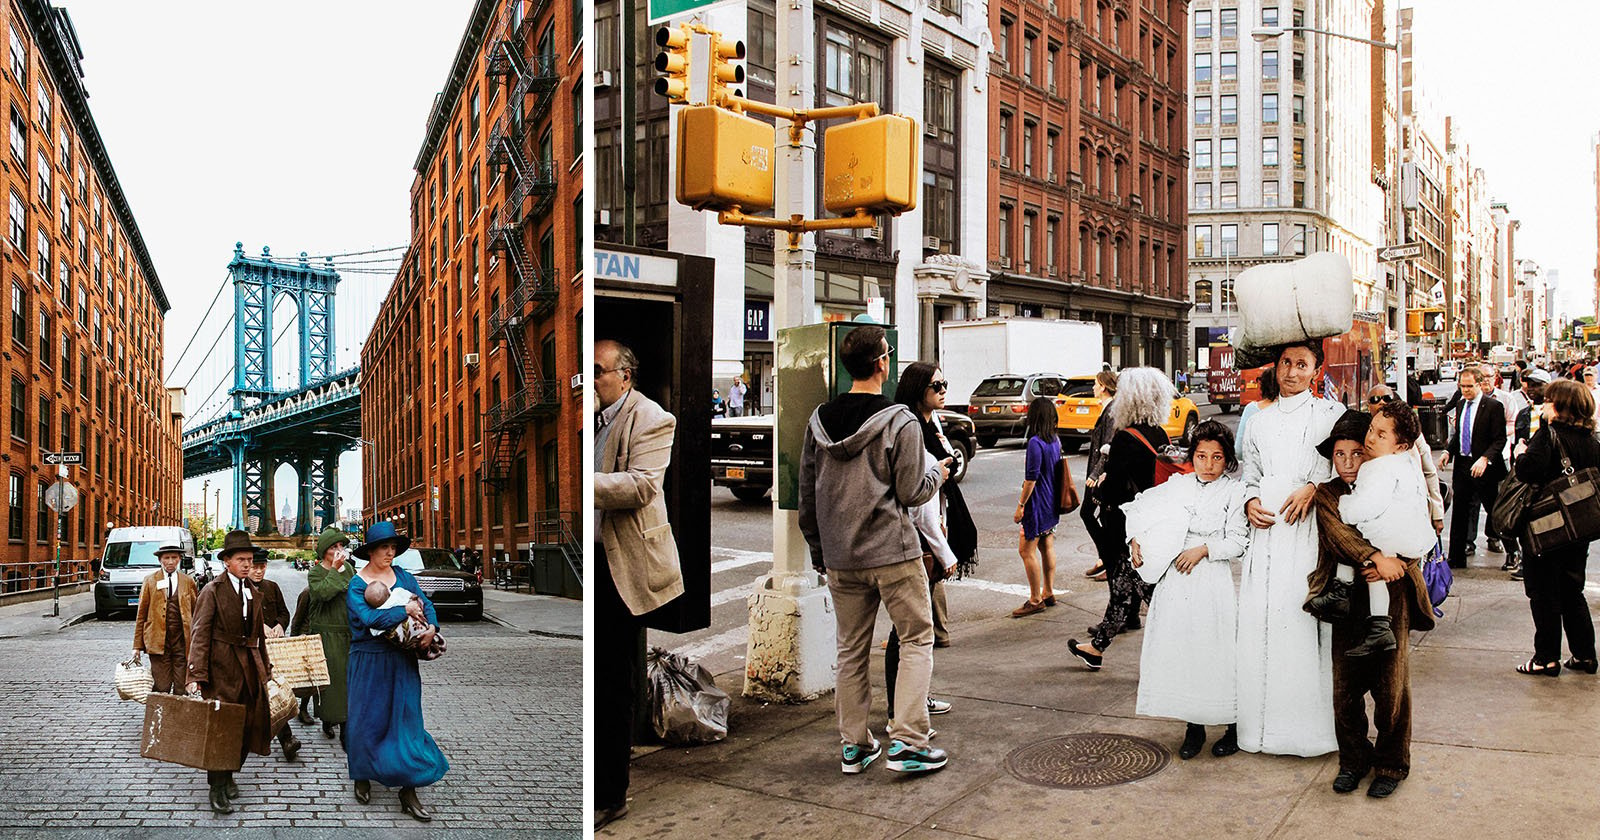
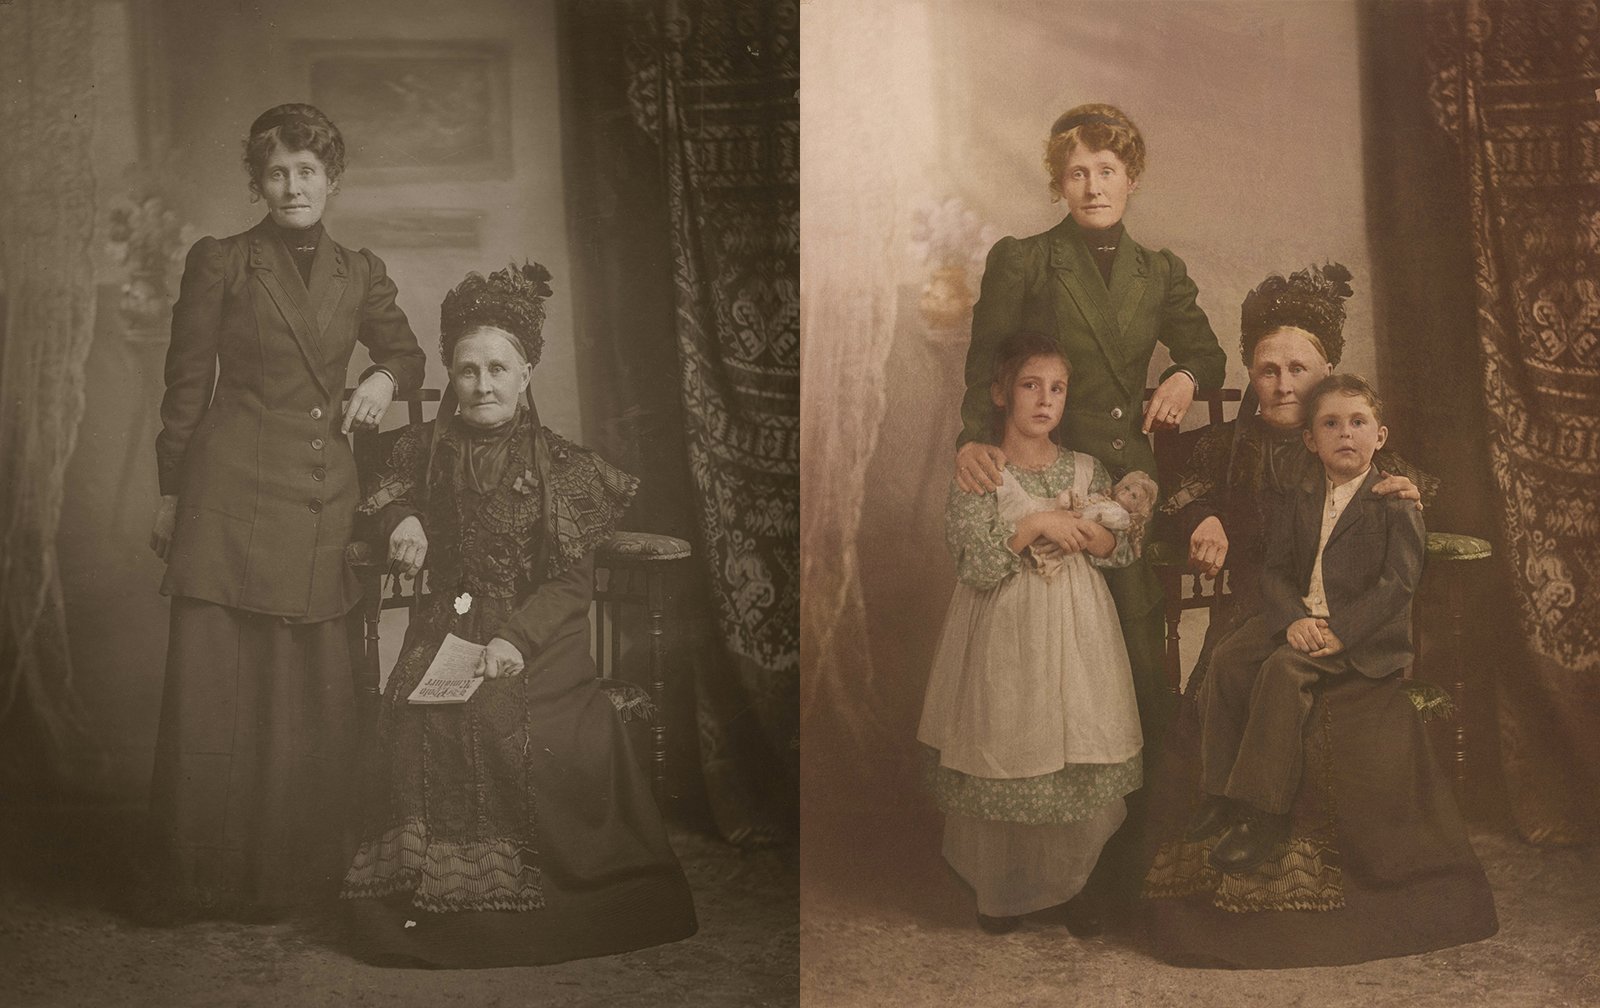
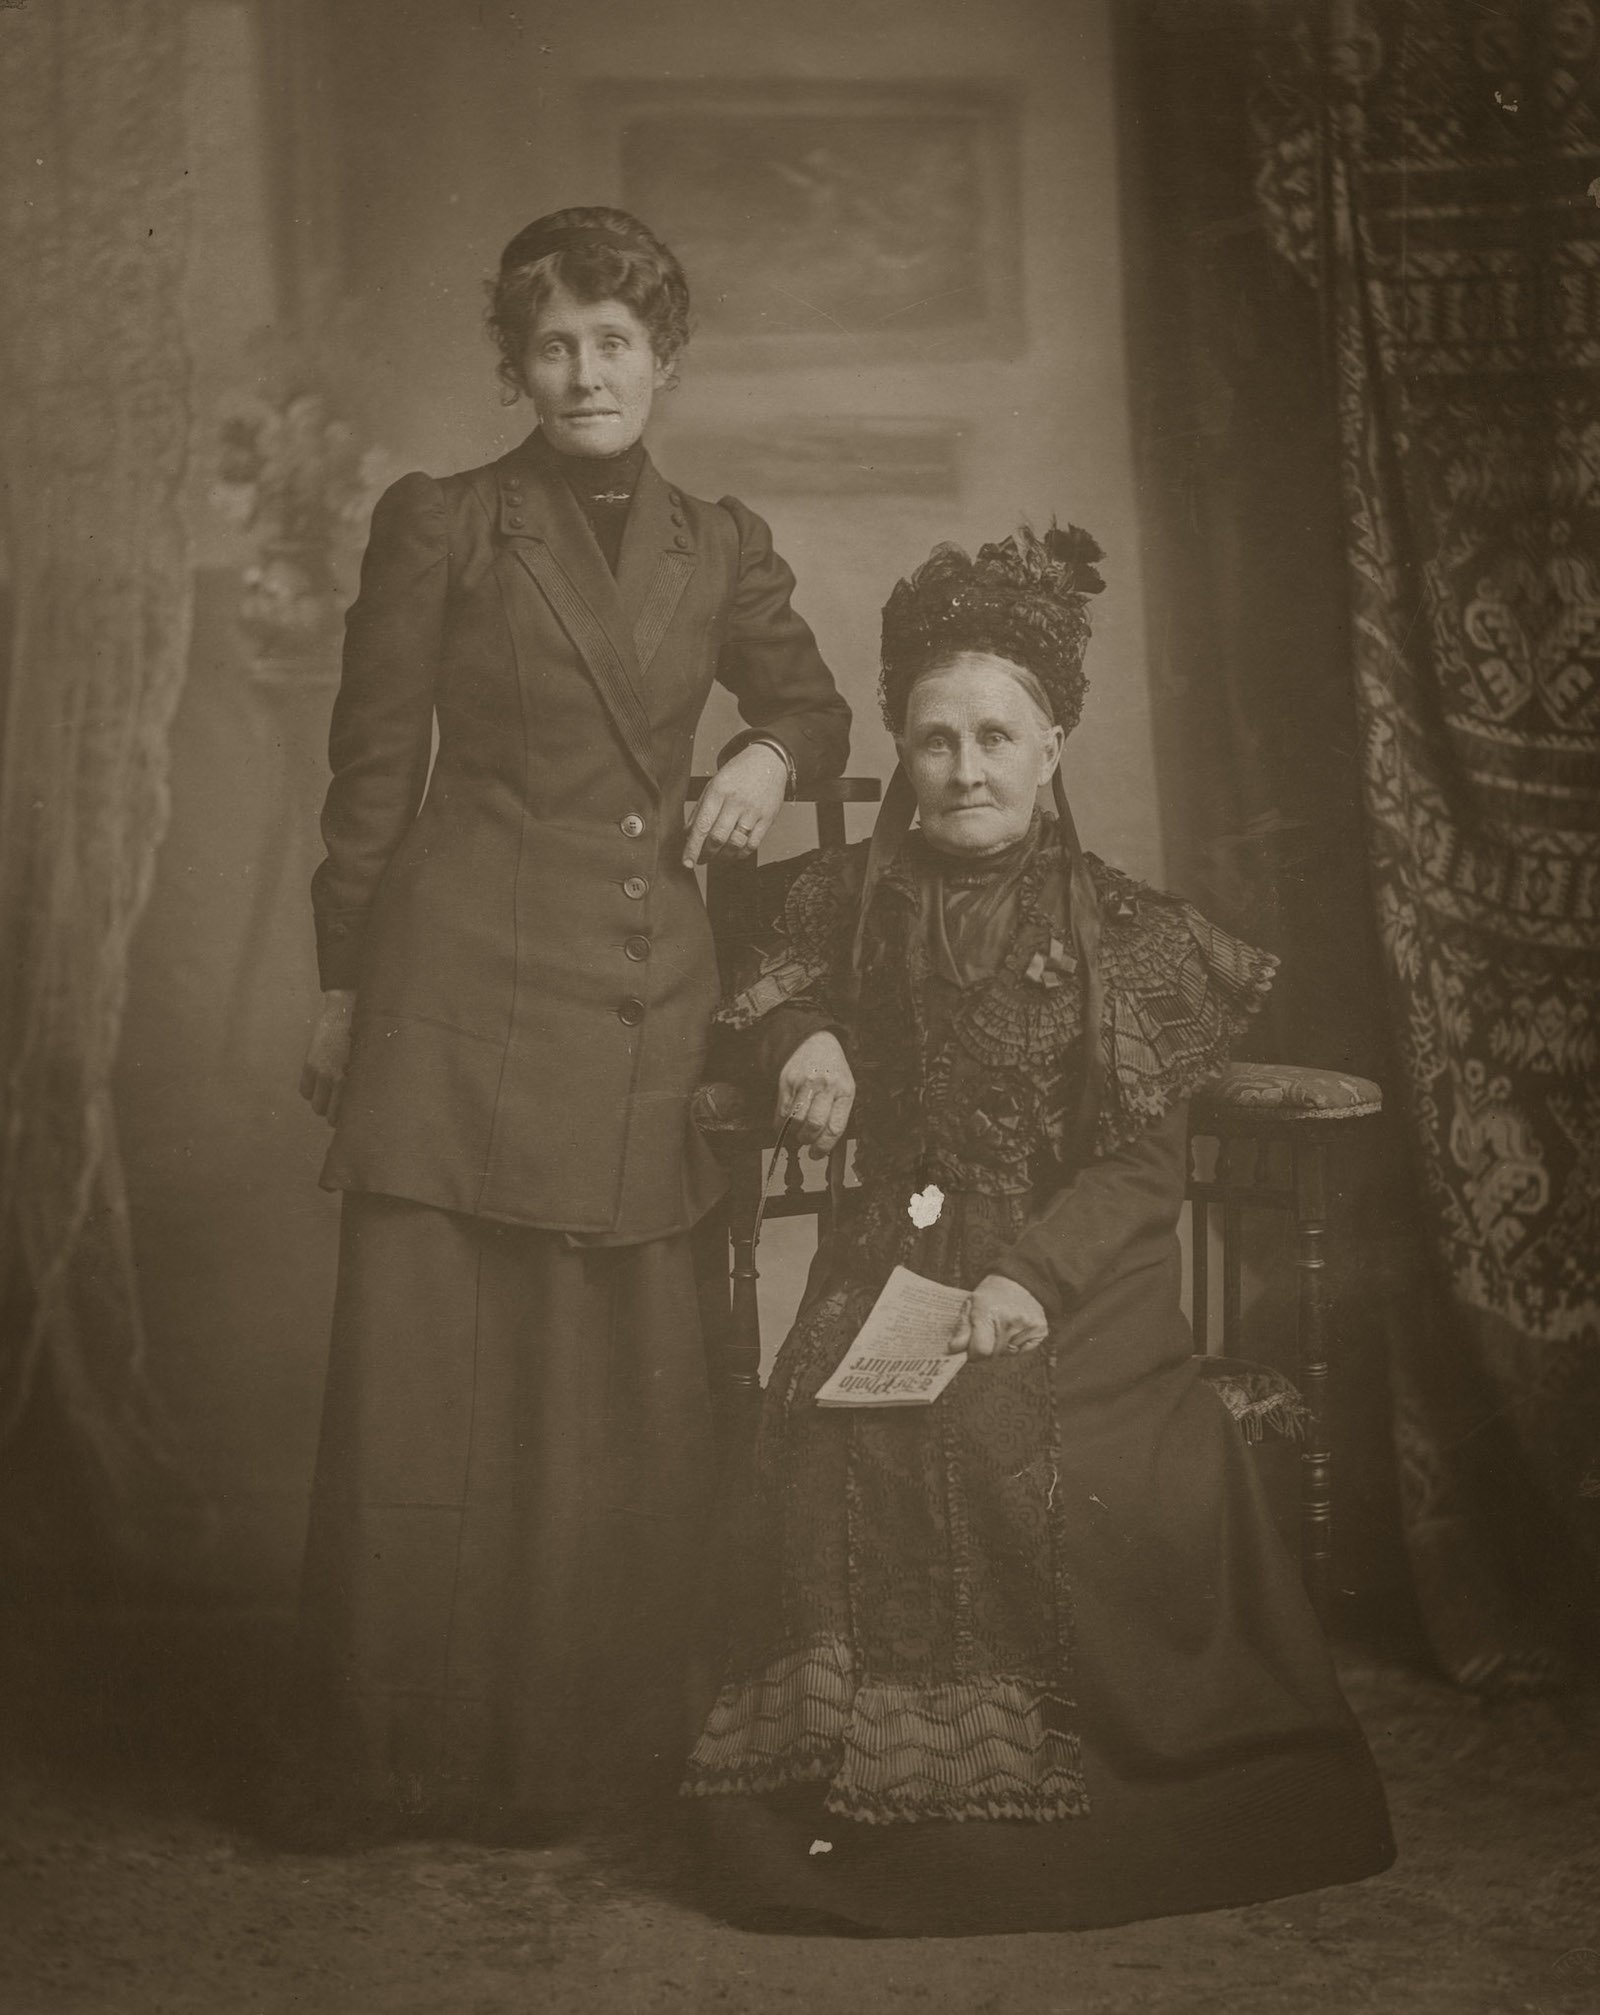
The photograph shows Alsop’s great great great grandmother and great great grandmother, and as best she can tell, it was taken in the early 1900s. It’s an amazing historical find, and got Alsop thinking about what it would be like to speak to these long lost relatives… and maybe introduce her kids to their great great great great and great great great grandmothers.
Since time travel wasn’t a viable option, Alsop took the photograph into Photoshop to transform this flight of fancy into reality. Then she shared her handiwork on social media to play a little trick on her friends.
“I first shared [the photo] on my personal page and said that my mum had found the photo of my relatives (all true),” Alsop tells PetaPixel. “My family and friends were astounded by the uncanny resemblance of the children in the photo to our kids, but most of them, even those that know my work well, didn’t think I Photoshopped it.”
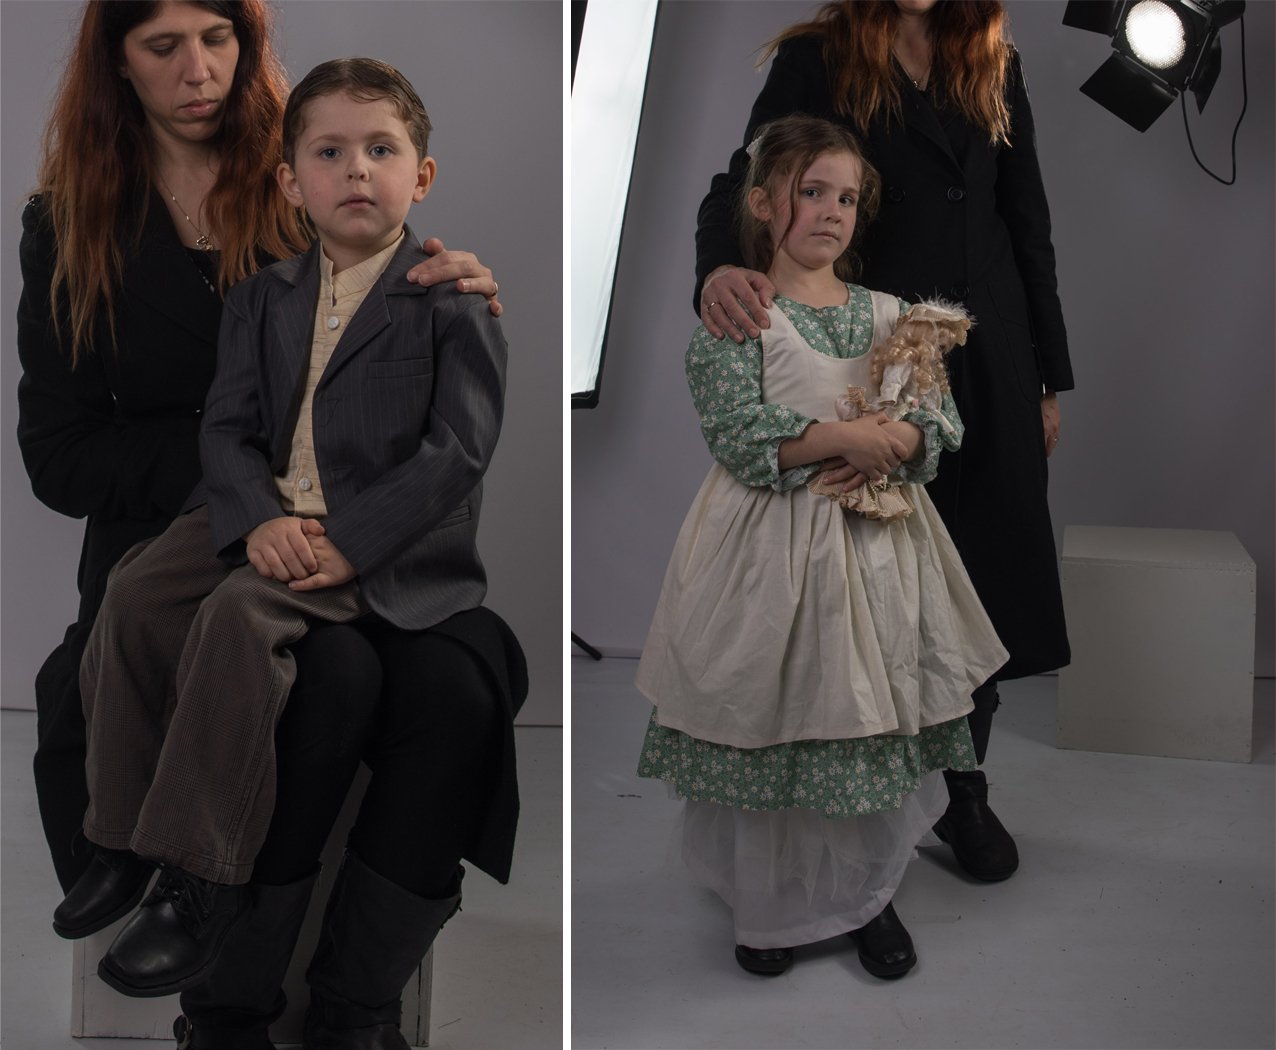
She let the deception go on for a while before revealing the trick. They had, in fact, dressed the kids up in vintage clothes, photographed them in the studio, and added them to the historic shot.
If you’ve ever wondered how you can use Photoshop to introduce your kids to their great great great great grandmother and great great great grandmother, this is how:
Alsop breaks down the step-by-step edit in a post on her website; if you want to pull off a skilled time travel Photoshop job yourself, you can do it in seven not-so-easy-but-definitely-fun steps:
- Examine the portrait
- Source era-appropriate props and costumes
- Examine the light and perspective
- Choose your medium
- Capture the expressions
- Position the subjects to match
- The Photoshop process
Of course, that last step takes extensive work, including (but not limited to): repairing the original photograph; compositing in the kids; adding in shadows; adjusting contrast, highlights, and shadows to match; and ‘destroying’ the quality of the final to match the era.
That’s how she took these studio shots:
And this original photograph from the early 1900s:
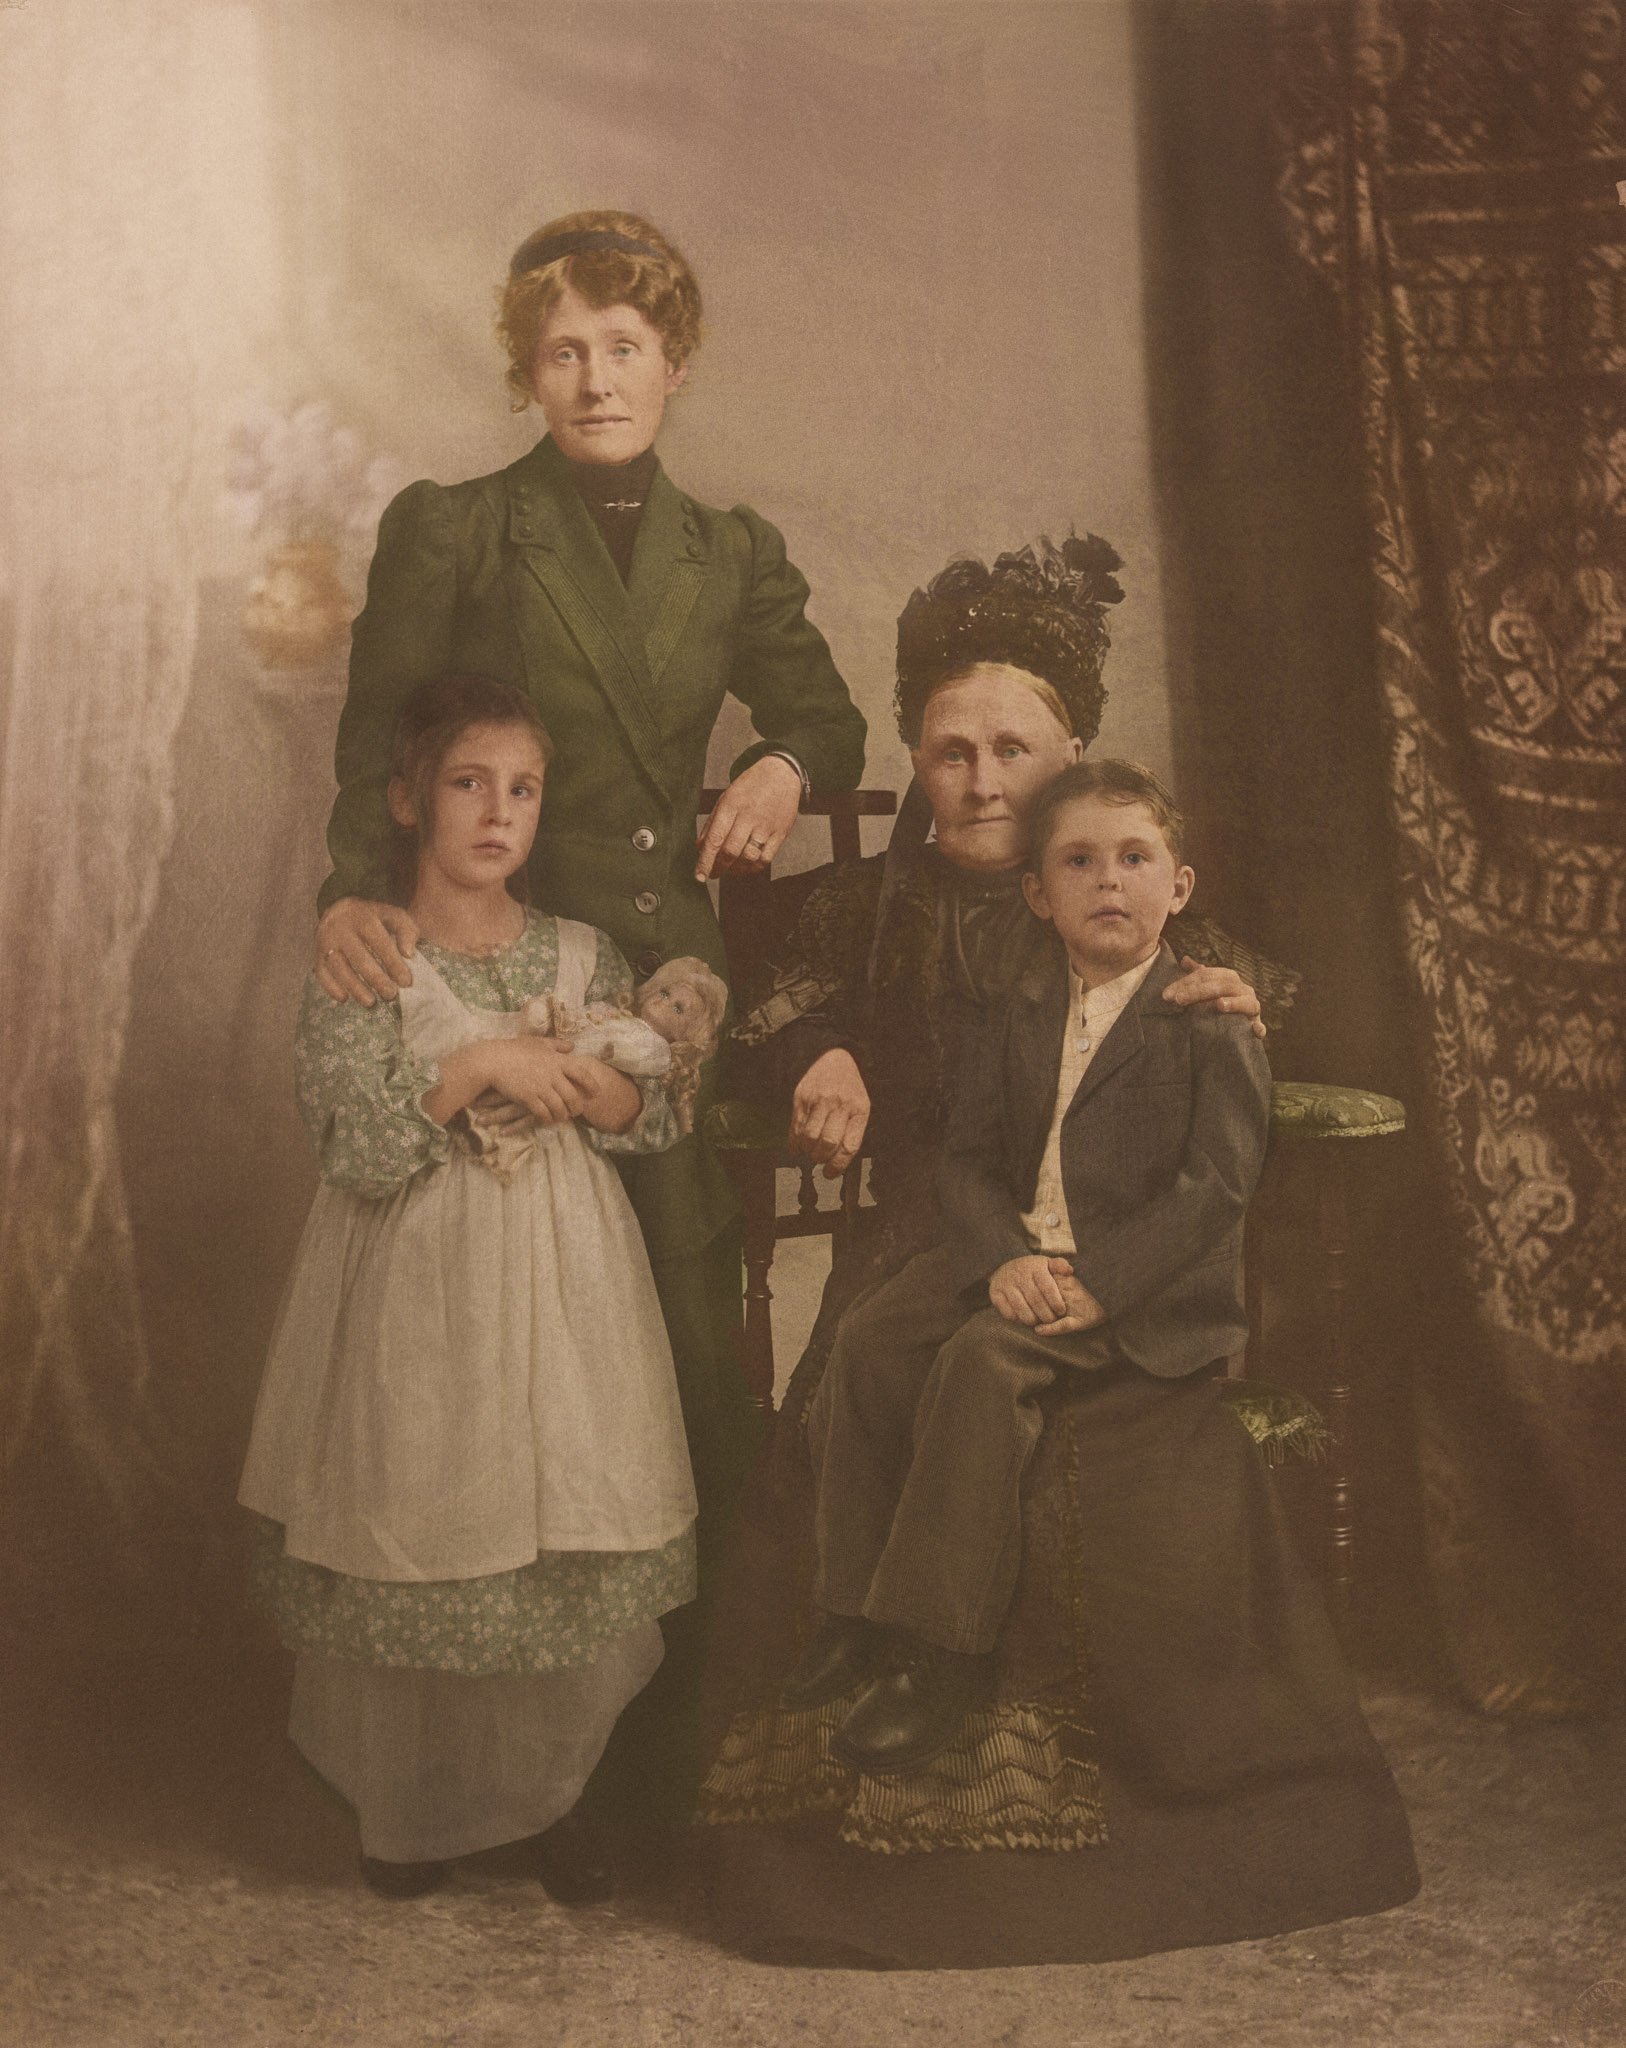
And turned it into this incredibly well-blended composite. Time travel via Photoshop:
To read all about this creative little side project, click here. And if you want to see more of Alsop’s work, don’t forget to visit her website and follow her on Facebook and Instagram. Careful though… she might mess with you if you do.
Image credits: All photos by Karen Alsop and used with permission.