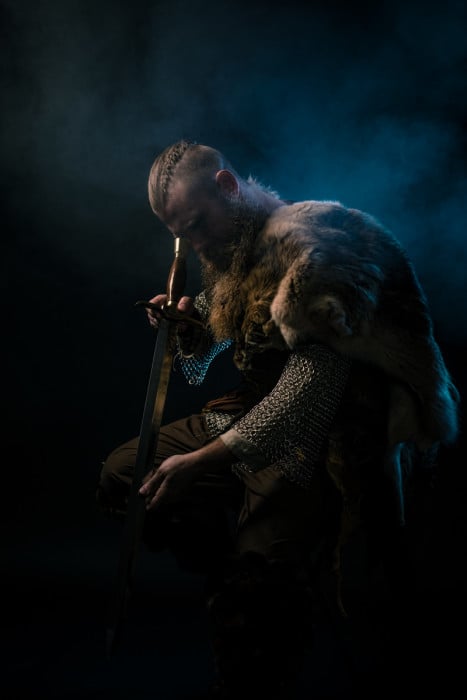
Furs and Fake Blood: How I Planned and Shot an Epic Viking Shoot

One of the most luring aspects of photography, for me, is storytelling. Whether it’s weddings, photojournalism, or creative portraiture, the opportunity to engage the viewer and pull them into another world is an incredible thing.
With a single image, a photographer has the opportunity to make a person laugh or cry, love or hate, or… throw on some chainmail and animal pelts, grab an ax and hop in a Viking ship to sail and conquer! For today’s adventure, that’s exactly where we’re going to take you. Ready?
As a photographer, my mind is always dreaming. In my down time, I like to browse, gathering inspirational thoughts and ideas, always searching for new and interesting themes. I find it helpful to jot down these ideas, let them settle and then revisit them from time to time until the opportunity arises to put one of them into motion. Giving them time to rest allows the bad ideas to weed themselves out (yep…we all have a few of those sometimes), and allows the good ideas to float to the top and expand as new details emerge over time.
Once you have a few ideas that withstand the test of time, the next task is to find the perfect group of artists that are willing to trust in your shenanigans. Being located right outside of Chicago, I am incredibly lucky to be surrounded be an some truly amazing artists in the industry, many of which I am so very proud to call my good friends. After rounding up some of my favorite crew and pitching some ideas, it was settled. We were off on our new epic journey with…the Vikings!
One of the most helpful aspects of planning a themed shoot with an entire team of talented artists is the ability to pool everyone’s creative abilities. Bringing together a group of like-minded individuals to plan and execute a creative theme really is a thing of beauty. There’s nothing quite like a good brainstorming session (or two or three) to bounce ideas back and forth and really bring the theme to life.
In addition to the initial creative planning process, there’s a huge amount of effort that goes into putting the wheels into motion and executing these shoots — from choosing the cast, to building the wardrobe and sets, and everything in between. Accomplishing all of these tasks with the resources of six individuals is always going to be more fruitful than one.
Lets touch on a few of the most important aspects of the planning process.
Casting
After the initial brainstorming session, the very first thing I like do is to begin the casting process.
In my personal opinion, casting the proper talent for the part is one of the most important aspects of putting together a successful shoot. This is the first step in convincing your viewer to believe the story you’re telling them in your image. If your talent doesn’t fit the part, no one will believe your story.
When it comes to the actual process, casting is often made out to be more difficult than it needs to be. To find our perfect Vikings, we took to social media, posting a few casting calls for men and women who simply “looked like vikings.” From there, we narrowed down our options and chose a few who we thought best fit the part.
Granted, that might not be the best approach for every shoot, but for something like this, it was perfect.
Wardrobe
After finding the perfect Vikings, it was time to start thinking about wardrobe.
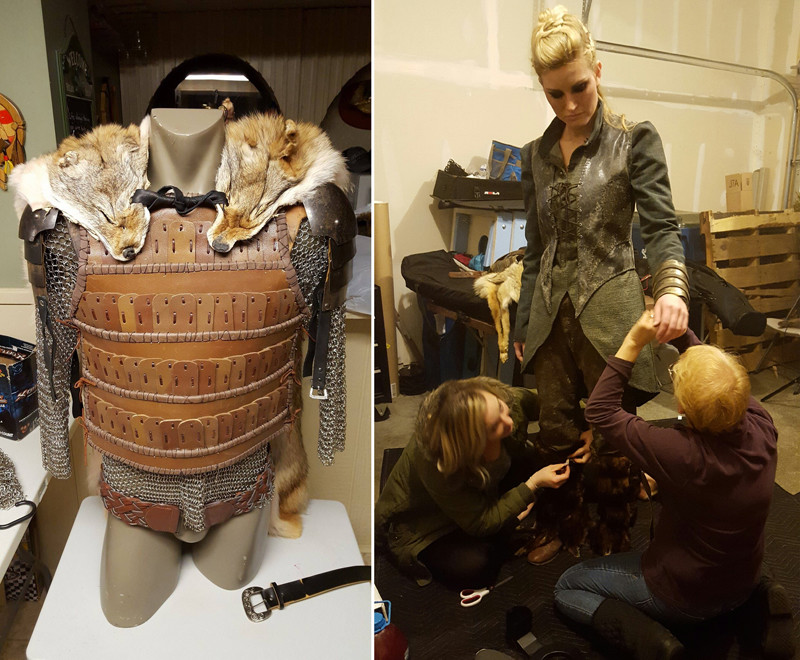
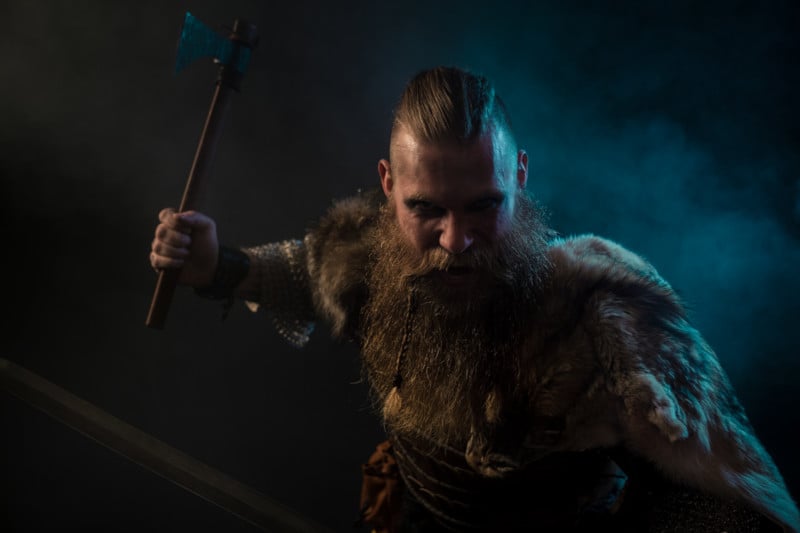
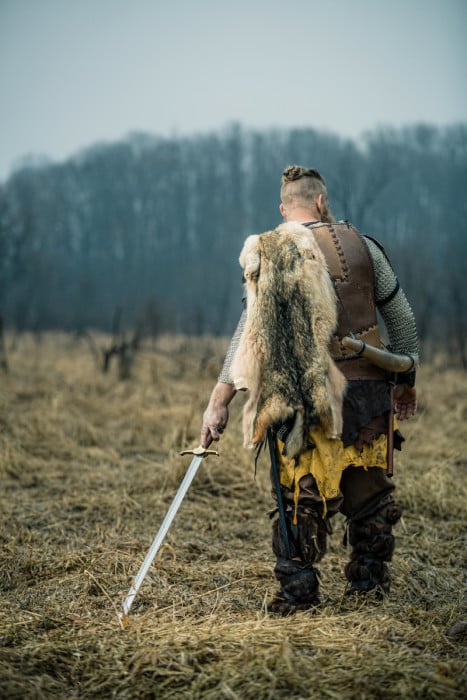
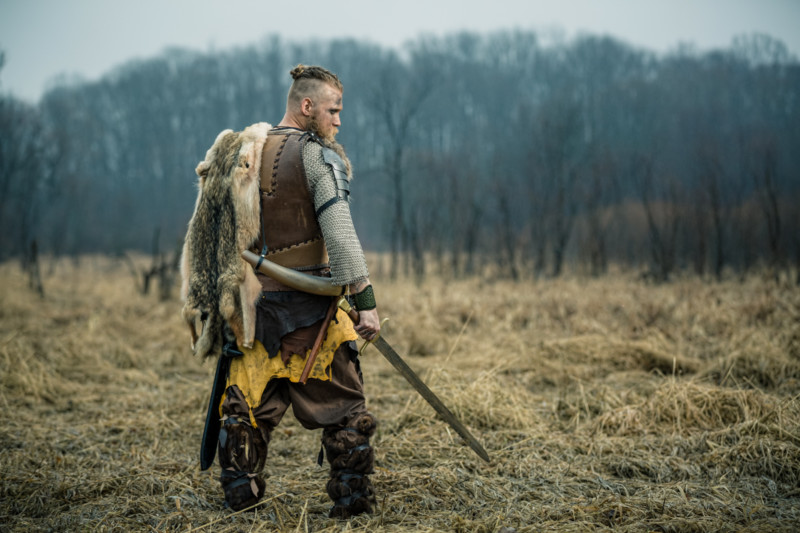
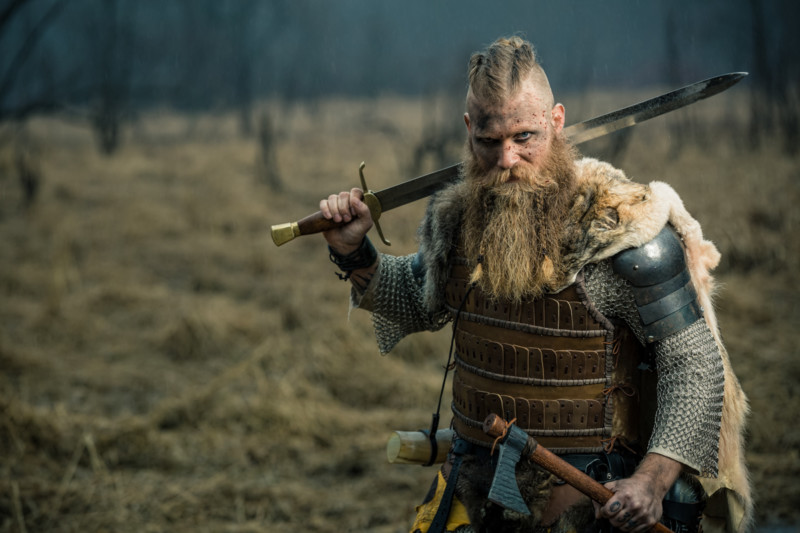
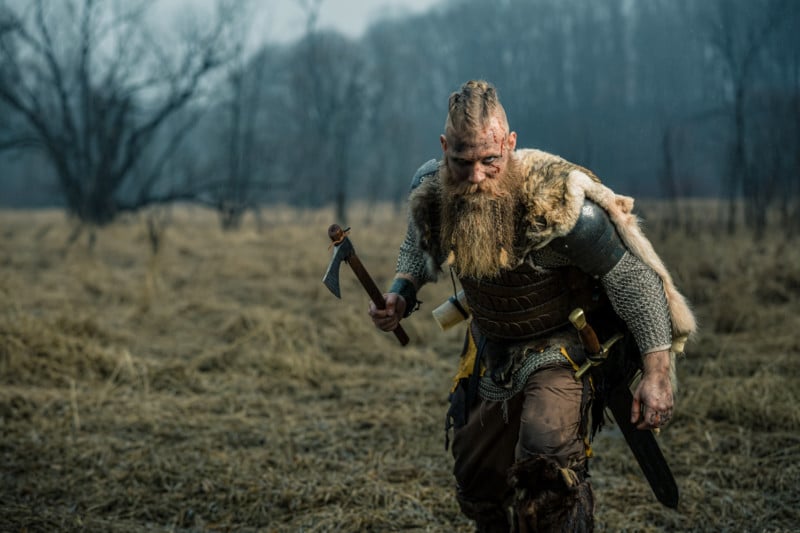
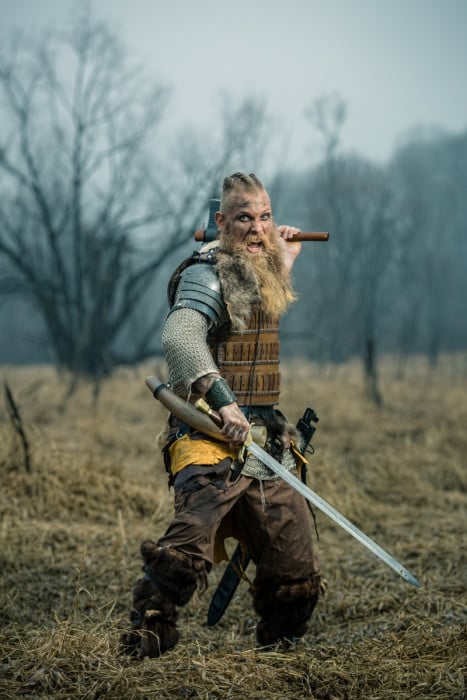
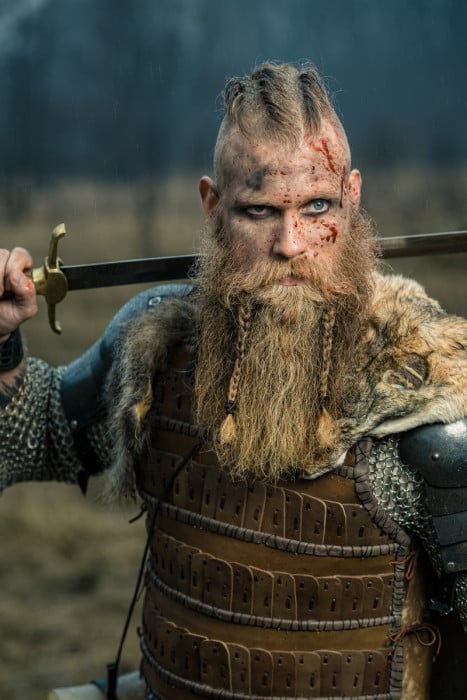
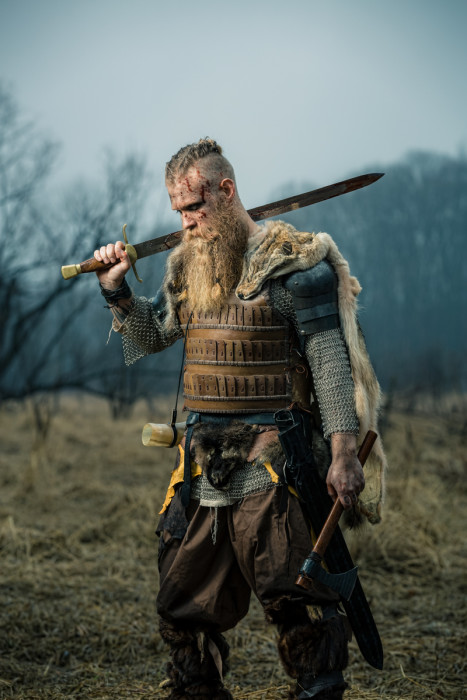
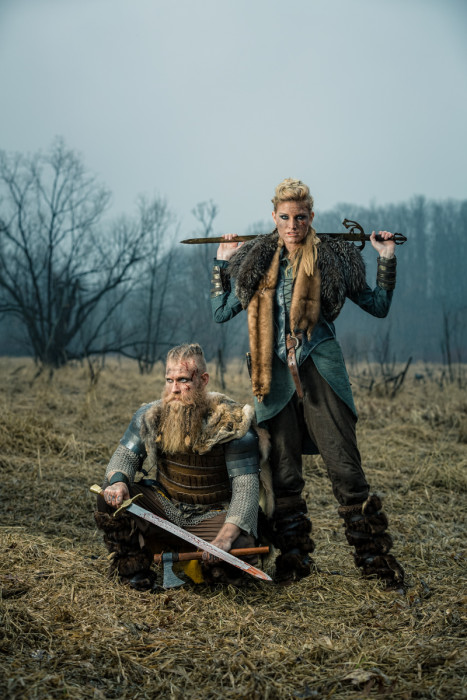
The fun part about building wardrobe for a Viking theme is that everything the Vikings wore was hand-made. This gave great creative flexibility when planning their outfits. As a bonus, our male mode, Jim, does this sort of thing as a hobby in his free time. He happened to have a Viking outfit from a previous event that he was planning on modifying for this shoot, which worked out perfectly.
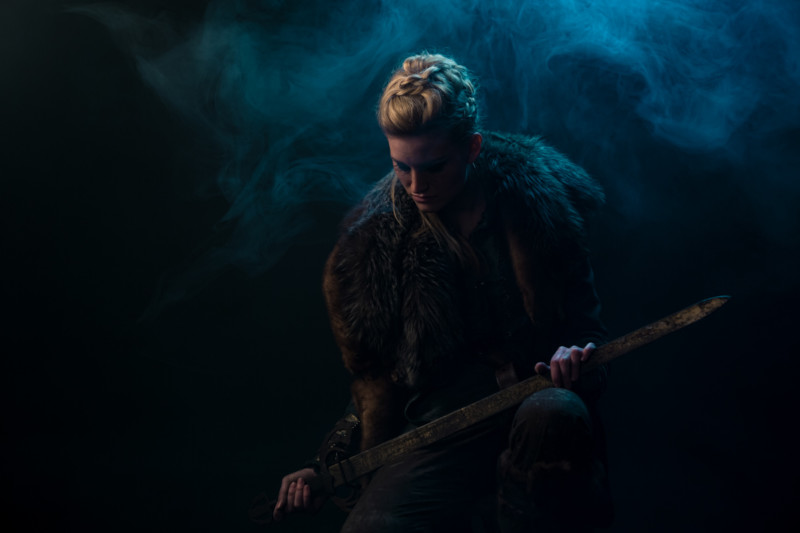
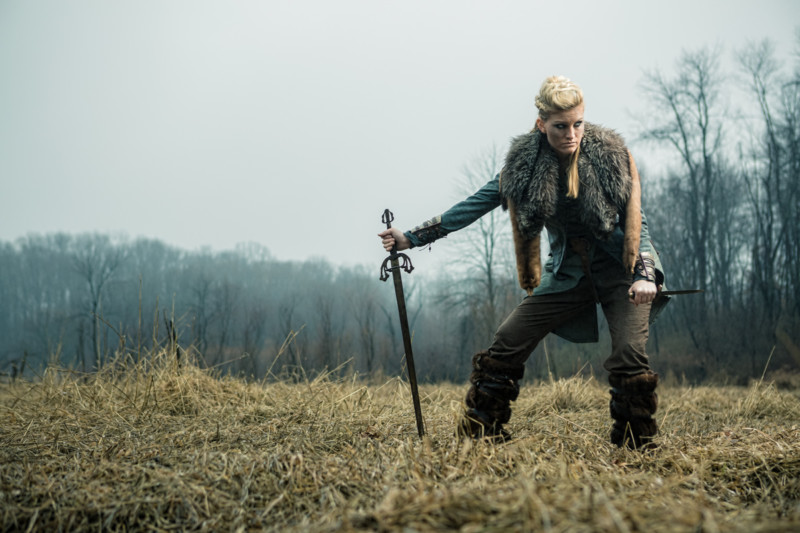
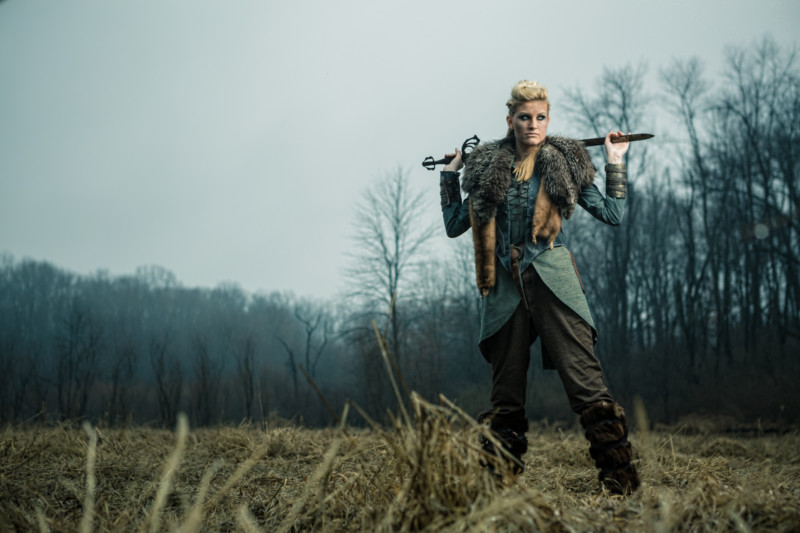
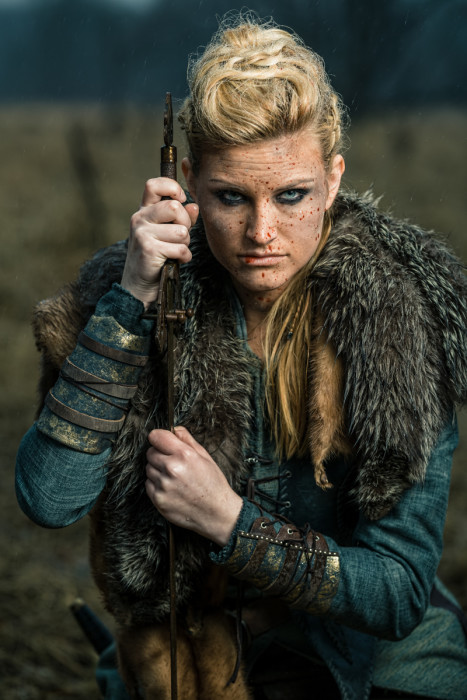
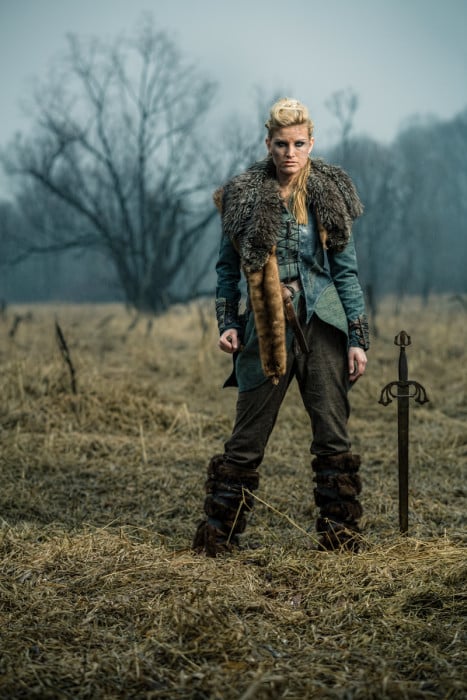
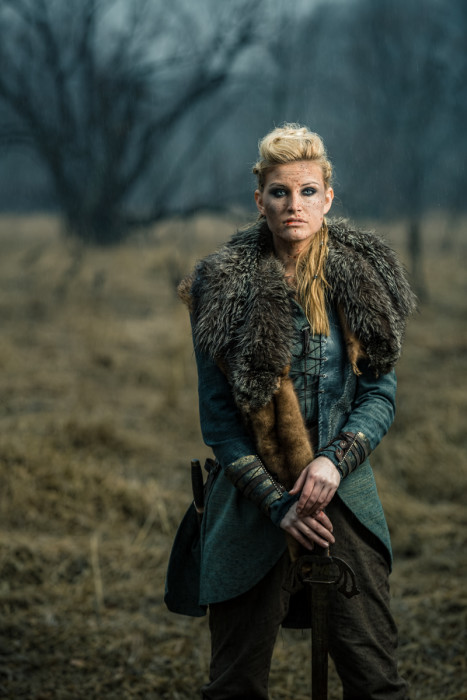
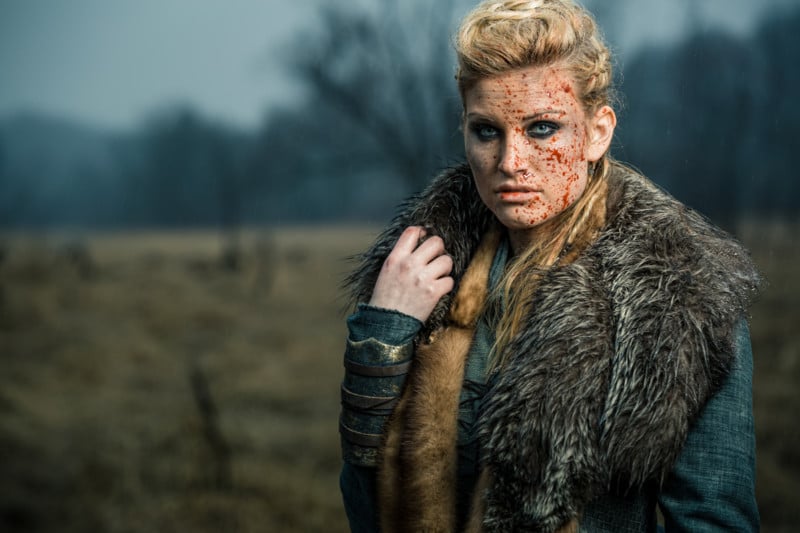
For our female model, Brianna, we started from scratch. My incredibly talented mother, Laurie, volunteered to make the costume completely by hand, so we all put our heads together, came up with a design, and sourced out the fabrics. For the rest, thrift shops, craigslist, and antique shops were all fair game.
We started looking for furs and pelts, jewelry, old belts, weapons, and anything we could find that might help tie everything together. A few other parts of the costume, such as the wrist guards (made from a plastic bottle, leather stripping, and spray paint) and the boots (made from an old pair of boots, leather stripping, and pieces of an old fur coat), were the handy-work of my cousin, Andria.
She even managed to borrow a few swords from a local resale shop. Never hurts to ask, right?
Location
Being a photographer who shoots primarily on-location, I would typically tend to say that location is an aspect of your shoot that is extremely important. While in most cases I still believe this to be true, our Viking shoot is a prime example of why there’s always an exception to the rule.
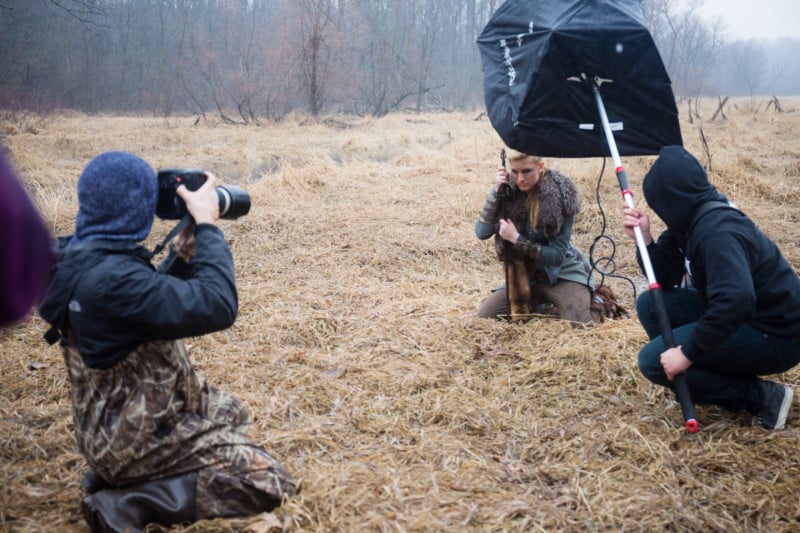
During our planning phase, it was our full intent to work our entire day out on location. I did some extensive scouting and had a few ideal locations chosen. As we drew closer to our shoot date, the unpredictable weather of Northwest Indiana decided to take a turn for the worst and we wound up with rain in the forecast for the entire day.
Instead of rescheduling, we decided to change gears, set up a backdrop in the garage… er… ”studio”… and kept things rolling.
Thing don’t always work out the way you might plan—that’s just the nature of things. This is why having a backup plan is always a wise idea. While plan B may not always be preferred, it’s better than no plan at all. And in some cases, as we found out with our Viking shoot, there’s even the chance that plan B might even wind up the better option in the end!
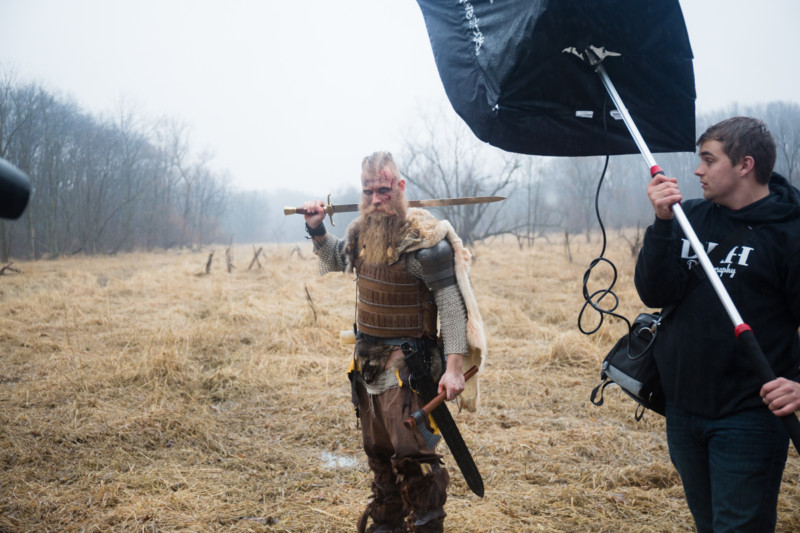
Here (below) is a look behind-the-scenes at our luxurious studio setup (insert sarcasm here).
As you can see, a successful studio space doesn’t always mean a fancy loft apartment in downtown NYC. Sure, a bit more space and a few less pieces of yard equipment might help create a better working environment, but what’s coming out of the camera is all that matters.
When you’re in a pinch, what’s important is that you do what you have to do to make things work. So, here we are!
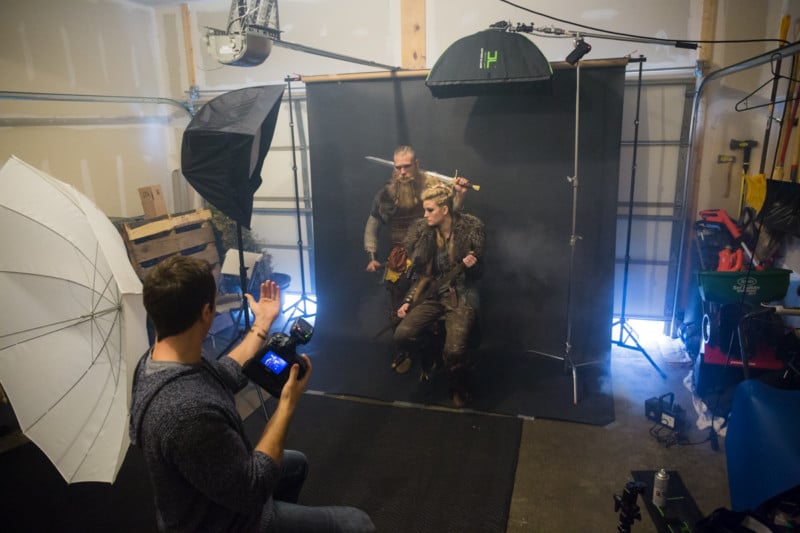
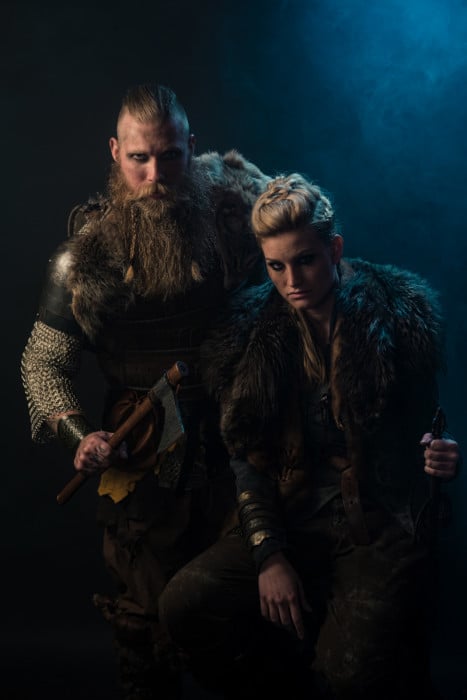
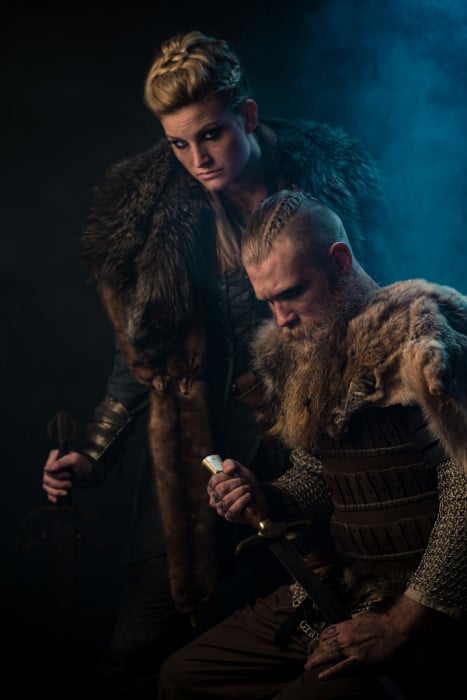
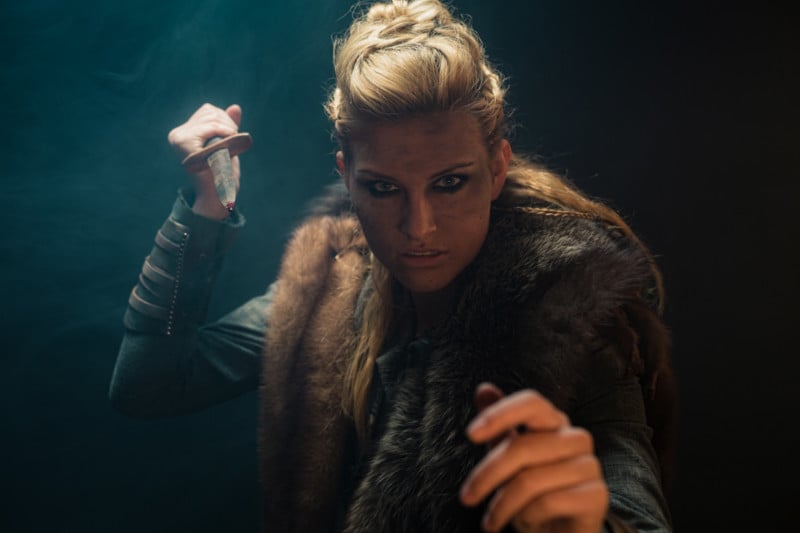
For the first good chunk of shooting on our backdrop, we used a lighting setup close to what you see above. Our key light, coming from the small softbox camera-left in the picture, was primarily positioned far camera-left, or far camera-right, depending on the position of the model(s).
The hair light, in the strip bank above the models, was positioned either overhead (as seen above), or slightly behind and to the right (or left) of the model(s), opposite the key light. This light provided a separation from the backdrop, and also illuminated the fog used in most of the shots.
The third and final light was our fill light. For this, we used a white shoot-through umbrella set to a very low power, positioned right around the same axis as the camera. This helped fill in our shadows and gave a little spec of light in the eyes, bringing in a bit more life.
All three lights being used were Canon 600EX-RTs and were triggered with the Yongnuo YN-E3-RT. The trim/hair light was gelled with a CTB to render the blue tones.
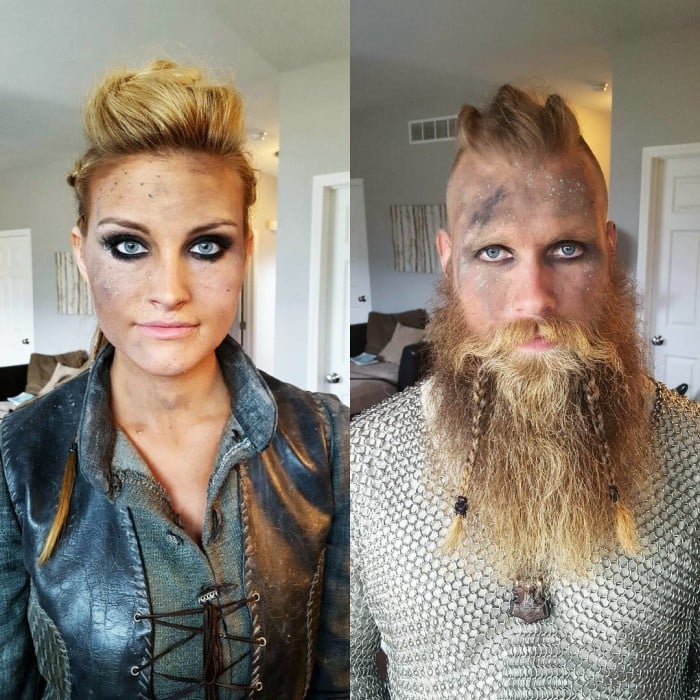
Hair and Makeup
Hair and makeup is the icing on the cake for any shoot. It’s what pulls everything together and brings truth to the entire look.
Jes Victor (hair) and Krissy Vanderwoude (makeup) are two of the most incredible talents we have in this entire area. These two couldn’t have knocked it further out of the park. As I mentioned before, building a team around you of people you trust is one an amazing thing. Not only should these people be able to take an idea and run with it on their own, but they should also be open and willing to listening and expanding on ideas from the entire team, as a whole.
Find a team that’s able to listen to each other’s ideas, and create together.
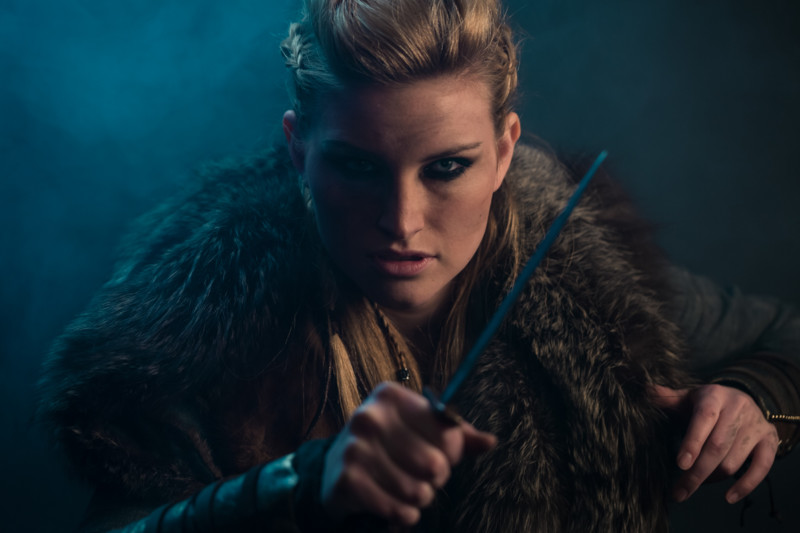
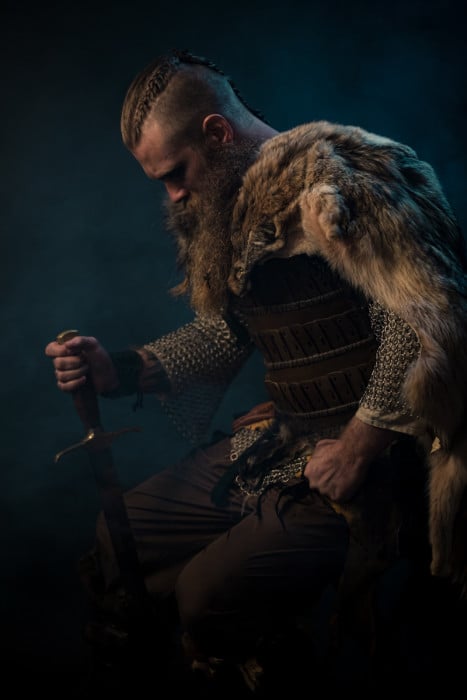
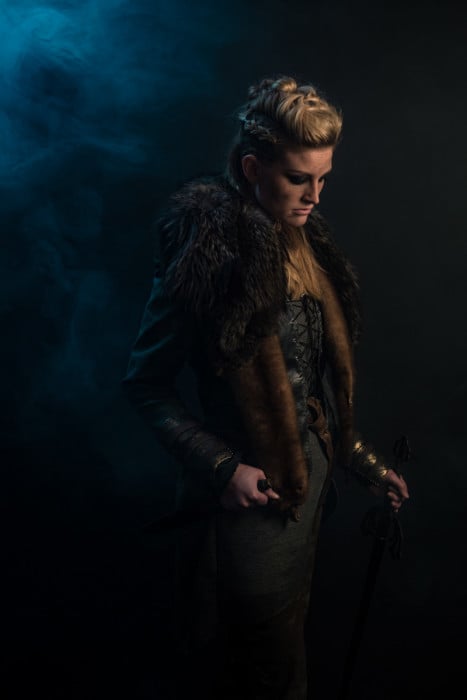
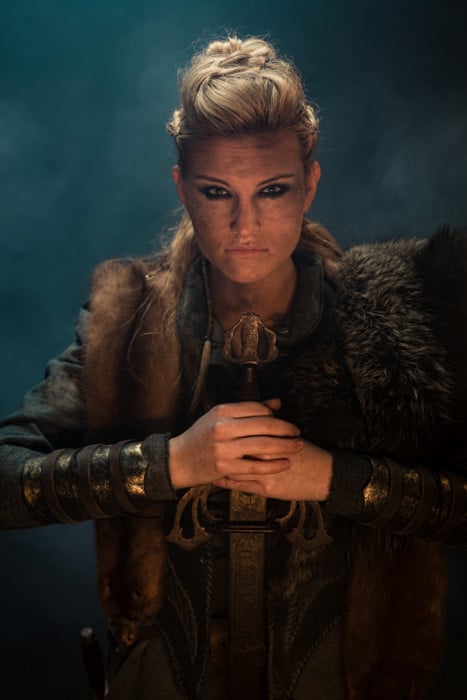
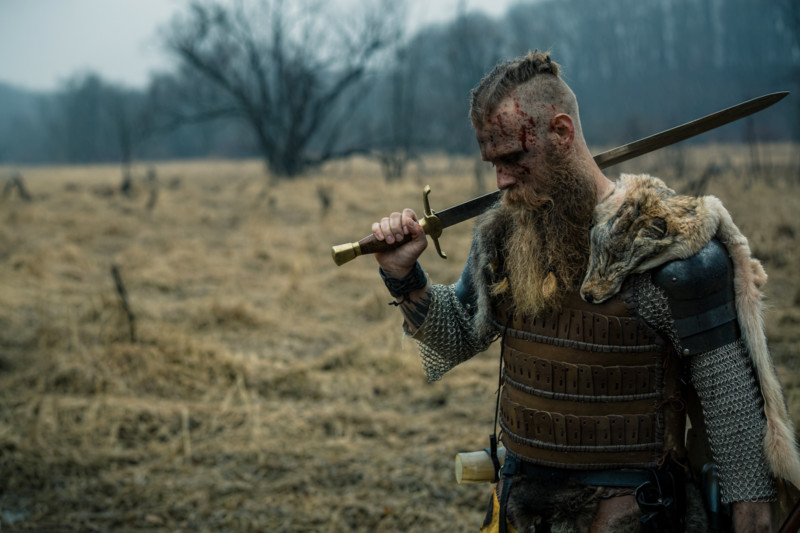
For the shot below, I have basically the same setup as before, but the lights are changing roles. Our strip bank is now our key light, coming from above, and our small soft box is providing our side/fill light (dialed down and CTO gelled), coming in from far camera right.
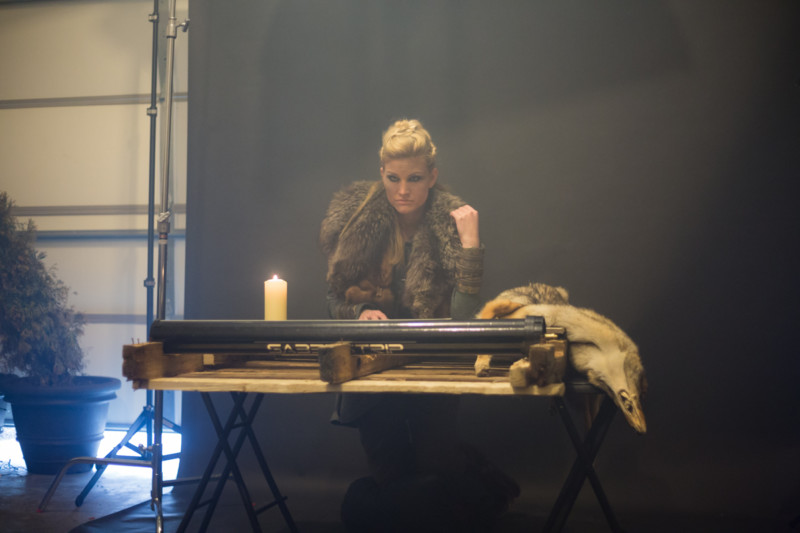
Next, we changed gears to something a bit different. We still have our hair light coming in from overhead, but our key light is now coming from a SaberStrip, which is placed directly below the axis of my camera, right out in front of our model.
With the position of the light, and a CTO gel on the flash inside the SaberStrip, we get a nice, eerie glow, reminiscent of a blazing fire on a battle field.
As mentioned before, when you’re in a pinch, you’re going to have to get creative. For this next shot, we decided to tear apart an old pallet I had laying around in our garage (I KNEW I kept that thing for a reason!) and used it as a make-shift table.
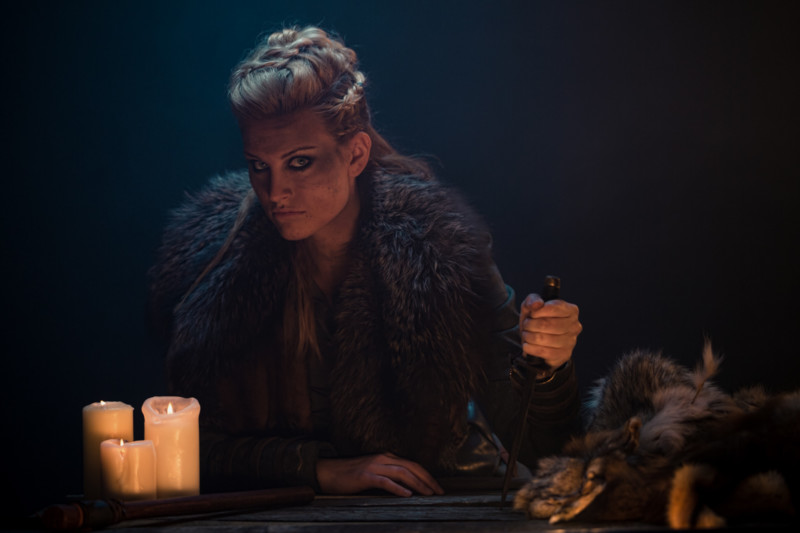
Remember to think about the illusion you can create with your composition. The final image only needs to show a few inches worth of space on the table, so crop in tight and make it work. Comparing the image directly below to the final shot of this series, you’d almost never know this was the same set.
Very simple lighting setup here once again. The SaberStrip, CTO gelled, was placed on the table in front of her to help mimic the light and mood coming from the candles. Our strip bank, overhead, helped separate her from the background, and also gave a “moonlight” type effect to the ambiance. (The softbox, camera right, was not in play on this scene.)

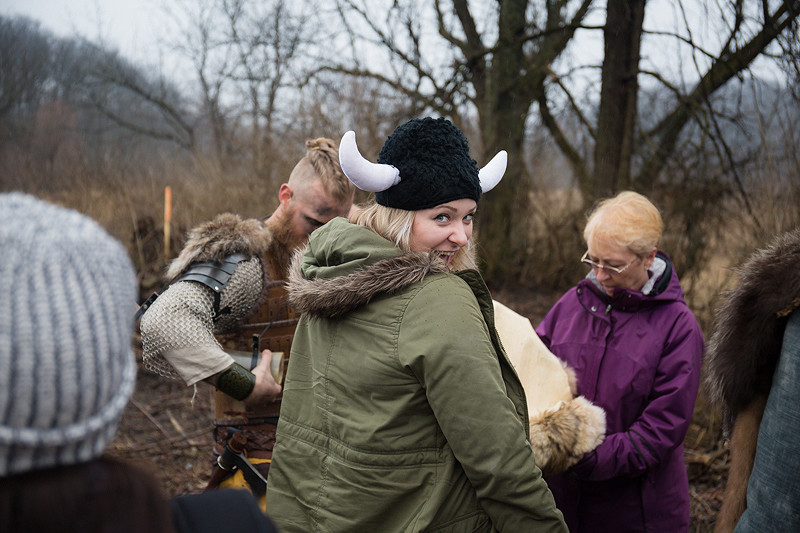
Right as we were finishing up this set, the crew outside notified us that we might have a break in the rain on the way. Considering one of our locations of choice was only a hop-skip-and-a-jump away, we figured we might as well take the risk and head out. We packed up the gear, loaded the trucks, and hit the road!
Once we arrived, we came to the conclusion that there wasn’t much chance of getting a clearing in the rain. Nonetheless, it was a unanimous decision that since none of us are made of sugar (contrary to what we sometimes believe), we’d all survive getting a little wet.
After all, what true Vikings would turn around and head home because of a little rain?
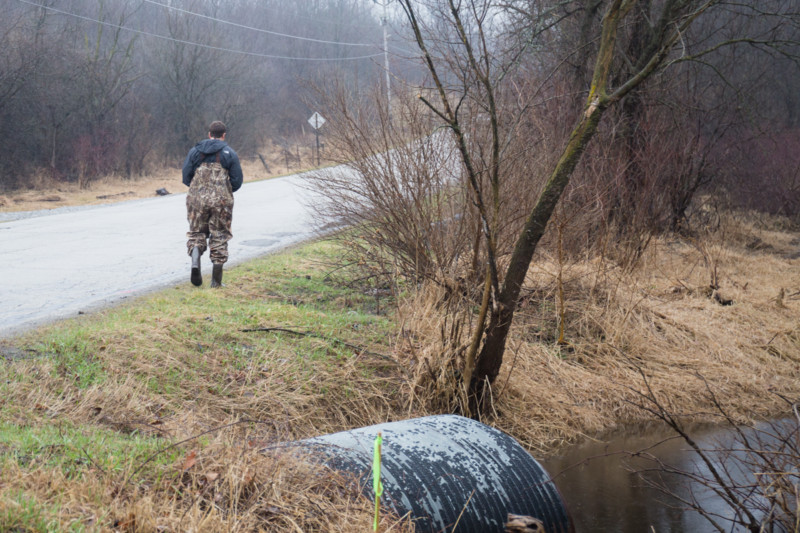
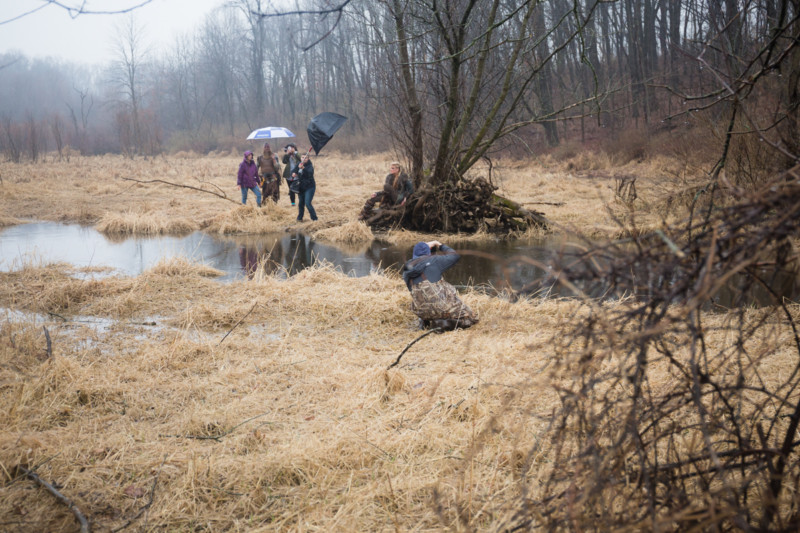
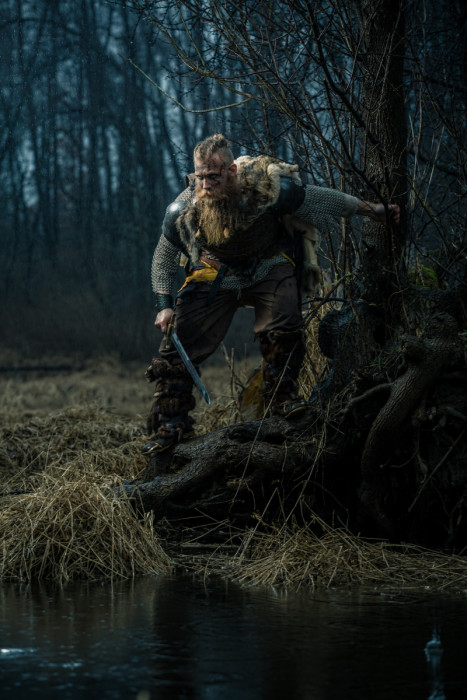
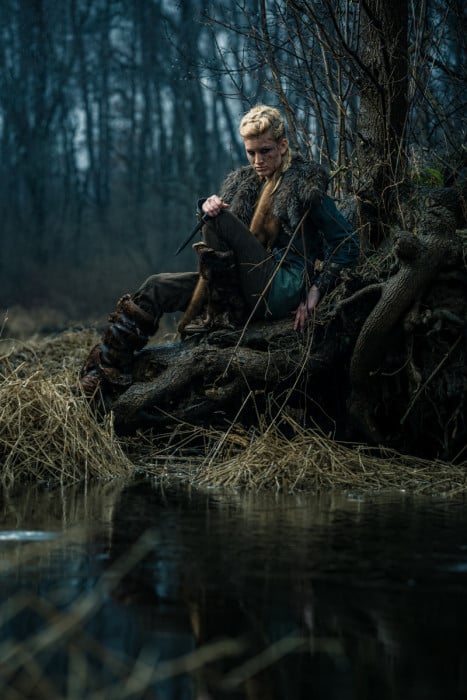
While scouting this location before our shoot, I knew I would want a vantage point from the water. I figured the best way to accomplish this was to actually be in the water, so I planned ahead and borrowed a pair of waders.
This allowed me the flexibility of shooting from any position I needed to, even if it meant being chest deep in water and shin deep in slimy muck. Thankfully, they looked amazing.
For this first set, I used an Elinchrom Ranger Quadra inside a Photek Softlighter. The Elinchrom gave us more power than a speedlight, allowing us to overpower our ambient light a bit more.
We soon after switched our modifier to the small softbox, which helped conserve a bit more power from the Quadra, and gave us a smaller, more contrasty light.
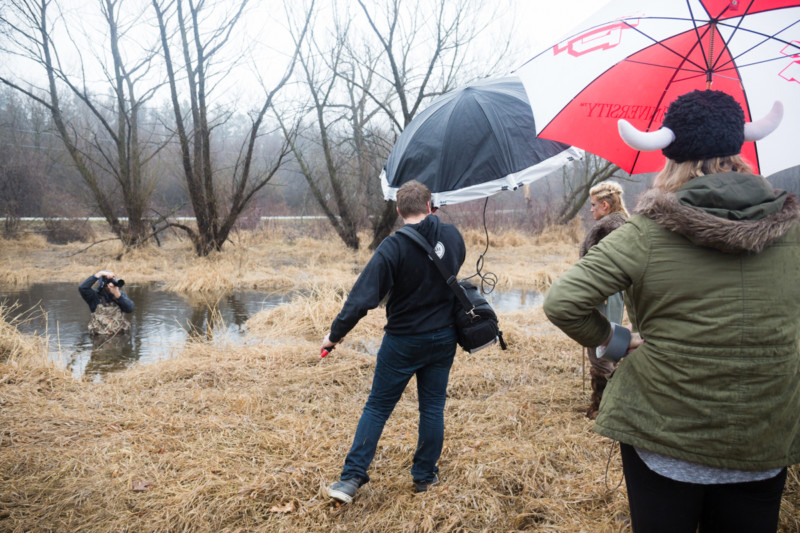
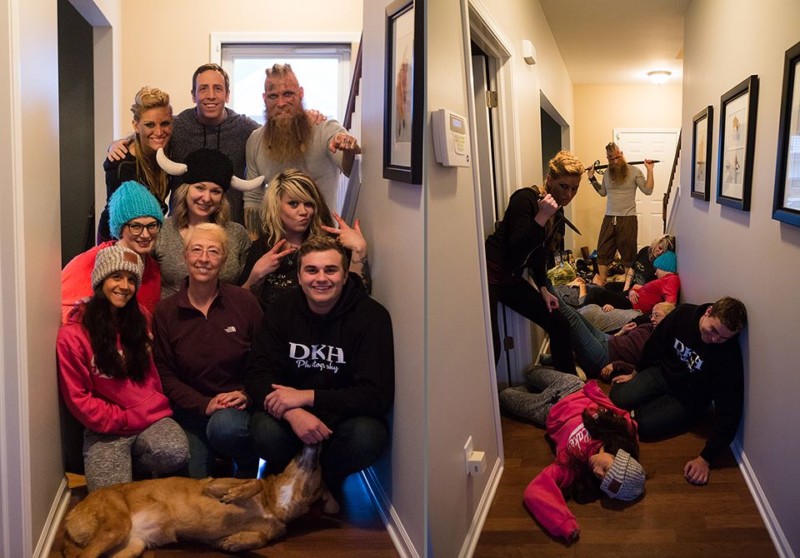
Shout-out to my beautiful wife, Haley, for these awesome behind-the-scenes shots!
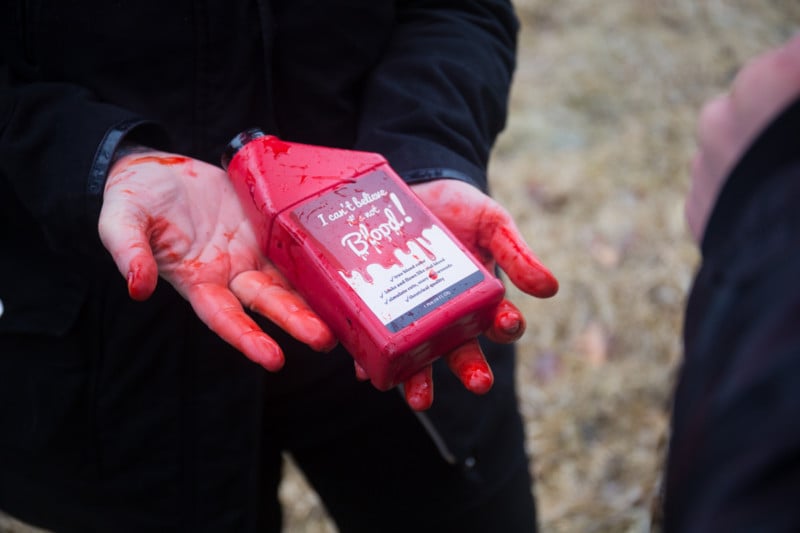
We were originally thinking we might have to make a sacrifice … but then Krissy came up with this stuff. Thank goodness!
Here’s a look at how the majority of our scenes here were lit.
Here’s a sample of where our flash didn’t fire. This shows what our scene looked like with only our available, ambient light…
…and then again, with flash.
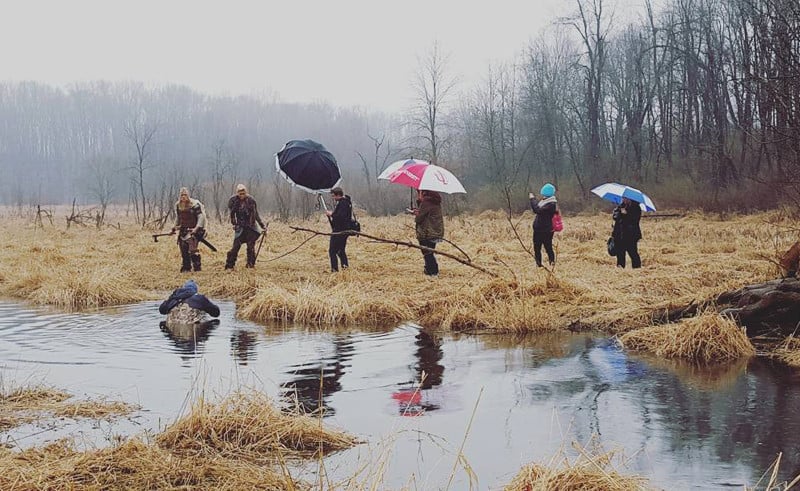
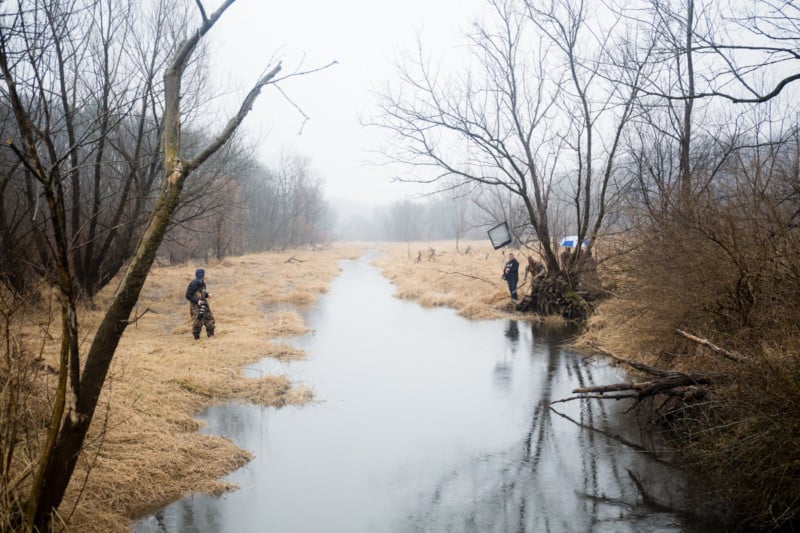
Here’s a pull-back of the entire scene. This shot is taken directly from the road that runs perpendicular to the creek.
This is a prime example to keep your eyes out for locations everywhere you go. You might easily drive right by this every day and not even know it was there. That was exactly the case with me until I actually had my eyes out for this specific shoot.
That about wraps things up! I hope this write-up has been helpful and insightful. Feel free to reach out to me with any further questions that might not have been answered in this post. Keep learning, keep creating, and enjoy every moment of it!
I want to extend a big thanks to Dallas Hall, my beautiful wife Haley, and my mom, for all the wonderful behind-the-scenes photos from the day! And of course a huge thanks to everyone who was a part of making this shoot such an incredible experience.
Stay tuned for Vikings, round 2, winter of 2016!
About the author: Matt Bigelow is a professional, published wedding, family, fashion and conceptual portrait photographer based in the Chicagoland area. You can find more of his work on his website, or by following him on Facebook and Instagram.