LensRentals Celebrates Independence Day with Some Gratuitous Lens Mutilation
A couple of weeks ago I got an email asking if we would be willing to take some lenses, remove the electronics, fix the aperture wide-open, and permanently lock them at infinity focus. It seems the person who needed this done was having trouble finding a legitimate repair shop or service center that was willing to do it.
Well, illegitimate is our specialty, so I started negotiations about just how exorbitant a fee we would charge for this work. We quickly arrived at a fair price (no money, but we get to take pictures) and yesterday received brand new copies of the Canon 100mm f/2 and Sigma 35mm f/1.4 Art to work on. If you’re the kind of person who slows down to view car wrecks or spent $200 on fireworks for the 4th of July holiday, you might like this.
(For those of you who aren’t American, the 4th of July is when we celebrate our Independence by getting sunburned, making burnt offerings of animal parts in our backyards, and then eating said offerings. During the entire day, we drink massive quantities of American beer and once it gets dark we shoot off massive quantities of Chinese fireworks. All too often, the results of mixing alcohol and explosives prove that Darwin was correct — but hey, that’s what celebrating is all about, right?)
If torn apart camera lenses make you squeamish, then you won’t like this, and I suggest you not read further. You won’t miss learning anything; it’s just for fun. As best I can determine, this post has absolutely no practical use whatsoever. It’s just something to amuse and entertain those of you who are amused and entertained by such things.
Canon 100mm f/2.0
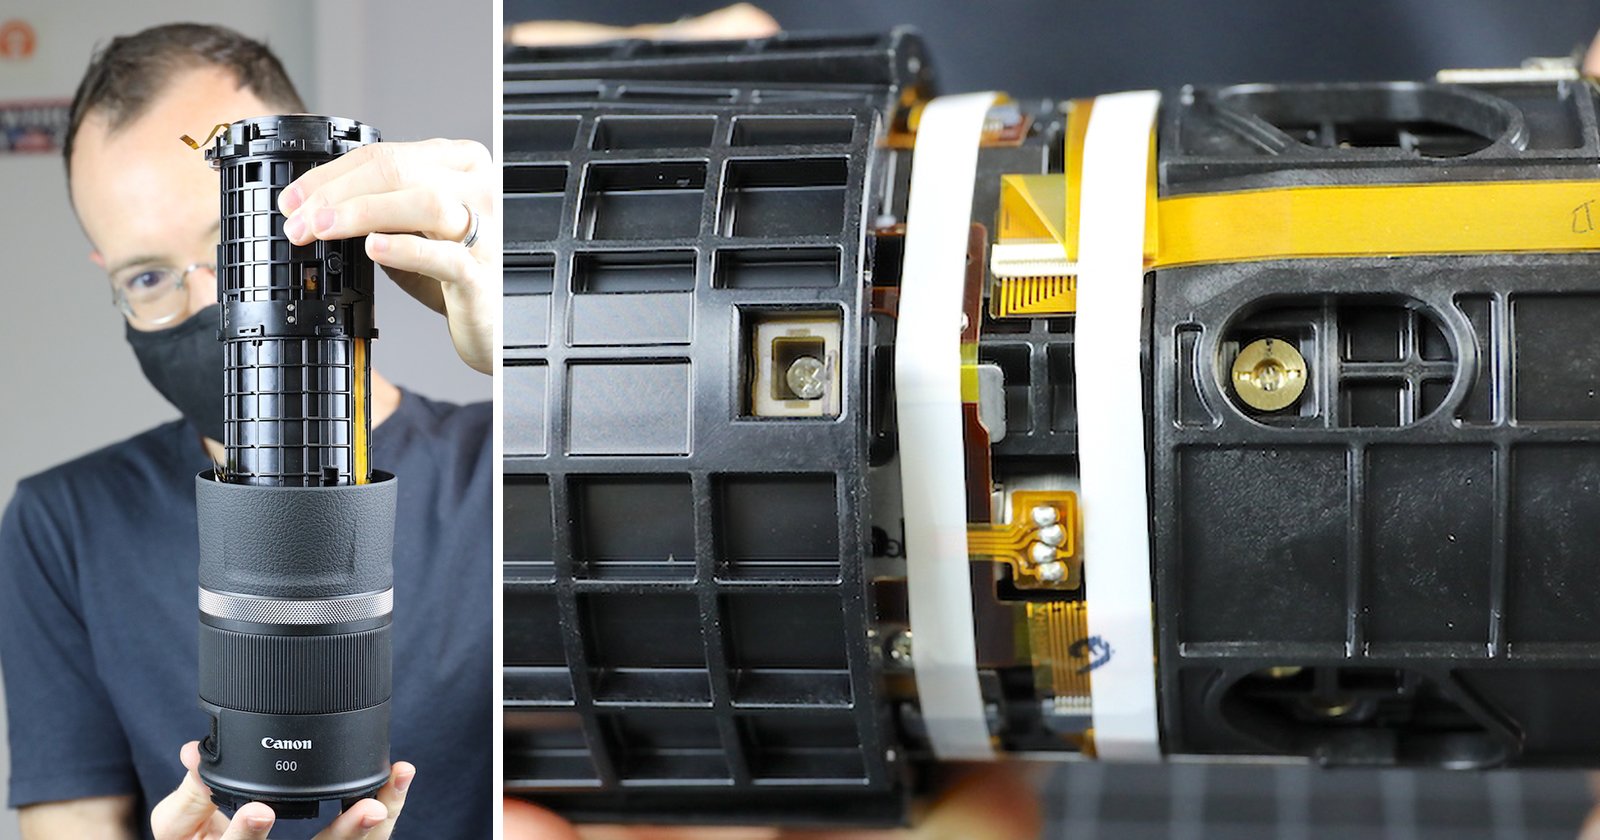
Being an older lens, we assumed this one would be simple to do. The plan was to remove the aperture assembly and electronics, then solder the focusing key at infinity. You know how plans go, though, so that isn’t exactly how it happened.
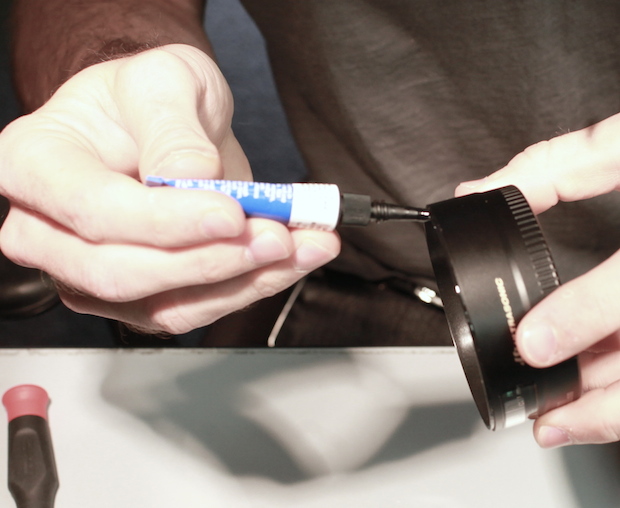
We started with removing the bayonet mount and rear barrel.
Then disconnected the flexes and removed the circuit board.
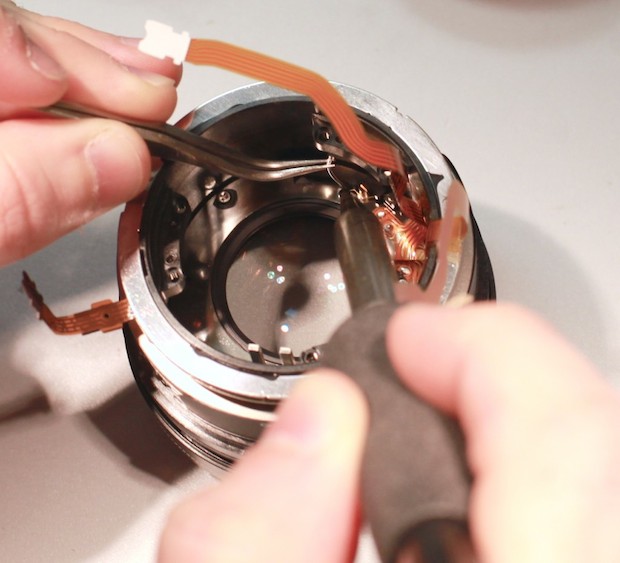
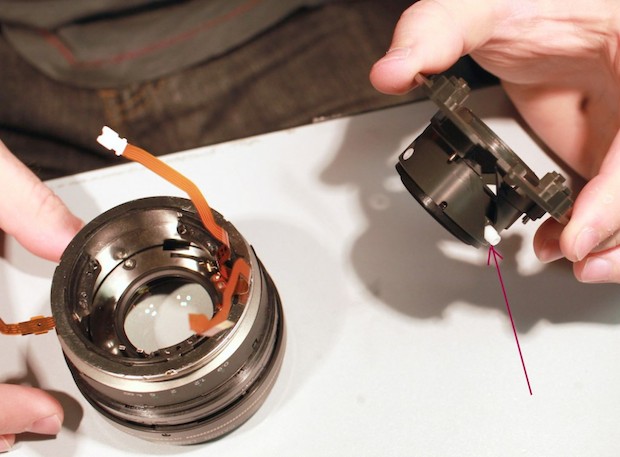
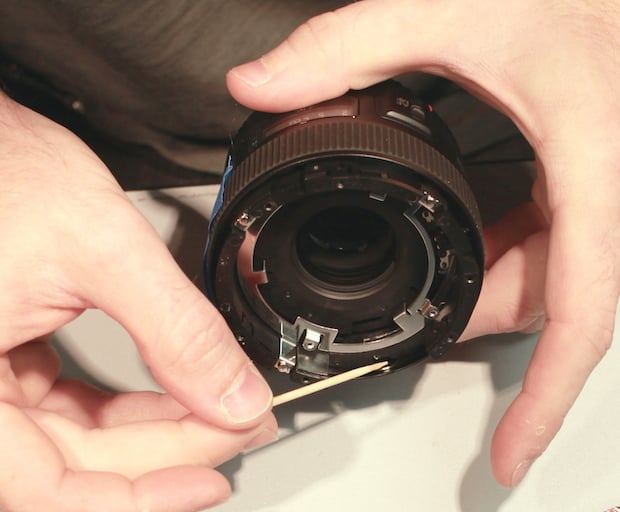
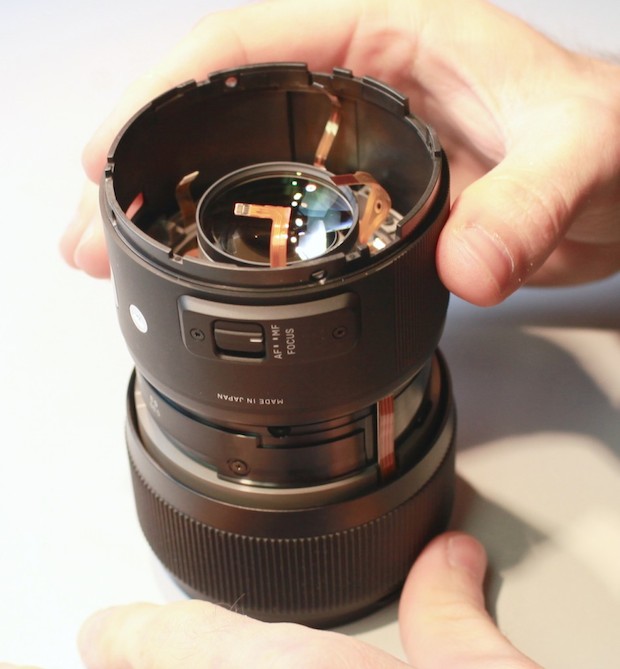
The mount removes as a single subassembly along with the rear focusing group. The focusing collar (red arrow pointing to it) sits in a fork connected to the focusing ring. Turning the ring moves the focusing element up and down in its helicoid. We had planned on soldering the fork in place, but with the lens disassembled, we couldn’t accurately check the infinity focus position so we had to go with our fallback plan.
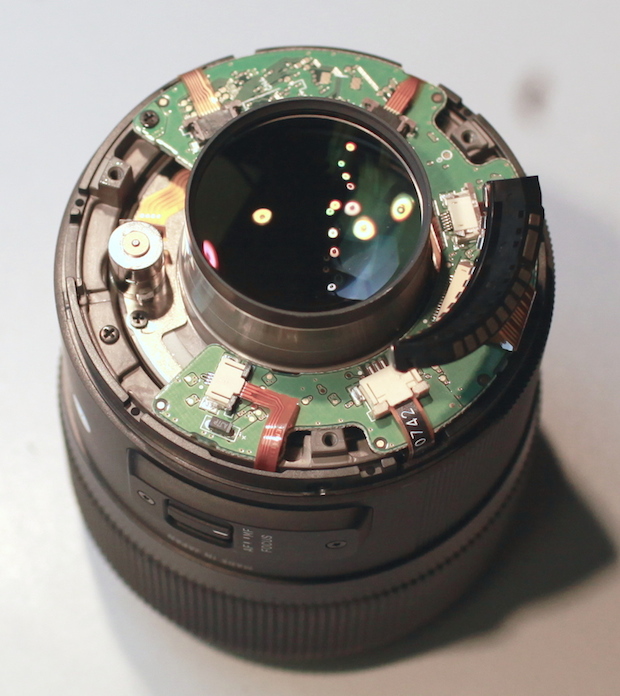
Examining the front half showed the aperture assembly was going to be a problem to remove. One lens element is within the assembly, and it also has two light baffles that were important.
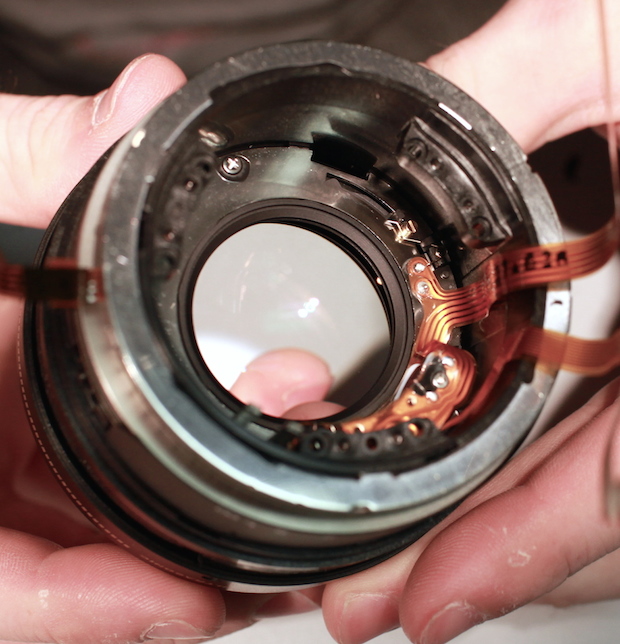
So instead of taking it out, we just put a drop of solder on the mechanics of the aperture ring, locking it in place wide open.
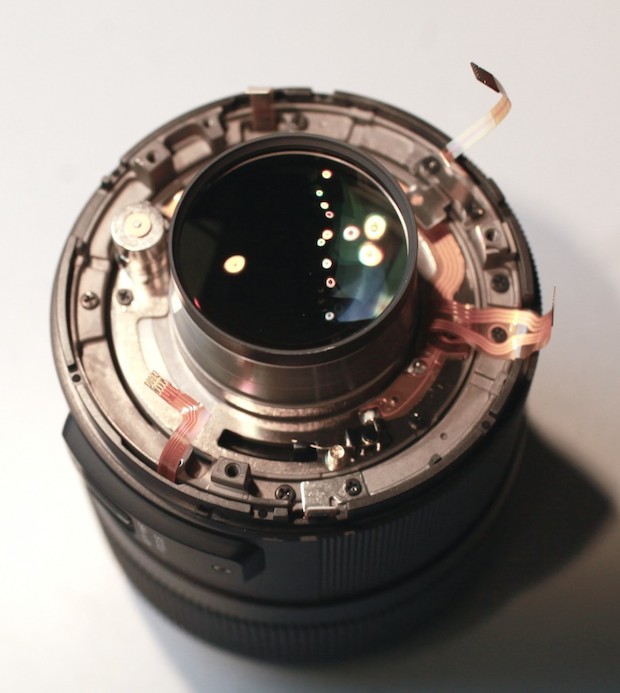
When we reassembled the front and rear halves we noted a lot of openings in the lens mount plate. Since this lens has something of a reputation for getting internal dust, Aaron decided to seal the openings up with double sided tape. Mostly, Aaron likes opportunities to fall back on his Fine Art degree. He spent 30 minutes carefully cutting out tape shapes.
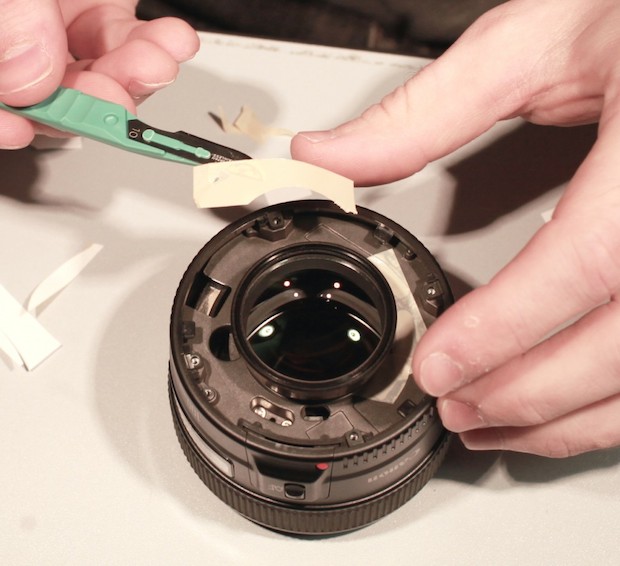
For the same dust control reasons, we replaced the electrical connectors. They no longer connect to anything, but do plug up what would otherwise be a large hole at the rear mount.
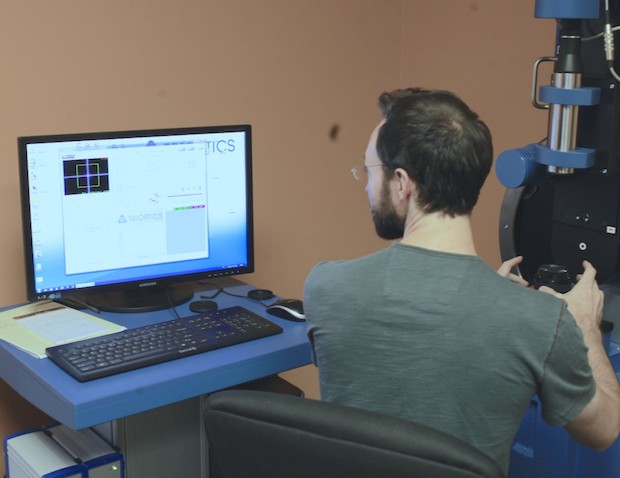
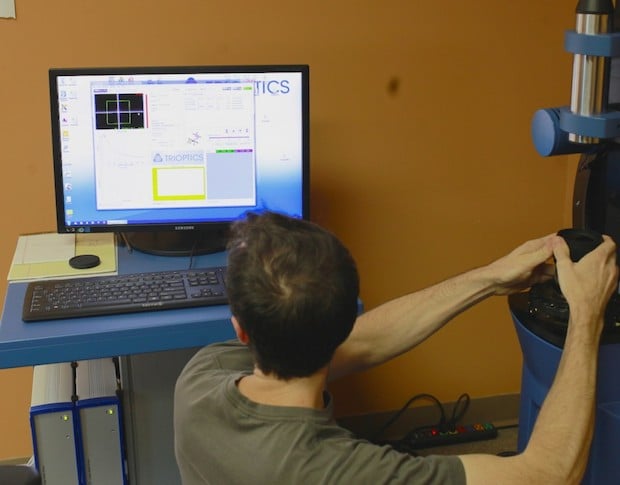
We decided to set infinity focus using the MTF bench. Since the bench delivers collimated light (appearing to come from infinity) we just manually focused the lens until we had maximum MTF and minimum astigmatism. (As expected, this was not quite at the infinity mark on the distance scale.)
Once we had infinity focus locked on, we glued the focusing barrel to the rear lens barrel.
And, for good measure, glued it to the front barrel, too.
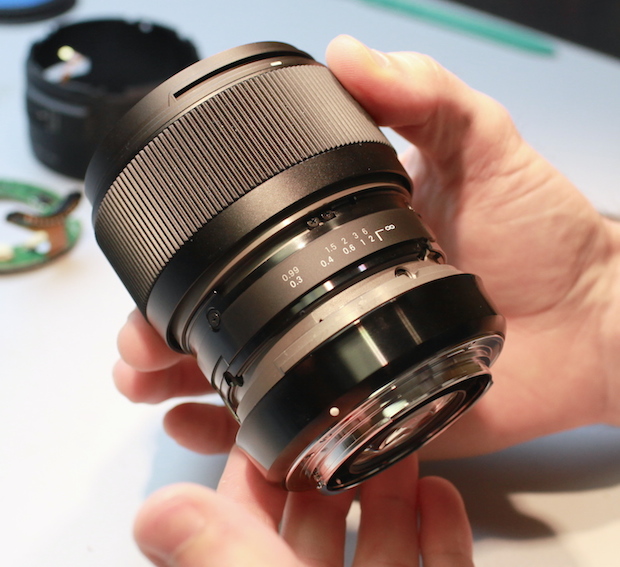
It’s not as slick and elegant as we would have liked, but it sure works.
Sigma 35mm f/1.4 Art
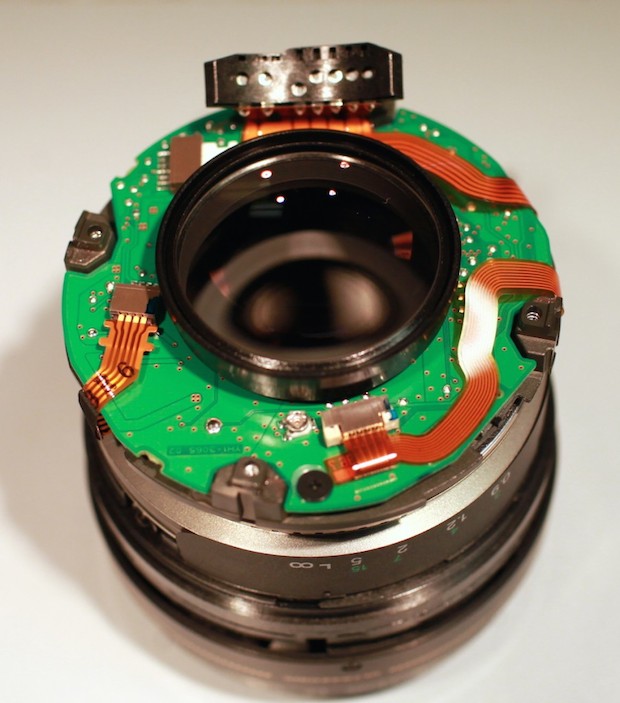
We thought the Sigma, with its more modern and modular construction, would be simpler to do and it was. As usual, we removed the bayonet to expose the PCB.
Then removed the PCB, exposing the aperture motor and controls.
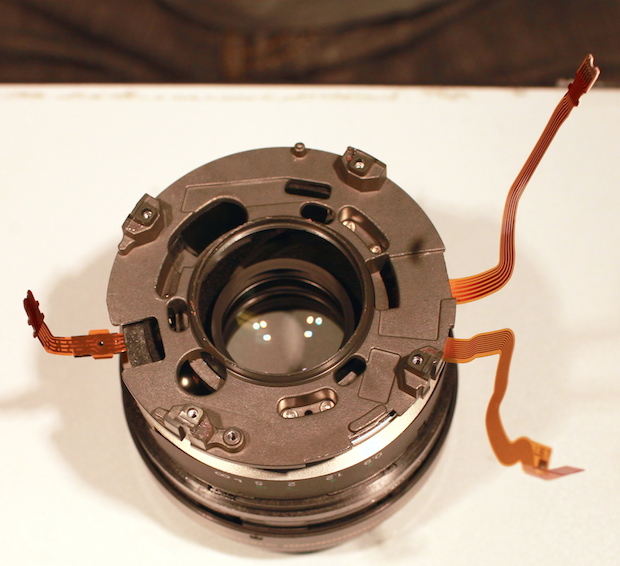
The rear barrel then comes off by removing a few side screws.
Soldering the aperture lever worked well on the other lens, so we repeated it here.

After which we remounted the bayonet, but left the rear barrel off.
That let us mount it to the MTF bench with part of the focusing mechanism still exposed.
Once we had infinity focus locked on, we filled the focusing stays with Loctite silicone.
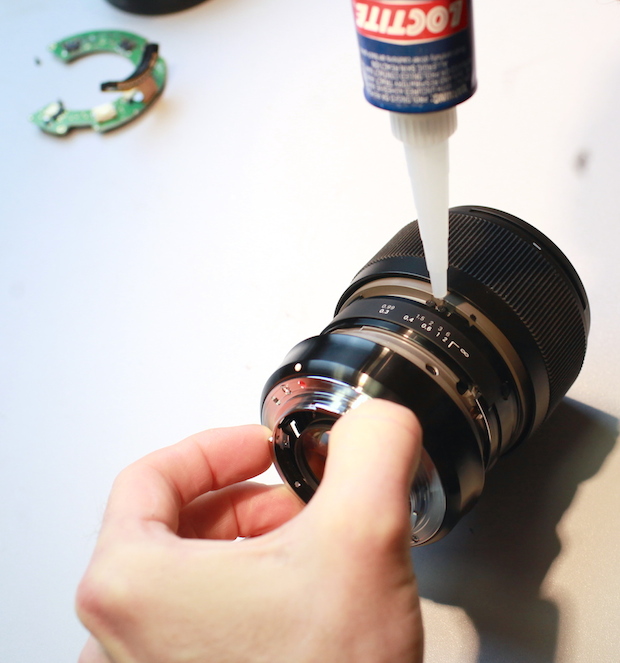
Once it dried, the focusing mechanism wouldn’t move with a pry bar.

We put the barrel back on before sending it to its new owner, of course.
About the author: Roger Cicala is the founder of LensRentals. This article was originally published here.