Building a DIY Barn Door Tracking Mount for Long-Exposure Astrophotography
Getting quality astrophotography shots comes with several challenges, and one of the main ones is that the starts don’t stand still — or, more accurately, we don’t. Since the Earth enjoys spinning on its axis once every 24-hours or so, exposures in excess of about 1 second begin producing star trails unless you have the camera or telescope on some sort of tracking mount.
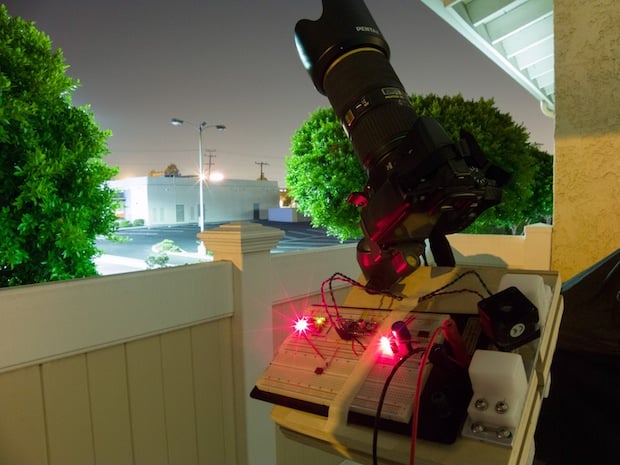
Fortunately, if you don’t have the money to purchase a $1,000+ equatorial mount but still want to take long-exposure astrophotography, the DIY barn door tracking mount above will enable you to do so on the (relatively) cheap.
The mount was built by University of Michigan aerospace engineering student David Hash (also known as Reddit user 0x05), and we had a chance to catch up with him over email to find out a little bit more about the rig and how he put it all together.
“The basic design is based on one I found on Cloudbait, but I worked out the drive mechanism and electronics independently,” says Hash. “The basic idea is to make a simple, hinged platform that is slowly driven open by a rotating threaded rod, so that the rotation of the platform exactly matches the apparent motion of the stars in the sky.”
The thing is, the speed of the rig has to be very precise. Hash shoots with a Pentax K-30 and lenses that range in focal length from 17mm all the way to 300mm. “At the focal lengths I’m shooting … if the rotation of the mount deviates by more than about 5 thousandths of a degree during the length of an exposure, you’ll start seeing elongated stars and other artifacts of poor tracking,” explains Hash.
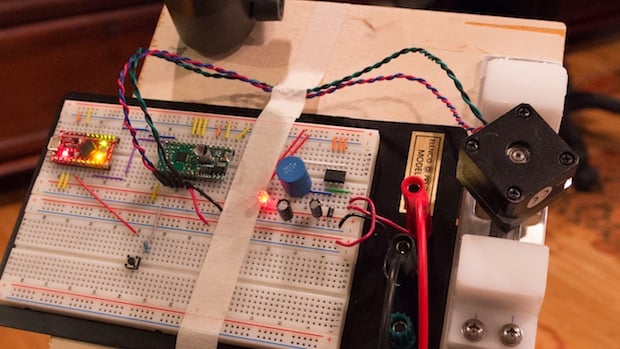
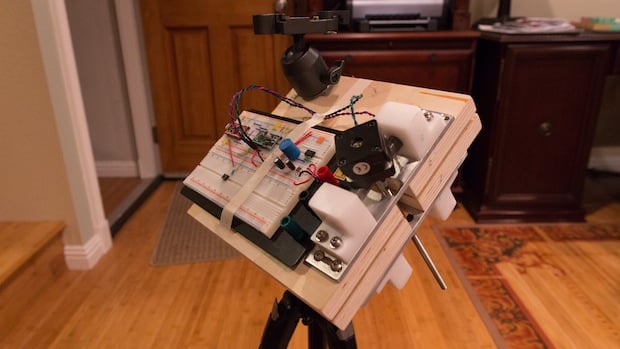
The mount itself is made up of a threaded rod driven by a stepper motor that makes one full rotation every 3,200 “microsteps.” The speed of the motor is controlled by a clock timer on board a low-cost microcontroller that calculates when the motor should pulse to ensure the camera is always pointing in the right direction.
That involves pulsing the motor about 50-times per second, as each microstep rotates the camera platform only eight hundred thousandths of a degree. The mount is designed this way so that everything runs extremely smooth.
Here’s a video showing how the single-button operated rig works:
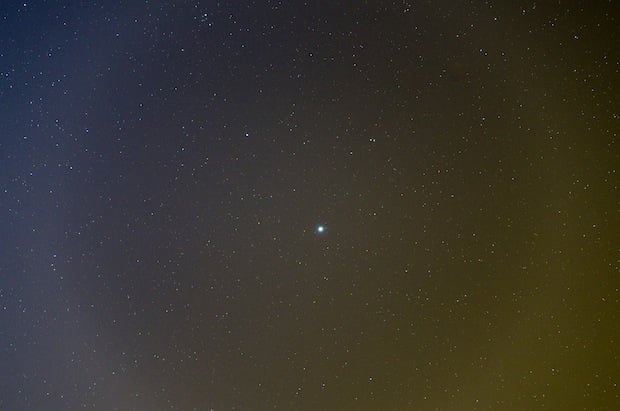
In case you’re wondering what sort of different the mount makes, here’s a 30-second exposure of the star Vega taken before the mount was turned on:
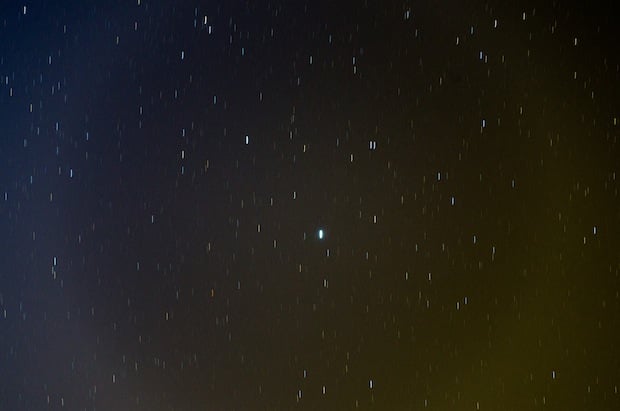
And here’s the same shot after:
Since Hash is spending his summer in the Los Angeles area, he wasn’t able to get any good sample shots until he took the mount out to Mount Pinos, about an hour and a half northwest of LA. Once there, however, he aligned the mount with Polaris (something you have to do every time), fired it up and managed to capture a few really good ones.
The first is a shot of the Milky Way taken with a Sigma 17-50mm f/2.8 at 17mm, while the second, third and fourth show M8 (The Lagoon Nebula) and M20 (The Trifid Nebula), M101 (The Pinwheel Galaxy) and a particularly awesome shot of M31 (better known as Andromeda), all taken with a Pentax DA* 50-135mm f/2.8 at 135mm:
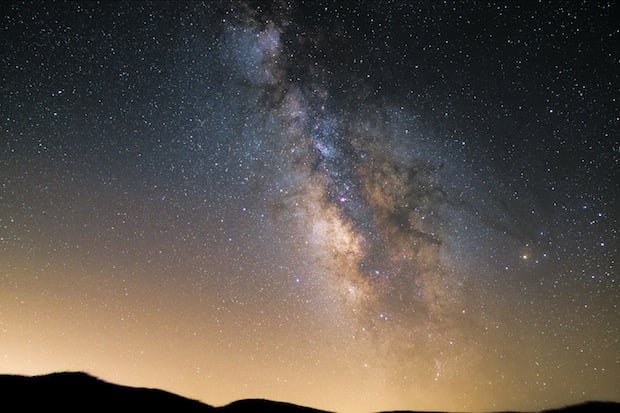
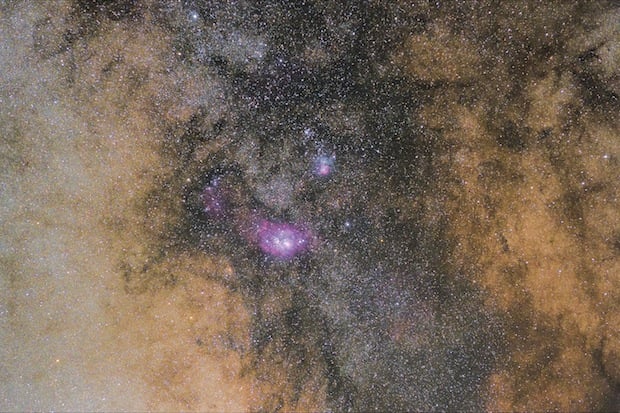
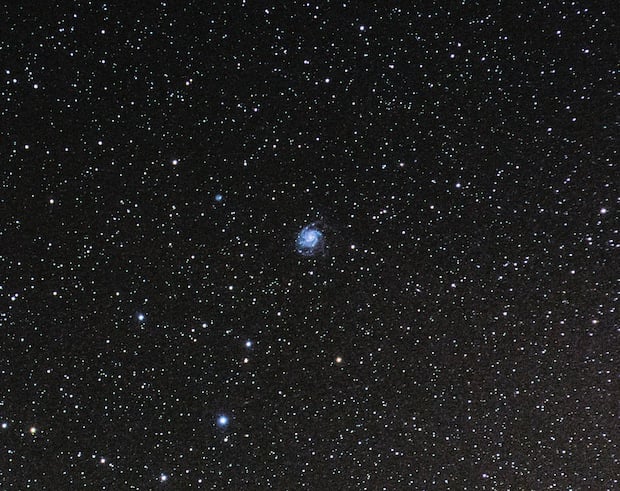
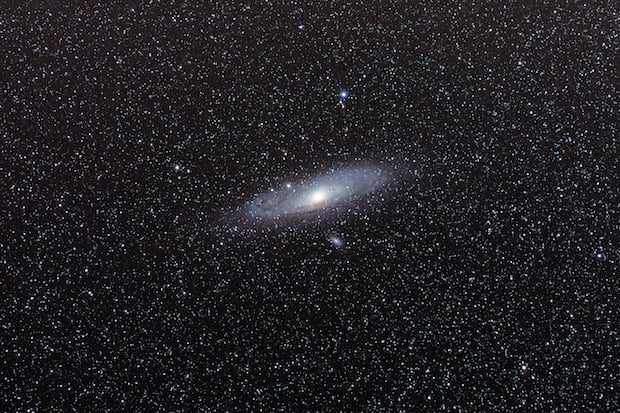
All of the shots are made up of several 90-second tracked exposures that were stacked and combined using a freeware program called DeepSkyStacker in order to reduce noise. Not bad from a homemade rig that cost him approximately $200 to build from scratch.
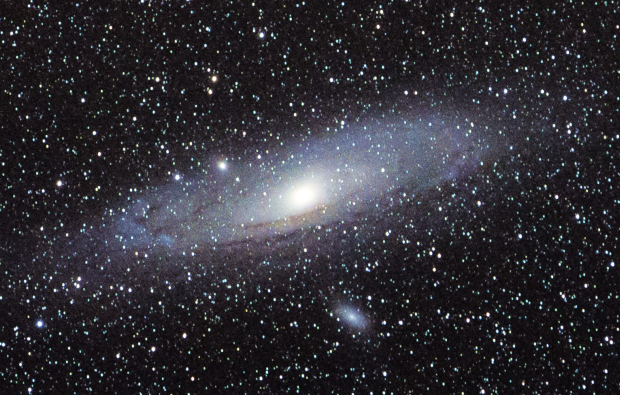
Here’s a closer crop of Andromeda:
You can see all of the samples in glorious high-resolution on Imgur by clicking here.
If you’re interested in building one of these yourself, you can get the basic blueprint at the Cloudbait link he mentioned. More info on the complex mathematics and equations of it all can be found on Hash’s Reddit thread on the subject.
(via Hack a Day)
Image credits: Photographs by David Hash and used with permission.