An Introduction to Playing with Ultraviolet Fluorescence in Photographs
![]()
Ultraviolet fluorescence is a mechanism in which UV radiation excites chemicals in an object and causes them to release visible light. There are many household objects which fluoresce, such as some washing detergents (anything that ‘makes your whites whiter), soda water (it contains a chemical called quinine which makes it taste bitter, and also causes the fluorescence), the dyes found in highlighters, the bacteria found on the face (which cause spots and acne), bodily fluids (including urine) and much more.
Subjects
There are many fun and exciting subjects for UV fluorescence, a little experimentation is always good, as it helps you to see what works and what doesn’t.
Try making fluorescent bubbles by dropping the felt from a highlighter into a bubble mixture and letting it diffuse (you may have to add extra soap or water), or look around the house to see how clean it really is. UV security markers can also be fun to leave hidden messages!
Equipment
- UV Source: I’m using a converted Metz flash which I’ve been lent, however a simple UV Torch or a black light tube will be more than sufficient.
- Camera: A DSLR with manual controls is ideal, however if you do not have one, a simple point and shoot may work
- UV Blocking Filter: To filter out stray UV radiation, not totally necessary but helpful!
- Fluorescent Object: Look above for some ideas
Method
This is a fairly straight forward method: simply place the UV filter over the lens of the camera and illuminate the subject with the UV light.
If fluorescence occurs it will be visible as the object should emit visible light. If you’re using a DSLR, you’ll have a lot more control over the exposure so experiment with how much you can see the glow.
Shooting RAW, as ever with this sort of thing, is advised, you can process the images a lot more to enhance the effect.
You can try and mix ambient exposure with a dash of UV – this can be interesting when using UV markers.
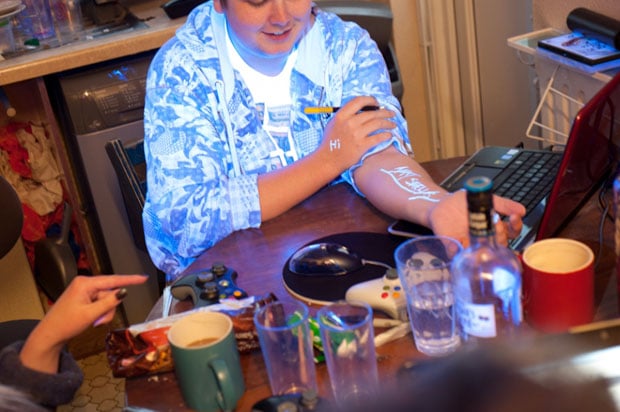
Nikon D700, 50mm f/1.8D, 1/30s f/5.0, 1600ISO
Try taking some pictures of yourself or a friend, show your teeth and nails to the camera as these fluoresce, if you see orange dots, that’s probably Propionibacterium acnes, but that’s completely normal as it’s part of your skins natural flora.

D700, 35mm f/2D, 1/160s, f/13, ISO800.
Tonic water is a great substance for experimenting with this type of photography as it can be used in many ways. Adding mentos to a bottle of tonic water gives a fountain effect (same as coke & mentos) and looks particularly interesting due to the fluorescence.
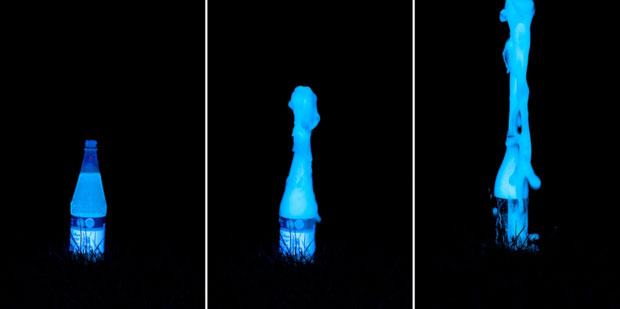
Nikon D700 & 105mm f/2.8 AF-S Micro
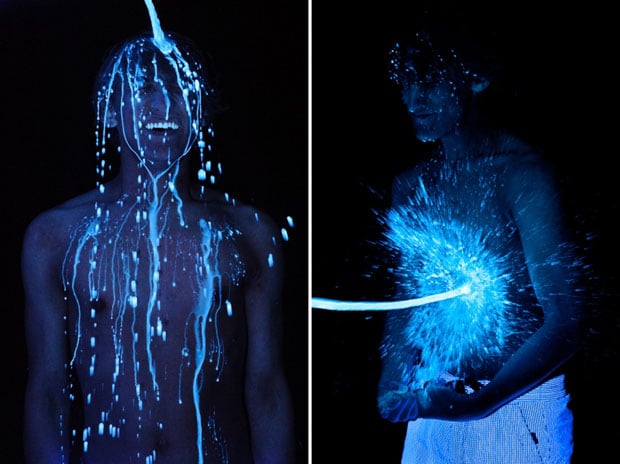
Nikon D700, 50mm f/1.8D & UV converted Metz Flash
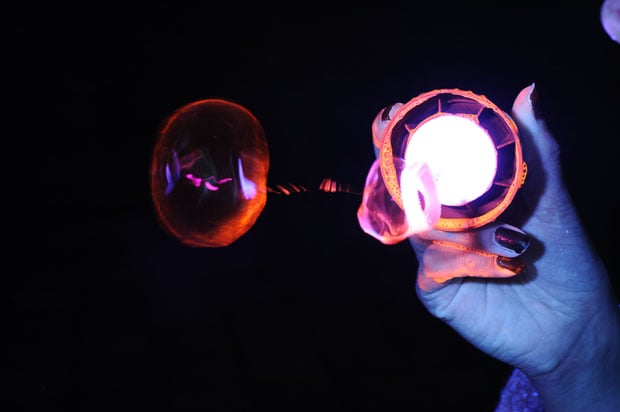
Nikon D700 & 50mm f/1.8 with UV Metz Flash
So there you have it: a new concept you can play around with in your experiments with photography.
About the author: Thomas Langley is a photographer based in the South East of England who specializes in wedding and portrait photography. Visit his website here. This article originally appeared here.