Getting the Most Out of Your GoPro: Here Are a Few Tips and Tricks
Over the past few product generations of the GoPro line, we’ve seen a ton of advancement in the feature set offered by everyone’s favorite action camera. Not only can it go anywhere and do pretty much anything you ask it to, newer models can even record in 10-bit log formats, in resolutions higher than 4K, in an 8:7 aspect ratio for ultimate flexibility in post.
GoPro Labs
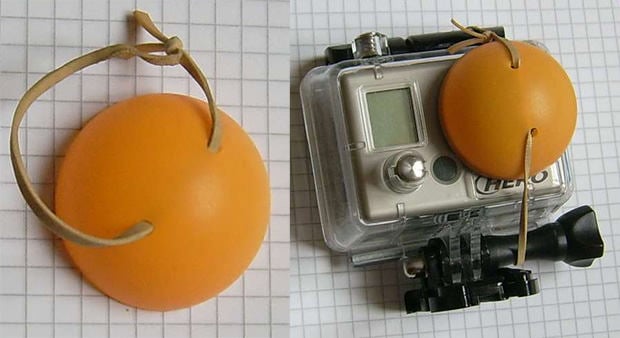
Up first is probably the single biggest thing you can do to unlock an absolute ton of additional features and functionality in your GoPro: flash it with the GoPro Labs firmware. This isn’t something you’ll find in any of the companion apps or even prominently advertised on the company website, but (at the time of writing) if you scroll down to the bottom of the home page on gopro.com, you will find a link to the Labs page.
This is a beta firmware separate from the main release, and unlocks all kinds of new features on all cameras from the Hero 7-13, the 5 Session, and the Max, all for free. All you have to do is download the install file, stick it on a microSD card, and put it in the camera.
There are far too many features to go into individually, but my favorites are manually locking a higher bit rate for recorded video than what is officially supported (having more raw data is always good for video quality), the ability to set a full camera configuration with a QR code (I’m talking exposure, resolution, frame rate, audio levels, time and date, and any combination of additional settings offered by Labs-it’s pretty nuts), and setting up an auto-trigger for a number of different conditions (time-delay, detected movement, detected sound, all kinds of stuff).
As a companion to this, I highly recommend downloading an app called QR Control, which will allow you to customize all of these settings and then save the relevant QR codes directly to your camera roll for later use. Gone are the days of sitting there screwing around with 10 different menus and submenus to change your settings around between shooting situations.
Break the Rules
Standard wisdom when shooting video is to ensure that your shutter speed follows the 180-degree shutter rule from the world of cinema. Put simply, if you’re following that rule, your shutter speed should be double your frame rate, e.g., if you’re shooting at 30FPS, your shutter speed should be locked at 1/60s to give an amount of motion blur between frames that looks natural to the viewer. This commonly requires the use of a neutral density (ND) filter to control the amount of light that reaches the sensor, and ensure that your footage isn’t a blown-out mess.
The problem with GoPros and other action cameras is that the image sensor itself is stationary, and all of the stabilization and smoothing is done by cropping into the image sensor and transforming the image electronically, rather than moving the sensor or the optics themselves to correct for movement. What this means is that in certain circumstances, where the camera is moving around a lot, the motion blur in the captured frame and the stabilization algorithm can end up fighting each other, where your image stays stable but suddenly gets blurry for a moment before sharpening back up. At the extreme, this can easily ruin your footage.
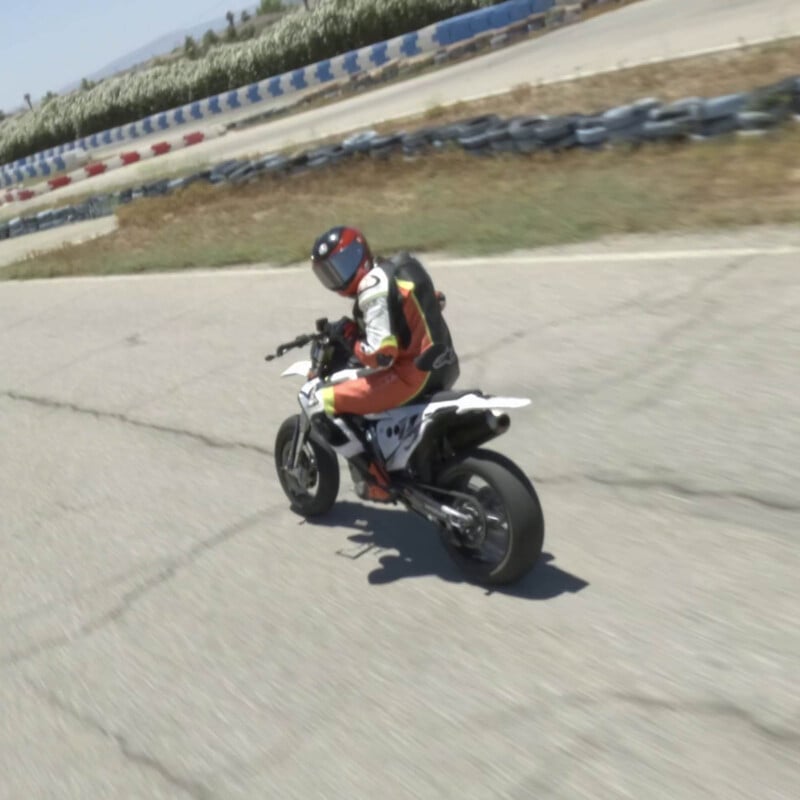
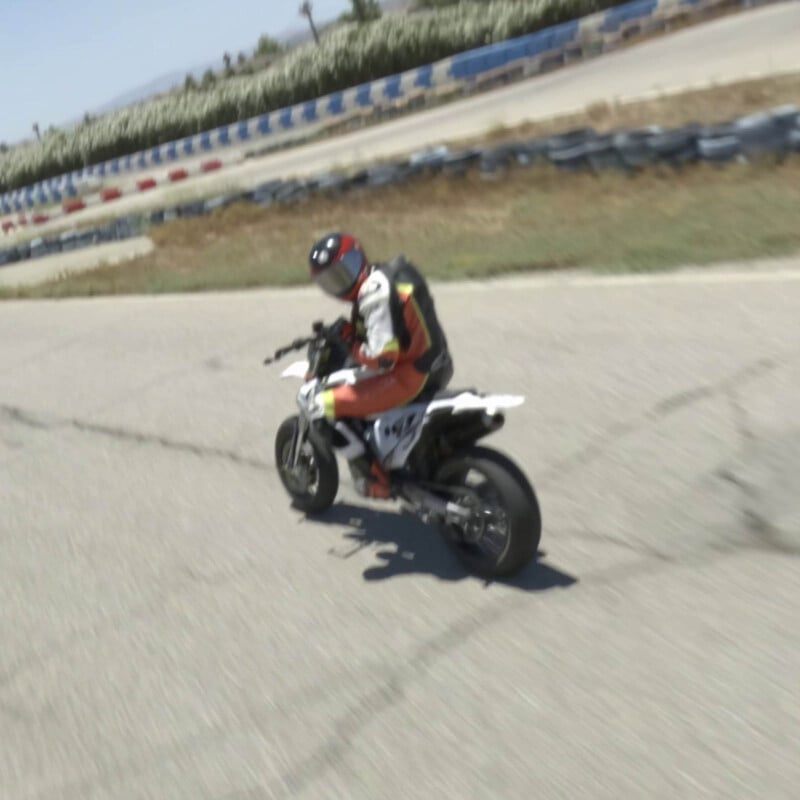
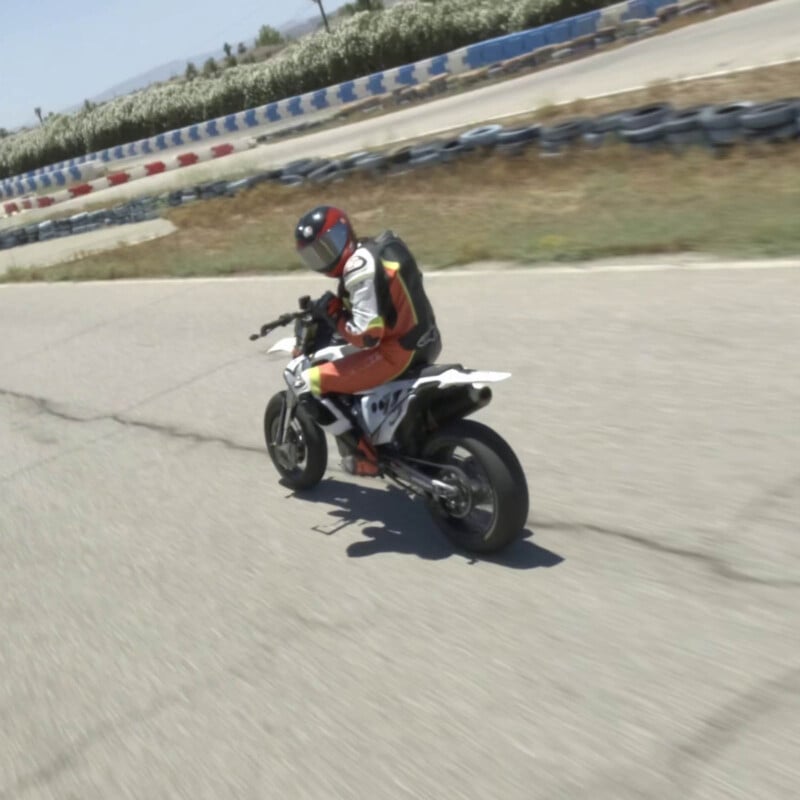
Above are a few stills from a recent shoot, in which I was flying a GoPro 12 on my FPV drone chasing some friends of mine, that illustrate this effect. Notice how the subject remains fairly still in the frame, but becomes blurrier in one specific frame for no obvious reason. To someone watching this on Instagram, they’d never notice, but if your goal is to get the best performance out of your camera, I’d recommend a different strategy.
Here’s a phrase that I’m sure will generate quite the debate: “Just fix it in post.” No, really. Normally, I vehemently support trying to get everything right in-camera, but this is one of my few exceptions. Especially if you’re going to be doing some speed-ramping or other things that have the potential to really highlight imperfections in your action cam footage, I find that it’s better to shoot at a very high shutter speed and then just add in a bit of motion blur in the edit suite if that’s what you’d like to do. The ancillary benefit of doing this is that you have sharper footage to pull stills from, which is cool to be able to do.
If your camera is fairly stable already and not moving around a lot on its own, feel free to use all the ND you want, you little conformist.
Lock Every Setting You Can
Look, I get it. It’s nice to be able to just point the camera, hit the record button, and have the camera figure it out.
The problem is that oftentimes, your camera has a different set of standards it uses to judge exposure or color than you do. It doesn’t know your intention; it can’t know your intention.
This is why I would absolutely recommend presetting and locking every setting you possibly can. Unless you’re going into a situation with wildly changing lighting, like from the ski slope to the inside of the pro shop, you are going to be a much better judge of what your settings need to be than your camera is. This is especially true for shots with very high dynamic range, like from the inside of a car’s cabin to the outside world. In that situation, it’s probably OK for the interior to be a bit dark if that means the view of the outside isn’t completely blown out, but speaking from experience, there’s a pretty good chance the exposure algorithm is going to decide that the interior is the part we really care about, and is going to white out the windows in the process. The same idea goes for white balance. Few things are as distracting as watching someone’s skin tone go from a natural color to heavily blue-tinted because the camera got overwhelmed by a sandy background.
If you’re 100% sure you need to have some amount of auto-adjustment, you can at least put limiters on its behavior. In GoPro Labs, there are options to lock the white balance after a recording has started, so the camera will adjust for current conditions and then never change until a new clip is started, in addition to advanced options like setting the auto-exposure damping to be more aggressive so brief moments of shade or darkness don’t result in the next 5 seconds being bleached as the exposure swings back down.
At the end of the day, you’re the creator. Personally, I put a lot more trust in myself to get it right than a machine.
Anything They Can Do, We Can Do Better
On the whole, I’m pretty happy with the footage that comes out of my GoPros. It’s not as technically perfect as that from my Z9 or my Z6III, but it’s great for a camera you can literally put in the line of fire and be fairly confident you’ll get the shot.
The only thing I’m not really a fan of is working with that footage in post. I don’t really know why, it’s just something I’ve hated having to do, and it always takes absolutely forever to get a final image that looks nice when playing around with the colors.
That is, until I found the GP-Tune plugin from XtremeStuff (purchased with my own money, not an advertisement or a paid plug). Previously, I had been forced to use color cards or try to manually dial in a white balance or contrast values, or even worse, use the official GP-log LUT (which isn’t beating my allegation that most manufacturer LUTs suck) and try to grade underneath it because DaVinci Resolve doesn’t support GP-log as a Color Space Transform yet.
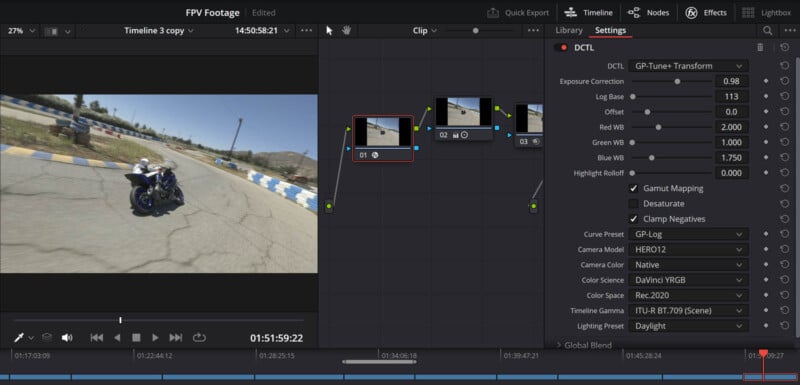
Using GP-Tune, you simply add it to the clip, tell it what model of camera you shot it with and which color space setting you used, and it calibrates your colors and does all of that for you, with options to get more granular if you’d like. It’s made it so much easier to just get to a nice-looking baseline to then grade as you like. I think it’s a no-brainer $25 buy for anyone who does any color work to their GoPro footage.