7 Tips To Improve Your Macro Photography
French photographer Emilie Talpin did not pick up her first camera until 2018 but within just a few years, she became both an OM SYSTEM Ambassador and a highly respected photo educator best known for her favorite photography genres: macro and nature.
Full disclosureThis article was brought to you by OM SYSTEM Cameras
At a Glance
As an OM SYSTEM Ambassador, photographer Emilie Talpin owns the brand’s flagship camera, the OM-1. However, once the photographer purchased the smaller and more compact OM-5, she immediately knew it would be her go-to camera for macro photography.
“I am obsessed with photographing the macro world, so I bring my camera everywhere,” Talpin says. “The lightweight combination between the OM-5 and the M.Zuiko Digital ED 60mm F2.8 Macro or the M.Zuiko Digital ED 90mm F3.5 Macro IS PRO makes it easy to store in a small pack while I walk to work or go on a nature hike. And thanks to the incredible weatherproofing that the OM SYSTEM cameras and lenses have, I never need to worry about missing a shot, even in stormy weather.”
Often, Talpin will use an Olympus FL-700 flash for her macro photography. Like the OM SYSTEM line of cameras and lenses, the FL-700 flash is compact, lightweight, and weatherproof as well.
“Carrying these three pieces of equipment has become second nature for me. They make up my ‘macro triangle’ of equipment and help me take incredible photos of the smaller things in life.”
Talpin stresses, however, that capturing compelling macro photographs isn’t just about the equipment that you own. She shares, exclusively with PetaPixel, her seven must-know tips to take better macro photographs.
Use All the Tools Available In Your Camera
As with most genres of photography, getting to know your camera and setting up custom buttons can lead to quicker, more efficient shooting while in the field.
“Focus is incredibly important in all forms of photography, but perhaps it is most important in macro photography,” says Talpin. While the autofocusing on the OM-5 and the M.Zuiko Macro lenses is incredibly accurate, Talpin still prefers to manually focus her tiny subjects.
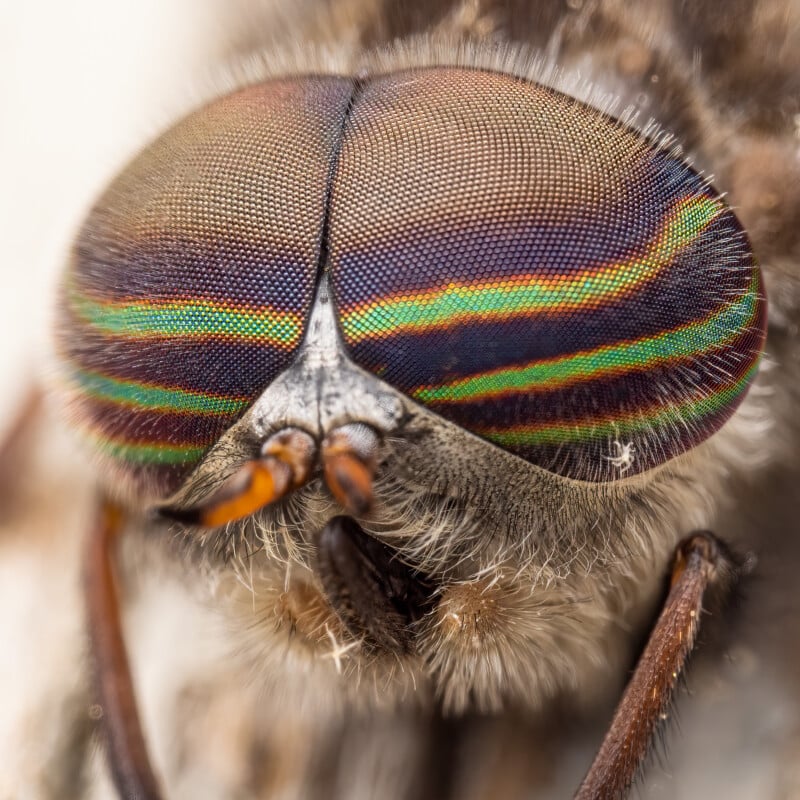
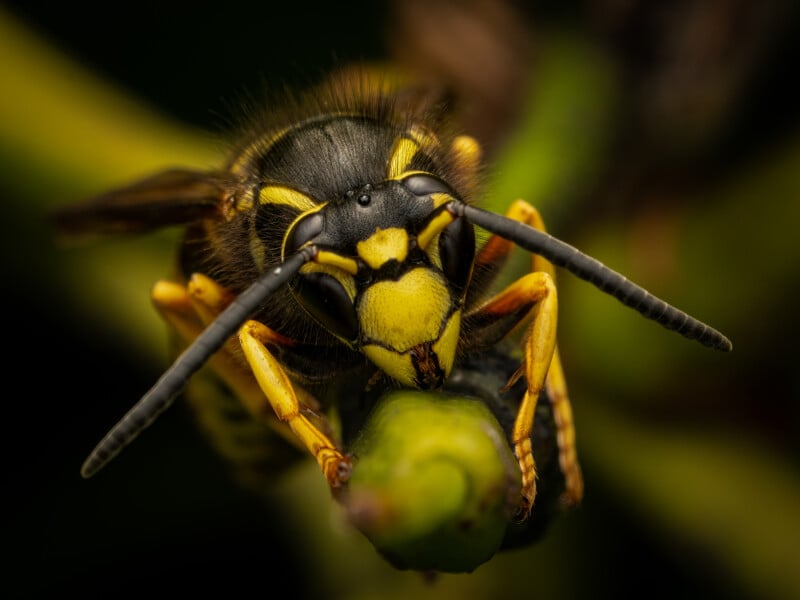
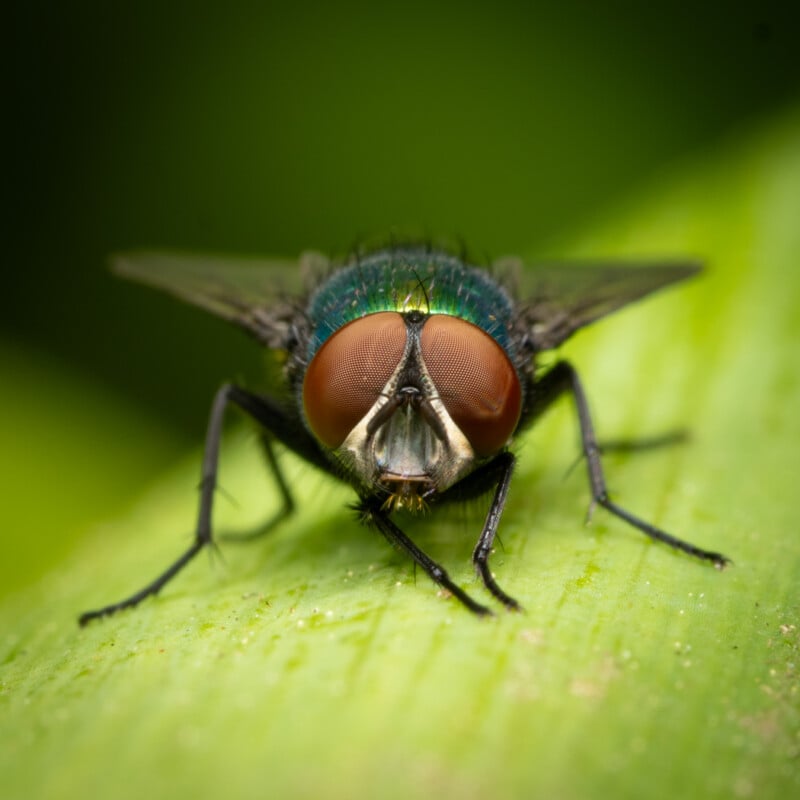
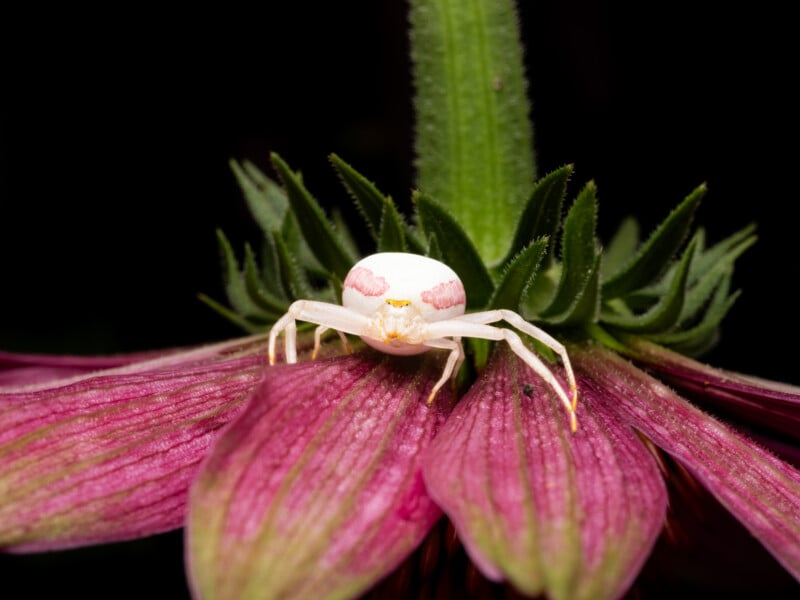
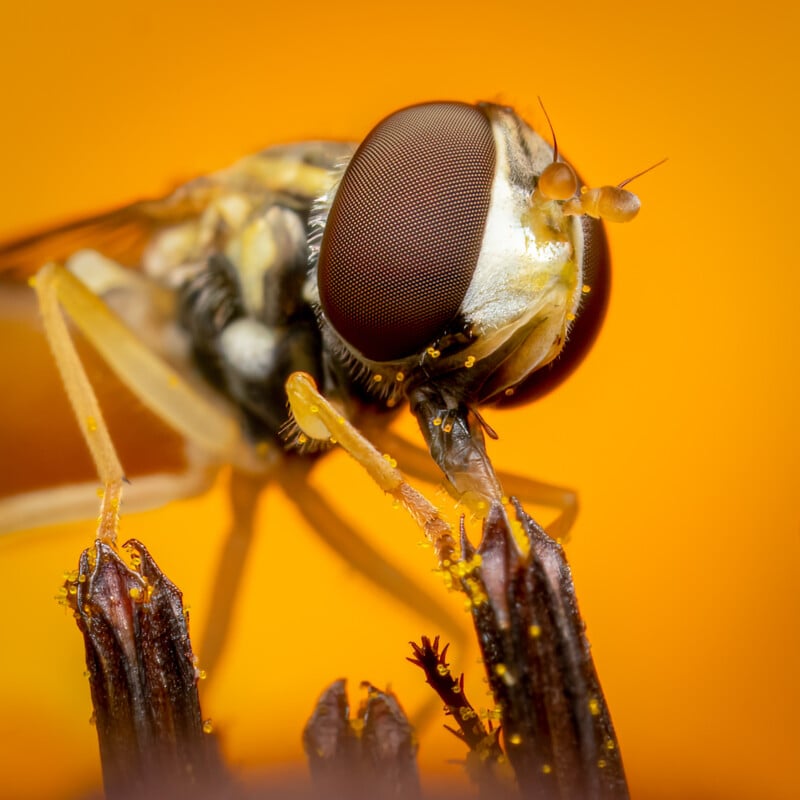
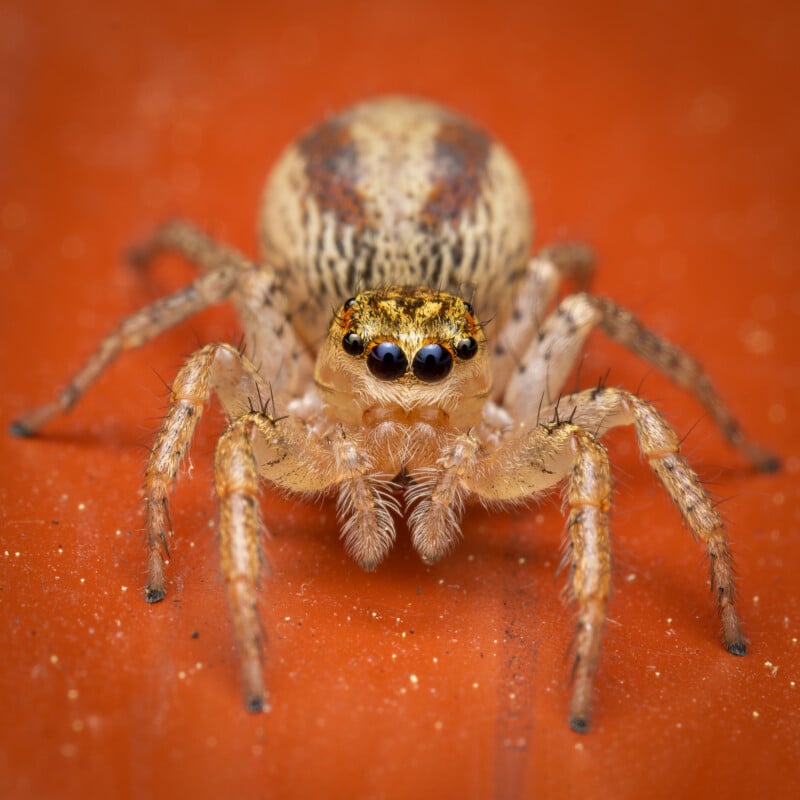
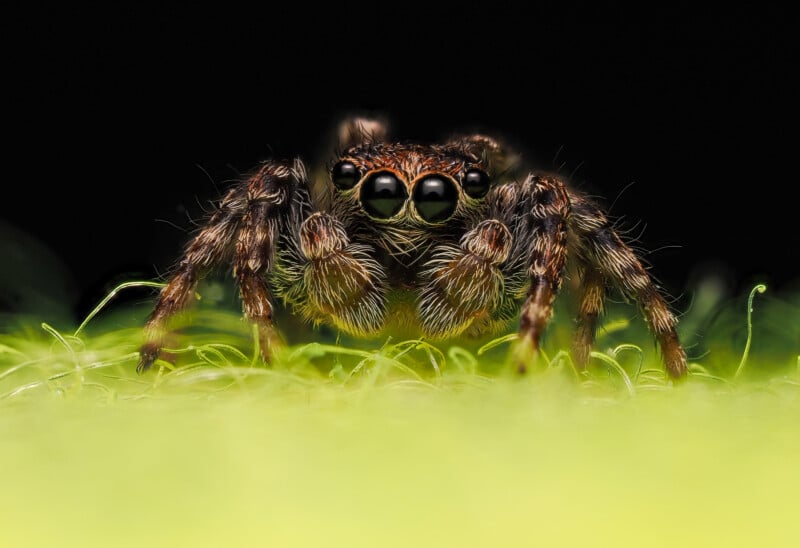
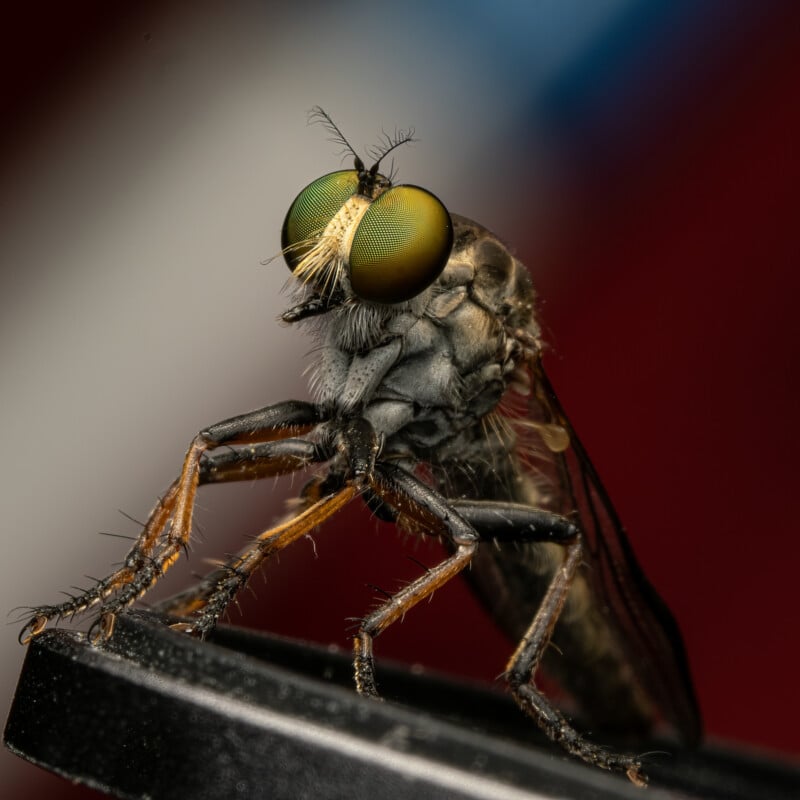
“I rely on the accurate focus peaking that is built into the OM-5 to manually focus on my subject,” Talpin describes. “Since dynamic bokeh is incredibly important to creating compelling macro images, it is vital to lead your viewers’ eyes to the exact spot that you want them to focus on when seeing the image. If I am photographing a spider or a fly, I need the eyes to be sharp, otherwise, the image won’t have the same eye-catching drama that I am looking for. This is where focus peaking becomes critical. I have my focus peaking to show red on the exact location in my frame that is in focus.”
“In addition, I have set a custom button on my OM-5 that allows for quick magnification on my subject, so I can get the focus nailed before I take the photo. Using the magnification combined with focus peaking allows me to quickly focus, assuring that I do not miss the shot.”
Since Talpin uses a flash, she often lowers the exposure compensation drastically, which can make focusing a challenge. However, thanks to the OM-5’s Live View Boost, she can brighten the image displayed on her LCD screen to establish focus and composition, without changing the exposure on the photo itself.
Lastly, Talpin suggests that learning how to focus stack is maybe one of the most beneficial tools a macro photographer can have. On her OM-5, Talpin can initiate either focus bracketing or focus stacking through the camera’s menu. With focus stacking, the OM-5 will shoot a set number of photos at the selected focus differential and then merge them into one jpeg file at full resolution. Focus bracketing, on the other hand, will capture the photos, however, the photographer will need to merge the photos in an external computer program such as Luminar Neo.
“I highly recommend photographers research and use all the technology available to them through their camera systems, because that’s going to help them to create the shot that they want,” Talpin concludes.
Don’t Use a Tripod
While most macro photographers do own tripods, Talpin suggests that they can often be more trouble than they are worth.
“Years ago, tripods made sense for macro photography,” she says. “A lot of macro photography can take place in low light settings, such as a dense forest. Additionally, I find the most active time for insects is in the early morning and late afternoon, so the sunlight is often hidden. All of these factors would suggest that I should be using a tripod for most of my macro photography. However, I rarely do.”

Talpin says that, due to the incredible advancements in image stabilization, using a tripod in most of her macro photography situations is no longer needed.
“I will still use a tripod when I am inside in a controlled environment,” Talpin explains. “When I’m outdoors, however, there are so many things that could move, such as leaves, or even the insect I am photographing. This doesn’t even take into account the soft ground and high winds that I often find myself photographing in. There are just so many parameters that I cannot control.”

“I want to be efficient when I am in the field,” she continues. “So I need a camera that also has accurate, trustworthy image stabilization.”
The OM-5 has up to 7.5EV steps of image stabilization via an in-body 5-axis image stabilizer. This stabilization is so powerful, that it even works with the in-camera conceptual photography features, such as focus stacking.
“When I teach workshops, people are blown away when I show them that I can not only shoot sharp handheld images in lower light situations, but thanks to the OM-5’s image stabilization, I can also easily capture a focus-stacked image handheld,” Talpin describes.
Perhaps the biggest advantage of leaving the tripod at home is that it can open the photographer’s mind up to be more creative.
“I have seen so many macro photographers set up a tripod and just take the same photo after the same photo. When I am shooting handheld, I find myself easily finding new angles of my subjects, and most times, I prefer the newer angles. I can’t even imagine how many of my favorite images I would have missed if I had chosen to set up on a tripod instead. Not feeling locked into those compositions allows my creativity to flow, and I see angles and details that I never would have seen if I was focused on a tripod instead.”
Find Ways to Have Fun
Talpin does carry her camera almost everywhere, so it’s not surprising to know that she has days where she may not find interesting subjects, or her creativity just isn’t there.
“I struggled with this for quite some time,” Talpin describes. “Sometimes, there was just nothing to photograph. Other times, even though I had a subject, I just didn’t find myself having fun. One day, when I wasn’t finding any macro subjects to photograph, I decided to try something different.”
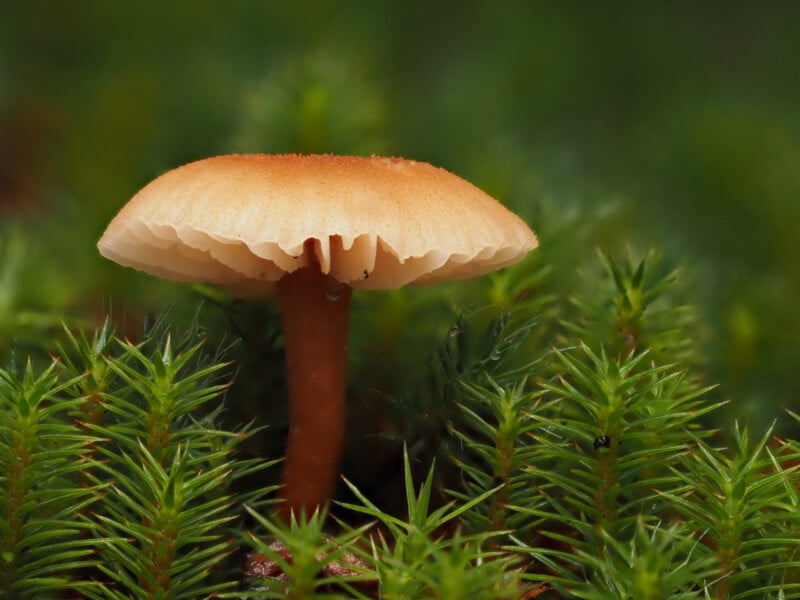
The OM-5 has a Multiple Exposure feature that allows photographers to create a photo out of elements that did not naturally occur together. Essentially, it is blending two raw files, in camera, to create a new image.
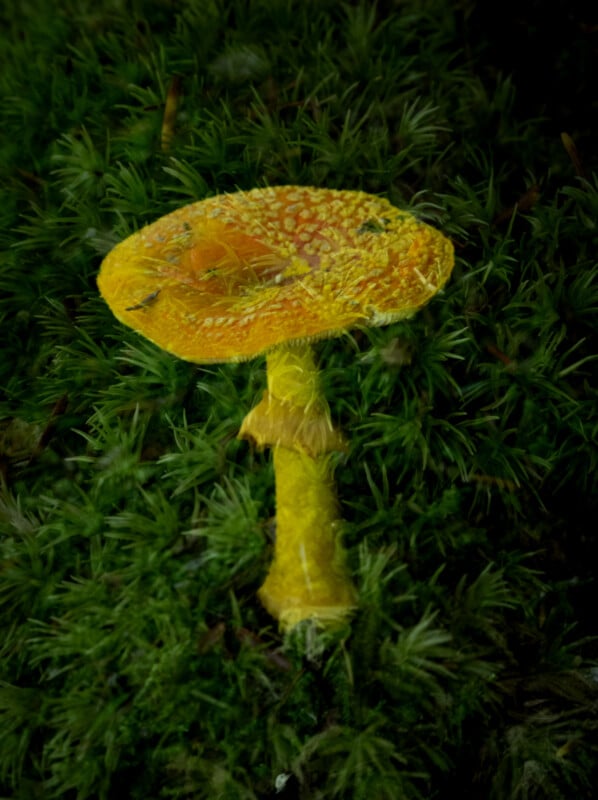
“I love that I can do multiple exposures right within the OM-5,” Talpin exclaims. “For instance, I found this cool mushroom on a recent walk, but the background wasn’t very photogenic. Later on during that same walk, I found this beautiful moss, but there was no subject in the moss. Knowing that mushroom might look great against this background, I simply combined the exposures using the easy-to-understand tool in the OM-5.”
Talpin says that one of the most interesting aspects of the multiple exposure feature is that the combined photos can be taken using other computational features on the OM-5, such as Live ND.
“I love that I can take a smooth image of a waterfall using my OM-5’s Live ND feature, and then use the camera’s multiple exposure feature to add a mushroom into the foreground,” Talpin explains. “It is such a cool feature, as you don’t need to mess around with Photoshop. You don’t even need to wait until you get home and get your photos onto a computer. You can just create the multiple exposure photo right there in the field, which I find inspires my creativity for the rest of the day.”
“Having a camera that is fun and has all those computational technologies that I can use, it just helps me be a happy photographer and ultimately, be a more creative photographer. There is no limit to my imagination, and my OM-5 is just a tool that helps me create the images that I have in my imagination.”
Learn How to Control The Light
While the OM-5 and the M.Zuiko Digital ED 60mm F2.8 Macro or the M.Zuiko Digital ED 90mm F3.5 Macro IS PRO are the base layer of Talpin’s macro photography kit, she stresses that maybe the most important tool in her backpack would be her Olympus FL-700 flash and a diffuser.
“It is vital for almost all macro photographers to be comfortable using a flash,” Talpin explains. “You don’t want to have the eyes of your subject have a bright, overpowering flare because the sun is too harsh. Learning how to control the light is critical to capturing dynamic macro images.”
Talpin says that when she teaches other photographers how to improve their macro photography, the first thing they always say is that the flash is intimidating. “I tell them to just put their macro lens aperture to f/16 and their flash to TTL mode and see what happens. They are always blown away by the results. Of course, the more you learn about your flash, the more power you will have to control the light, but most flashes have a pretty good ‘auto’ mode that can get you shooting insects right away.”
Additionally, Talpin says capturing the right light using a flash can save a photographer hours of valuable time. “I have gotten very accustomed to my macro setup, and I feel that I know how to control the light in my scenes, so I find myself doing very little editing. Some of my favorite images were edited on my phone in Snapseed. While editing software is incredibly powerful, there is no substitute for getting the shot right in camera. And the less time I spend in front of my computer, the more time I can spend out in the field taking photos.”
Pay Attention to the Background
In her years of teaching, Talpin has seen the same issue over and over again with new macro photographers. “They are so hyper-focused on the subject, they neglect to explore its relationship with the background,” she states.
Talpin says it is a very common mistake to make as macro subjects can often be incredibly enthralling. However, she explains that the background is just as important as the subject.

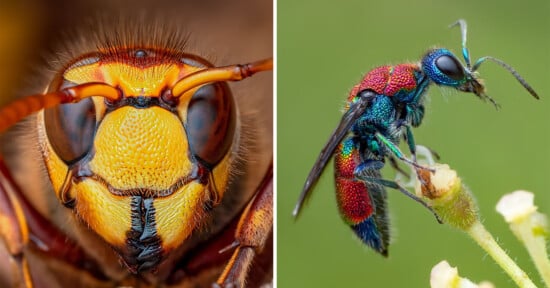
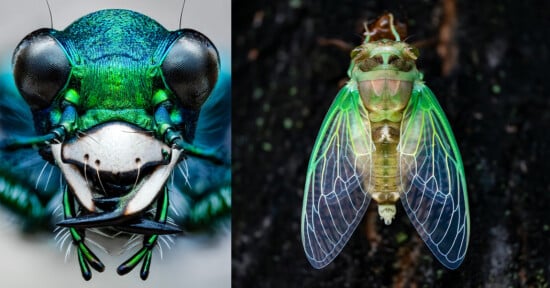
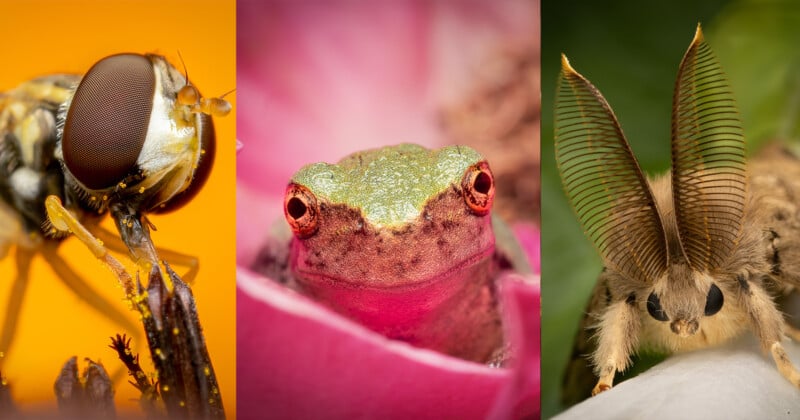
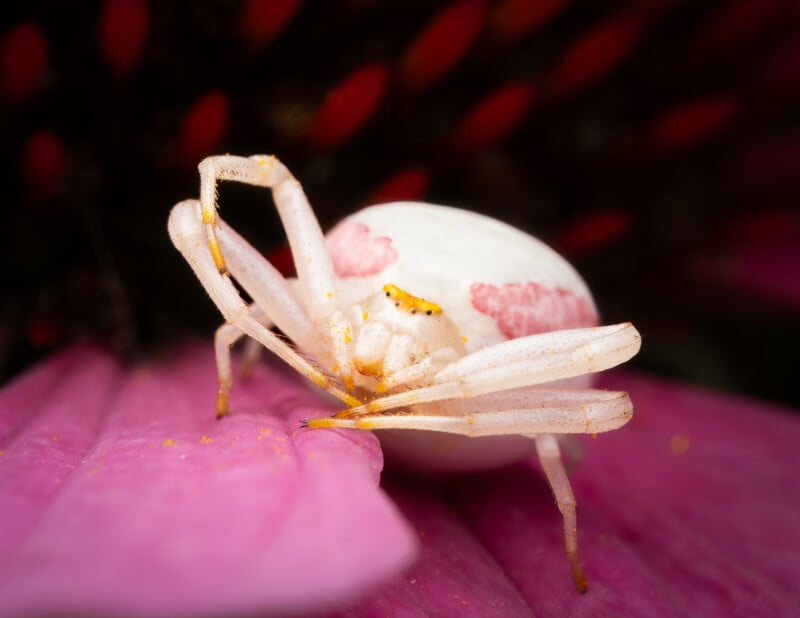
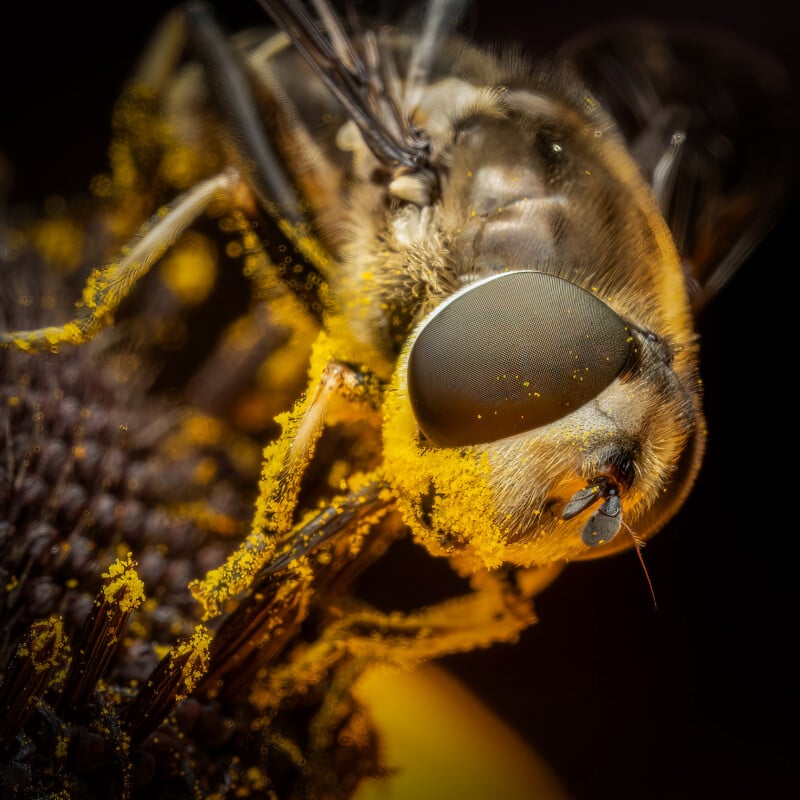
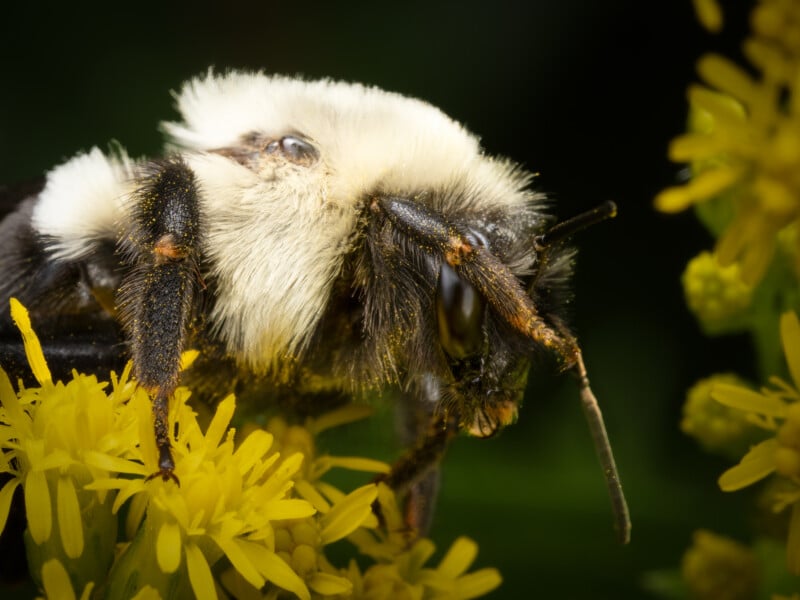
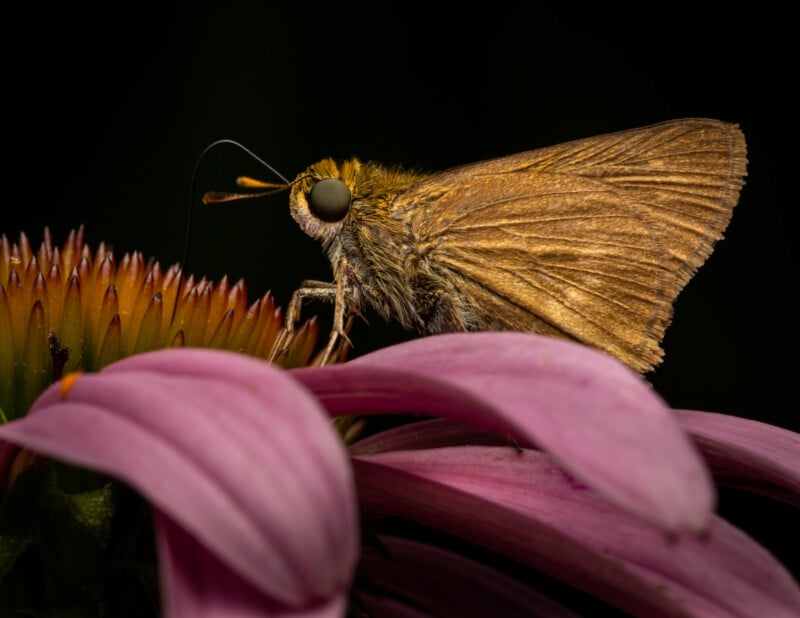
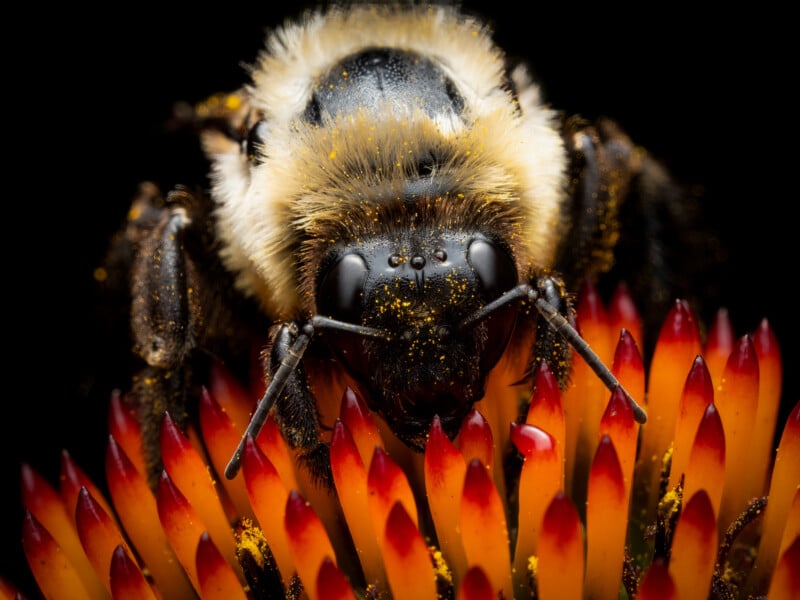
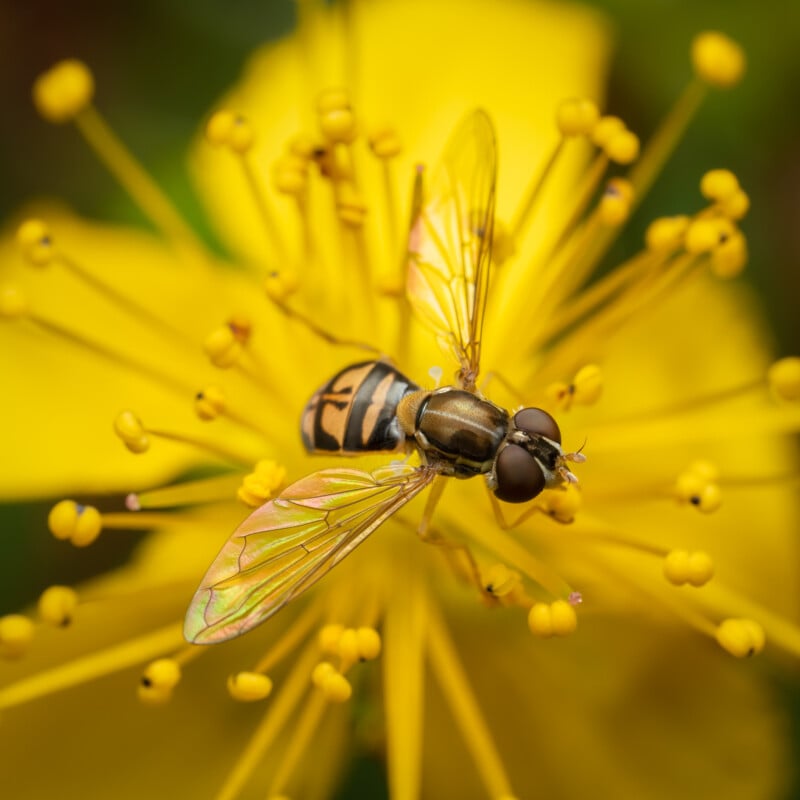
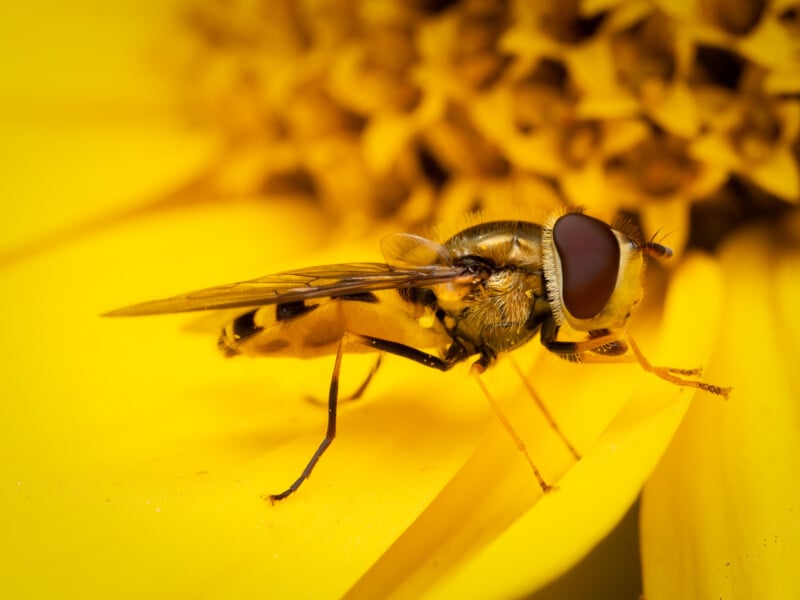
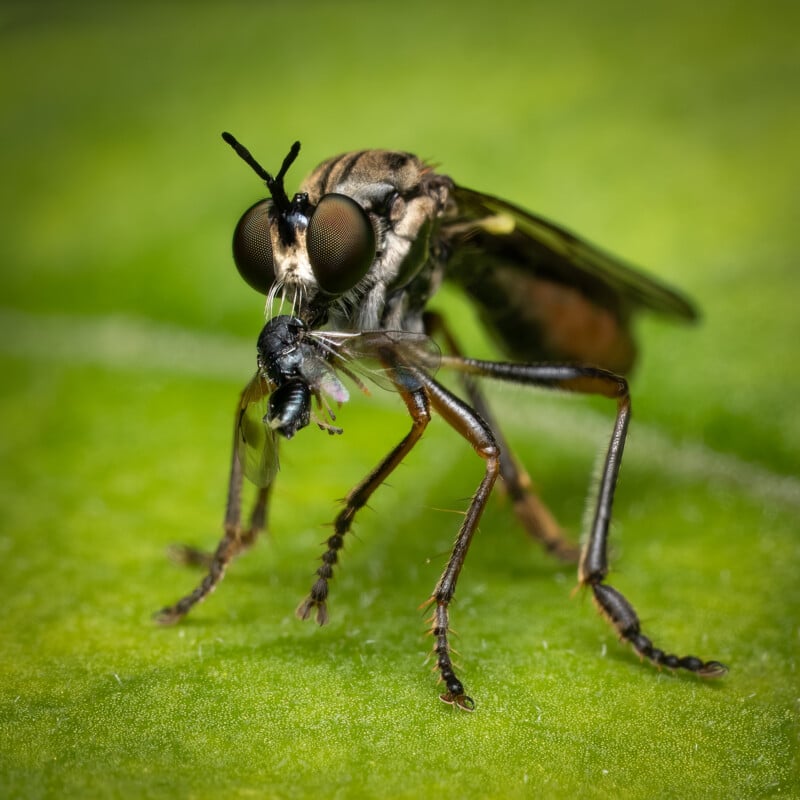
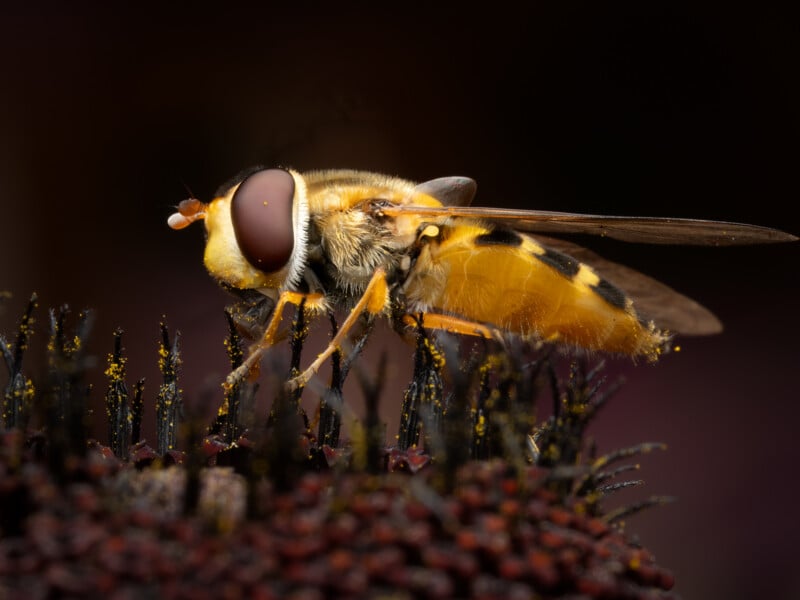
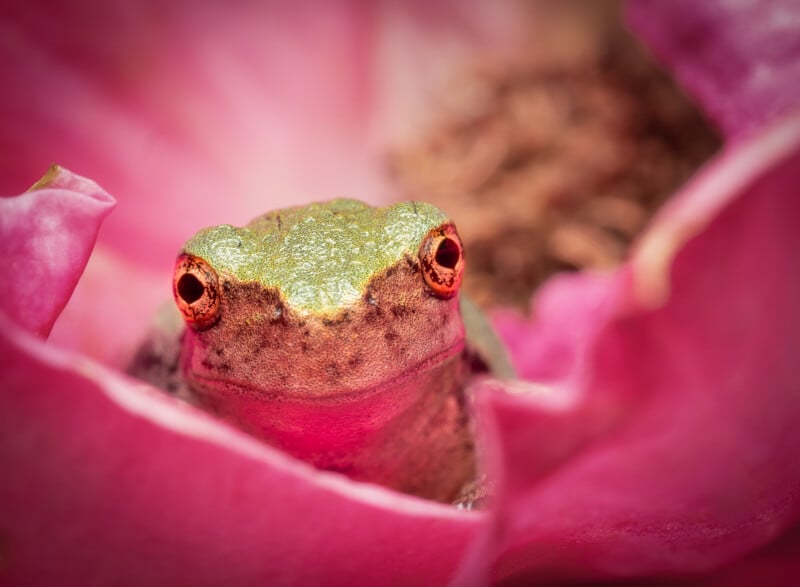
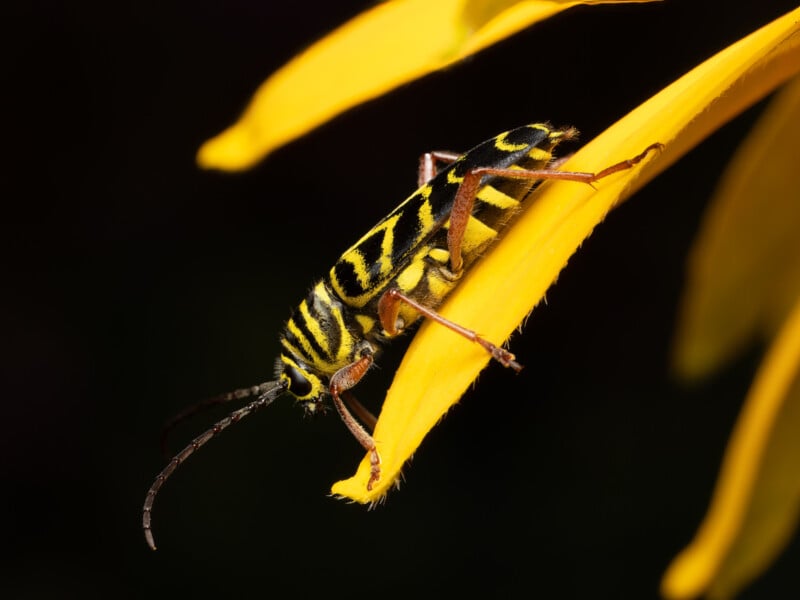
“For me, the most beautiful aspect of macro photography is the relationship between my subject and its environment. Whether it is a bee collecting pollen, a frog resting on a leaf, or morning dew reflecting the sunrise light, there is always a relationship to explore with my camera and lens. The subject and the background, and that relationship between the two, is what makes macro photography a fantastic medium for visual storytelling.”
Talpin recommends moving your body and your camera constantly, which is why she rarely uses a tripod on her macro photography shoots.
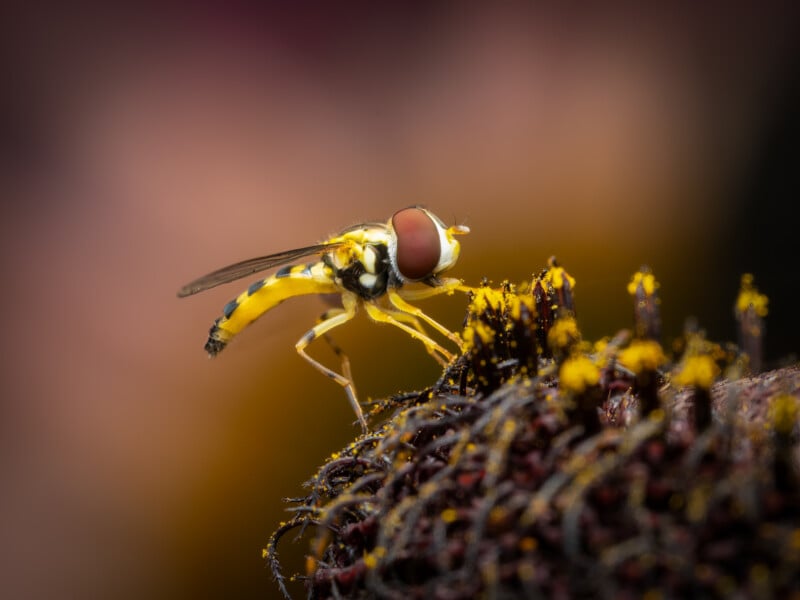
“I want a background that isn’t going to distract from my subject, but rather compliment my subject and show the relationship between the two. Oftentimes, I might find a background that I love, and I think that it can’t possibly get any better. However, after I take my shots from that angle, I will force myself to explore further, and I can’t tell you how many times I found an even better background than the one that I thought was perfect.”
Shoot Early And Late
As with most genres of outdoor photography, Talpin says to photograph the early worm, you need to be the early worm. “Most wildlife, insects included, are most active and easily found in the early mornings and the late afternoon,” she says.
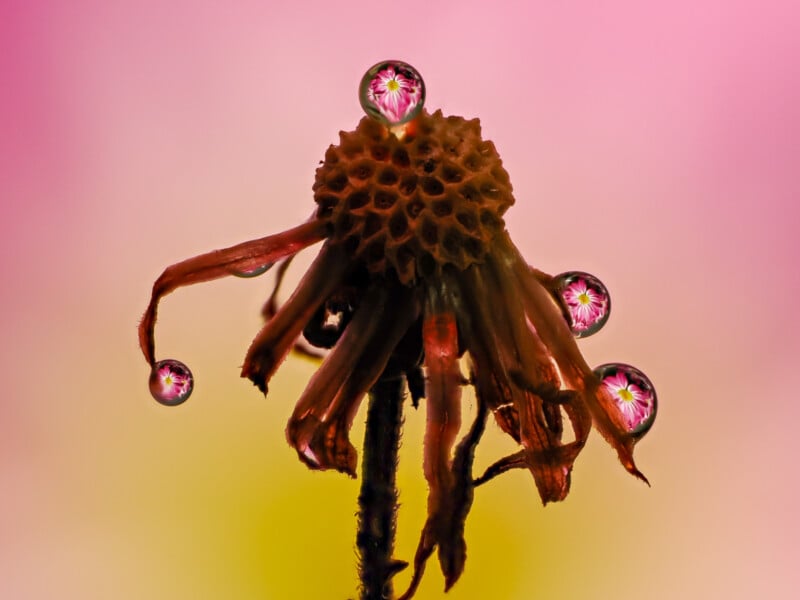
Not only are the insects easier to spot in the early morning hours, but it is also the best time to photograph dewy grass and leaves.
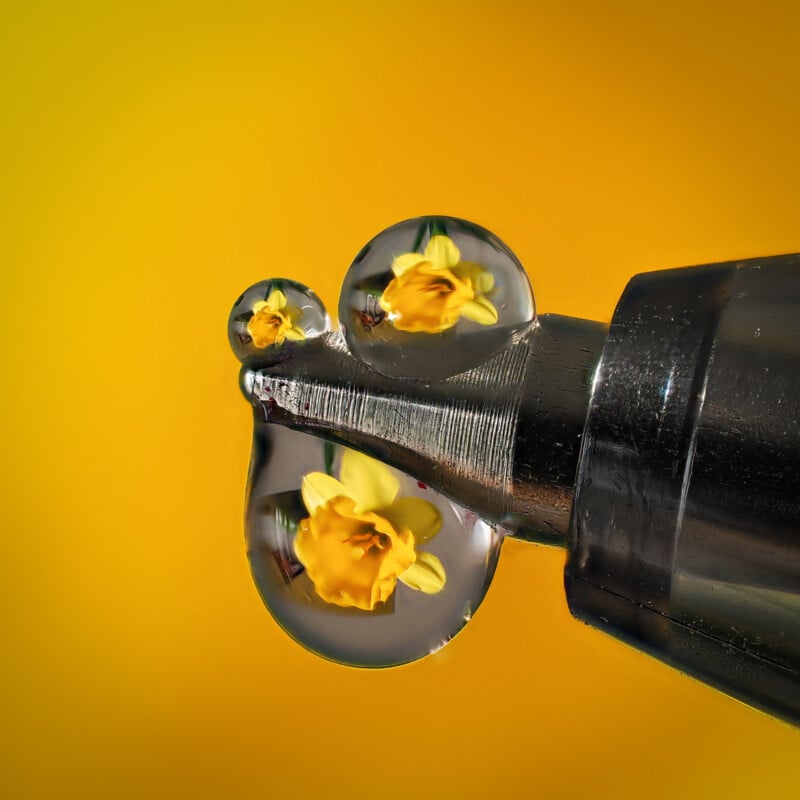

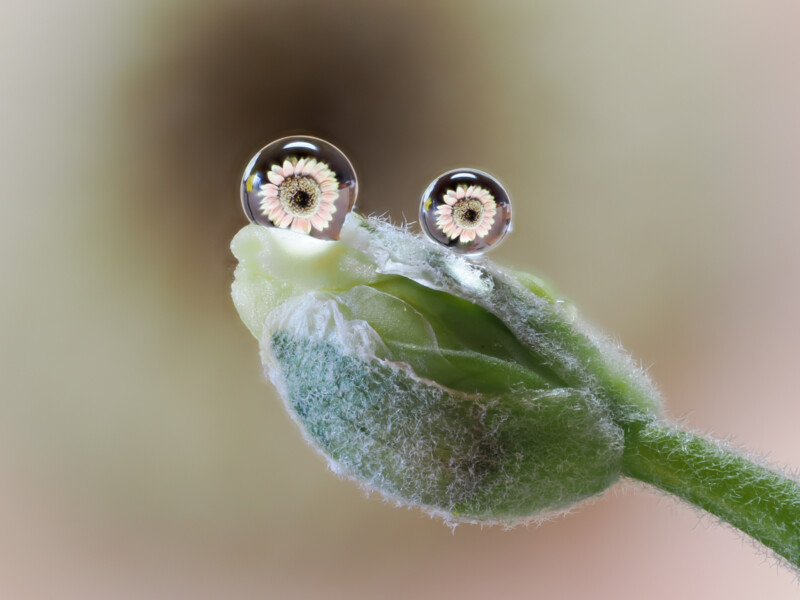
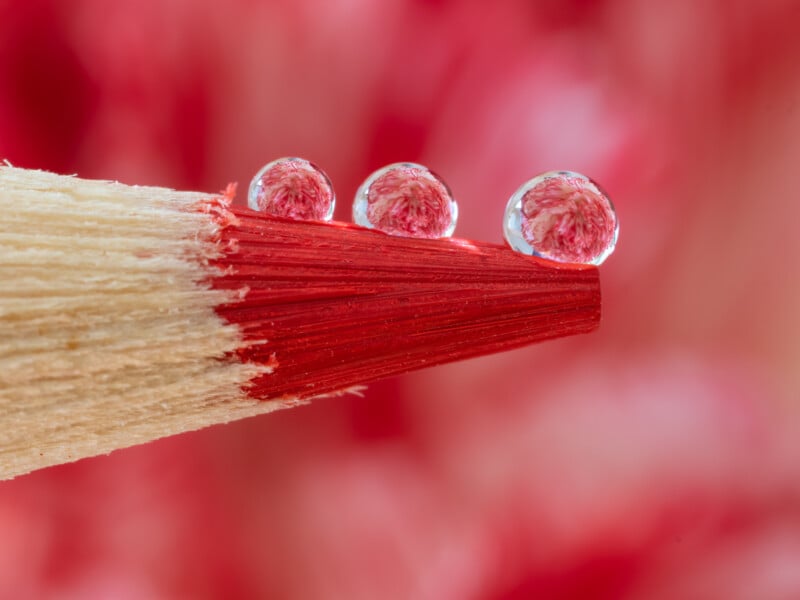
“I love finding and photography dew up close. And by far, the best time to capture this is in the early morning. The low light of the rising sun helps create incredible reflections in the small water droplets, so it’s crucial to be there at the right time.”
Explore the Macro World
Nature photographers often look for the big landscapes from the grand vistas, however, most often overlook the lively and colorful world sitting right at their feet.
“As I mentioned, I bring my camera everywhere,” Talpin describes. “One day, my wife had a chiropractor appointment. During her session, I decided to look in this small garden that they have next to the parking lot. To my surprise, I found two tiny tree frogs staring back at me! I often get asked if I took that photo in Costa Rica, and it always invokes a laugh when I tell them ‘No, I took it in a chiropractor’s parking lot in New Hampshire.’”
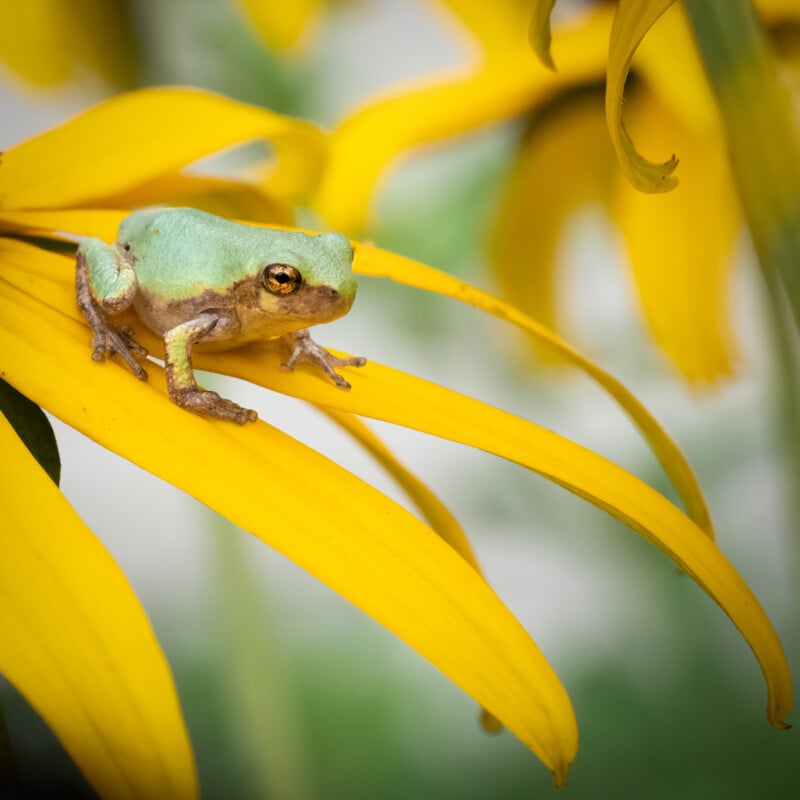
“That is what I love about macro photography. It’s just opening up a word that is right there right in front of you, but you would have no idea unless you look.”
“You don’t have to travel or hike anywhere to do macro photography. It’s right there, right in your backyard and it’s fascinating to take a photo and just look at your screen and inspect what you just took.”
“I love opening people’s eyes to a world that they have never seen before. And I hope it inspires them to look deeper into the macro world that is all around them.”
More from Emilie Talpin can be found on his website, YouTube, and Instagram.
Full disclosure: This article was brought to you by OM SYSTEM
Image creditsAll photos by Emilie Talpin