Photo Idea: How to Capture Creative Reflection Portraits
Capturing cool reflection portraits might seem like a breeze—you just put someone behind some glass and go ham, right? But as photographer Matt Granger explains in this tutorial, even a basic understanding of the “key variables” involved can open up more options for you.
This tutorial is essentially a quick overview of these “key variables,” starting with an understanding of how light reflections work, and then expanding that understanding into the realm of photography.
By doing some quick distance calculations, you can begin to imagine that your subject is in the foreground, and any reflected lights in the glass are actually acting as the background. This might seem counter-intuitive at first, since the glass is in front of them, but it makes perfect sense once you realize that the light coming from the reflected light source is actually much further away from your camera’s sensor than the surface that it is being reflected off of.
You can see this demonstrated in the two screenshots below. The bokeh balls get bigger as Matt’s model Joe gets closer to the glass in front of her:
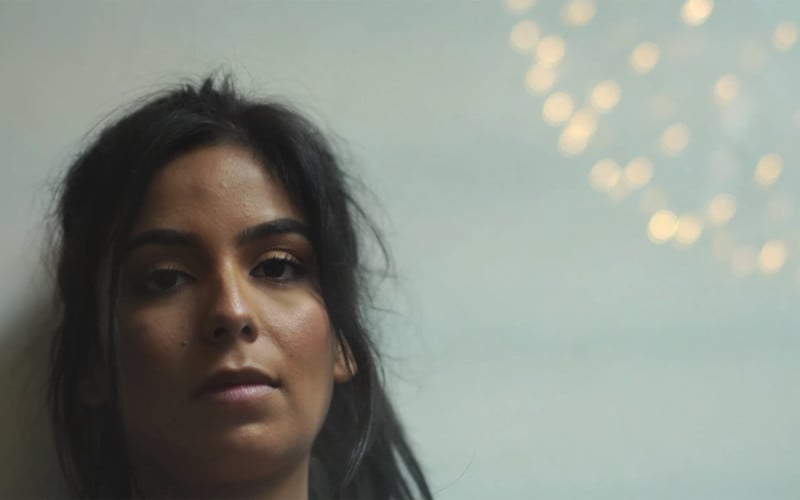
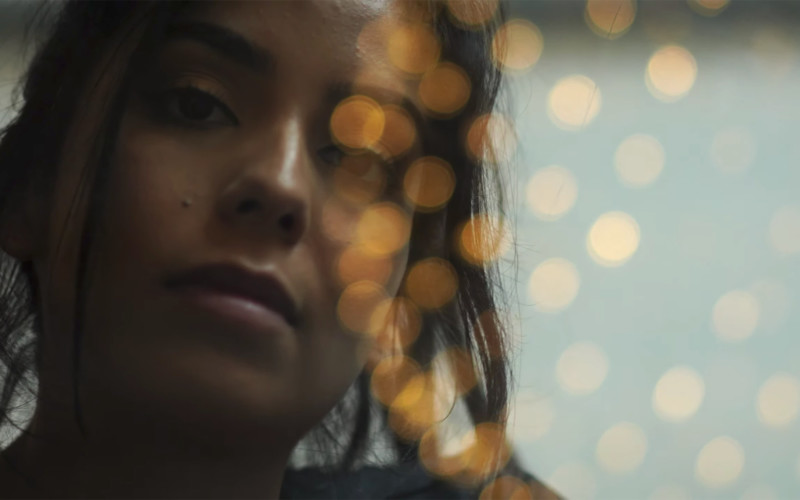
This isn’t just semantics: by understanding this basic premise, you can do what Granger does in the video and move your subject closer or father away from the glass in order to achieve the perfect relationship between them and the reflection you’re capturing.
Playing with these parameters also allows you to selectively blur out parts of the image that you don’t want to include, like dirt on the window through which you’re shooting.
Of course, this is far easier to demonstrate in video than in writing, so check out the full video up top to see some sample images and dive a bit deeper into the subject of reflection photography. It’s not an overly complicated subject, but as Matt explains, “calculating the distance to your reflections opens up a lot of options!”