How to Pose Regular Couples for Engagement Photos
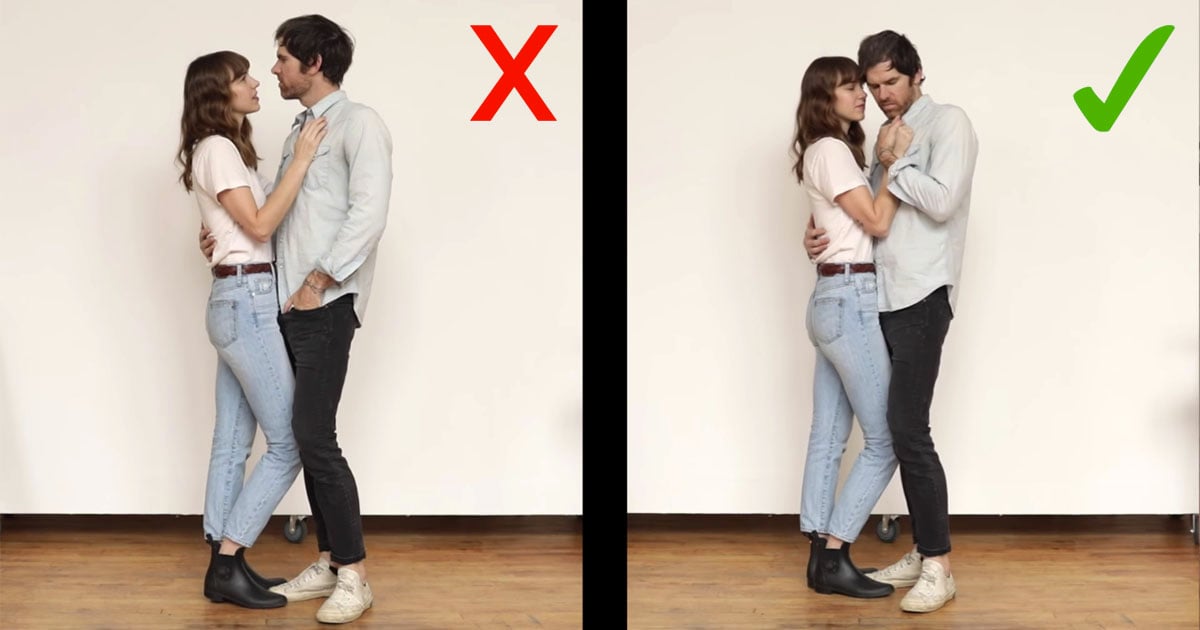
As a wedding and engagement photographer, you have an opportunity to work with a diverse range of people, but most of them will not be professional models. In fact, most of your clients probably feel downright uncomfortable in front of the camera, and that awkwardness can show in your photos. It’s up to you to direct your clients into poses that make them look at ease and in the moment.
Opening your engagement session with a quick posing crash course for your clients will allow you to break the ice as well as develop a common vocabulary that you can use throughout the session to quickly get them into natural-looking poses. It also helps establish your credibility and shows that you know what you’re doing, which should also help put your clients more at ease. It’s a win-win.
If your engagement photo clients later become your wedding photo clients, you’ll already have established this rapport, which will give you more time to capture incredible wedding images.
Please note, while the video is geared toward a traditional male-female couple, these tips really work with any couple, regardless of gender or orientation.
Individual Posing for Engagement Portraits
Before diving into couples posing, we recommend starting one-on-one with either subject to cover basic individual posing goals. Below, we’ve broken down the traditional goals for posing both male and female subjects.
Foot Position
As the name implies, foundation posing starts at the foundation, or in this case, the feet. During your talk through, you can start with foot position and then work your way up from there.
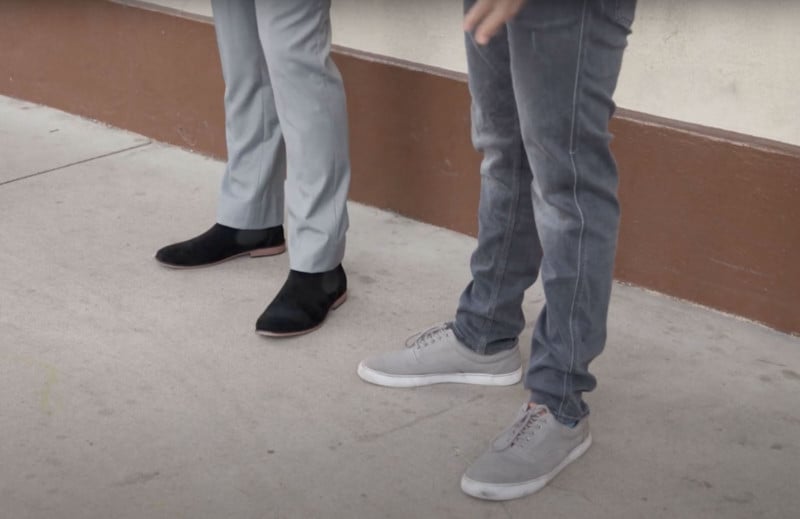
Male subjects: Generally speaking, male subjects should stand with their feet shoulder-width apart, with the toes pointed slightly out; the idea here is to create presence and demonstrate confidence.
Female subjects: Posing females usually takes one of the two following routes:
- Bold & Confident: Female subjects can follow the same directions as male subjects to create presence and demonstrate confidence.
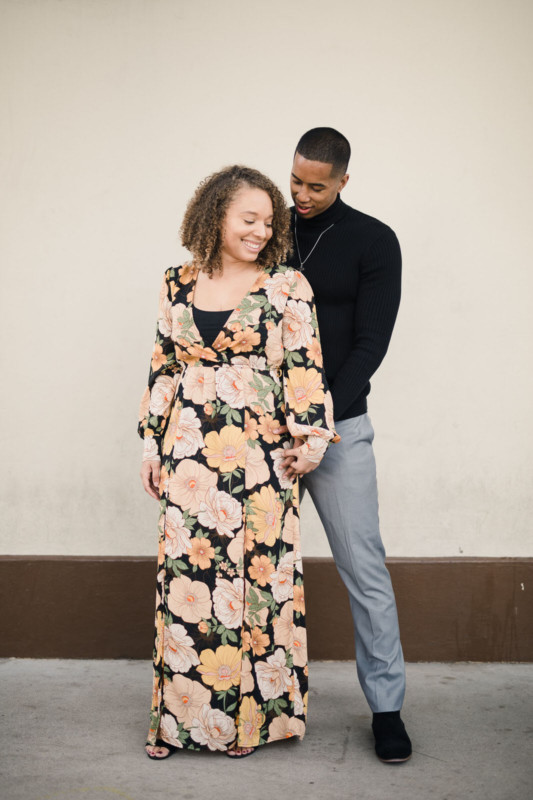
- Feminine & Curvy: By making small adjustments from the directions above, you can easily highlight femininity and curves. The hip position will remain the same, but the feet will be dragged in together, with one foot placed slightly behind the other. The knees will slightly overlap as well (see the image above), which helps create a classic hourglass shape.
Hip Position
If you’ve never heard the term “kick out your hips,” now’s the time to understand what it means. Subjects should choose a side and kick their hip out (or slightly lean to one side) to avoid standing square on their feet, which can leave the subject looking stiff and awkward.
Posture
We want to avoid slouching in our photos, so help your subjects maintain good posture. As funny as it sounds, an easy way to direct your subjects into standing up straight is to ask them to imagine a string pulling them up from the top of their heads. Asking your subjects to take a breath before having their pictures taken helps expand the chest, which also typically results in better posture.
Hand Placement
Hands can draw a lot of attention and even direct the viewer’s focus in portraits, so the importance of hand placement can’t be overstated. Where you place your subject’s hands can change based on the pose and look you’re going for, but here are some basic pointers:
Male subjects: If both hands are free, place one of the hands in a pocket. Otherwise, chances are that at least one hand will be used to make contact or create a touchpoint with the other subject.
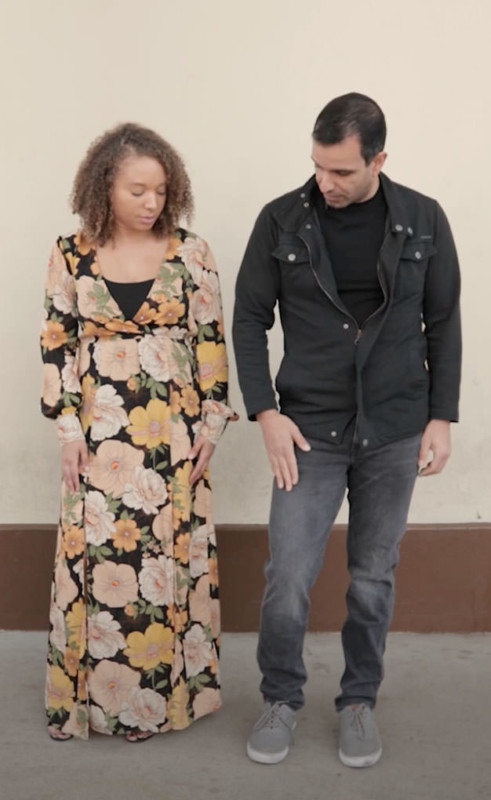
Female subjects: The goal for hand placement with female subjects involves creating a gap between the subject’s arms and her body to highlight curves. Hand placement can determine the size of this gap. Ask your female subject to place one hand on her thigh and draw it up just a bit until the gap between her arm and body becomes evident (see the image above for Pye’s demonstration). Placing the other hand will depend on the circumstances of the pose (holding hands, holding onto the dress or some other object).
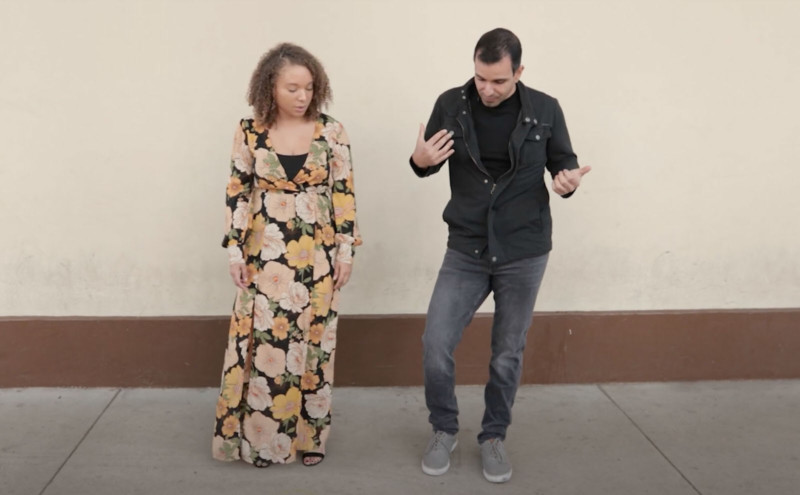
Putting It All Together
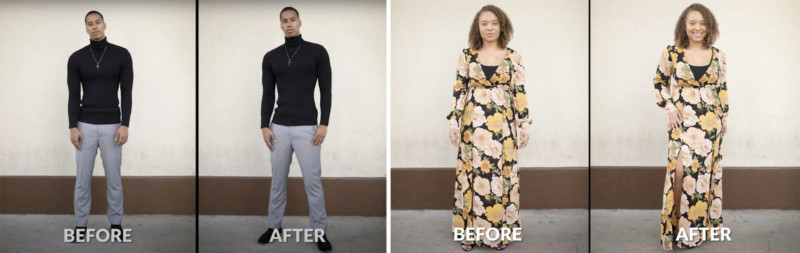
After putting all of these tips together, the results become evident. It’s amazing the impact that small adjustments can have on creating presence and confidence in a final pose and portrait.
Couples Posing for Engagement Portraits
Here are five foundation poses for engagement portraits:
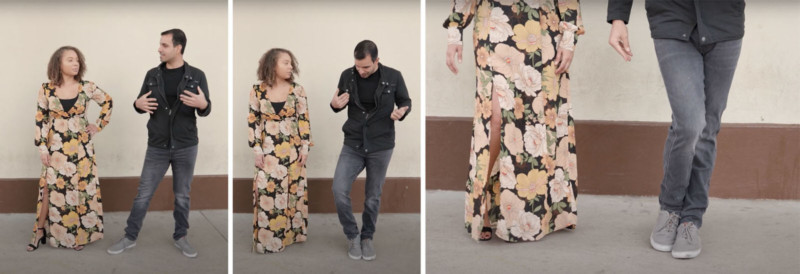
The V Up Pose
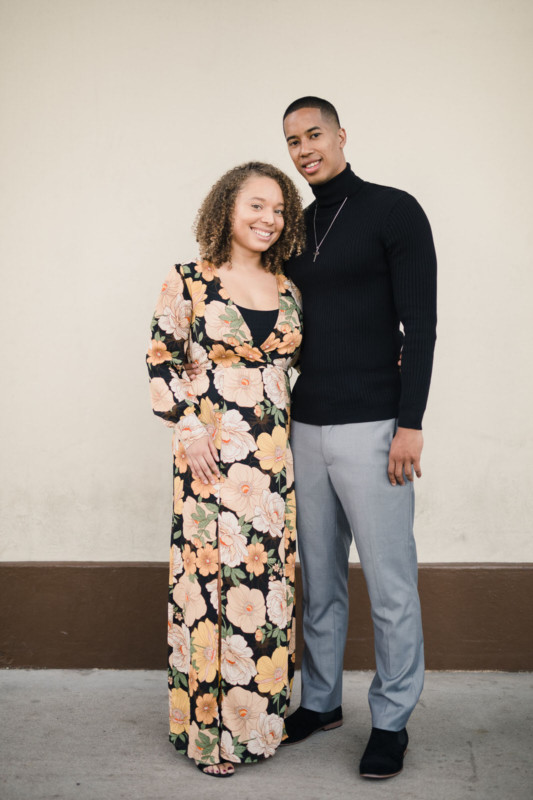
The V-Up pose connects your couple at the shoulders and hip. Notice how the couple’s feet are positioned, facing forward, and angled somewhat toward one another. Another way to think of this pose is as the “red carpet” shot you see taken of celebrities on the red carpet at film premieres and other grand events.
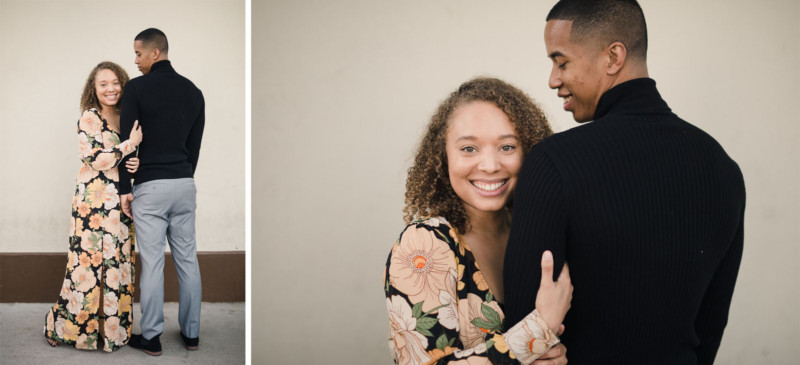
The Closed Pose
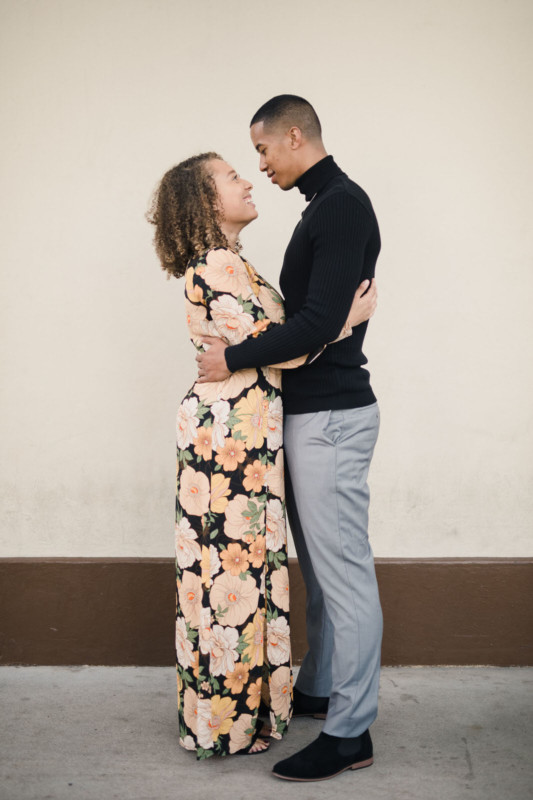
Building on the V-Up pose, ask your couple to imagine a door hinge connecting them at the hip. Now, ask them to close the door and face one another (see the image above). This is where the term for the “closed” pose comes from. The door hinge analogy works to visually represent what it means to open or close a pose.
A closed pose is more intimate as the couple’s feet are positioned to face each other. This pose can be used whether you’re asking the couple to press against one another or stand apart and hold hands. You can also make micro-adjustments with hand placement, eye contact, kissing or not kissing, and other ways to get a variety of looks from this one basic pose.
The Open Pose
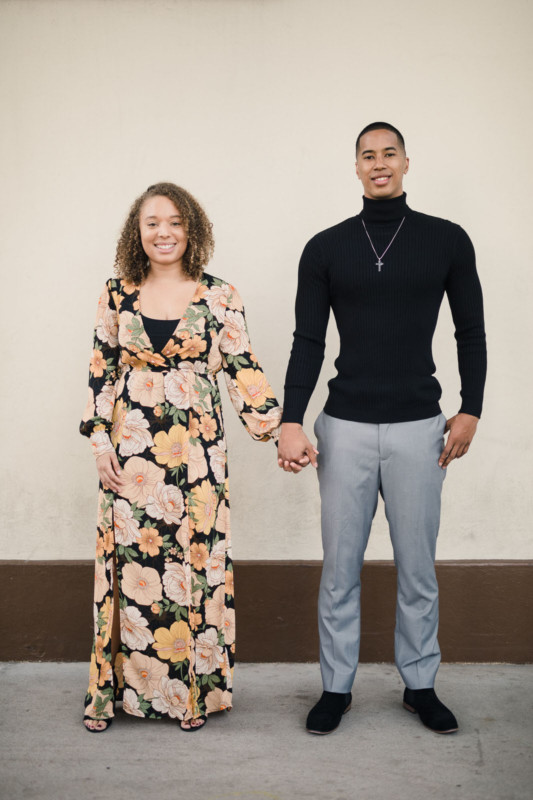
If you’ve already used the door hinge analogy for the V-Up and closed pose, you can probably just ask your couple to open up and hold hands in the center to quickly get them into a nice open pose. In this pose, the subject’s feet and chest should face forward, directly toward the camera.
The Stacked Pose
In the stacked pose, one person’s feet are essentially stacked in front of the other person’s feet, with all feet facing in the same direction. Hand placement is key for avoiding the awkward prom photo version of this pose, which usually features the person in back reaching around to hug the belly of the person in front.
This works well for maternity photos in which you want to draw focus to the belly, but it’s not the best way to go about capturing engagement portraits. Instead, line your subjects up directly in front of one another, have them hold hands, and then ask the person in front to scoot over to the side a step or two to create overlap without blocking the person in back (see the image above).
Adding micro-adjustments, such as directing the couple’s eye direction, can add a bit of sophistication and grace to this pose as well.
The Reversed Pose
In the reversed pose, one subject will face the camera while the other faces the opposite direction. Again, if you’re ever unsure of how to go into the various poses, remember that it all comes down to how the feet are positioned. Also remember, you can add even more variety to this or other poses by changing your camera angle and shooting wide and tight, as illustrated in the example images above.
From these foundation poses, it’s easy to make micro-adjustments and capture a wide variety of looks from your session. You should no longer have to try to memorize poses you saw on Pinterest or worry about running out of posing ideas.
Moreover, sharing these five basic poses with your clients at the start of a session also minimizes miscommunication and takes the guesswork out of what you’re looking for when directing the couple into various poses. With this posing framework, you’re all set to professionally pose your couples and rock your next engagement session.
P.S. If you’re interested in learning more, our catalog of courses includes complete training systems on wedding photography, business, lighting, and more that guide you through all things photography. You can find additional information on SLR Lounge‘s individual courses, training systems, and Premium subscriptions here.
About the author: Pye Jirsa is a wedding photographer based in Southern California and the co-founder of SLR Lounge. The opinions expressed in this article are solely those of the author. You can find more of Jirsa’s work here. This article was also published here.