How to Shoot Concerts: Tips from a Pro Music Photographer
![]()
I am writing this concert photography guide in response to several ‘How to’ guides I have seen online that don’t quite hit the mark on how to take great live concert photographs. Most of the articles focus too much on the obvious, like concerts are dark and avoid things in your way (like mic stands and such). Personally, I think it is a bit patronizing to suggest that you are letting the photographer in on the ‘professional secrets’ if it is written by a non-professional music photographer, so this is my guide.
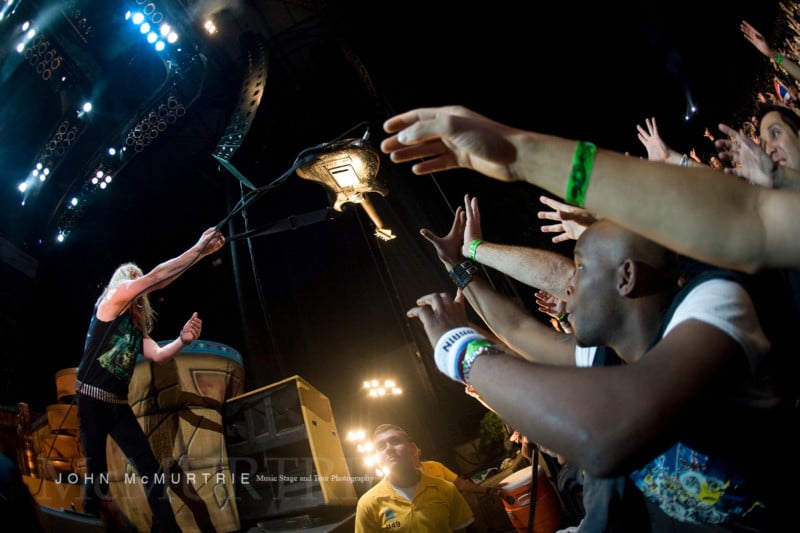
A lot of this information focuses on the technical aspects of taking a good picture. The rest of it is pretty straightforward, really. If a guitarist appears in front of your lens, throwing shapes with his head back and one arm in the air, then hit the shutter release button. It isn’t rocket science, but it isn’t as easy as you may think either.
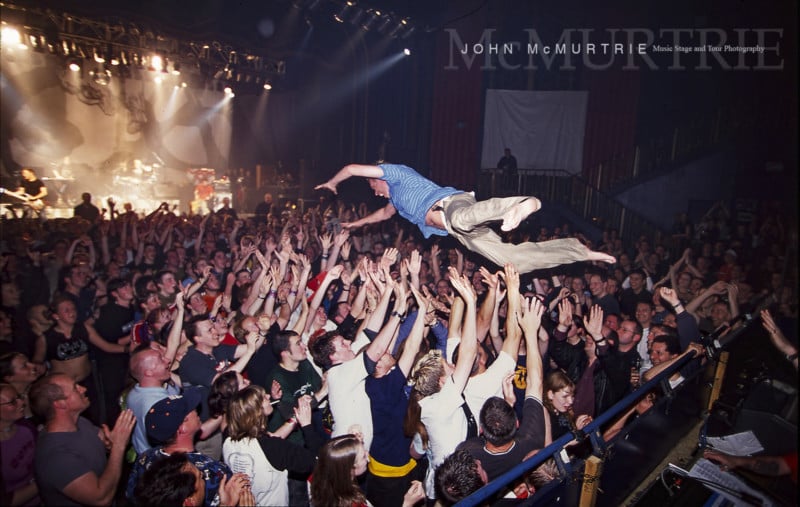
Most people who get into music photography do it because they have a passion for music, photography, and a love of the music scene. If this is the case, you are half way there to making a great music photographer, but it also takes time and practice. I started in 1989 blagging a photo pass for Ozzy Osbourne at the Hammersmith Odeon. It was the defining moment of my life experiencing the exhilaration of standing in the photo pit so close that I could touch Ozzy — a moment that led to shooting hundreds of shows in the UK.
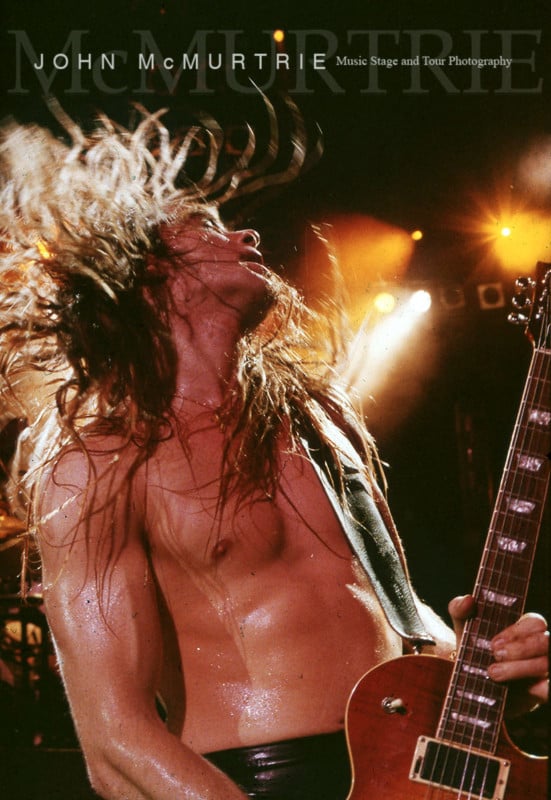
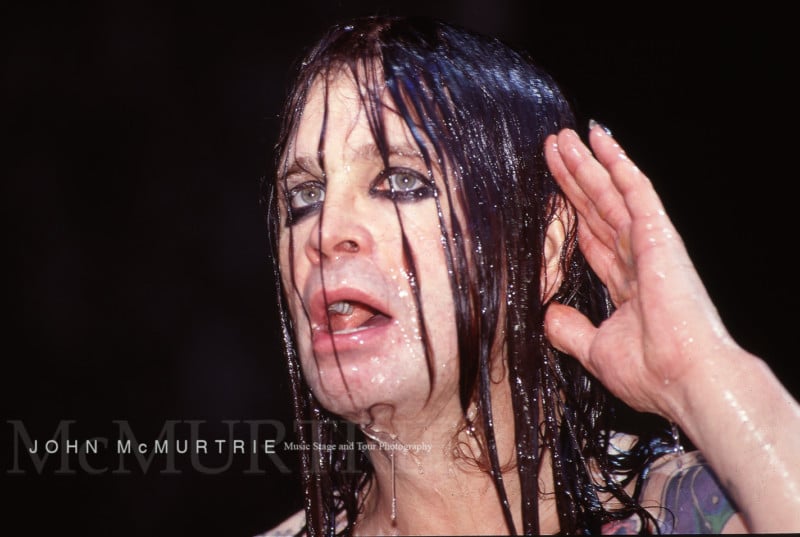
I first shot bands to build up a portfolio and went on to shoot for Rolling Stone, Q, NME, Classic Rock, and Metal Hammer magazines. This work regularly takes me all over the world shooting in stadiums, arenas, small clubs and even live stage productions like War of the Worlds.
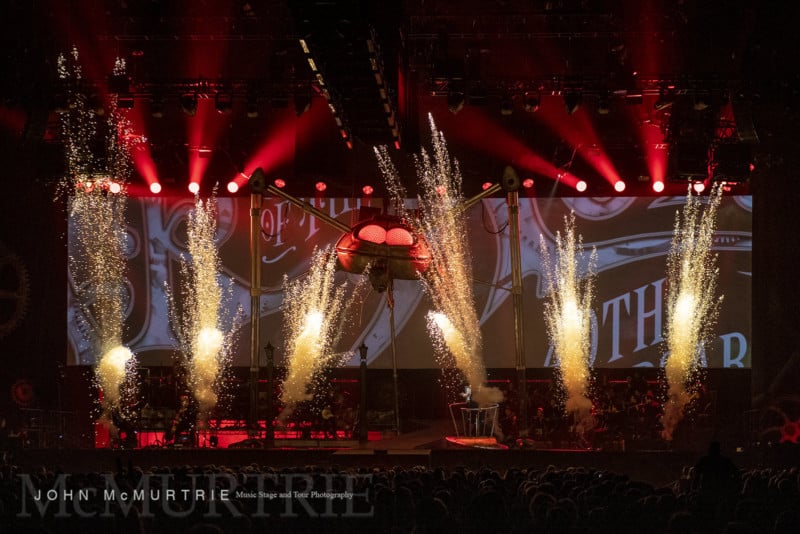
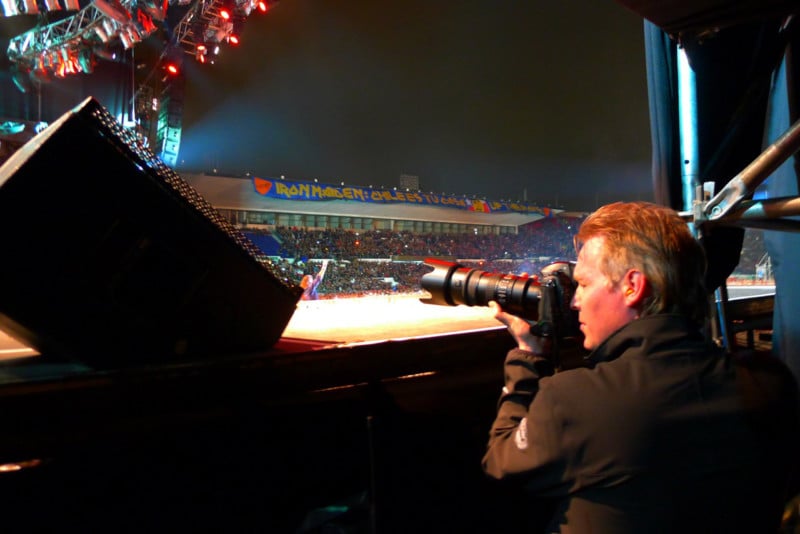
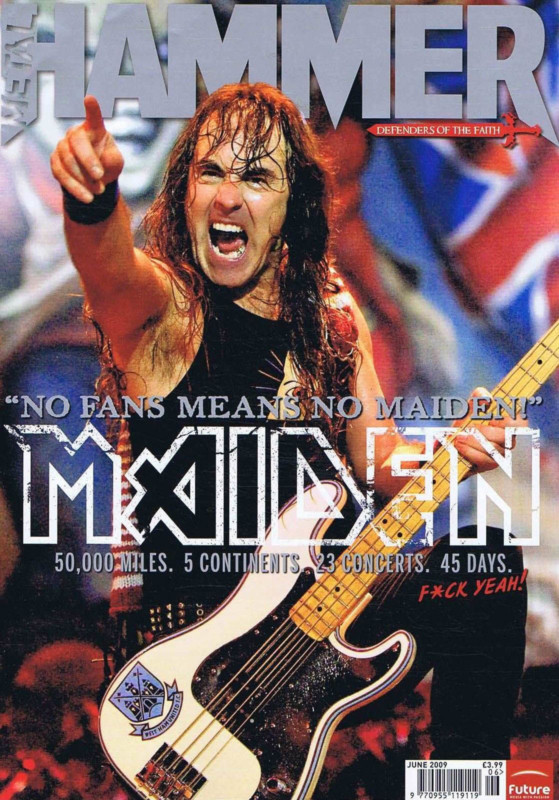
I also work as Official Photographer for IRON MAIDEN and accompany them on their sensational tours around the world on board Ed Force One in their very own Boeing 747 (Piloted by Captain Bruce Dickinson). On average I shoot approx 200,000 images a year so I have some experience of shooting concerts. I also published the No.1 bestseller ON BOARD FLIGHT 666, a photo documentary with IRON MAIDEN capturing 4 years on tour.
Fear of the Dark
Firstly, the dark isn’t the problem it once was. Gigs are dark but modern cameras are excellent at producing good results at high ISO, so the dark is not always an issue. But shoot RAW! JPEG just won’t give you the latitude you will need to correct highlights, color balance, levels, and noise, so make sure you shoot RAW or there is no point reading on! I also implore you to shoot manual on your camera or you will never learn a thing!
With film cameras, it was tough getting anything decent above ISO 1600 and technically it was a nightmare having to push process the film to get good results. That said, we did get great results but the key to taking a good shot was knowing when the light was good to shoot. This still applies now and is a discipline that is worth learning.
Know When to Press the Button
When you first get access to a big gig, the temptation is to just hose down every second of the performance. You can do that, of course, but you will discover a high percentage of images will be dark, out of focus, and probably not usable, and an unreasonable amount of time will be spent editing through all your images.
This may sound obvious, but be patient and wait for the right moment to shoot. Focus on the lead singer, find a good angle where the mic isn’t obstructing their face and try and watch what the lights are doing. When the light looks good and you have a reasonable exposure and the artist looks half decent then shoot. If not try and wait. That said, if something spectacular happens like the singer jumps into the crowd or blows a kiss at your camera, then just keep shooting!
Big shows have follow spots that are usually good quality warm/daylight spotlights that stay consistent for most of the show – they are manually operated by a person and their job is to follow that artist wherever they go on stage. The lighting director is in radio control with the follow spot operators and will instruct them to kill the light or go half power at various stages during a show.
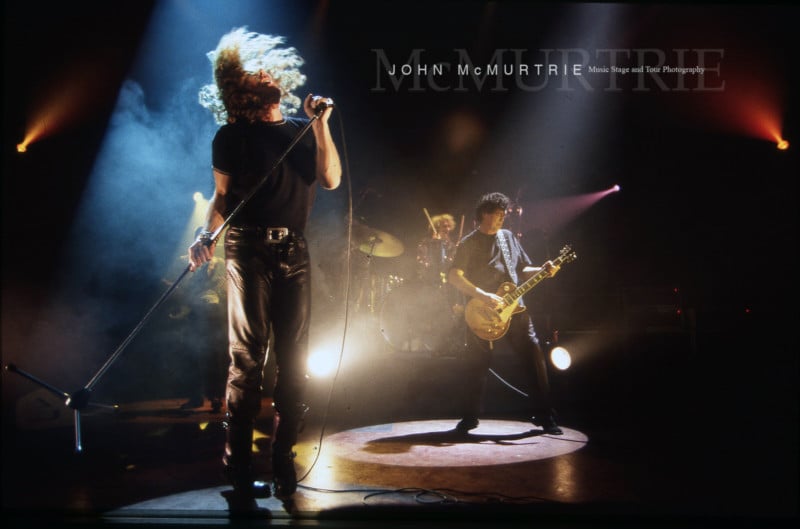
If you are lucky enough to shoot a show with follow spots, then your ISO can stay around 1600 or 2000. Set your camera lens to f/2.8 or f/4 and keep your shutter speed above 1/250th (usually you will get 1/500th @ f/2.8 using ISO 2000). Once you know where your exposure needs to be then you can concentrate on capturing that defining moment.
Capture the Artists’ Likeness
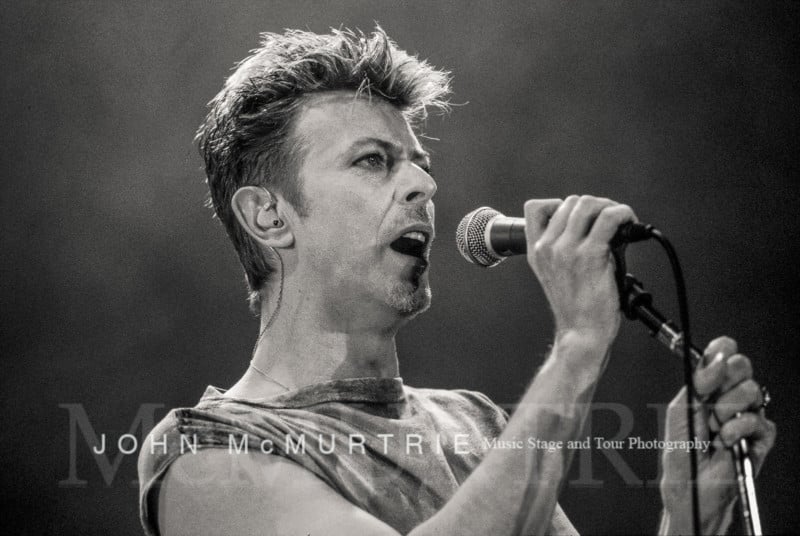
Watch the singer, see what kind of expressions he is pulling. Does he/she look like him or her? Often you will shoot a famous artist and they don’t look like their publicity photos. If so your images may not have much value. It is a picture editors hate, receiving a set of pictures that don’t look like the artist. It sounds crazy, but it is more common than you think.
If this is the case, change the angle and shoot as many different expressions as you can. I remember shooting David Bowie and most of the shoot he just didn’t look like the classic Bowie we know and love. I changed the angle and the light changed and I got some incredible photos. This was on film but I knew by looking through the viewfinder it didn’t look like him. I got there in the end but it pays to be honest with yourself as you shoot.
High ISO
Not all gigs are lit up like an Aerosmith show and small club shows can be challenging. That said there is no reason why a modern camera with a good lens can’t produce good to reasonable results in a dimly lit venue.
The first thing to consider is how high ISO can your camera go before the noise is unusable? Test your own camera in low light and find out. There are lots of noise reduction changes you can make in post-production but I would try and avoid having to overuse this. From my experience, the effect can make people look like they are made of wax and your photography will look like they are melting if overused!
If your camera has an insanely high megapixel count (over 30 million) then chances are your camera won’t be good at high ISO. This is a technical fact due to the way the sensor works and a thing called dynamic range. The higher the megapixels, the less dynamic range the camera can give at high ISO.
At low ISO, the high megapixel cameras are mostly outstanding. It will be unable to shoot at very high ISO in bad light and produce good results. It is one thing testing your camera in low light but it is another testing it when the light really is bad. The game changer in high ISO for me was when Nikon launched the D3 – which produces outstanding images up to 6400.
All of the images in my IRON MAIDEN book (‘ON BOARD FLIGHT 666’) were taken with the Nikon D3 and D3s cameras.
The quality will totally depend on your camera, so not every camera is good at high ISO. I have taken stunning shots using ISO 6400 in reasonable light but then as the light changed the quality also worsened giving noise in the blacks and dirty colors using the same ISO. So find out how good your camera is before shooting a show, then you will know how high your ISO can go before it affects the quality.
I now use Nikon D5 cameras for the majority of live photography. This is a 20-megapixel camera and shoots great up to ISO 3200. At 6400 the results are reasonable and anything above that is purely ‘get out of jail’. At a very dark show, you can do two things. Wait for the light to come on (usually in the chorus or guitar solos) or shoot at the highest ISO you dare. Maybe ISO 6400 and open your lens aperture to f/2.8 (any wider like f/1.8 is hopeless if you are close to the artist. The depth of field is too narrow and more than not your focus will miss).
Then select the fastest shutter speed your exposure meter will allow (remember you are in Manual mode). Try and keep your shutter above 1/60th if you can unless you are shooting a wide shot of the entire stage. At 1/60th you will get sharp results but any fast movement of anyone jumping or turning will blur. Ideally, you want to be at 1/250th if at all possible.
Weirdly, with modern LED lighting, some colors (blue and red) will produce incorrect exposure information so your LCD display on the camera is imperative for checking on your exposure. Most modern cameras will allow for a couple of stops of underexposure which you can bring back in the edit (as long as you are shooting RAW). In low light, you have to be patient and wait for the lighting to look good. Sometimes the band wants a show to be dark as it fits their mood and other times the lighting guy is just asleep. Either way, you deal with it.
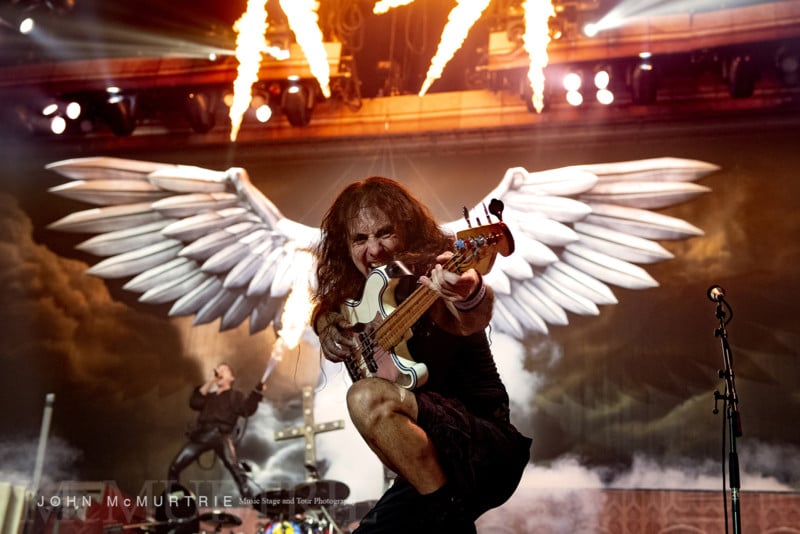
For many years, I shot in London’s small clubs using an effect called flash blur. By using flash, it solved the low light problem and was an impressive effect to freeze a guitarist in motion.
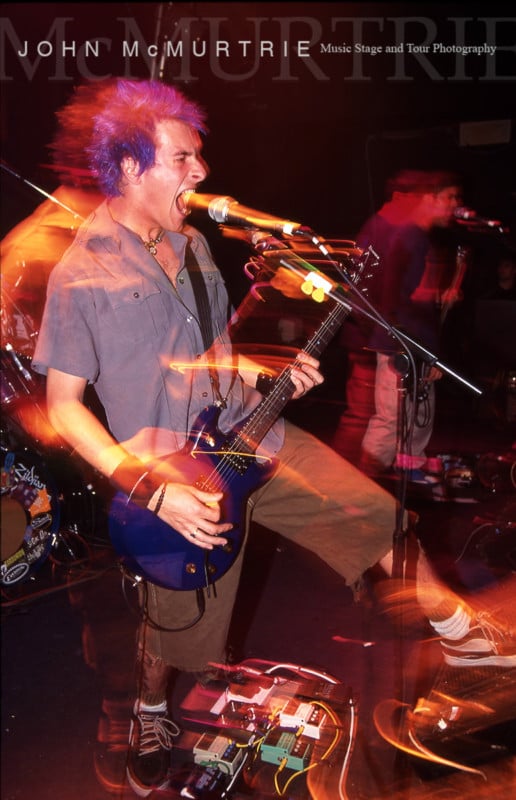
The trick is to use a low ISO like 100 and use very slow shutter speeds (1/15th – 1/4) that aren’t long enough to fully expose but enough to give you light trails or blur lines. This setting combined with a flash gun that is freezing the action produces stunning results but it is a trial and error method that takes some getting used to.
Alternatively using flash with a mid/high ISO (ISO 400) will produce good results as long as you are exposing for the background lighting also. Let the cameras through the lens metering automatically select the flash exposure and you set the ambient exposure manually.
Don’t Combine Flash and Smoke
Never shoot with flash if there is a lot of smoke, it just doesn’t work!
YouTube Preparation
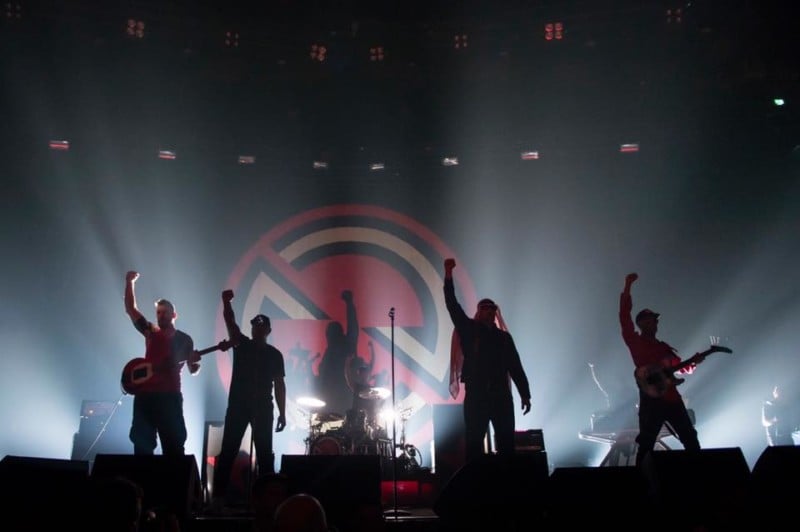
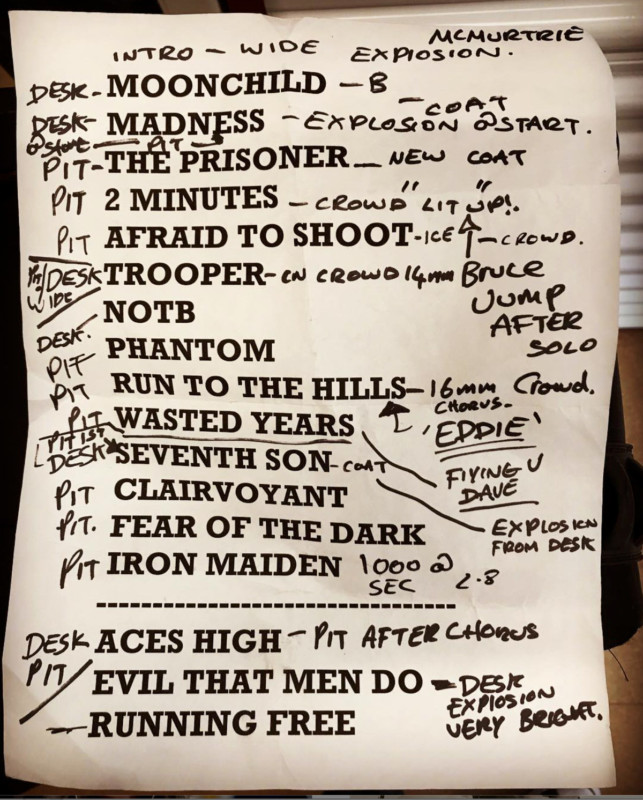
If the concert is an editorial commission then you will probably only get 3 songs at the beginning of the show. Because you only get to shoot 3 songs you need to prepare and find out what happens during those first moments of the show. The best way to do this is to learn the show from YouTube. On YouTube, there will be plenty of fan uploads showing where each member of the band stands, pyro explosions, jumps, what the stage show and lighting is like, and what are the must-see moments to capture. There have been many a gig where I have watched the show before going to the venue so that I knew all the cues for pyro.
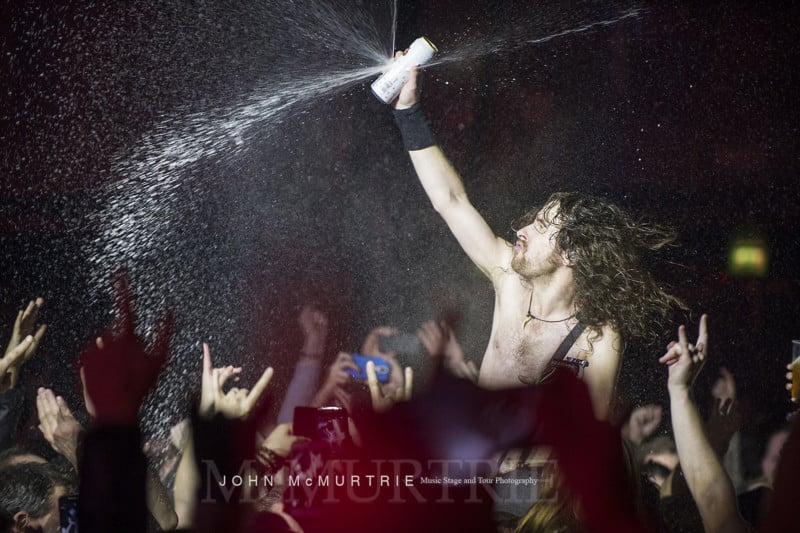
With Maiden, I am lucky to see the production rehearsals and I make notes so I know exactly when and where things happen. Once you know what you are going to shoot then you can plan where you will shoot from.
Right Place, Right Time
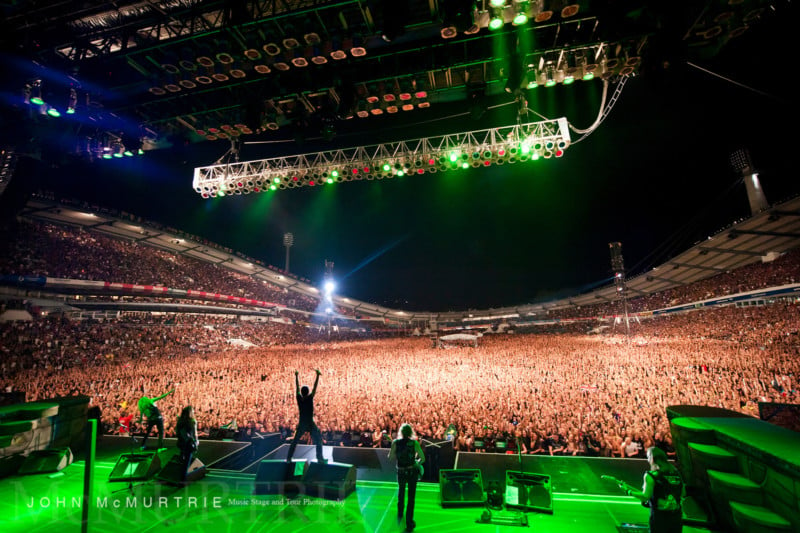
Knowing when things will happen allows you to be calculated and in the right place at exactly the right time. The best images don’t necessarily come from being at the front in the pit, sometimes the best shots are from the back of the venue looking at the entire stage.
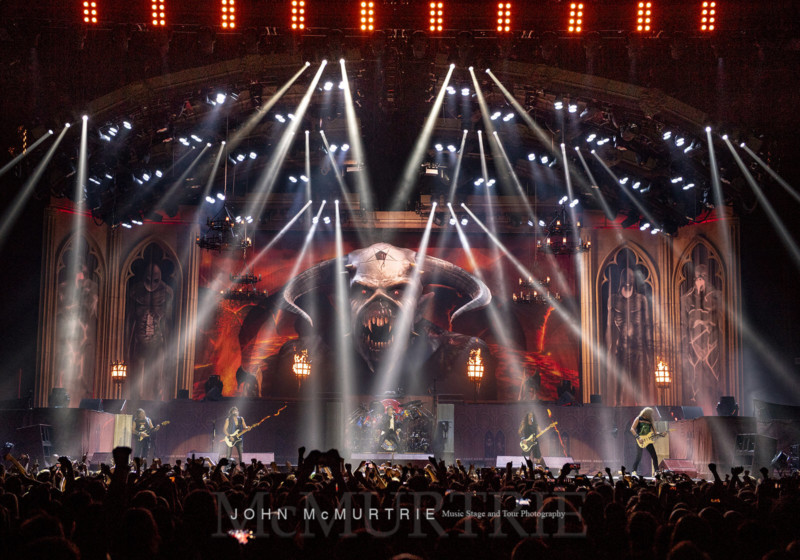
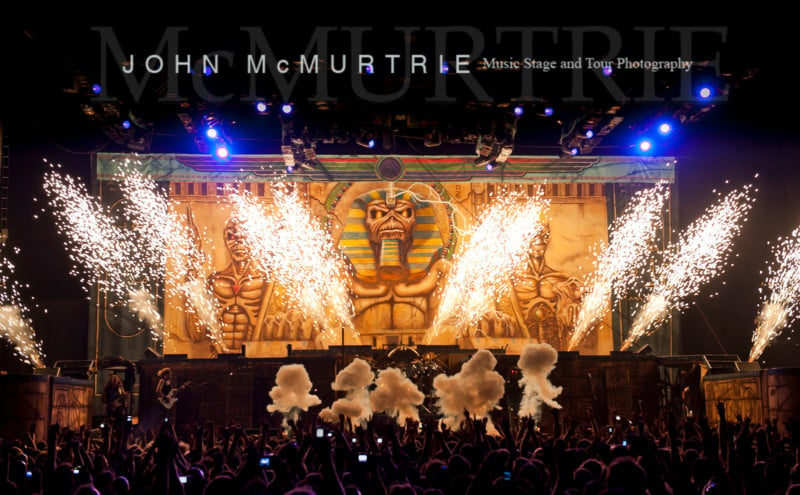
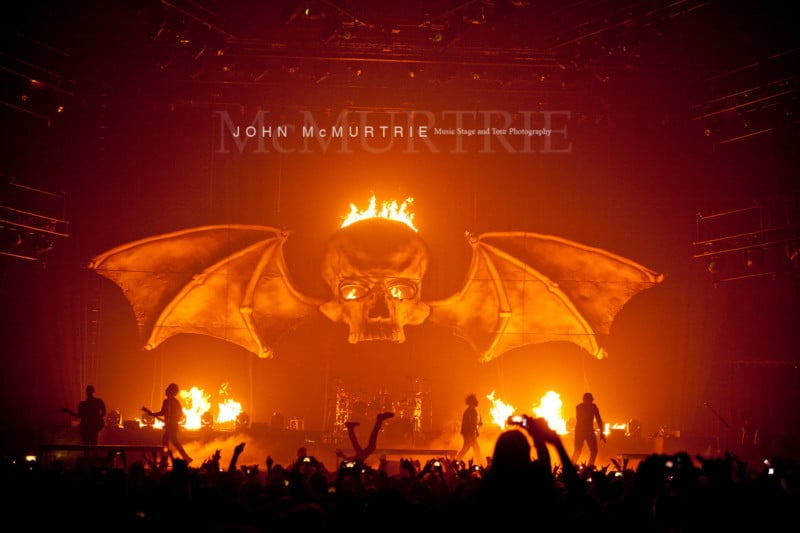
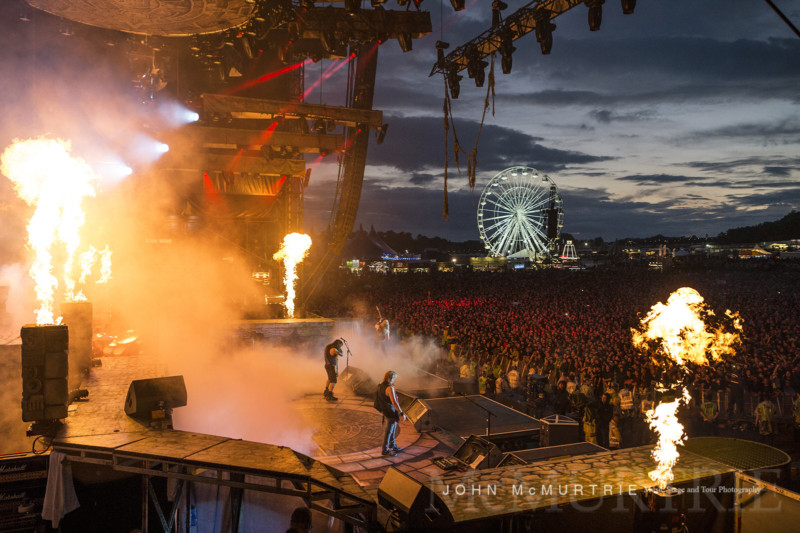
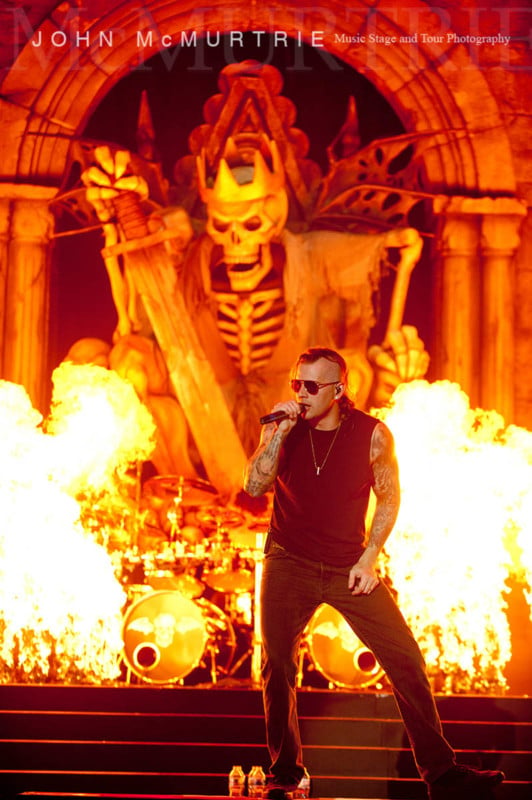
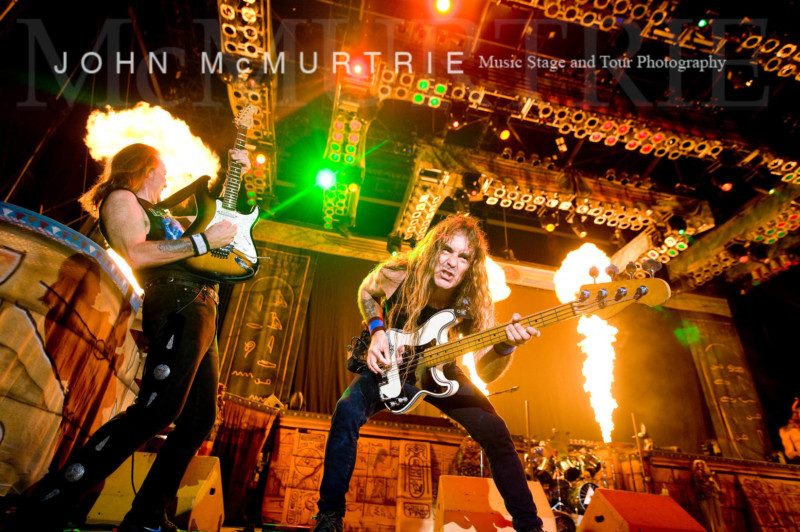
AC/DC, Maiden, Slipknot, Rammstein, and Metallica all have an impressive stage show with pyros. Find out when the big production moments happen and make sure you are in a position to get the pyro explosions and the full stage show in the frame.
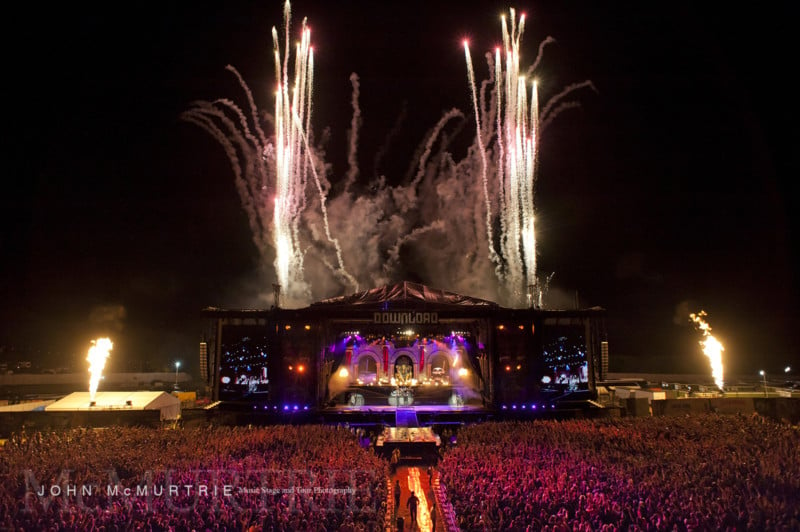
Sometimes the pit is the worst place to be if the stage show is impressive. I know modern restrictions with its 3 songs in the pit prevent you prowling the venue for the best vantage point but sometime if you ask, you will get special access to shoot from the Front of House desk or at the back. The big wide shots make great double page spreads in the magazines and pay more than a single page so always get a wide shot of the full stage.
Bring a Flashlight
Getting to the back of a venue through thousands of people is never easy regardless of the style of music you are shooting so bring a flashlight, or what I like to call the crowd separation device. Shine a bright light at someone and they get out of the way! It is that simple. It also stops you falling over stuff in the dark. I never shoot a show without a flashlight in my pocket. It can also help add light if needed.
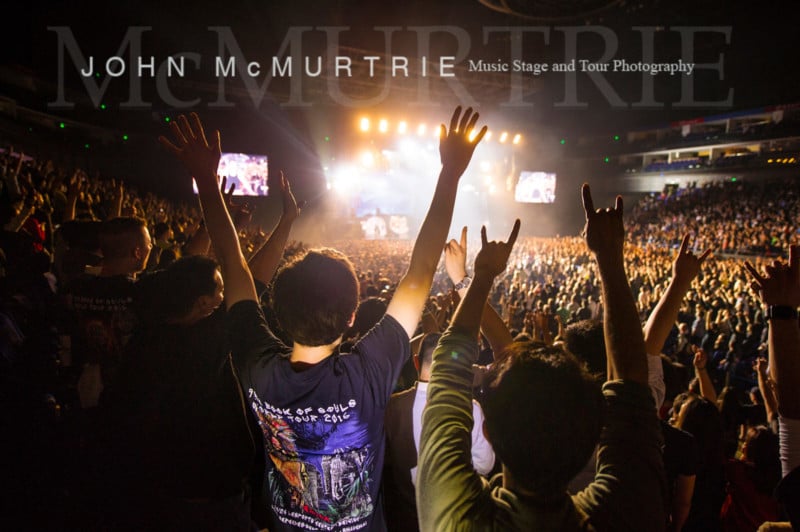
Fire Up the Crowd
Get the crowd to go f***ing crazy! Shooting the crowd at any size gig is always great fun but focus on somebody interesting that looks like they are enjoying the show.
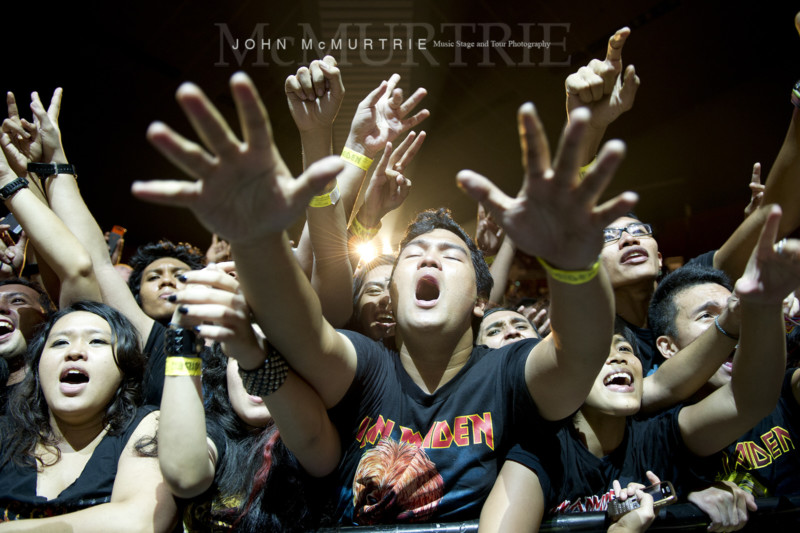
Some people don’t want to be photographed and if that is the case, move on and keep shooting until you get someone going crazy. There is nothing worse than a crowd shot with someone looking disinterested.
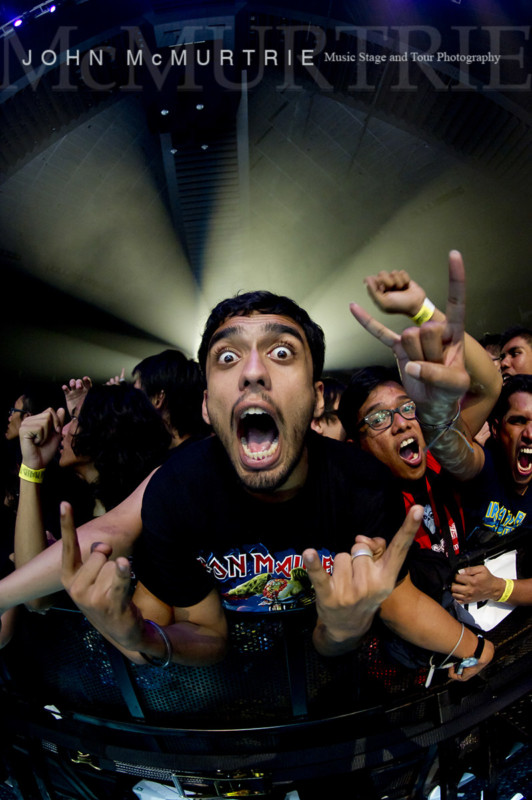
Band managers and magazines don’t want to see a lukewarm crowd. On the big stadium crowd shots, I always focus on one individual and let the rest of the crowd fall off around them. Sometimes 70,000 people in one picture is too much to take in. Shouting at a crowd to get their attention’ also works well!
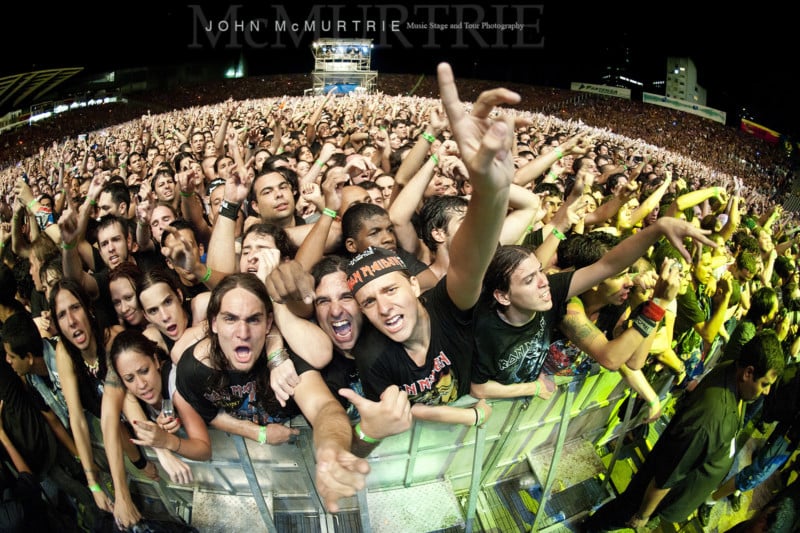
Access
Get access and make the most of it. If you are lucky enough to get a full Access All Areas pass to a show, then make the most of that opportunity. Shoot backstage. The walk up pictures to the stage are always used and if you can get in the dressing room backstage before and after the show then shoot as much as you can but have some awareness of the band’s mood and behave appropriately.
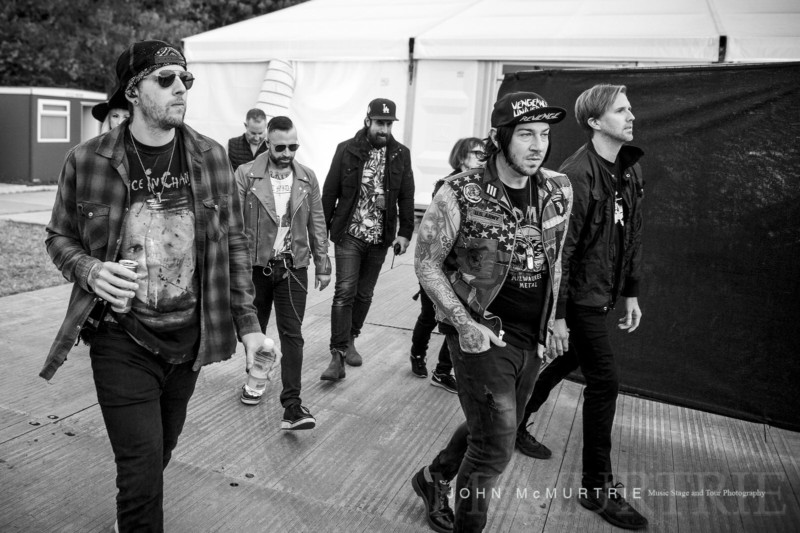
Once you have access to shoot a whole show, don’t waste that opportunity. Even though you have a full access pass make sure the security are aware you are allowed to roam the venue. Many times (especially in America) I have been stopped by security even though I have a triple A (AAA for Access All Areas) laminate pass. The Head of Security is the person that needs to be told there will be a photographer permitted to shoot everywhere and that message is normally passed on by the band’s Tour Manager or the band’s security. If local security stops you, tell them to radio the security boss and stay polite. Being a dick in these circumstances rarely works!
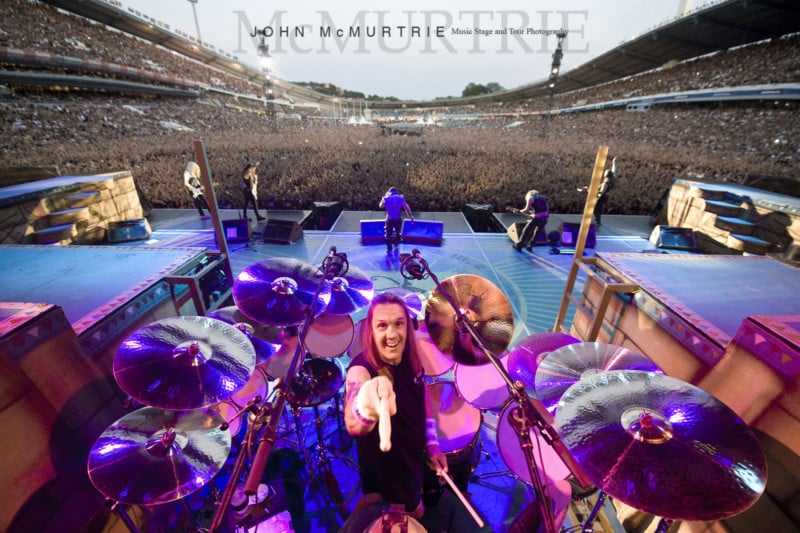
With full access, you are not pressured to get all your shots in 3 songs but it does bring other pressures. The 4 principle areas I shoot from are the pit, on stage, Front of House (mixing desk area) and up in the gods. Before the show, you need to see how accessible all these areas are and make a plan.
Avoid Dangers
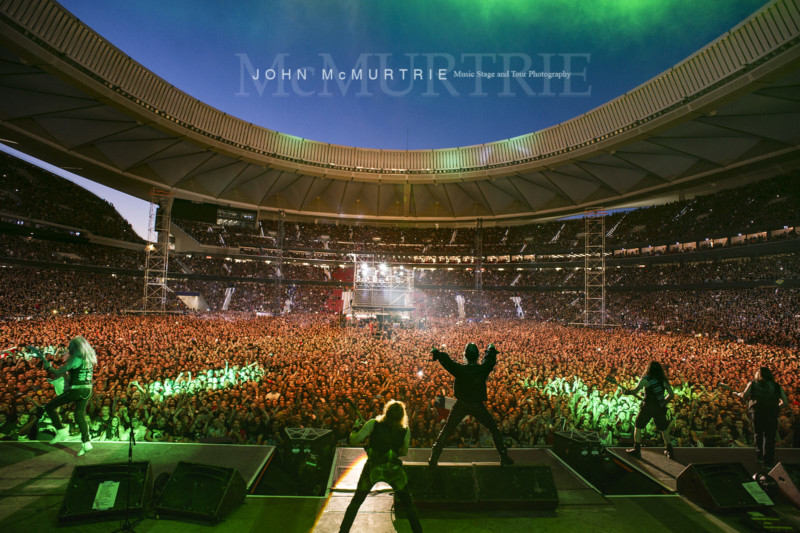
On-stage work can be filled with real danger and you need to find the stage manager and introduce yourself. He will be able to warn you of any moments during the show he won’t want you getting in the way. This will either be pyros or stage set changes or simply where the guitar techs are or the band’s preferences on the night. There are several songs during the IRON MAIDEN set I stay well clear onstage due to the danger of being literally blown up or flattened by a 2-ton stage prop.
Once the details of health and safety have been taken care of you need to work out what pictures you are trying to take up there. The drummer is the first priority as he is the most inaccessible to get good shots from the pit.
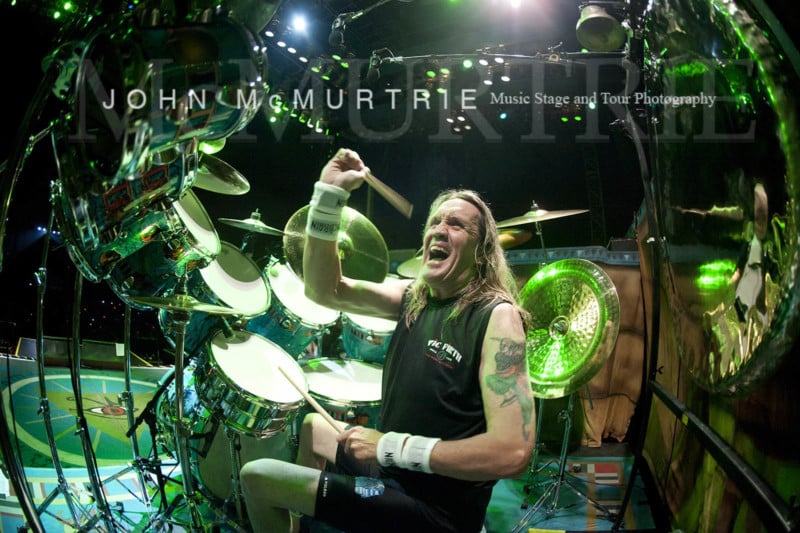
Secondly, it is the onstage shots that illustrate the scale of the show. With a gazillion people in the crowd, knowing when the ‘blinders’ are switched on and illuminate the crowd is essential. Shots on stage with a band and no lights on the crowd are often unusable so check with the LD and on the set list when these moments happen and then work out where the best vantage points are?
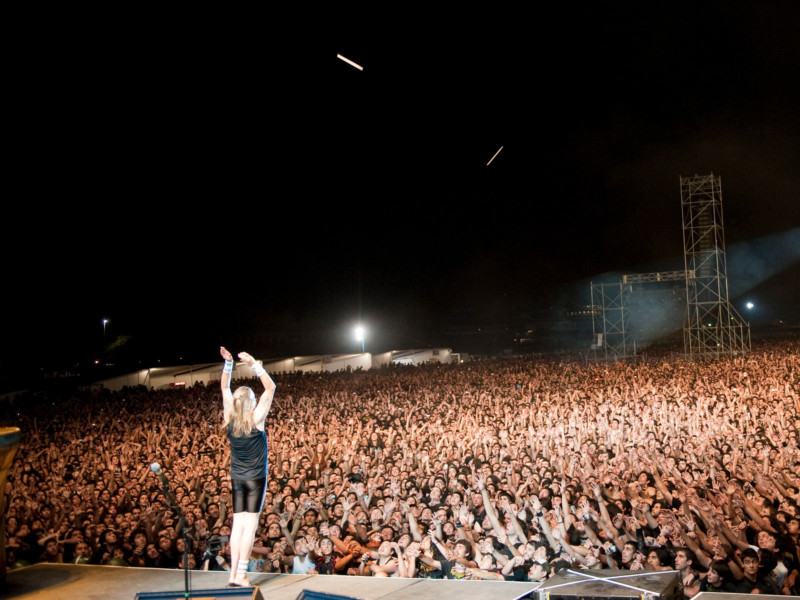
In between songs is best to avoid getting in the stage technicians way because that is when guitars are tuned and swapped. Upset one of the roadies and the entire production crew will be on your back. Front of House is probably the most comfortable shooting position during a show but often it is virtually impossible to get to this area once the crowd is in the venue. Using a flashlight helps get through a crowd but doing a recce of any access routes before the crowd comes in will help.
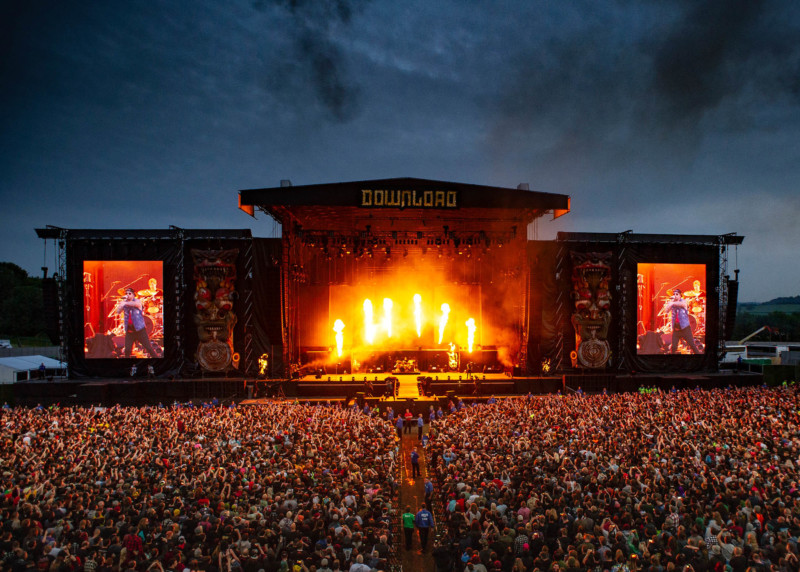
The same for getting up into the bleachers at the big shows as getting lost or wasting time will lose you shots during the show. Again the impressive shots from high up in the crowd at a stadium or Arena often only work when the blinders switch on and light up the crowd. You have to decide when to shoot on stage with the crowd lit up and when to climb high up into the highest part of a stadium will equally look good.
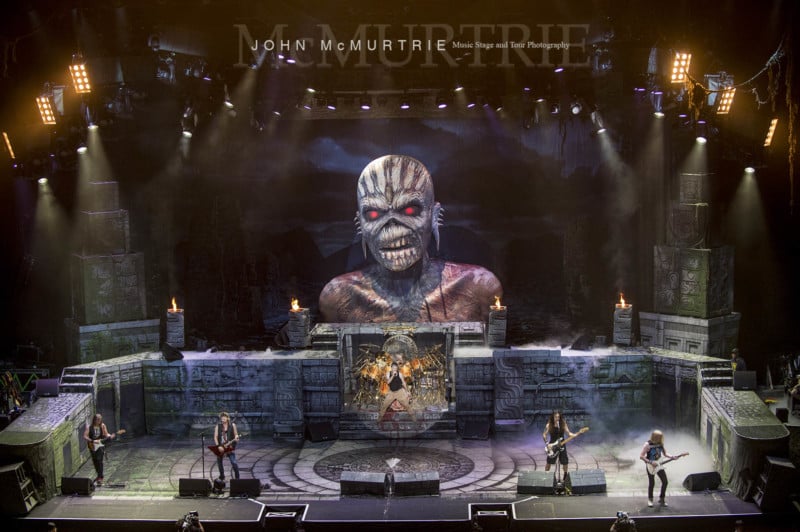
Looking at a set list I usually plan where I will shoot for each song. You usually have to miss at least one song traveling high up into the gods of a venue so I will plan to leave when I know I can miss that song but know the next will have impressive lighting.
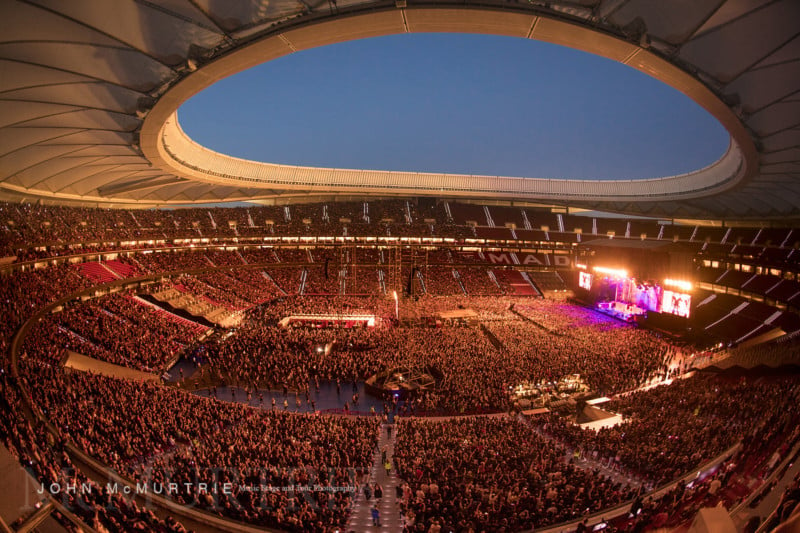
Many a show I have wasted time waiting for the lights to come on! Obviously, there are plenty of other areas that you can shoot from and every venue will be different but try and work out where before the crowds come in.
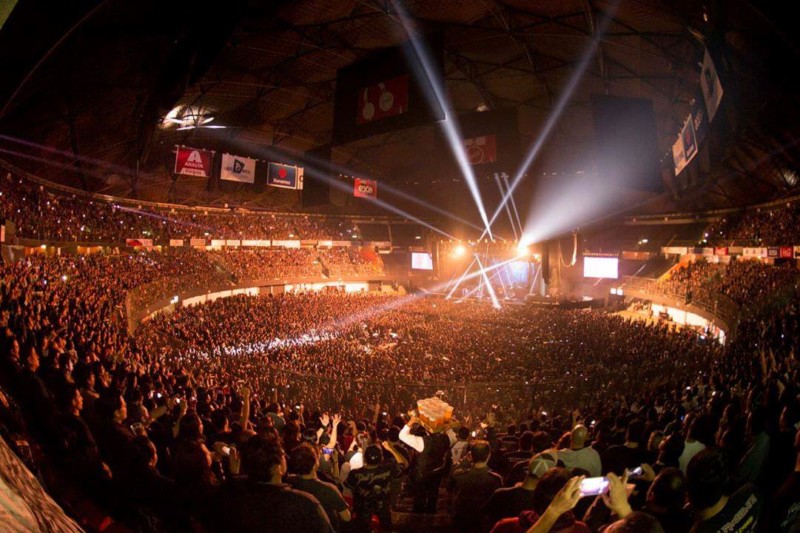
Use Continuous Shooting Mode
When we shot on film this was called the motor drive but now it is called continuous. I shoot a lot of jumps shooting continuous at 10 frames per second. I pre-focus and hold the shutter down giving me a choice of images.
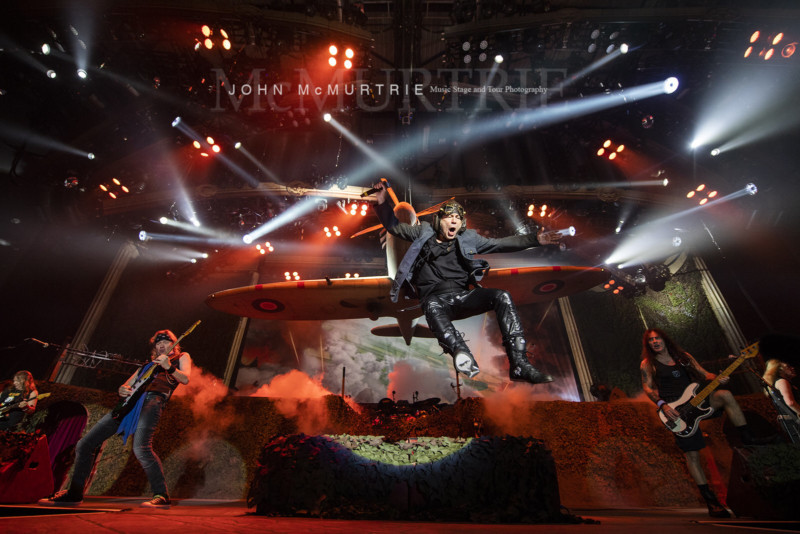
This is a great way of getting the perfect shot. Know when to shoot but when something looks great or something exciting happens then shoot and shoot a lot of frames. You may only use one frame out of 20 shots but you can choose the exact moment where everything works.
These Colors Don’t Run
Love it or hate it, LED lighting is here to stay! I can see why it has pretty much replaced the older style tungsten Parcan lights, but they can be a total pain to shoot. LED is lighter, brighter, cooler and safer and they give the LD more control, being able to dial in a whole multitude of colors and saturation. But they cause a real headache for modern RGB sensors with over-saturation blowing out individual colors.
With an RGB CCD, each color is read by the individual part of the sensor for that color. i.e. Blue records blue, red records red, etc. So if an LED light is throwing out the color blue, the level of color is so pure it washes out into a blown out block of color. The sensor is unable to record any tone or shade whatsoever. It is the same with red and less so with green. It sucks and there is very little you can do about it. It is also worth noting exposure meters over-expose with blue and red light so underexpose by at least a stop and check your cameras display for reassurance.
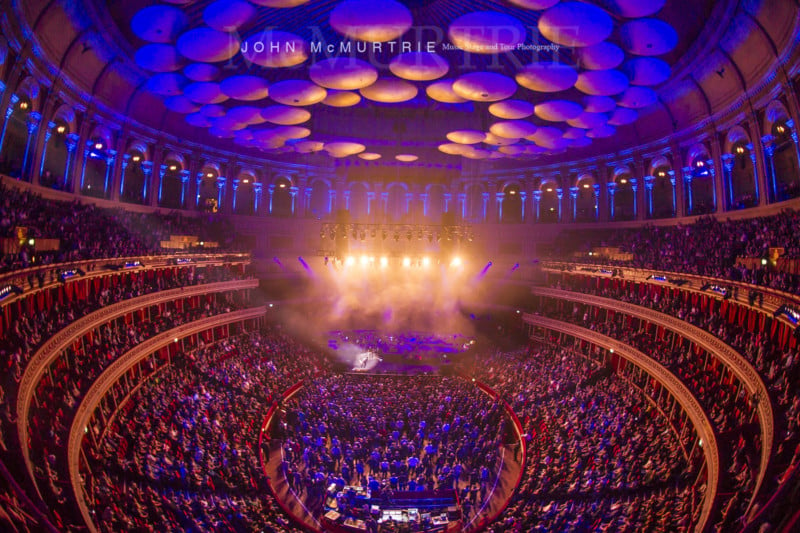
There are a few ways to shoot LED stage lighting and some tricks in post-production that help, but the first thing to do is manage your expectations because generally speaking there is not a lot you can do if there is 100% red, green, or blue in the mix! You can try some of these tricks below.
1. Underexpose, add Clarity and shadow detail, reduce the offending colors saturation, dial in the opposite color on color balance all in post-production.
2. Use fill-in flash and slightly underexpose the colored LED.
3. Ask the lighting director to tone down the saturation and add reds to the blues and blues to the reds. Only possible if you are working for the band. I have done this with IRON MAIDEN and believe me it works.
4. Convert everything to B&W (the last resort).
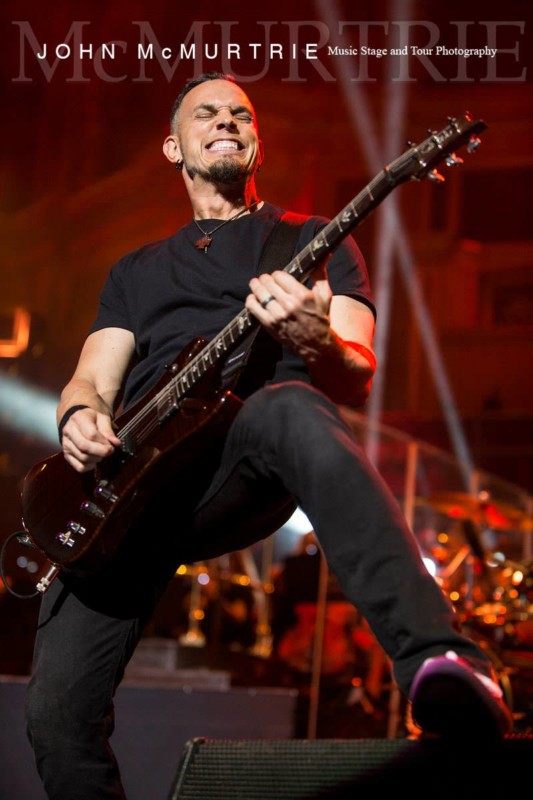
There are several methods in post-production you can try but from experience very few actually work well and if you edit too much, the colors just look odd! I once spent the entire night editing the opening show on a new tour creating pre-sets to reduce color burn and the only method that actually worked was to underexpose on the next days show. It is the number one problem shooting music in the 21st century and until sensors advance and lighting directors dial out the saturation from the mix, it is one that will continue to be a problem for stills/video in the future.
In my IRON MAIDEN book ON BOARD FLIGHT 666 all the images shot between 2008 and 2009 were shot with Tungsten lighting, 2010-2011 are all LED and you can see this difference in color saturation.
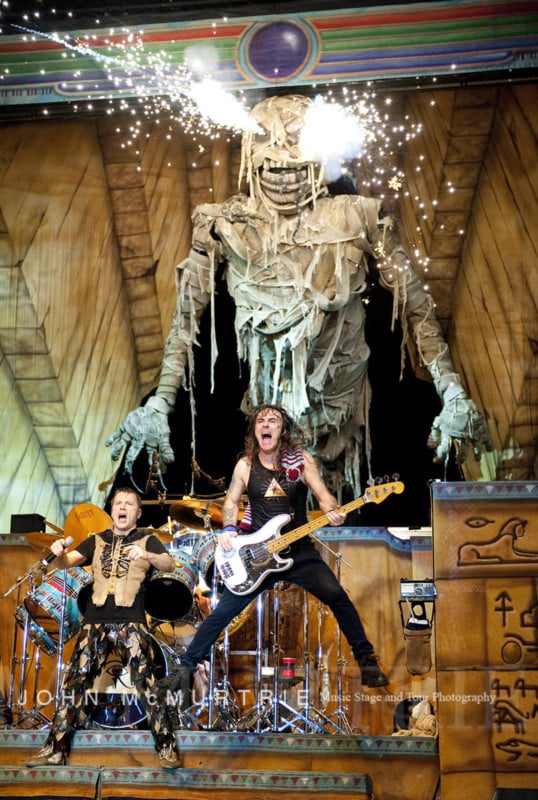
Follow spots are generally tungsten but I expect that to change also to LED in the near future. On one tour we had the follow spots set to 20% and because of this, I was forced to overexpose the LED stage lighting behind the musicians so the follow spotlight on the artist was the correct exposure. I ended up pleading with the LD to turn up the power on the spots because it was just killing me every night. I eventually got my way but I had 10 shows with virtually unusable colors blown out behind the perfectly exposed follow spot.
Buy Good Gear
The saying a bad workman blames his tools doesn’t apply in music photography and try and to get the best equipment you can afford. The more expensive pro cameras are built so much tougher and will last longer than a cheap DSLR.
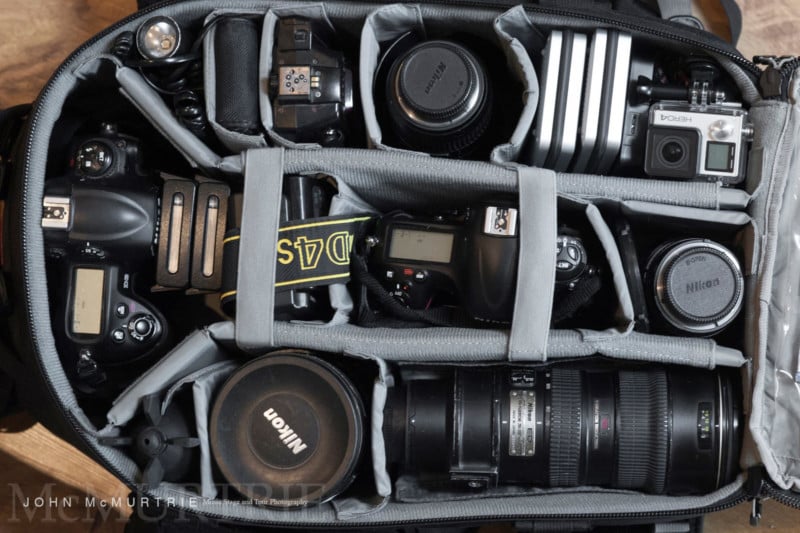
You will need a camera that can take a few knocks and has good water (and beer and sweat) resistance. A second-hand Nikon D3 will cost you around $450 and will be a better investment than a mid-range new camera that costs more. Don’t go for the highest megapixel camera either as the higher the pixel count the lesser the performance at high ISO.
Try and get lenses only with an aperture of f/2.8. They tend to be better glass than the ‘kit’ lenses that come supplied with cameras these days and will ensure you get sharp results, have a bright viewfinder and allow you take pictures in low light. You will never take good concert pictures with cheap glass. A 50mm f/1.8 is a relatively inexpensive lens but excellent for small shows. A 24-70mm f/2.8 is also an excellent investment! Get the best you can afford but make sure it can shoot at f/2.8.
Focus Lock
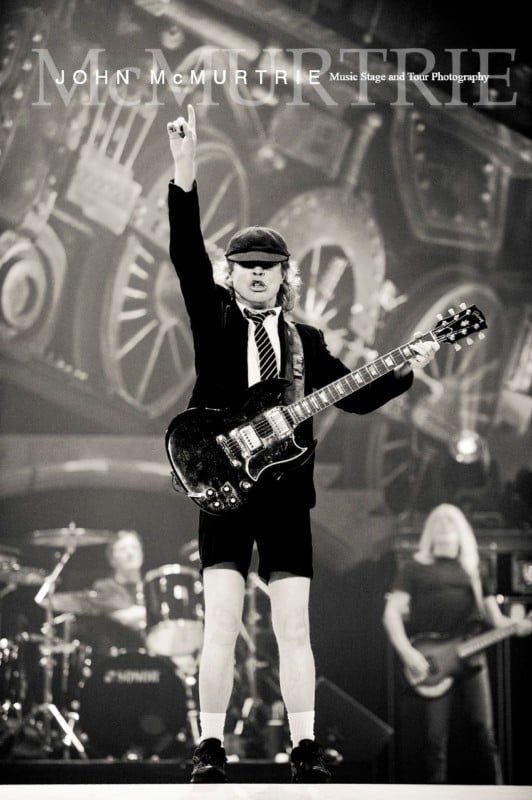
The autofocus on most modern cameras is excellent, so use it but know how to stop the focus system when you can see things are sharp. Most cameras have a focus lock button and I use focus lock all the time. It just stops the focusing zipping off to infinity when an artist moves in the frame. On a guitar player, I focus on the eyes, lock focus and re-compose. Because the way a guitarist moves will mean your autofocus will be on the guitar or a shoulder or some hair which will kill the image. 50% of all published shots of guitarists have the face sharp and often with the headstock cropped out.
Anticipate
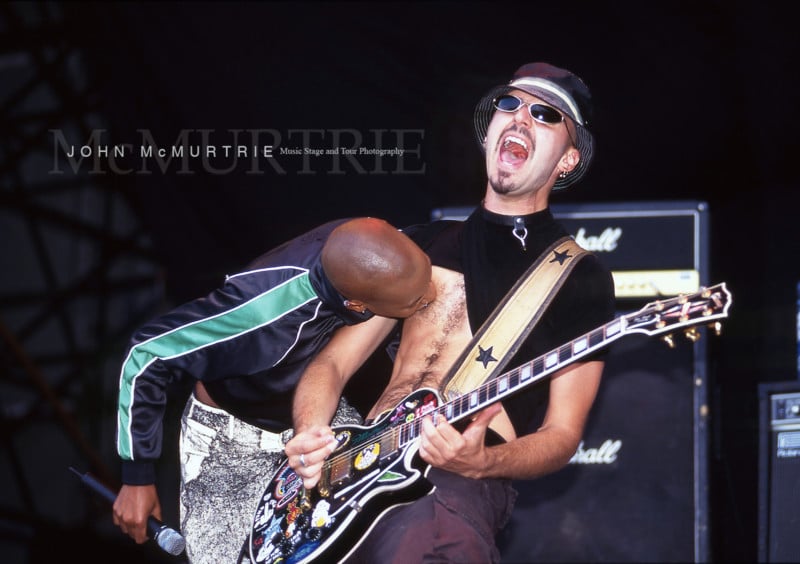
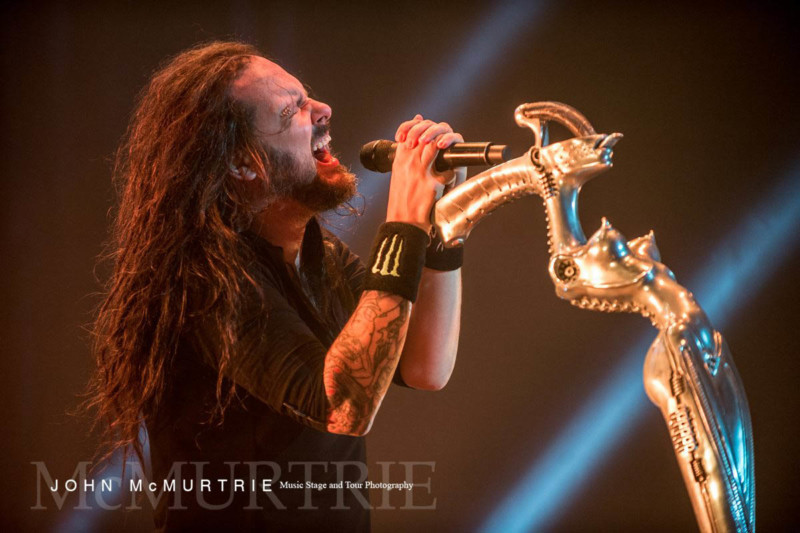
Don’t just shoot from a fixed position waiting for that moment to magically happen in front of your lens. Often it just won’t. Try and anticipate what is going to happen and be ready. The shot below of Jonathon Davis from KORN I set out to get before I walked in the venue. I will admit I had shot them 3 times previously and failed to get a clear shot of Jonathon and his mic stand where you could see his face. But I got it in the end and it is an image that has published many times recently.
Edit Your Shots
I can’t stress to you how important editing is. Firstly a picture editor doesn’t want to sieve through a hundred images from a show. Choose your best and put those out. Probably around 30-40 is a good amount for most publishers. Of those best images, make sure you edit them in modern editing software like Adobe Lightroom or Capture One.
Because you have shot in RAW, you will be able to tweak the exposure, highlights, and color balance easily without any loss of quality. Just adjusting these a small amount will make a world of difference. Finally, export your RAW file as a best quality full resolution JPEG (SRGB for web use and RGB for print publication). I use a secure web server gallery that allows me to quickly distribute links to publishers and enables them (if an agreement is made) to download the full-res images for publication.
Make Money
So many people are commenting that there is no money in music photography anymore which is simply wrong. The demand for images has trebled because of social media. Because of this, standards have dropped, though, and more and more outlets are looking for cheap or free images. This is why your images have to stand out!
A really excellent live shot has value. A mediocre image is probably worthless these days. We used to syndicate our images through picture agencies. Many still do but have discovered that the return is literally peanuts (or maybe enough to buy some peanuts!). So does that mean there is no value in music pictures anymore? The simple answer is no.
I have been lucky and work for several publishing outlets but because of this, I know first hand that if a magazine wants to publish an image they will pay for it. Social media has forced publishers to up their game on content and if you have a great shot, chances are there will be a publication that will want to pay to use it.
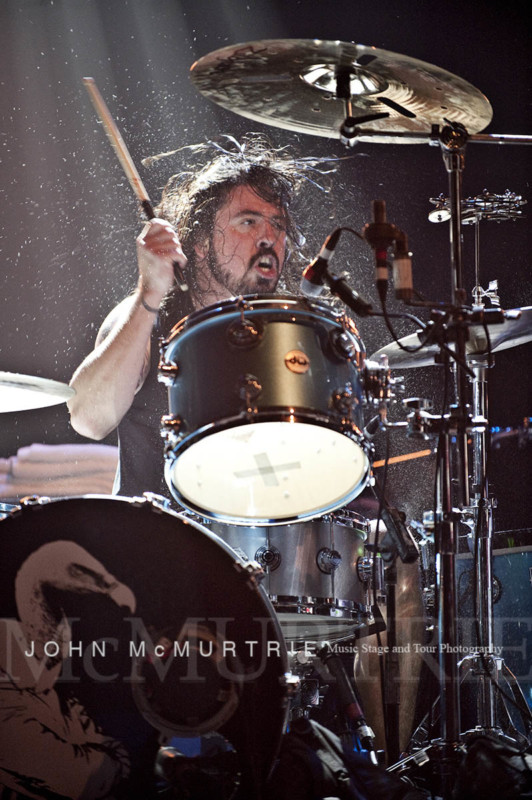
The music magazines have definitely made cutbacks but do still pay for good content. It is hard to compete with the big agencies with their subscription-based image use but put everything you shoot online in a secure gallery so if someone needs an image you can supply it fast.
![]()
Also, do everything you can to get pictures that no one else has. It is easy to get access to smaller bands so try and grab as much off stage material that you can. Historically there is enormous value in music shots so try and commit to the long game. You may not be making big money straight away but over the years you will build an archive that has enormous value. I have shots of Muse when they first started as an unknown support band and Avenged Sevenfold backstage at the Underworld (500 capacity). Both bands now play Arenas and stadiums and these pictures are regularly in demand.
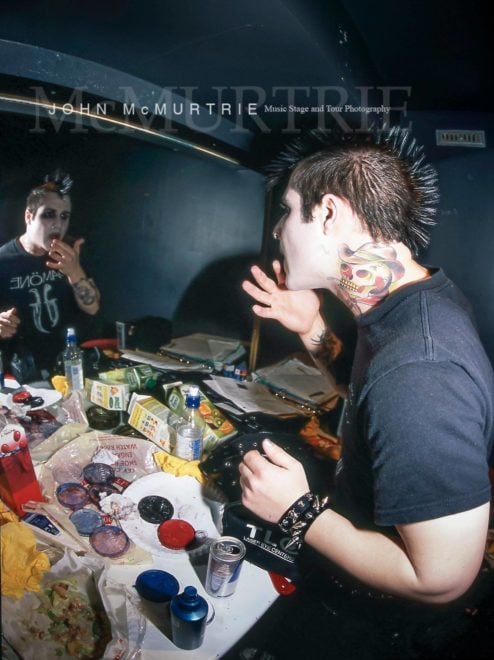
Selling direct to the band’s management or record label works and often leads to direct commissions. I occasionally give smaller bands free shots for their own social media which usually puts you in a favorable position in the future. As long as any free shots you give are on a limited license. While you are establishing yourself there is no harm in letting smaller lesser known bands see and use your watermarked images. That doesn’t mean bands are allowed to just steal your pix and use them for free though.
Establish a rapport with the artist or management and offer them pictures. I know there will be a lot of photographers getting ready to tear me to shreds for this but giving stuff away at the beginning will open doors for you – only if you establish a clear and concise understanding of the limited use of the pictures (no artwork, press or merchandise and a limited time period). Next time these bands come around and as they become more popular it will help getting hired and getting better access!
There is a difference between giving away a few pictures and working for free. Don’t work for free, because that denies another photographer a paid commission. If you are shooting and you think you have some great shots and no one is buying, then there is no harm letting the band see and use a few, but make sure you have your watermark clearly identifying you as the author.
There is currently a trend to seize copyright from photographers, making them sign contracts before issuing photo passes. Just don’t do it! Rights grabs are becoming more and more common and even several of the big publishers are trying it. I agree that photographers should respect an artist’s right to control merchandise and I agree to sign editorial only contracts but beware of any rights grabs hidden in the legal jargon.
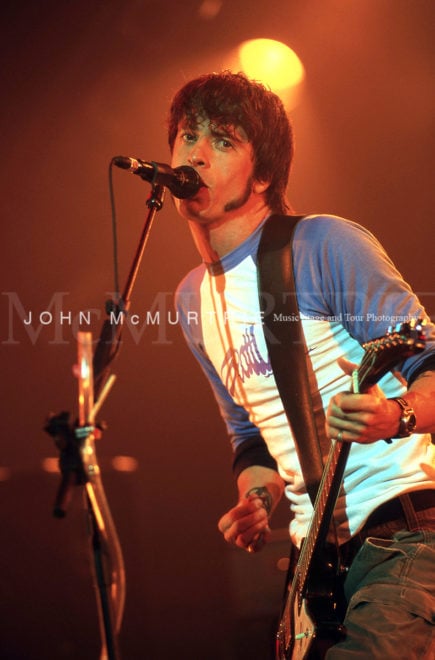
Wherever possible, retain your copyright as that is your most valuable asset to your business. I shoot for a couple of bands that do a ‘buy-out’ of copyright but I am compensated well for doing this.
![]()
If you want to make money from music photography, your images need to be good and hopefully better than the photographer standing next to you. Just try and be consistent, original and the most important strength is to be reliable. An art editor will never give you regular work if you don’t deliver the goods each time. Not just great shots but literally delivering the shots quickly with no complications or complaints.
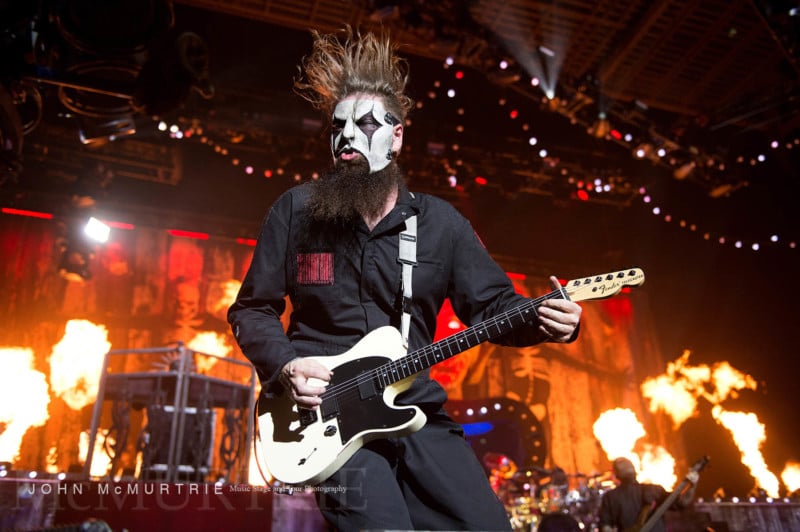
Art editors will listen to your tales of woe and how the lights were bad, or how you had a nightmare, but they won’t commission you again. You also need to deliver what publishers want to see. Often it is hard to get the perfect frame due to the stage height or the lighting but try and imagine what kind of image encapsulates that band before you start shooting. If it is Slipknot you need to capture the aggression, the flames, the masks, etc.
Conclusion
By perseverance and stubbornly continuing to shoot you will get better and better at shooting shows. Eventually, you will build up an archive and slowly you will begin to sell shots and get known to bands, labels, and management. It is very rare to just walk into music photography and start making money but it will happen if you keep at it. Good luck!
About the author: John McMurtrie is a music, stage, and tour photographer based in London. The opinions expressed in this article are solely those of the author. You can find more of McMurtrie’s work on his website, blog, Facebook, Twitter, and Instagram. This article was also published here.
Image credits: Header photo: STEVE HARRIS – IRON MAIDEN 2018 COPYRIGHT JOHN McMURTRIE. ALL RIGHTS RESERVED.