Underwater Photos: A Deep Dive Into Prep, Gear, Shooting, and Editing
This article is not about my advice on how to run your photography business with regard to legalities, releases (prop, model, and liability), safety, price, and style, etc. However, it is about what I do, how I prep, and how I take photos underwater. That’s it. Read it and if you get some good ideas and want to try, then go explore and do it safely and legally.
A Little About Me
I’ve always been interested in photography and was hooked with my first camera long ago – a Minolta X700. If there is a photo opportunity, I’m all in and I’ll submerge myself into learning more about that particular type of photography. My passion for photography takes me everywhere from shooting macros of insects, to landscapes, time lapses, portraits, weddings, and more. And in this case, shooting models underwater.
Ok, so let’s get into what I do to shoot underwater.
Safety, Safety, Safety
Shooting underwater with a model can be dangerous. I always chat with the model before we shoot and again the day of and before we get in the water to explain the risks of shooting underwater. After the chat, we get in shallow water, take a look around, become familiar with our surroundings, and practice what we will do.
If at any time I notice the model struggling, we will stop and re-evaluate our session. At that point, we will either stay in shallow water and do portraits or stop the shoot altogether. It’s also very important to take frequent breaks between shots. She or he needs to be well relaxed, focused, and comfortable. Constant communication during the shoot is essential and will give you an idea of how they are feeling.
To further minimize the risks, I have multiple safety people who are well known to me as excellent swimmers, know CPR, and keep constant focus on the model and myself during the shoot. They are always there to render assistance if any problem should occur.
Another thing to keep in mind is water temperature. I find that the experience is so much better in 75 to 80 degree water. Anything colder becomes a nuisance and can make the shoot miserable and possibly unsafe.
Finally, talk to the model about clothes. Obviously, you don’t want an inexperienced swimmer jumping into the deep end of a pool wearing a ball gown. Focus on clothing that is easy to swim in, is light, and flows well. It’s also a good idea to have water and snacks on hand to refresh energy.
Ultimately, this should be a safe, fun, and relaxing time for both you and the model.
With all of that said, I normally shoot with models that have I have a history with. I know they can swim, drop, and pose really well. I evaluate, develop and maintain relationships with those that have excellent skills underwater.
Equipment
Camera/Underwater Case
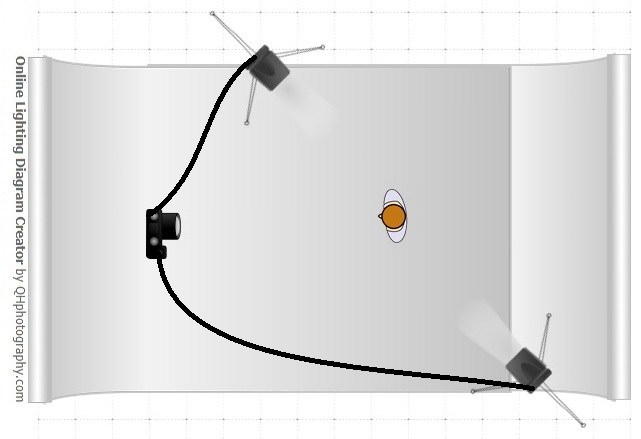
I’ve been shooting underwater for about 5 years and started with an Olympus TGx series, then moved on to a Canon G16 in a Fantasea underwater case. As my passion and editing improved, I upgraded to an Ikelite underwater case for my Nikon D750 and then eventually added two Ikelite DS160 strobes with 15-foot cords so I could shoot with off-camera light.
I also carry two 7 foot light stands for use either in the water or laying down on the edge of the pool. I’ll affix the lights to the stands and dip them about 6 inches in the water or set them up in the pool alongside the model and myself. Depending on my light setup, I use lead weights or pre-washed rocks or bricks to hold down my stands both in and/or on the edge of the pool.
case
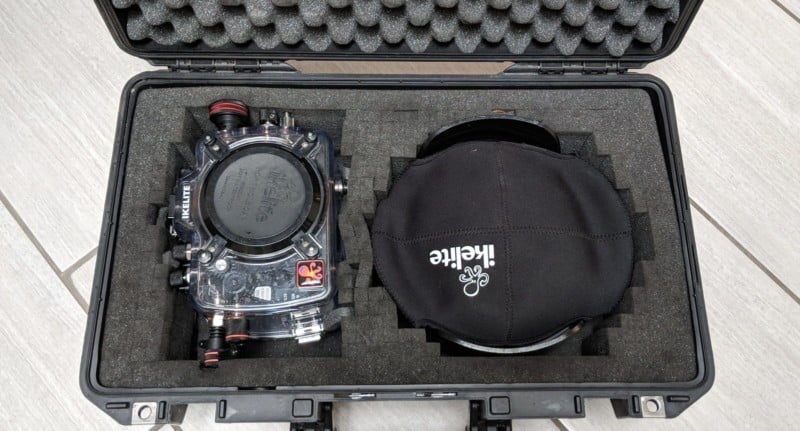
To protect all my equipment from damage when not in use or when traveling, I store the underwater case and lens port/dome in a Pelican Case Air, the strobes, cords, and the rest of the equipment in a padded bag. In addition, the bag also has room for a few tools, silicone, extra gaskets for the underwater case, sunscreen, swim gear, and my dive mask.
Lens Choice
Other than well-maintained saltwater pools, most chlorine pools, the ocean, and lakes can sometimes become cloudy with the overuse of chlorine treatments, sand, or dirt, etc. Also, I like my working distance with the model to be about 5 to 7 feet for easy communication and safety.
Zooming underwater for this kind of work makes no sense. So, because of all that I chose a Nikon 24mm f/2.8D lens to pair with my Nikon D750. The Nikon 24mm focus is extremely fast, has a close focusing distance of about 1 foot, and is very sharp. Because of the close working distance, the chances of in-focus shots are much higher.
Shooting underwater and especially in cloudy or murky conditions will degrade the cameras ability to focus accurately. Therefore you will want to work as close as possible to the subject.
On a side note, avoid dragging lots of props in a pool. Color bleeding of fabric, dirt on props, etc can cloud up the water.

Personal Gear
Obviously, in a pool, I wear regular swim gear but most importantly, a weight belt of 6 pounds and a dive mask. The 6 pounds of weight helps me to drop to the bottom of the pool faster and easier. I never ask the models to wear weight.
The mask is important so that I can see what the model is doing and I can compose shots easier. In a lake or ocean, I’ll don SCUBA gear and tether my camera to my SCUBA gear. Truth be told, I’ve only photographed fish in the ocean and a few models in a lake. But that will change soon.
Shooting
Camera settings
It depends on ambient light, but for the most part time I use Aperture Priority, ISO 100 to 200 (ish), and F/4 (opens of the DOF just a bit – shooting underwater is not about bokeh). Sometimes with good constant ambient light, I’ll switch to manual and adjust settings as needed.
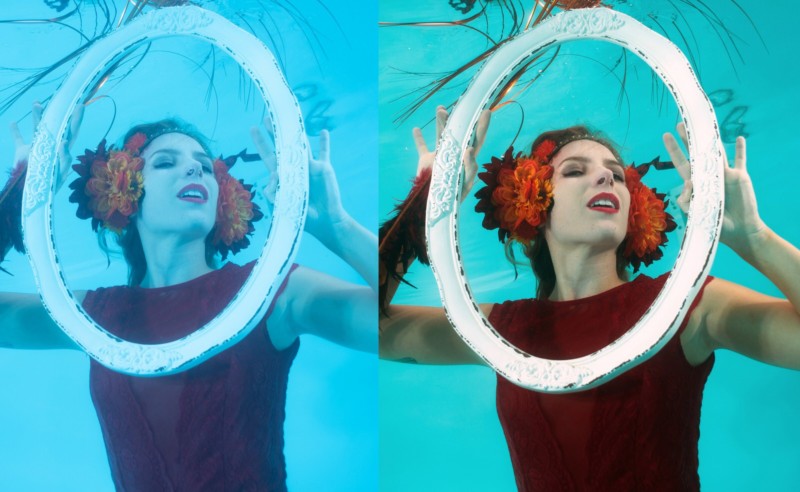
Obviously, with off-camera lights I’m limited to 1/200 of a second with my D750 so I’ll switch to manual and adjust my camera settings and strobes as ambient light changes. Most everything I do in and out of the water is at a color temp of 5600K. And sure, the water creates a ton of color cast but that’s easy to fix in Lightroom. I’ll go more into that later.
Shooting underwater is tough but the Nikon D750 and the 24mm focus so fast I use group 4 point AF-S and usually keep the group in the middle of the frame. At f/4 99% of my shots are in focus. I don’t use 3D, AF-C, back button focus, etc. Every once in a while if I’m shooting portraits underwater, I might switch to a 50mm f/1.4 and shoot at f/1.4.
Natural Light vs Off Camera Lighting (OCF)
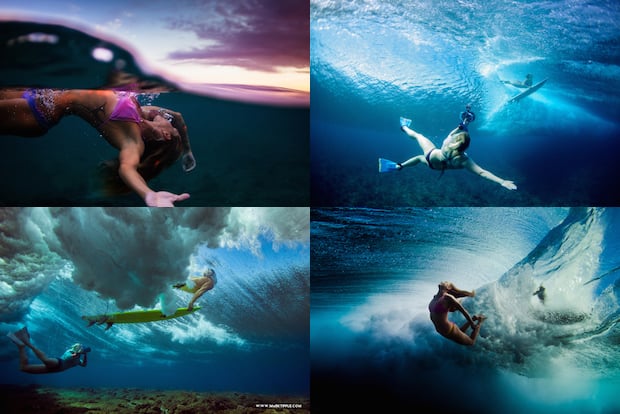
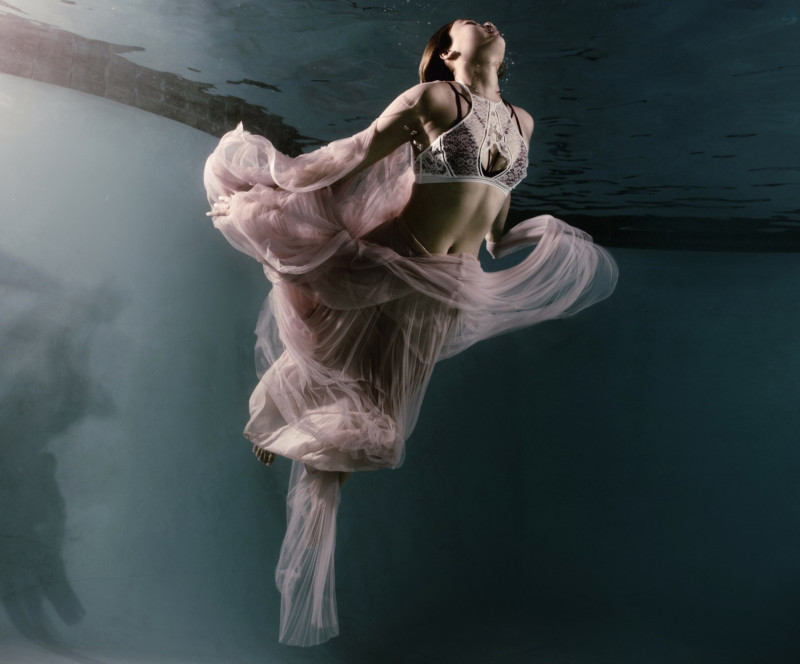
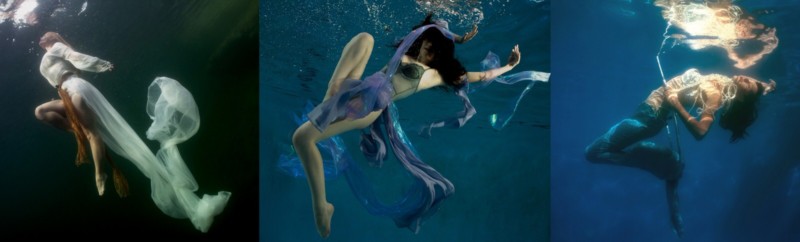
I like how both OCF and natural light look in different conditions underwater. For example, if shooting during a bright sunny day, I’ll shoot natural light because I like the way the light falls through the ripples on the surface and land on the model. But as the day goes on and the sun gets low, I like to add OCF, both behind and in front of the model as it almost creates a 3D effect. So on most shoots, I’ll do both.
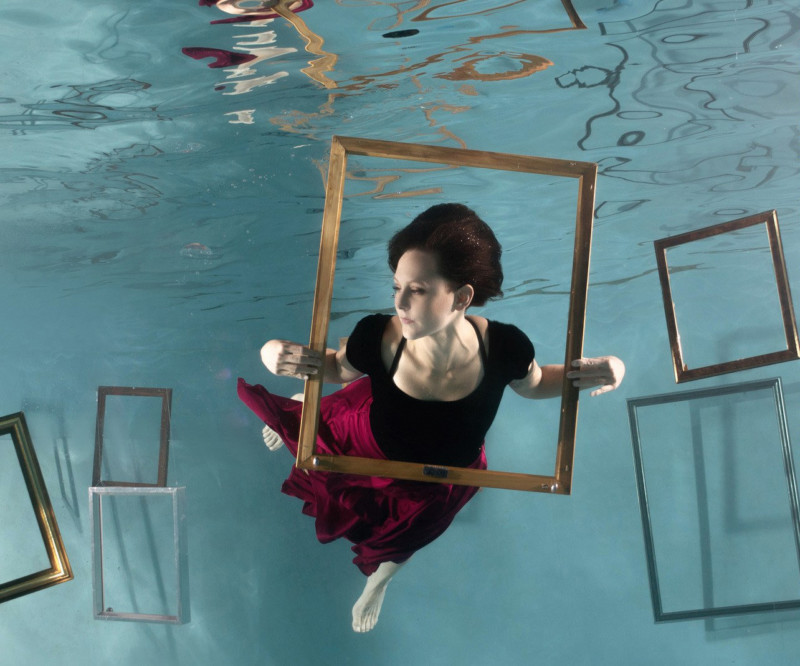
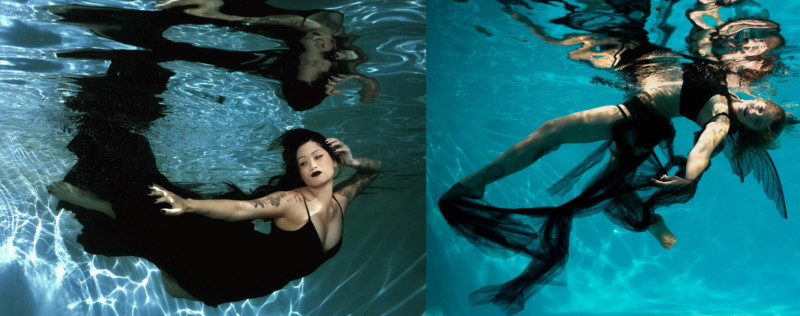
In the 3 photos above are different examples of OCF: strobes in the water behind right and in front left (top), Direct on-camera flash (bottom left), and two out of water strobes on light stands with Alien Bee 7″ reflectors and 30-degree grid inserts (bottom right).
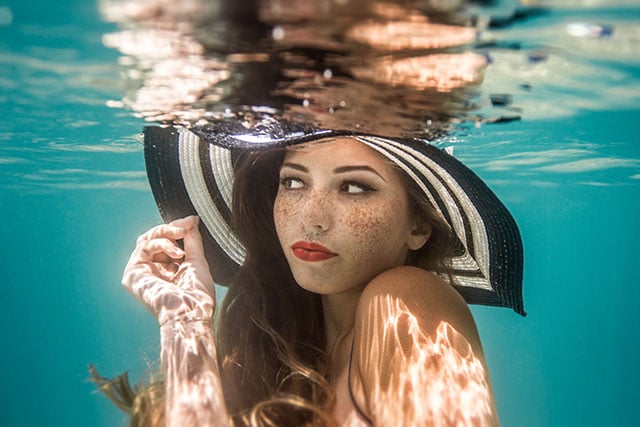
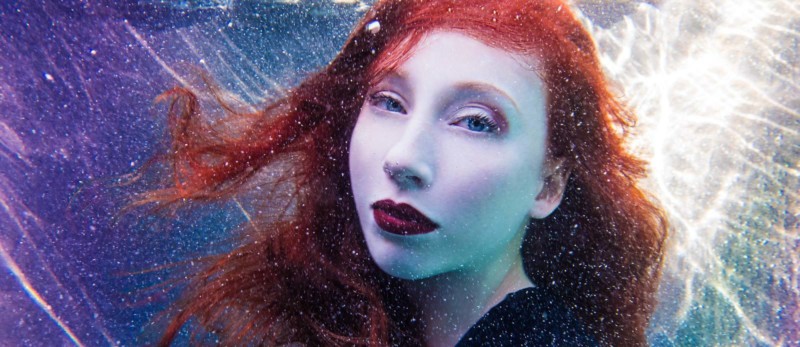
My shooting style underwater
Tips while shooting
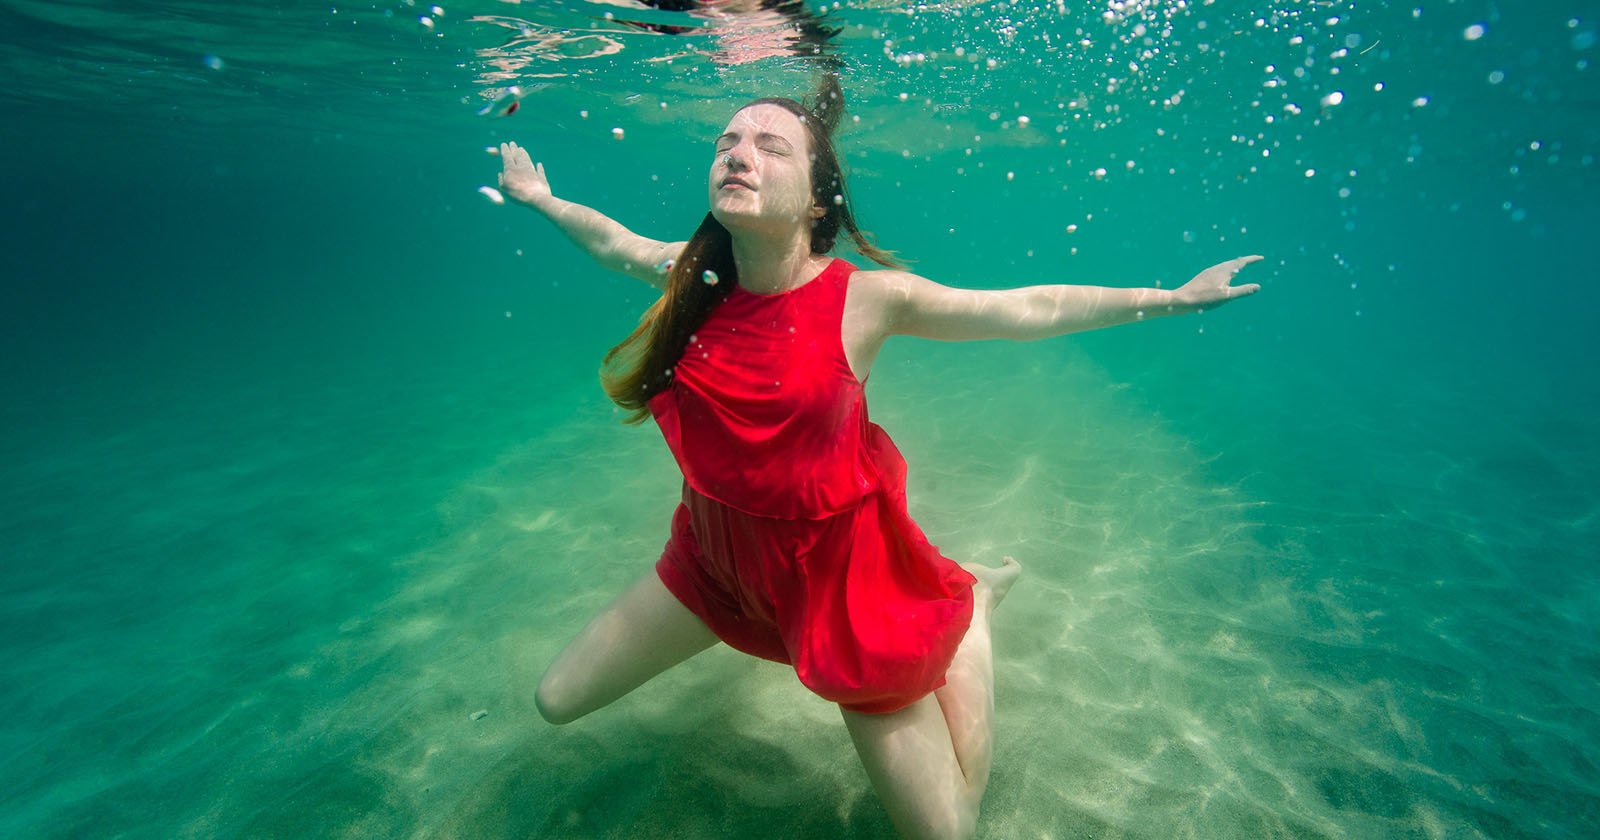
I discuss with the model whether we are doing a portrait, sitting full body, or a full body swim/movement shot. I’ll drop down on a 2 count and ask her/him to drop down on a 3 or 4 count. This way I’m in place and ready to shoot when they are in motion or dropping to pose. I’ll usually stay down for 10 to 15 seconds and I coordinate this time with the model.
I’ve found its a lot easier to drop and shoot in a horizontal position than it is kneeling or in a sitting position. In addition, I like to get as low as possible and shoot up. The composition and perspective are more pleasing this way. I’ll do the same SCUBA diving. The bubbles from my regulator get the way if I’m vertical.
Take your time. Pool shoots are strenuous and require lots of breaks between shots. Even with one model, I plan 2 hours. This includes setup, discussion, breaks, and shooting.
Editing
Editing underwater shots is a bit tough because of all the color cast. And depending on how deep you are the water it will absorb different wavelengths of light. Even at 5 to 10 feet, red is the first to disappear and then followed by yellow and orange. This is why skin tones are most affected.
You can solve this problem by changing your cameras white balance settings or just shoot in RAW and fix it in a RAW editor. To resolve this, I turn to Lightroom. I’m sure the editing experts out there have a million other ideas but for the most part, this will bring the skin tones, etc back to where they should be.
My quick edit process:
- I import my RAW files into Lightroom.
- Move the temp slider somewhere between 6000 and 7500.
- Move the tint slider to somewhere between +10 to +35
- Desaturate, lower shadows (darken), bring up highlights.
- Adjust contrast to +30 or higher.
- When I’m done in Lightroom, I’ll export jpeg and continue edits in Photoshop. Here I will remove bubbles, background distractions, maybe adjust hue, crop, etc.
Remember this is my process for RAW photos produced by the Nikon D750. Your camera will produce something different and you will have to find your own workflow.
Thanks for reading and I hope you enjoyed it. Remember to have fun and always keep safety in mind.