How to Shoot Macro Snowflake Photos at Home

This is my account of how I’ve fallen in love with snowflake photography… I’ve spent the better part of my life photographing nature’s smallest details. My early years of shooting botanicals eventually evolved into my current obsession with macro insect and spider photography. I’ve spent that same time running from the cold.
For years, friends and family encouraged me to try my hand at photographing snowflakes. And for years, the idea intrigued me but I couldn’t get past the mental image of me fumbling around with my camera and frozen fingers. Until now.
Last summer, I discovered a piece of camera equipment that changed my photography. I’ve been shooting macro with the reverse lens technique for many years, but using a 50+-year-old lens with a manual aperture ring has its limitations. My camera couldn’t communicate with my lens and, though I use my camera in manual, shooting with a stopped down aperture resulted in not always being able to see my subject clearly at ƒ/11 (my macro sweet spot) – it was too dark.
Someone recommended I look into a particular reverse lens adapter and let me tell you, it was a game-changer. Though I didn’t get the exact model recommended (it was $500+), I did find an alternative for around $100. Enter the Vello Macrofier Reverse Mount Adapter. Finally, I could see what I was shooting clearly in my viewfinder! Summer 2017 was my best year yet for macro insect and spider photography. I found and photographed more “new-to-me” bugs than ever before. Then came the cold weather.
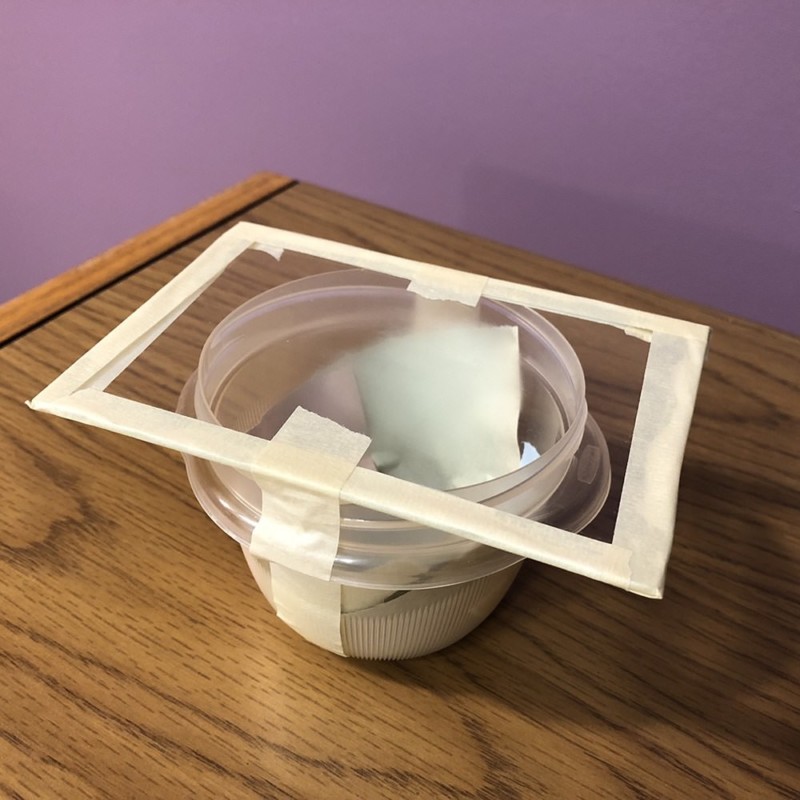
Like every year before, I wallowed in sadness as Ohio’s winter chill overcame my beautiful local arboretum. Ice, snow, and frosty wind kept me huddled inside my warm home, my camera buried away in a cabinet. Until one day, I got the overwhelming urge to go outside and photograph snowflakes. I have no idea what evil spirit possessed me to go outside in single-digit temperatures, but I did, but not before crafting a makeshift “snowflake studio” from a plastic food storage container and a piece of glass from a small picture frame. I completed the studio by crumpling pieces of colored construction paper and placing them inside the container, under the glass plate. I tossed my “studio” on my front porch for ten minutes to cool down before bundling up and stepping outside.
My Equipment, Technique, and Process
My “snowflake studio” was made from a small plastic food storage container with a small glass plate taped to the top. I placed colored construction paper in the container to create a pastel background. It’s not very glamorous, but it’s what I had available and it works amazingly well.
I use the Vello Macrofier Reverse Mount Adapter to reverse mount my Canon EF-S 24mm ƒ/2.8 lens to my Canon 70D. The Vello adaptor retains electrical connectivity between my camera and lens, allowing me to look through the viewfinder with a completely open aperture, resulting in a bright and clear view of my subject.

I use my camera’s built-in flash for lighting. I pair the flash with the Graslon Spark flash diffuser to diffuse the harsh light. I’ve placed two sheets of polystyrene in the Graslon Spark for additional diffusion.
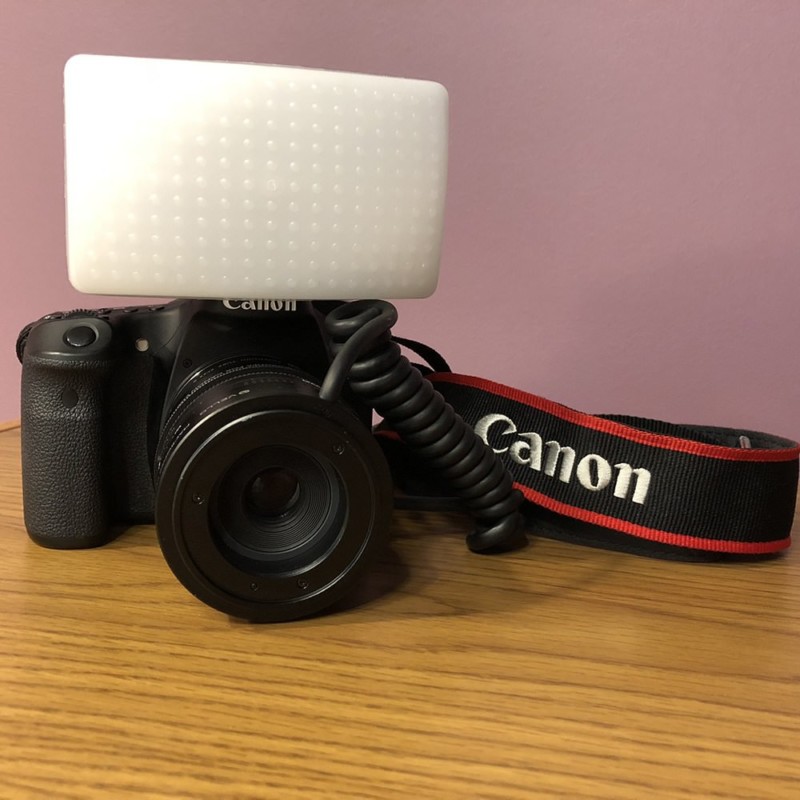
I tend to shoot with the following settings: ISO 200, ƒ/11, 1/250. Shooting at ƒ/11 provides just enough depth to get clear snowflake shots.
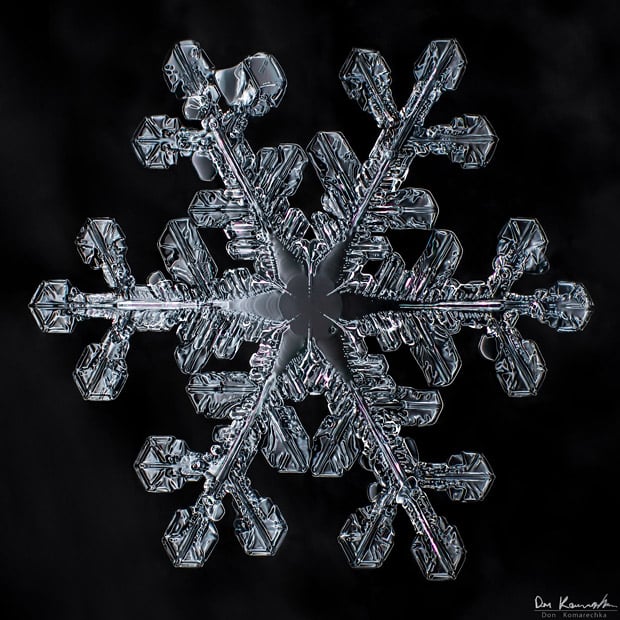
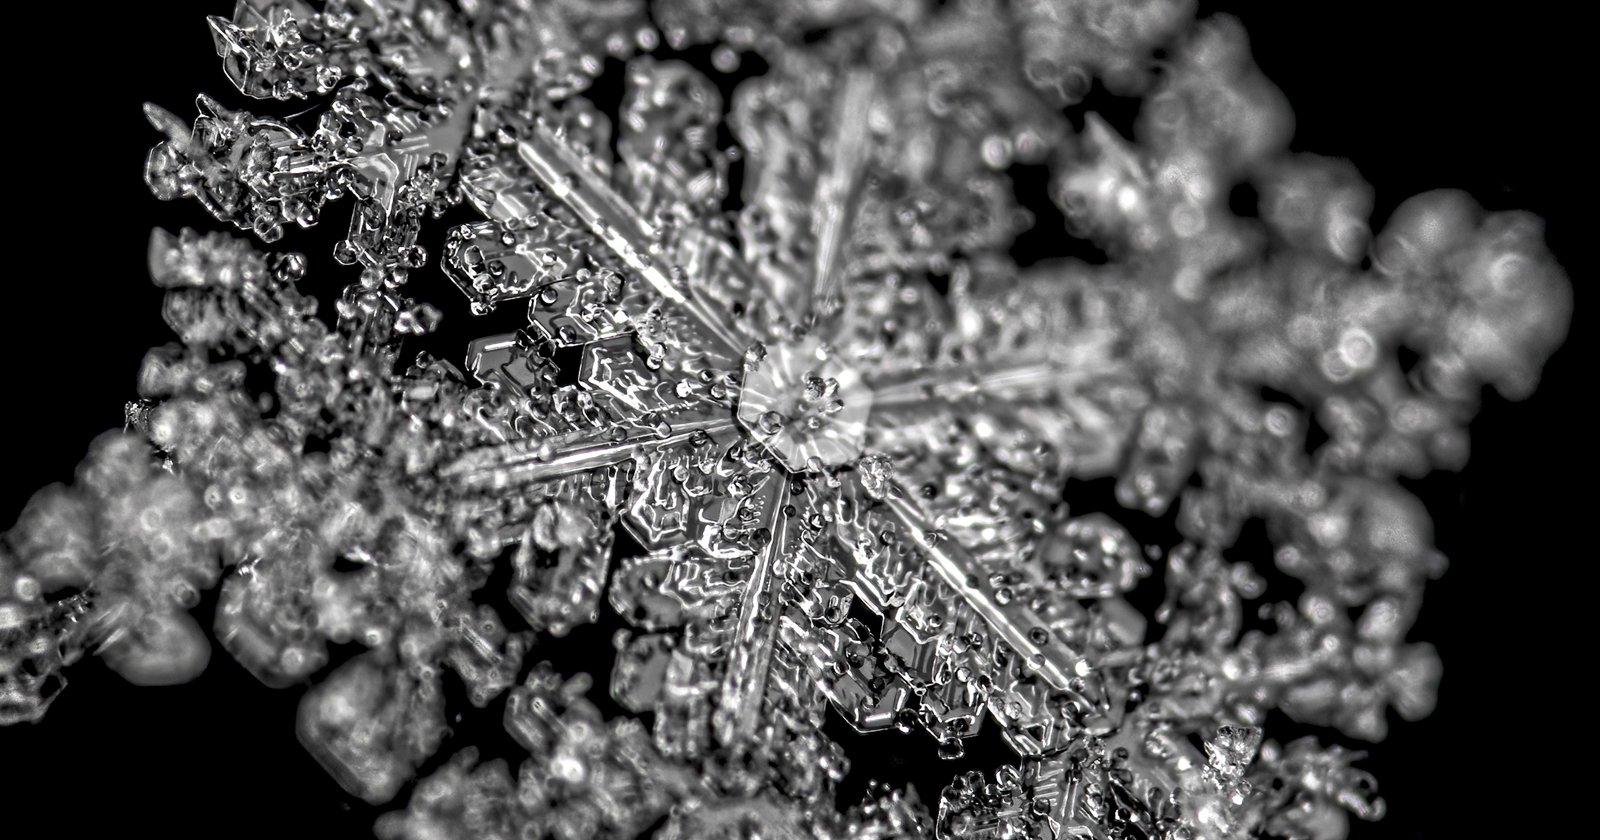
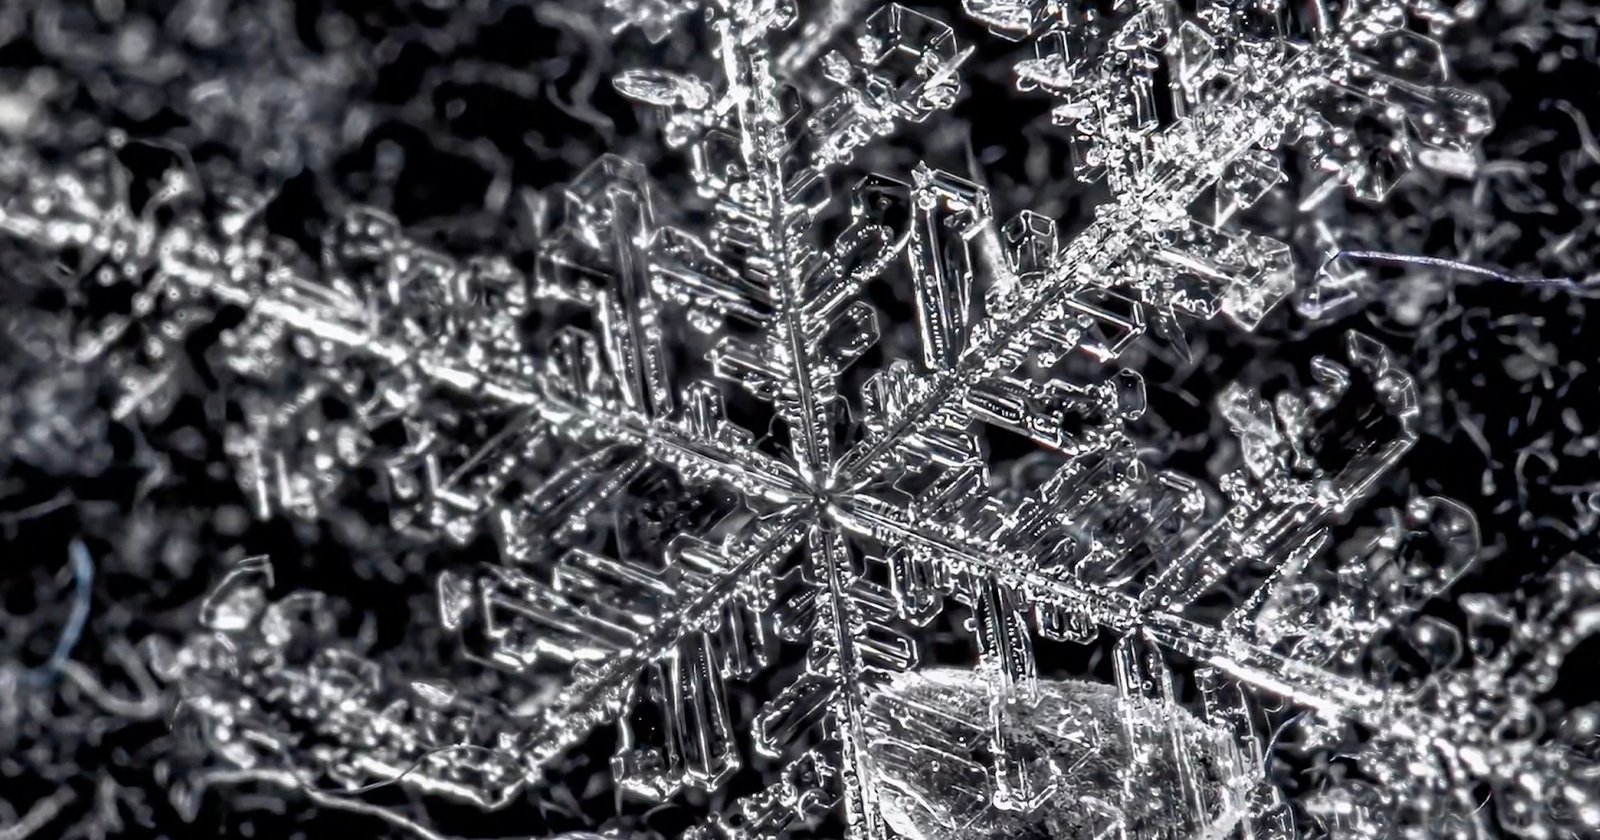
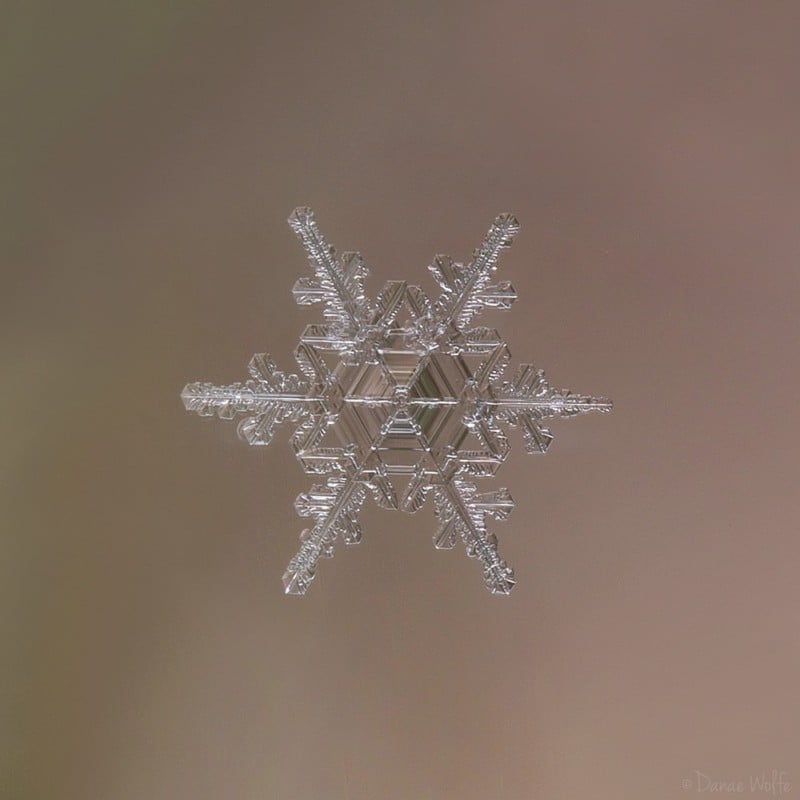
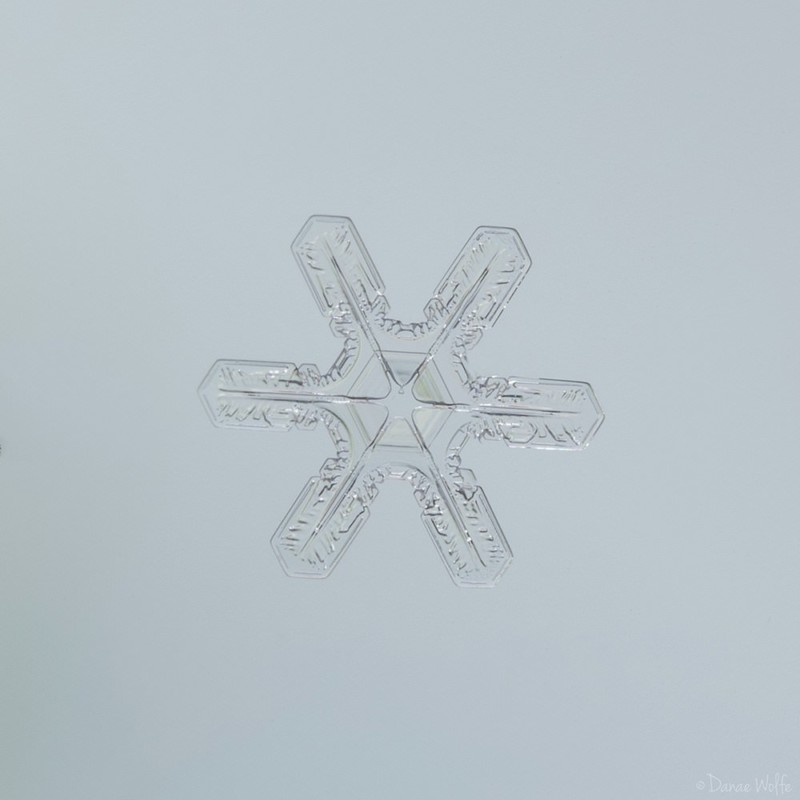
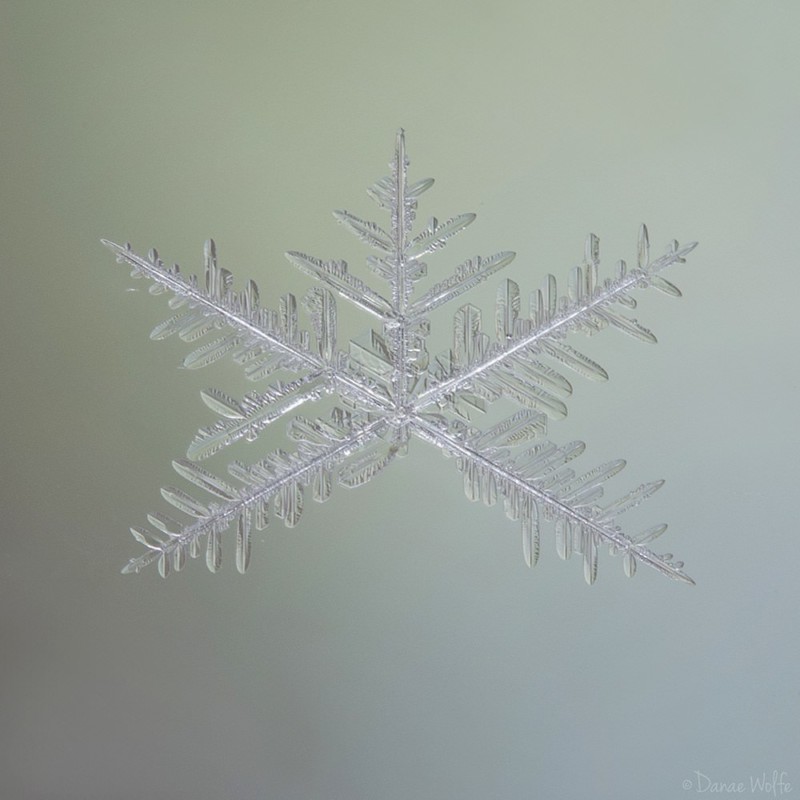
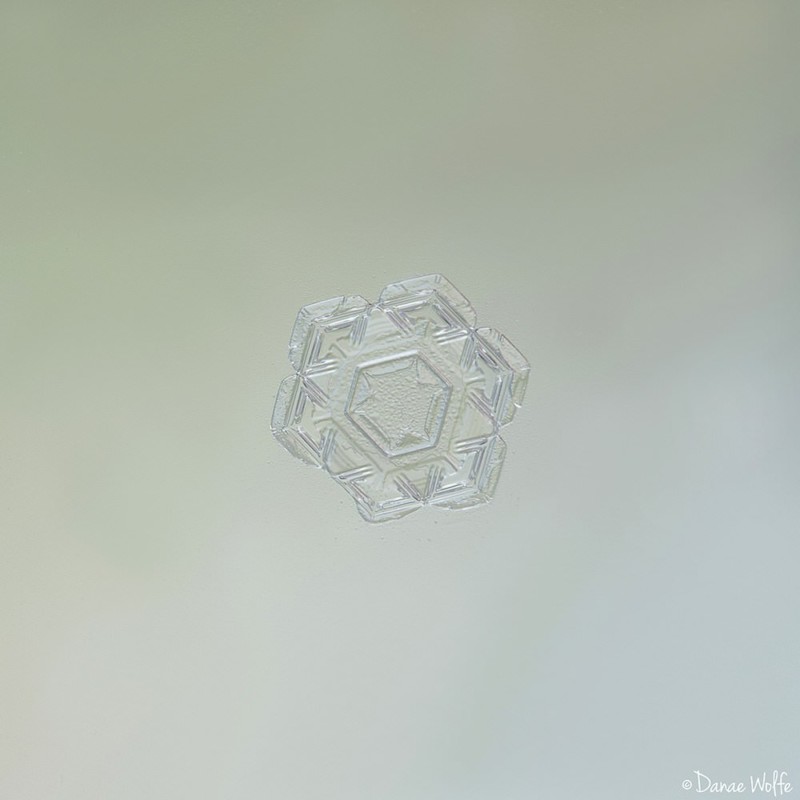
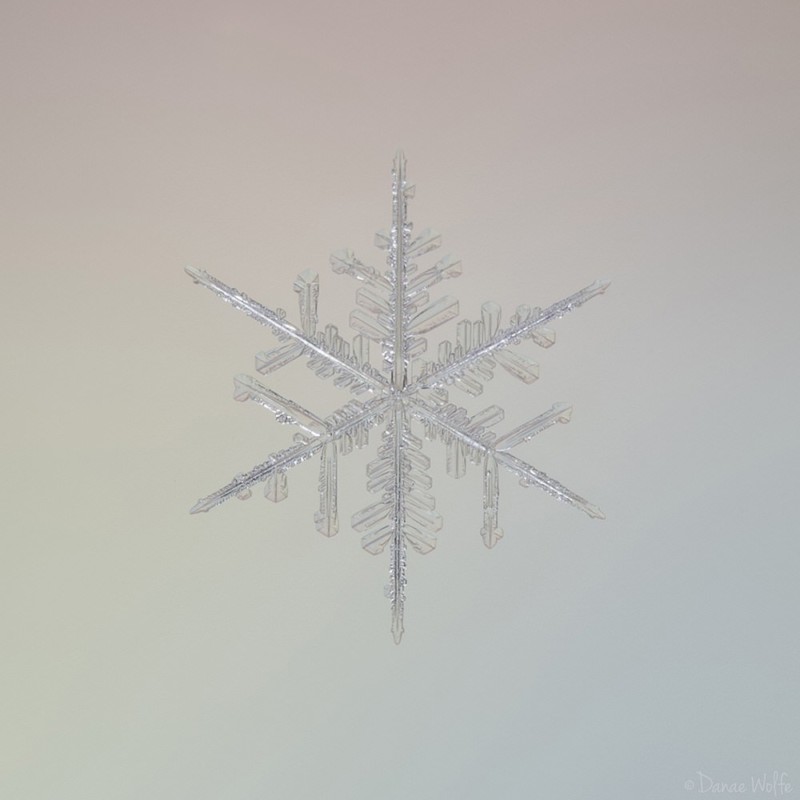
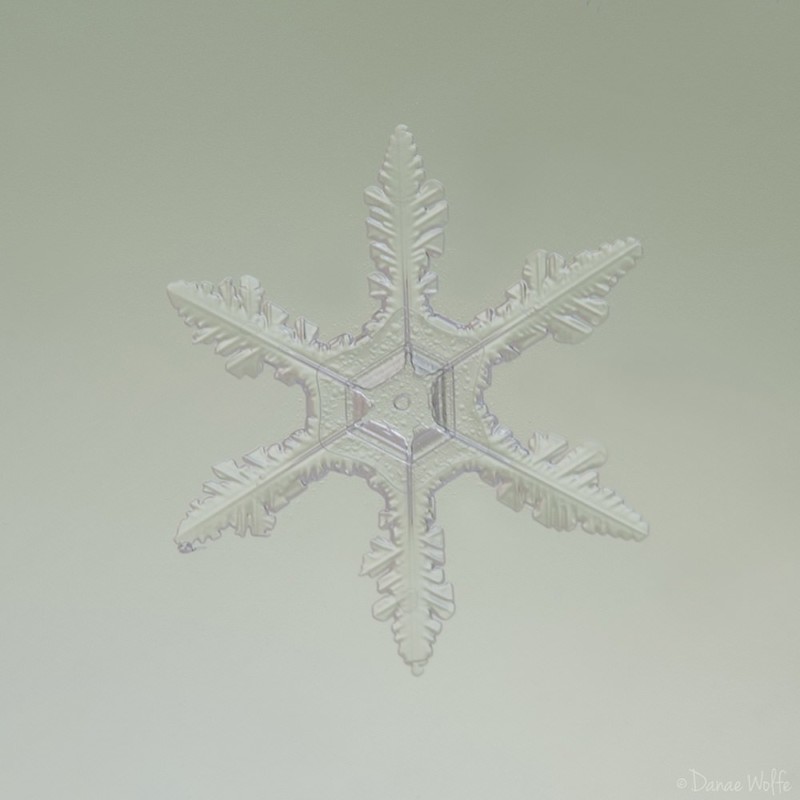
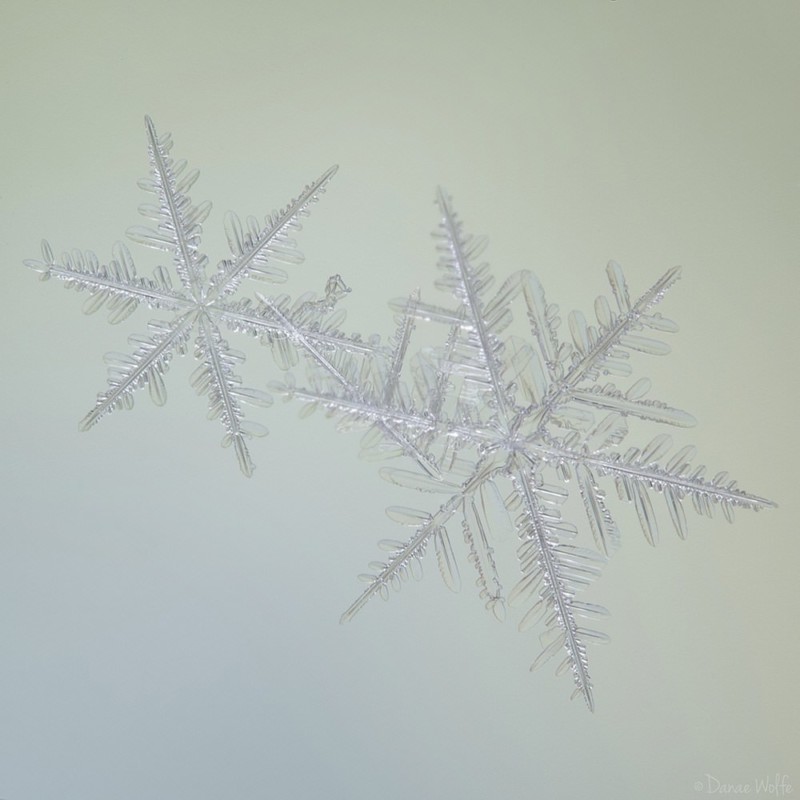
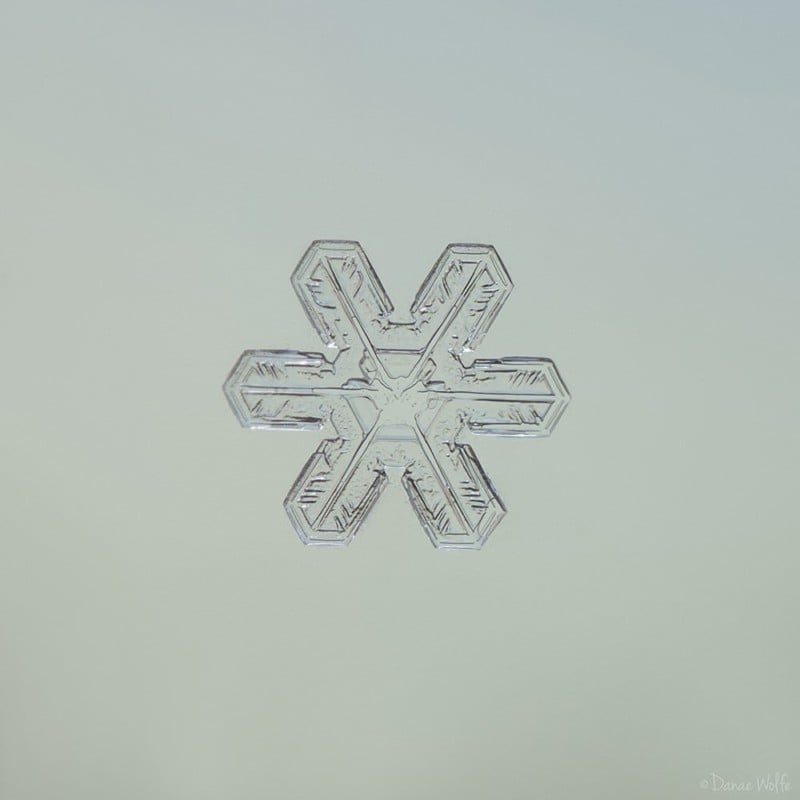
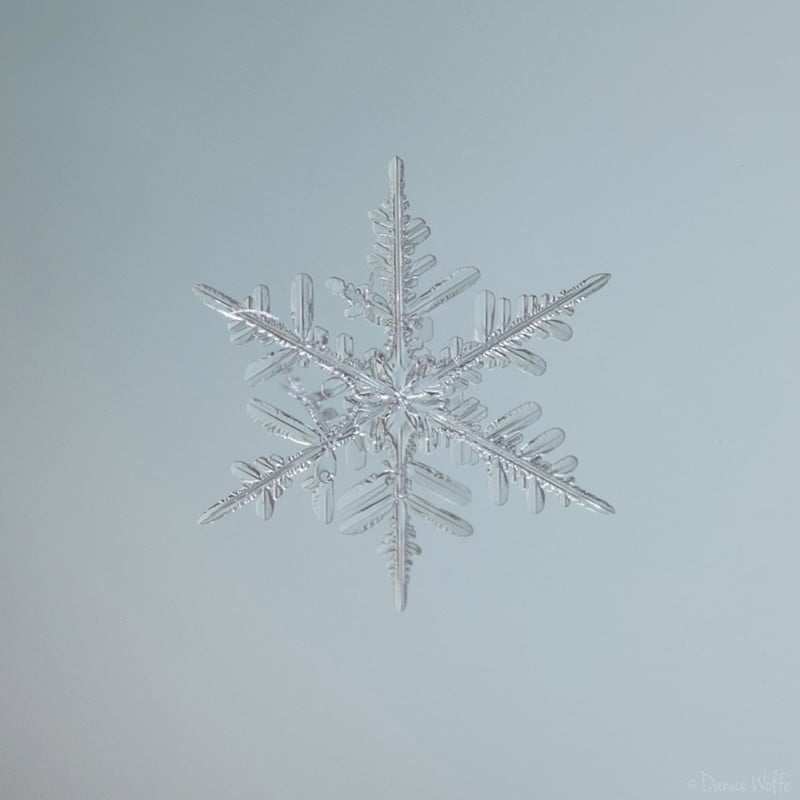
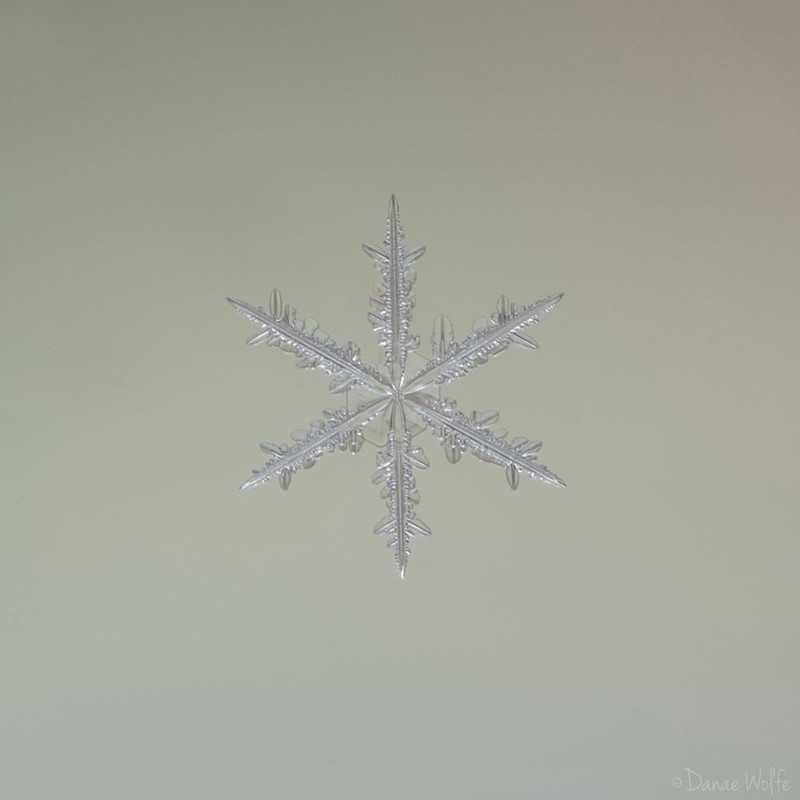
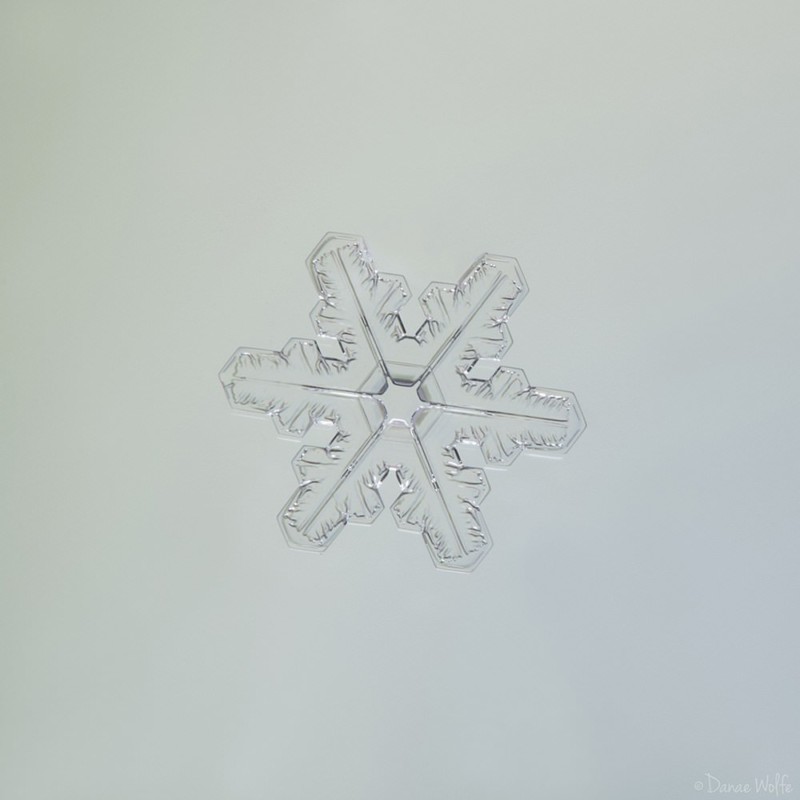
Here are the results!

Along the way, I’ve learned some helpful hints:
1. It’s important to set your glass plate outside 10-15 minutes before you intend to shoot to allow the glass to cool enough so the snowflakes don’t immediately melt when hitting the plate
2. Depending on the rate of snowfall, your glass plate will need to be cleaned often. I started cleaning my glass by unceremoniously wiping it on my pants. This technique worked quite well to clean the plate, but it warmed the glass enough to immediately melt all the snowflakes that landed on it for about a minute. You’ll need to let the glass cool down again, and by that time, you may need to clean it again resulting in a never-ending cycle of cleaning melted snow off your plate. I found using a clean paper towel worked better since it didn’t warm the glass as much, but the issue with this technique is that, because it doesn’t warm the glass, it smears snow across the glass plate, resulting in frozen smears all over the glass. Vigorous rubbing (but not too vigorous, because come on, it’s still glass) seemed to do the trick to remove all snow while keeping the glass cool enough to continue shooting quickly.
3. Many of your shots will end up with “snowflake debris” around your primary subject. You can easily remove these pieces of debris through the lasso and content-aware fill tools in Photoshop. I used the clone tool to remove additional dust spots, imperfections in the glass, and debris left from the paper towel.
4. I suggest playing around with different colors and textures of paper you use for your snowflake studio backdrop (or other materials you’d like to try). I have developed a style of bright and pastel backgrounds in my shots (even for insects and spiders, when possible), so I’ve chosen to retain that style, despite others’ suggestions to use a black background. Get creative and don’t be afraid to try something new!
5. Depending on outside temperatures, I recommend investing in a warm pair of gloves that allow enough mobility to operate your camera. I’ve used hand warmers in my gloves and they are awkward and don’t keep my fingers super warm. I’m still looking for the perfect solution.
6. Like my insect and spider photography, I shoot snowflakes handheld (I hate using a tripod). I hold my camera in my right hand and my “snowflake studio” in my left hand. I balance the weight of my camera on my left wrist while shooting. This provides the stability I need for sharp shots. Yes, it seems awkward, but it works!
7. With the constant cleaning, my glass plate eventually fell off the plastic container to which it was taped (luckily, it didn’t break). I continued shooting by placing the container with colored construction paper on my porch and holding the glass plate at varying heights over the container. I liked this better than holding the entire container with the glass plate attached. It was easier to maneuver the setup and easier to clean. Again, try different techniques until you find something that works and feels comfortable.
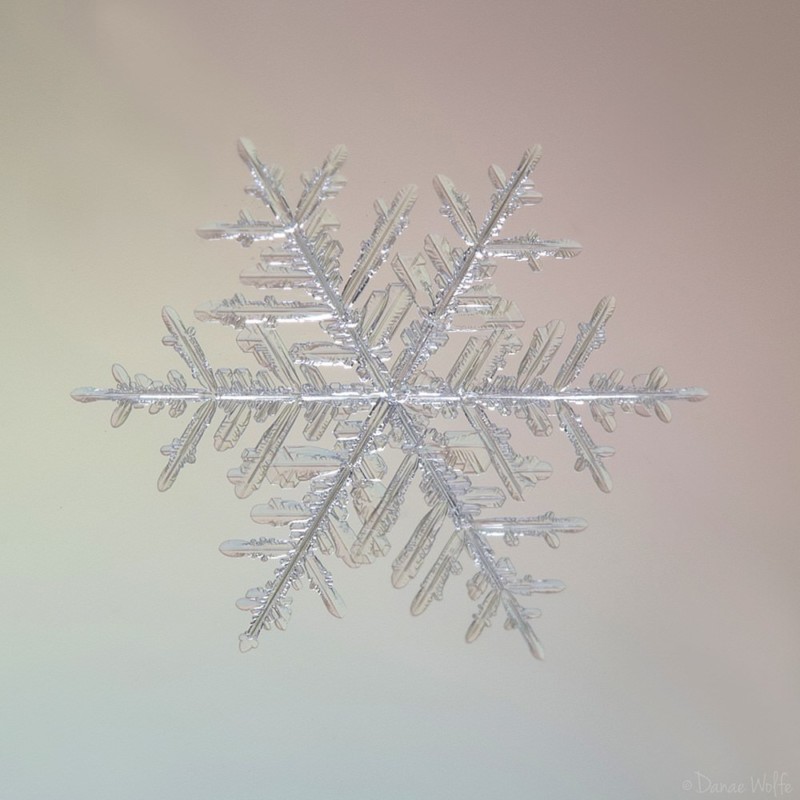
You’ll notice the vastly different shapes and sizes of snowflakes. I’m not a meteorologist so I can’t speak to the science of snowflake formation, but I’ve noticed some distinct differences in snowflake shapes and sizes depending on the outside temperature. In warmer temperatures (25-30°F), the snowflakes are more geometrical with refined edges.
In cooler temperatures (<10°F), the snowflakes were larger and more sprawling in design. 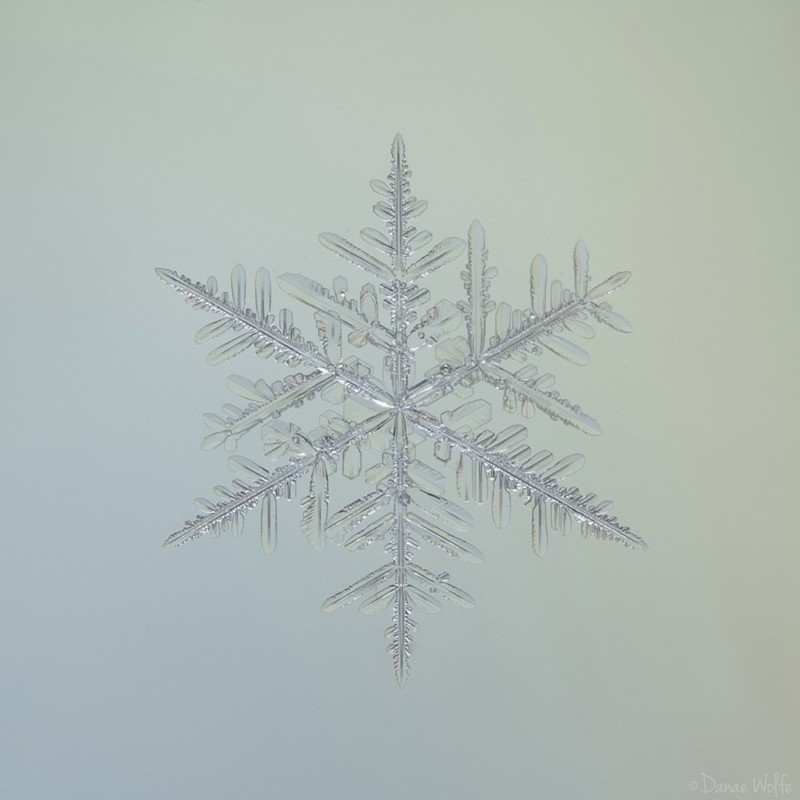
It’s fun to experiment in different temperatures to see how snowflake shapes and sizes differ. If you’d like some additional and far more detailed information about snowflake formation, I recommend checking out this Scientific American article.

While I’m still playing and perfecting my technique, I’m SO excited to have found macro subjects to keep my passion for photography alive all year. I’ve fallen in love with snowflake photography so much that I may just move to a snowy-all-year kind of place… I jest. Now, I’m craving snowfall and I never thought I’d be sad to say goodbye to winter. But alas, one day the insects and spiders will return and I’ll be back to chasing bugs. But for now, I’ll remain happy (elated, even) to chase snowflakes.
About the author: Danae Wolfe is a macro nature photographer residing in NE Ohio. Her primary artistic interests include shooting candid insect & botanical portraits. You can find more of her work on her website, blog, and Facebook page. This post was also published here.