How to Make a Timelapse Video: A Beginner’s Guide
A video is made up from 25 single photos per second, that, when placed back-to-back, trick our mind into seeing motion. But what would happen if we only took one photo every minute, and then played them back at 25 frames per second? The result is a magnificent hyper-realistic compression of time.
We call this a timelapse, and I’ve created a video that will explain all the steps you need to know so you can make your very own.

I started off in the beautiful Louvre courtyard in Paris, focusing on the Pyramid, and hoped to capture some engaging clouds passing by. One must remember when framing a shot that video does not have the same picture ratio as a standard still image. My Nikon D500 produces a native 3×2 image format, being three parts wide, to two parts tall. Video, on the other hand, works in a widescreen ratio, which is, as the name suggests, wider than a standard image.
I changed the shooting mode on the back of the camera from live view photo to live view video mode, and by doing that, it produced black bars at the top and the bottom of the image, so I knew where the edge of my 16×9 image lay.
Although 25 frames per second is the standard in European and Commonwealth countries, you will notice that there are also 24 or 30 frames per second options, which are standard in North America… because they just have to be a little bit different. In the end, it only equates to a minute difference, but when shooting for minutes and hours, it will make a larger difference in the overall length of the film.
Lastly, I needed to think about how to physically make the timelapse video. There are two main ways, an easy way, and a not so easy way.
If you have a camera such as the Nikon D500 like me, then you will have an built-in timelapse feature in the video menu. It will work through all of the complex equations, put all the photos back to back, and spit out an MOV movie file automatically.
If your camera doesn’t have a timelapse option, it isn’t a huge problem. You just need to take a series of photos at a constant interval, then put them into an external editing software to make those still images into a video. If you are shooting this way, I would not recommend shooting in RAW. When you are taking hundreds of thousands of photographs, RAW images will unnecessarily consume a lot of card space. We don’t even need to shoot in a large JPEG image either. HD video is 1920 pixels by 1080 pixels, so most “small” JPEG images will be far greater than that, meaning there will be zero quality loss when downsampling.
Before I invest the full 20 min for the time-lapse, I want to make a quick test of 1 min. This way I can quickly see if there are any mistakes—exposure, focus, framing or anything else.
A common mistake is to leave your focus set to automatic. The result might mean the automatic focusing system will try to find the focus each time before shooting. This will create breathing problem if the lens doesn’t focus at the exact same place each time, and deliver an uneven final product. To avoid this, first, set your focus and then turn your camera’s focus off. I do this by switching mine into manual focus. Once I was satisfied with my test, I reset my time to 20 minutes and pressed start.
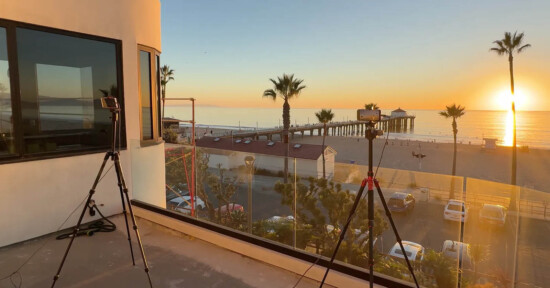
For the second timelapse in this tutorial, I chose the back of the Notre Dame Cathedral. The concept was to shoot during sunset to have the beautiful sunset colours and see the scene changed from daylight to street light.
I used two cameras for this example—one set in manual mode and the other in aperture priority mode with exposure smoothing set on. The result was two very different sequences. The Nikon D7000, which was set in manual, kept the same exposure through our the sequence and got darker and darker until it just fell off into blackness. Whereas the Nikon D500, set to Aperture Priority, continually re-compensated for the amount of light available, always giving me an even exposure.
How many photographs do you need for the perfect timelapse? This all depends on what you are shooting and how long you want your final video to be. For this shot, I knew I wanted the complete sunset, so I set the shooting time to one hour.
Fortunately, Nikon takes the guesswork out of my equation. If we enter the shooting duration and interval between shots, it automatically calculated the output time.
If you need to do it manually, it is a little more confusing. First, figure out how many seconds you will be shooting for. Then divide the shooting duration by the interval, giving you the total frames for our output video. Finally, divide the output frames by 25 (because there are 25 frames per second) and you will have the total output length in seconds.
In this case, it is as follows:
- Shooting Duration: 1h = 60min = 3,600sec
- Interval between photos: 13sec
- Output video: 276 frames = 11 sec
I went to the Eiffel Tower, the most iconic structure in France and, possibly, Europe for my last timelapse of the tutorial.
I wanted to make something that combined long exposure night photography with our time lapse, so I found a beautiful carousel that would create delightful light streaks. Because I shot photos and did not just speed up a video file, it meant that I could drag out the shutter speed to two seconds. This allowed me to capture the light trails I desired in the image. As a bonus, there was a little bit of traffic as well, which added some more motion to the shot.
In regards to settings, I shot at an ISO of 100 to minimize the noise, had a shutter speed of two seconds so I could have enough time to streak the carousel as it spun, and let my camera suggest an f/8 aperture, which looked good to me. I shot in manual mode because I did not want any of the lights to pulsate. I also switched my White Balance onto fluorescent to counteract the green glow of the street lights, this meant it would remain a consistent temperature throughout the sequence.
Finally, I was careful not to shoot at an interval quicker than the shutter speed. The shooting duration was 20min, with 5-second intervals, which was more than the 2-second shutter speed. Running the same math as before, this gave me a 10-second output video. The result, I think you’ll agree, was quite pleasant.
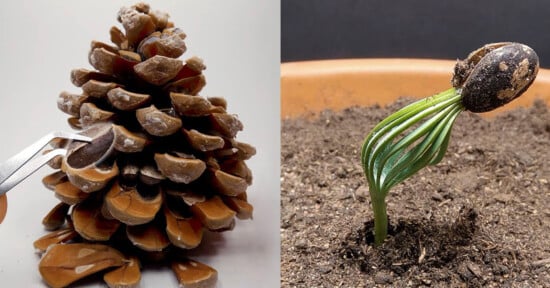
The hyper-realistic passing of time lends itself to timelapse photography. Anything with motion will look great—flowers blooming, the sun setting, or a construction project. As long as you have motion and movement, it will be a perfect subject.
Now that you have all of the knowledge to make an excellent time-lapse, go out and shoot some beautiful sequences. Let us know how they went by leaving a video in the comments below.
About the author: Alexander J.E. Bradley is the founder of Aperture Tours (formally Paris Photography Tours) and heads up the tours in Paris. A professional photographer for over a decade Alexander enjoys shooting the surreal by mixing dreamlike qualities into his conceptual images. You can view more of his work on his website.
You can find more photos and articles like this on the Aperture Tours website, or by following Aperture Tours on Facebook, Twitter, and Instagram. This post was originally published here.