Capturing the Milky Way with a Phone, Compared to the Sony a7R II
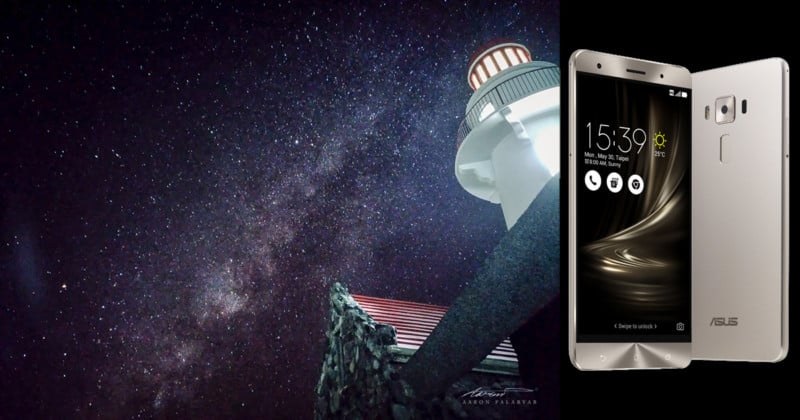
I just got back from Batanes as part of a large group of bloggers and other media people who were there to try out the photography features of the Asus Zenfone 3 line of mobile phones, courtesy of Asus Philippines. I was there mainly as a resource person on shooting the Milky Way, but I was intrigued about the possibility of pulling off Milky Way shots using a mobile phone.
One of the headline features of the Asus Zenfone 3’s camera is its built-in manual mode that allows you to go all the way to ISO 3200 and do long exposures of up to 32 seconds; for comparison, using the $4 645 Pro app on my iPhone 6, I max out at ISO 2000 and a 1/2 second exposure at most, on f2.2. Combined with its large aperture f/2.0 Largan lens, this would theoretically add up to the standard exposure settings for a wide angle Milky Way shot.
Fortunately, we had wonderful weather and good conditions the whole time in Batanes, with dark, moonless skies and the Milky Way galactic core visible as early as 6:30pm. I was loaned the Zenfone 3 Deluxe, which has a higher-end Sony IMX 318 sensor compared to the standard Zenfone 3 with the Sony IMX 298 sensor, but both share the same camera controls and features.
Initial Test Shots
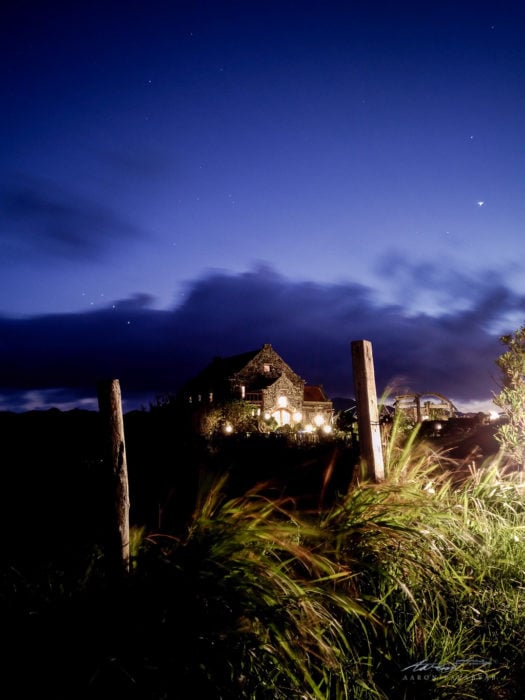
As darkness fell early, before 6:00 pm, I warmed up by taking long exposures of Fundacion Pacita, our dinner venue and the most beautiful hotel in Batanes. I was pleasantly surprised with the results.
I never really thought about getting shots like this from a mobile phone because I’m a large-sensor camera snob, being spoiled with the class-leading performance of the full-frame Sony A7RII, the Sony A7S before that, and the Canon 5D Mark II before that.

I found the result quite pleasing overall, particularly at this very low ISO, and then responding well to minor tweaks in Lightroom CC, as you’ll see in this image.
The 16mp originals of the images above were nearly noiseless and tack sharp viewed at 1:1 resolution on my 5K iMac. There’s impressive detail and sharpness, visible in the foreground grass, in the stone exterior of the building, in the background, and in the trees beside it. Here’s a 1:1 crop of that section:
Of course, a good tripod, not your typical flimsy consumer tripods, will go a long way in maintaining this sharpness when shooting your long exposures.
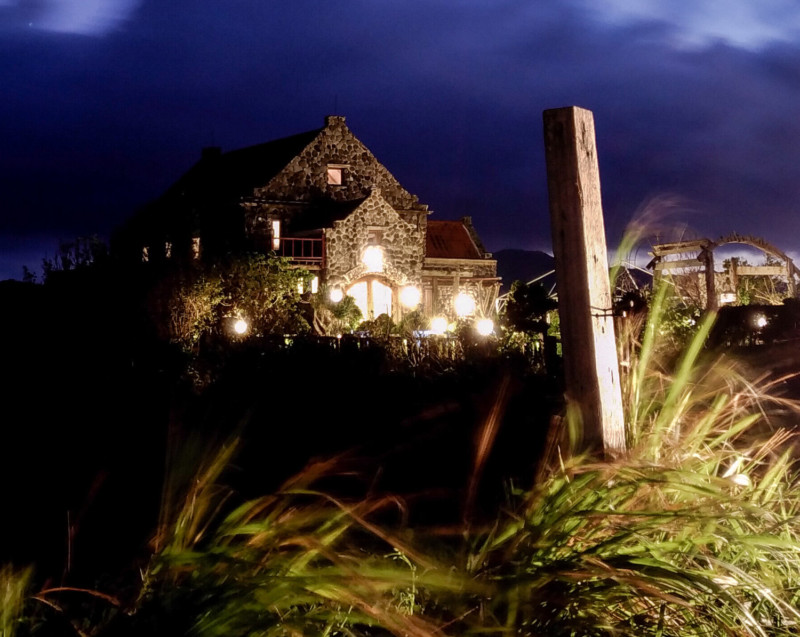
Dynamic range is so-so, which is not much of a surprise given the 1/2.6″ sensor size. You’ll see in the first image that the camera was having trouble holding on to the brightest highlights in the sky in the top right and the darkest shadows in the bottom left. In the second image, sans the highlights in the sky, only the deep shadows were lost, and the overall result was more pleasing to my eyes.
(A few hours later, I figured out how to decrease the default contrast to save more of the shadows, though I’ll have to do more in-depth tests to really see how much extra dynamic range it actually gets.)
Particularly for social media posts on Instagram and Facebook, I think the image quality is more than enough, as long as you make sure not to clip your highlights, which aren’t salvageable in Lightroom and always look unappealing. So, in short, the Zenfone 3 Deluxe passed the first test easily.
My First Milky Way Images
About an hour later, it was completely dark and the Milky Way began to be visible to the naked eye. It was time to really put the camera to the test.
To get a visible Milky Way, you need to max out the exposure settings on the phone, meaning shooting 32-second exposures at ISO 3200. This was the result of my first attempt, after processing in Adobe Lightroom CC:
Here’s the unedited photo straight from the phone for reference:
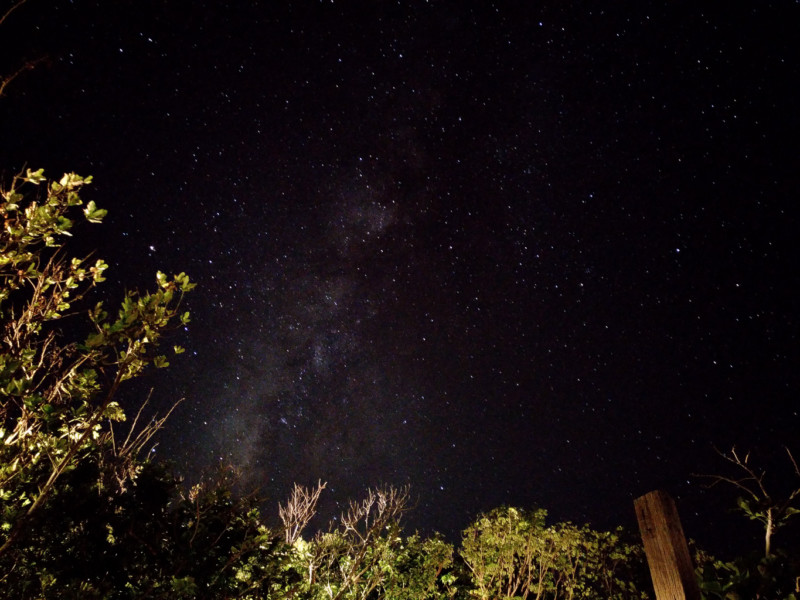
And there it was: my first Milky Way photo shot on a mobile phone! For me, this was a bit of a turning point, because a lot of people who ask me for photography advice on social media are discouraged about not being able to afford the gear to shoot the Milky Way. With my own setup costing well over $3,000, I couldn’t quite dispute that, but now that I’ve proven to myself that a smartphone can do it, that conversation changes.
Kudos to Asus for giving the option to unleash the full potential of the phone’s camera with one tap to switch from full auto to manual mode. I don’t know what engineering or programming had to go into enabling the camera to get to ISO 3200 and a 32s shutter speed when most other phone cameras do not, but what I do know is that it works and is fun to use. You’ll see how easy it is to shoot these images in the video at the start of this post. It also has a host of other fun shooting modes, which I’ll go over in a future post.
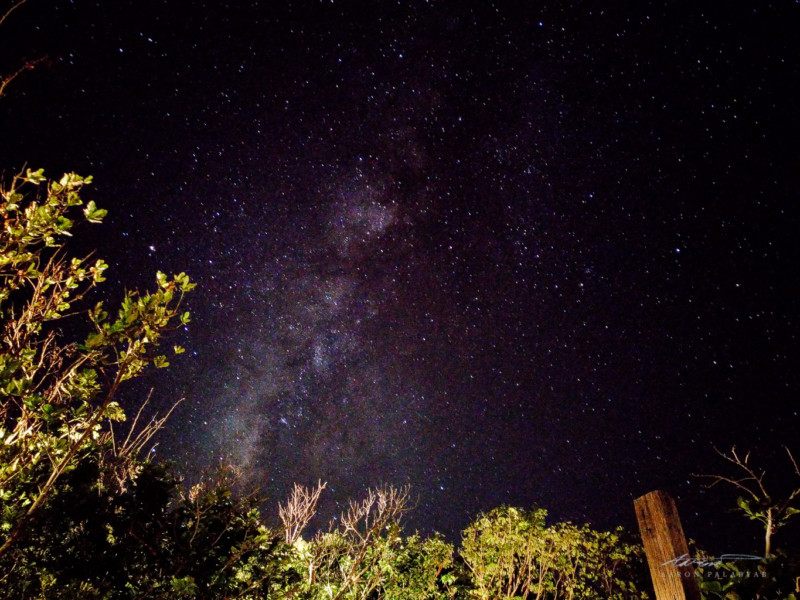
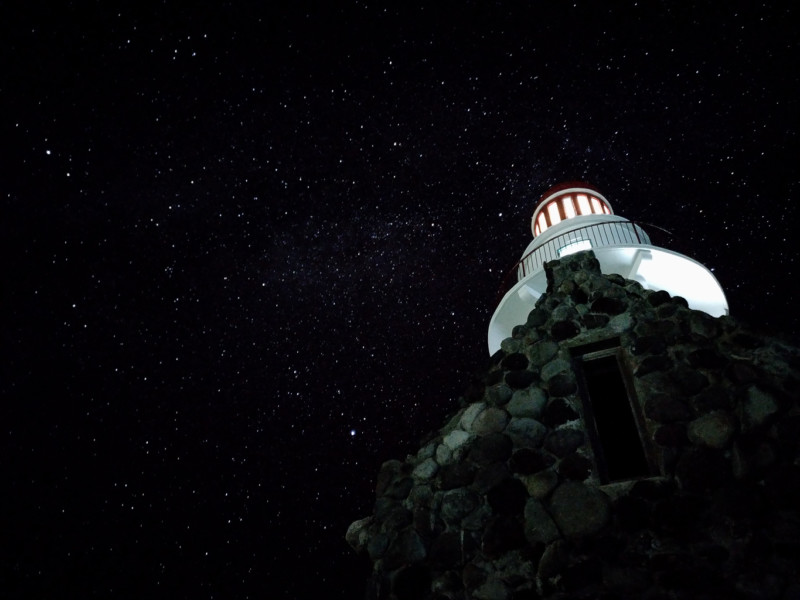
Armed with my proof of concept, we headed back up to Naidi Lighthouse for a group Milky Way session, which was a lot of fun for everyone, especially for me, seeing how everyone applied the concepts I had taught in a short workshop the night before. Here are my own images:
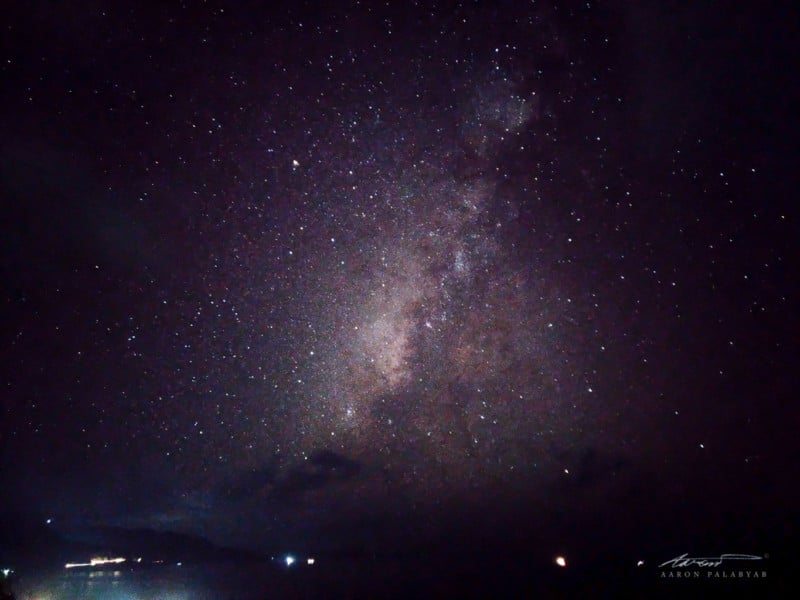
Here’s the unedited image:
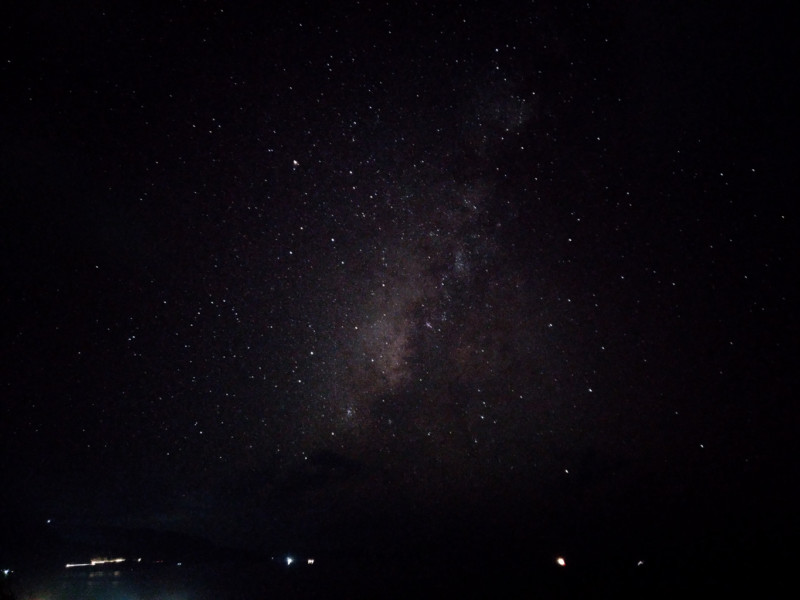
The above image was shot in about 85% ideal conditions compared to, say, 100% that I experienced on a recent trip to Mt. Pulag. So it’s a fair representation of what the camera can do under very dark, mostly clear skies.
Is the image perfectly noise-free and detailed? Of course not! But it’s plenty clean enough for posting on Instagram and Facebook, where the resolution doesn’t go large enough to emphasize the noise.
More images:
And unedited:
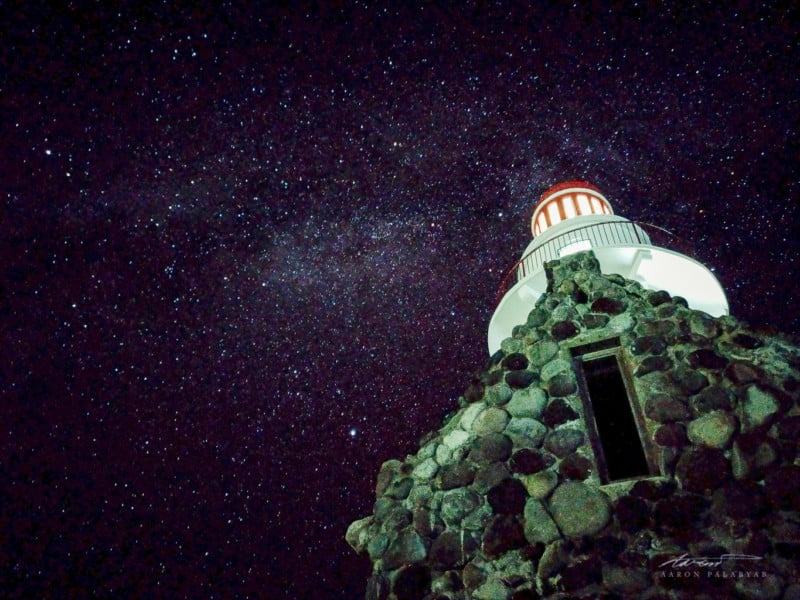
And here’s my favorite shot from this session:

Unedited:
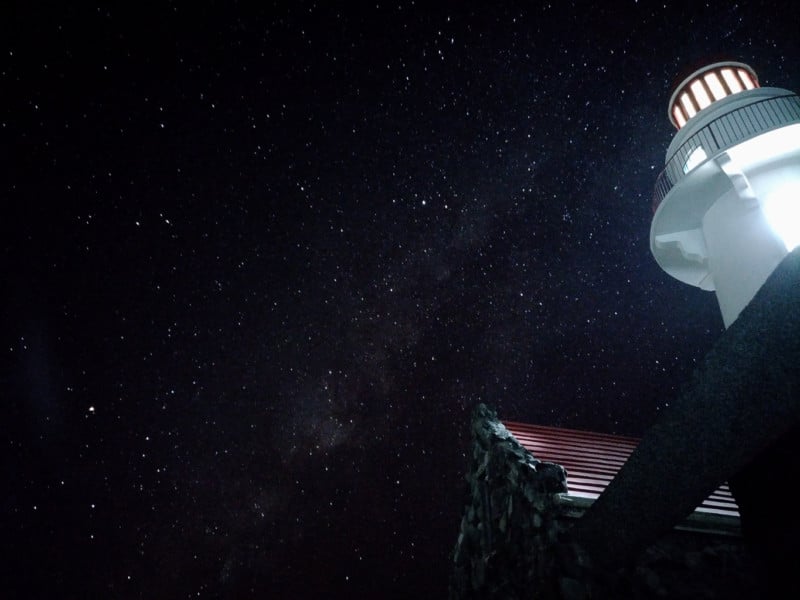
As you can see, even when not shooting the brightest part of the Milky Way (which during this season goes below the horizon very early, resulting in a dark exposure) the image responds very well to easy-to-perform tweaks in Lightroom.
Comparison to Large Sensor Cameras
I remember the first camera I ever used that could even go up to ISO 3200 was the industry-disrupting full frame Canon 5D Mk II back in 2009-2010, a camera that changed low-light shooting forever. Even though it’s half a decade later, it’s still surprising to me that a mobile phone can now offer the same option. (Now I kindasorta maybe get how Vincent Laforet felt when the 5DII came out and he demo’d its low light capabilities, hehe.)
Shockingly, I’d say this phone, at least for social media uploads, can reasonably match up with and even be sharper than Milky Way images that were shot on DSLRs using cheap, slow kit lenses (typically f/3.5 and above). This is especially true when using older or lower-end DSLRs that can’t go past ISO 1600. These require you to use a longer shutter speed, which causes the stars to trail instead of being sharp pinpoints.
The first reason why that is, is that it’s actually easier to nail proper night sky focus with this phone than with a typical DSLR. You can eyeball the focus on the phone screen, the same way I used to do with a fast lens on the low-light monster Sony A7S, but could not do on the Canon 5D Mk II.
The second reason is the fast f/2.0 fixed wide-angle lens. An equivalent lens on a DSLR would typically entail significant additional expense. With some easy exposure and noise reduction adjustments in Lightroom CC or Photoshop, you can get a very good image for posting online that people probably won’t know was shot on a mobile phone unless you say so.
Where the phone seriously underperforms vs DSLRs and other advanced cameras is the inability to shoot in RAW. This is a crucial part of my standard workflow, essential for perfect white balance and squeezing every ounce of exposure, detail, and dynamic range out of each image. In addition, it simply can’t match the lower noise, vivid color reproduction, and wide, natural-looking dynamic range you get out of those cameras, though you absolutely wouldn’t expect it to with such a dramatically smaller sensor. Finally, I wouldn’t expect to get outstanding Milky Way prints larger than 8″x10″ due to these limitations.
But as I stated above, for posting on Instagram it’s plenty good enough, and your creativity in composition combined with proficiency in Lightroom and Photoshop can go a long way to making great-looking images. You can even attempt exposure stacking to get as noise free an image as possible.
All that said, just for fun and to provide a reference, here’s the same image shot on the Asus Zenfone 3 Deluxe, and on the class-leading combination of the Sony A7RII and night sky champ Samyang 24mm f/1.4 prime lens:
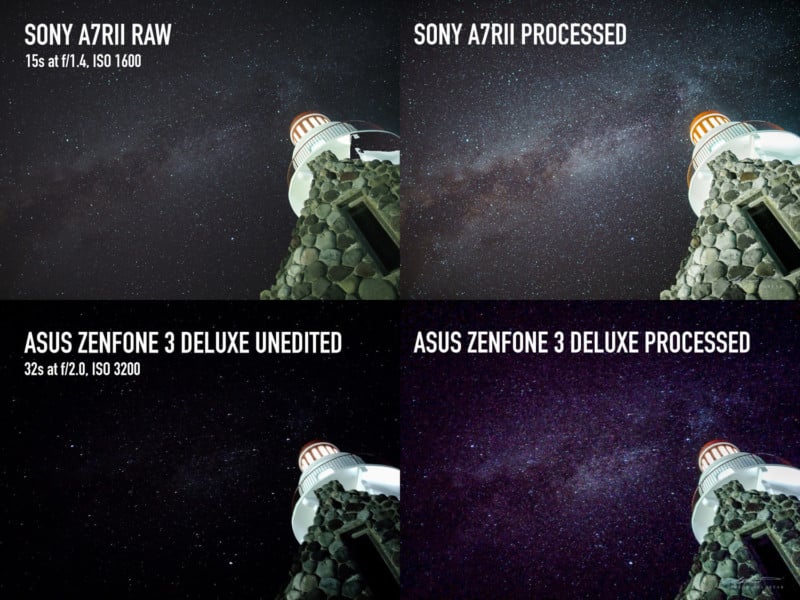
I have to admit, at social media resolutions, while the PhP 160,000 setup of the A7RII with the Samyang is clearly superior in every way, the Zenphone 3 does a truly admirable job for 1/3 to 1/10th the price (depending on which phone you get), while being a fraction of the size and weight… plus, you know, being a smartphone at the same time.
Additional Tips for Shooting the Milky Way with a Smartphone
Since there’s only one set of exposure settings for any Milky Way shot using this phone, I’d say that the two crucial difference makers for getting the sharpest possible shots are:
- Getting a solid, high quality tripod and cellphone holder head combo to make sure your phone doesn’t slip or vibrate during the long exposure.
- Nailing your focus perfectly.
Aside from that, I’d advise going into the Optimization menu in the phone, setting it to Manual, and dropping the contrast all the way down (see the video above), because the dynamic range is really where the phone shows its limitations. However, as I usually pump the contrast all the way up for my Milky Way images on the A7RII, this isn’t that major of an issue for these shots as they would be for high contrast daytime shots.
Conclusion
All things considered, the best thing I can say about shooting the Milky Way with the Asus Zenfone 3 is that it was easy, a lot of fun, and it works! As a pro photographer, I’m sometimes sick of lugging all my gear around, and it’s really cool that now I can take advantage of good night skies armed with just my phone and a small tripod or stable surface.
For beginners and hobbyists, shooting the Milky Way with their phone should be a thrill. Being able to do this on your phone is a game changer.
I think the technological evolution represented by the camera hardware and software combination on the Zenphone 3 points to an exciting and imminent future where mobile phones cameras continue to maximize their technical potential, and more and more competently double as advanced small sensor cameras. It’s good to see companies like Asus leading the way as the company that makes my current smartphone seems to be slowly stagnating.
About the Author: Aaron Palabyab is a fine art landscape and travel photographer, and a filmmaker with a decade of experience, working both in the Philippines and abroad. You can find more of his work on his website, Facebook, Instagram, and 500px. This article was also published here.