6 Clever Ways to Get Better Lighting from Your Camera’s Pop-Up Flash
Most entry- and enthusiast-level cameras come with a pop-up flash, which though not especially powerful, can come in very handy. In this tutorial we’ll show you six built-in flash techniques than can help you get the better results from this often overlooked and somewhat maligned feature.
01. Fill-in
One of the most important lessons that you can learn about flash is that it’s not just for use when it’s dark, it can really boost your daylight images as well. A little fill-in light can bring images to life, especially portraits, by adding a little sparkle and lifting dark shadows.
The first step is to pop-up your camera’s flash and set it to Fill-in, Forced or Flash-on, this tells it to fire even if the exposure system thinks that there’s enough light without it.
In many cases your camera will now ensure that the shutter speed is within the flash and camera’s sync range, often slower than 1/125sec, but sometimes 1/250 or 1/60sec — your manual will say. If the camera doesn’t automatically set a suitable shutter speed you’ll need to adjust it manually and then you’re good to go.
Fill-in light is especially useful with back-lit subjects as it enables you to record some detail in the bright surroundings as well as the subject that’s in shadow. And on bright sunny days it allows you to place your subject in shade so that their eyes aren’t screwed up against the sun.
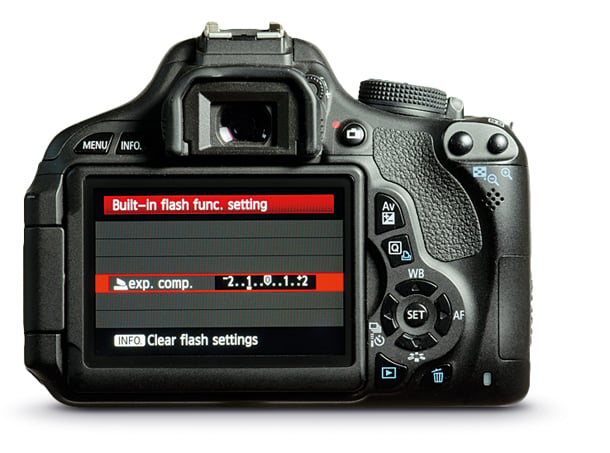
02. Use Flash Exposure Compensation
Flash exposure can be varied just like the overall exposure; however, instead of using the exposure compensation control you need to use the Flash Exposure (FE) compensation control. This will increase or decrease the flash output depending upon what you dial in.
It’s worth noting that with modern TTL (through the lens) metering systems the exposure is adjusted above and below what the camera considers to be correct.
Flash exposure compensation is a very useful feature that helps to balance flash power with the ambient light, which means it’s great when you’re using fill-in flash mode.
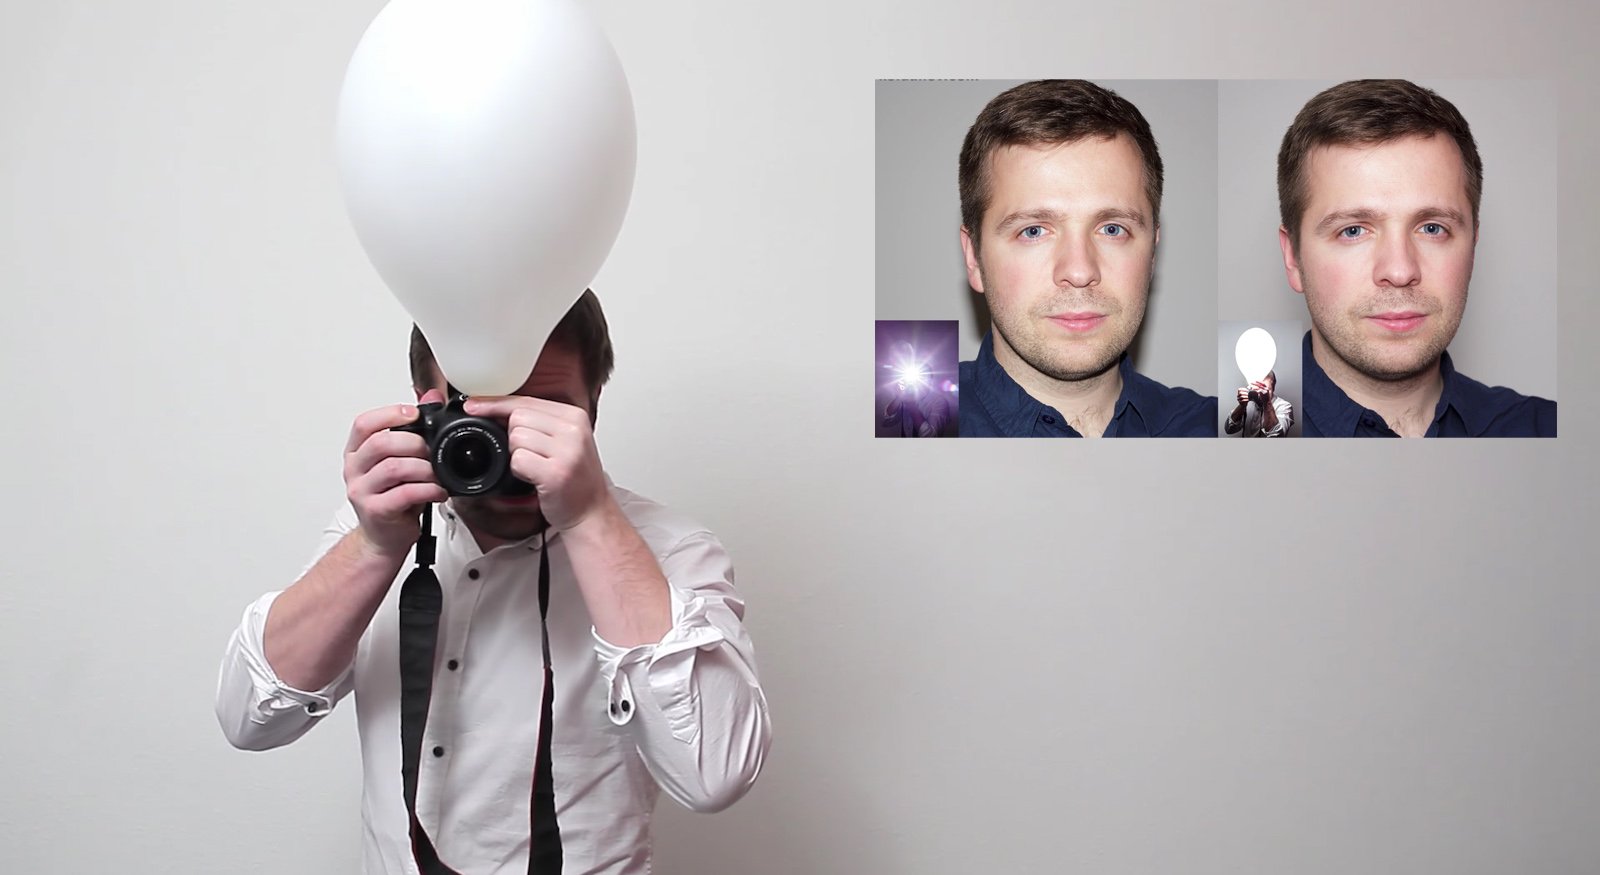
03. Diffuse
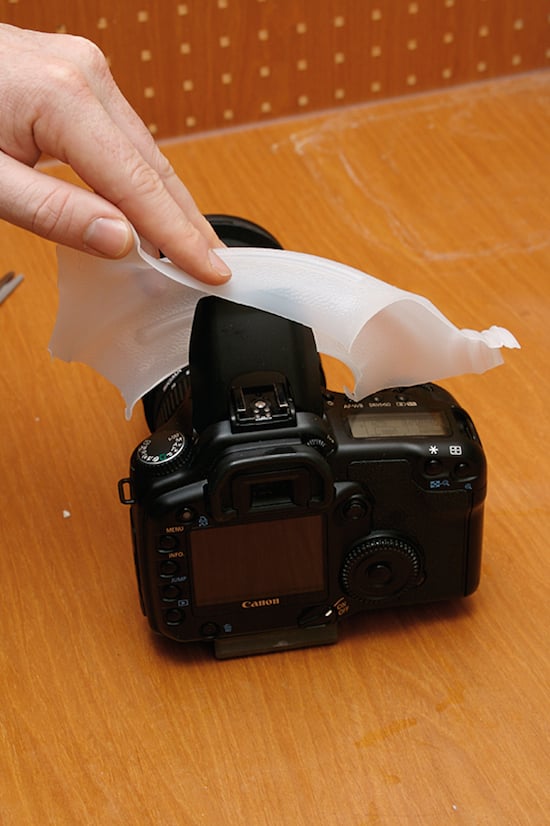
Because the on-camera flash is a relatively small source of light it can be very harsh, potentially creating unpleasant highlights and deep shadows. This is easily rectified by diffusing the light to make it softer.
There are lots of on-camera flash diffusers available on the market, or you can make your own with a strip of translucent white plastic, from a milk container, for example — although this can have an impact on white balance.
Even a piece of greaseproof paper or tissue can be used in an emergency.
Another possible option is to bounce the light from the flash off the ceiling. You’ll need a small rectangle of white card or something similar that can be held in front of the flash and angled up towards the ceiling.
The light will hit the card and bounce up to the ceiling from where it bounces down onto the subject. This gives your subject nice soft light from above, creating a natural look. It’s essential that the ceiling is white otherwise the light will be colored and look unnatural when it hits your subject. As on-camera flashes aren’t especially powerful it won’t work with very high ceilings.
Diffusing and bouncing the flash effectively reduces its power, so your subject may need to be closer or the camera’s sensitivity set a little higher.

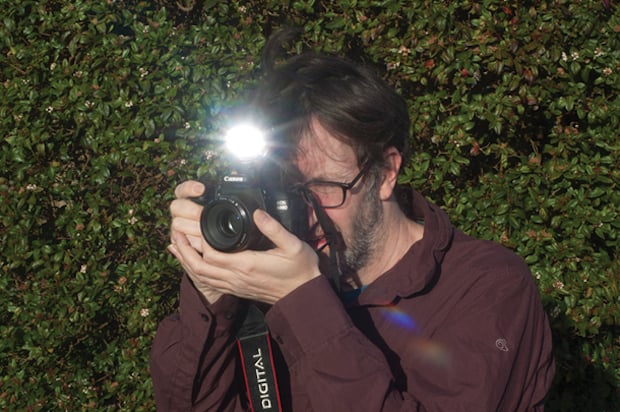
04. Use Red-Eye Reduction
One of the problems with using on-camera flash is that the light is very close to the lens and this means that there’s a high probability of light bouncing off the back of the eye and into the camera, creating the well-known red-eye effect.
Fortunately, most cameras have a red-eye reduction mode to help tackle this problem. This works by firing a pre-flash before the exposure so that the subject’s pupils close down to reduce the amount of light that can enter them.
In many cases this will significantly reduce the problem; however, if you have an image that still exhibits the phenomenon it can be dealt with quickly and easily in most image editing software packages.
Diffusing or bouncing the flash will also help reduce the likelihood of red-eye.
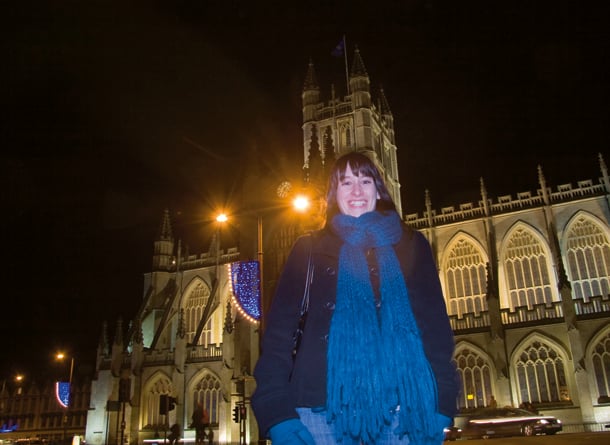
05. Slow-Sync
Although a burst of light from your camera’s pop-up flash will illuminate your near-by main subject, its power falls off quickly and the background will not receive a significant amount of light. This means that you can wind up with a brightly lit subject in front of a dark background.
But if you extend the exposure time the brightness of the background will increase without over-brightening the subject — although you may find that you need to adjust the flash exposure compensation a little.
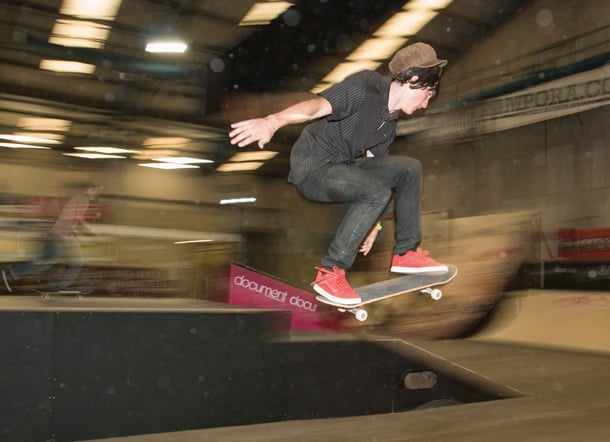
This technique of using a slower shutter speed with flash is known as slow-sync. It’s useful for injecting life into the subject and separating it from the background. Although the subject will be frozen by the flash, the long exposure for the background may mean that the camera needs to be on a tripod to prevent it from being blurred.
If, however, you choose to pan with the subject, it can be rendered sharp by the flash while the background is blurred.
06. Second Curtain Flash
In its default setup, a flash will fire at the beginning of the exposure.
On many occasions this is fine, but if you are shooting a moving subject and using a shutter speed that doesn’t freeze it, there will be a ghostly image of the subject visible where it moved after the flash fired. It can look as if the subject is moving backwards.
If, on the other hand, the flash is set to second-curtain mode, it will fire at the end of the exposure and the blurred movement will be seen behind the subject, giving a greater sense of speed and a more natural looking result.
Second-curtain flash is often combined with slow-sync to accentuate movement and create dynamic images.
About the author: Jeff Meyer is the editor of PhotoVenture, a photography blog for everything post-capture — improving photos, image management, sharing and more. This article originally appeared here.