How to Shoot a ‘Day vs Night’ Portrait In-Camera
Special effects are a fantastic and fun way to tell compelling stories through images. While they may seem complicated, the truth is, many special effects are easily done in-camera using tools you likely already have. In this video, I’ll be walking through how to create one of our signature portraits, the “Day vs. Night” effect.
- Wide Angle Lens
- Tripod
- 3-4 Stop ND Filter
- Strobe Light
- Grid + CTO
Step #1: Composition

For my composition, I placed my couple against a plain white wall. I framed them in the center for the symmetry. To capture these images, I’m using the Canon EOS R5 with the RF 28-70mm f/2 mounted on the Peak Design Travel Tripod.
Step #2: Ambient Light
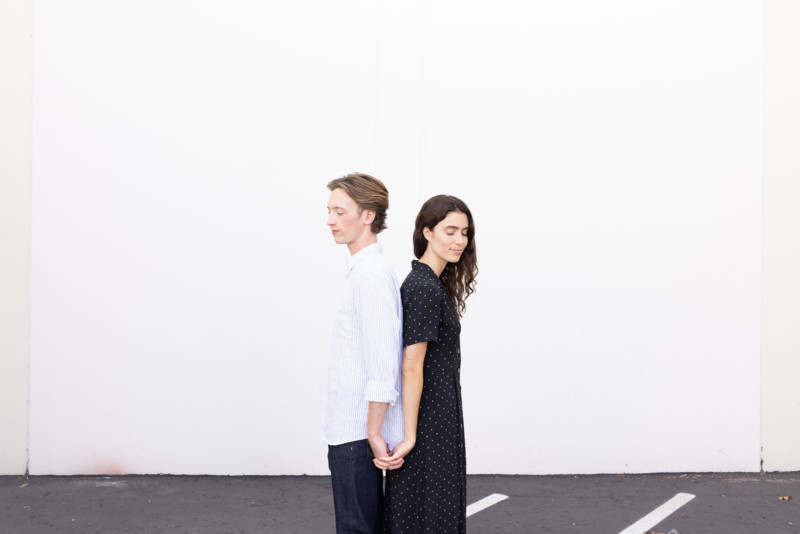
Our goal is to create an image with half the image bright and the other half dark. To start, I exposed the scene for the bright side.
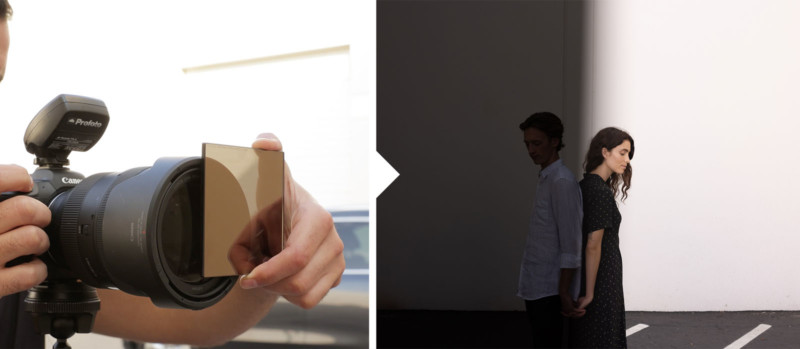
Then, used the Tiffen Water White 1.2 ND filter by holding it in front of the lens to darken the left half of the image.
Step #3: Modify Light
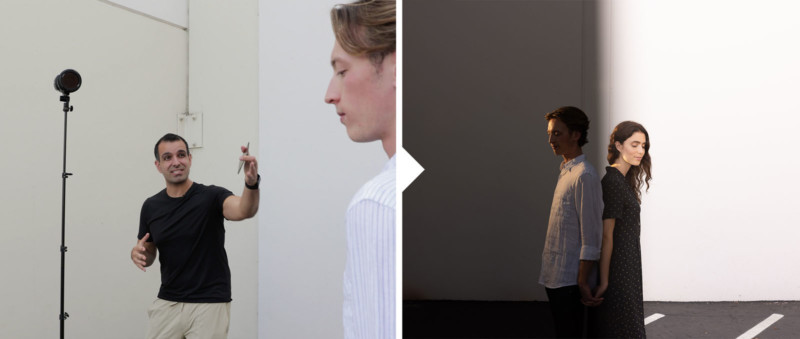
Now, let’s add light to the dark side of the image using flash. I have with me a Profoto B10 Plus with the CTO and Grid kit up on a stand just out of frame. I use the grid to keep the light focused on Will’s face and prevent spill.
Step #4: Photograph
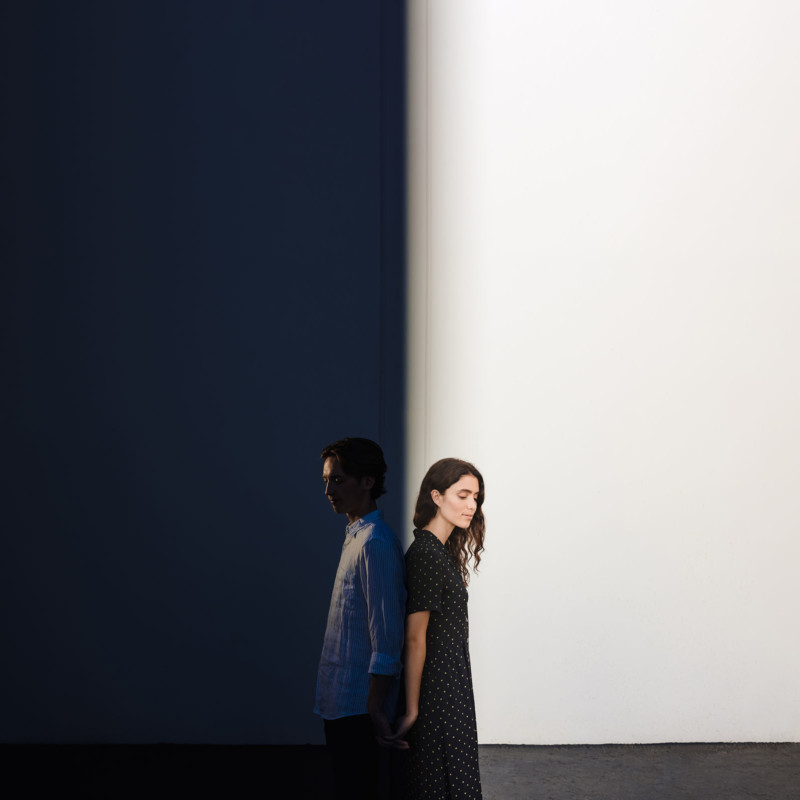
Combining all of the steps so far, we end up with this final image. Adjust the ND filter as necessary to get the division between perfectly down the middle.
Conclusion
I hope you enjoyed this article/video. Next time you’re out on a couple’s portrait shoot, give this technique a try. As you can see, you can create great special effects using simple tools in-camera.
P.S. For an inside look on how we do all of our signature portraits over at SLR Lounge, head over to SLR Lounge Premium for our SFX Photography Course. In this course, we walk through how to create our most popular signature portraits such as the Ring of Fire. In addition, check out VF Presets for intuitive lighting based presets such as our Crush Pack that we used for our final image. Thanks for watching and we’ll see you next time!
About the author: Pye Jirsa is a wedding photographer based in Southern California and the co-founder of SLR Lounge. The opinions expressed in this article are solely those of the author. You can find more of Jirsa’s work on Instagram.