Get Educated: Recommended Projects and Tutorials

As with most fields that are technology driven, in photography, if you don’t keep moving you’ll quickly find yourself dead in the water. This is why seasoned pros and amateur hobbyists alike should always be learning and expanding their abilities. It’s really the only way to stay competitive. And I don’t even mean that in a financial sense, I mean that just in terms of your skill set.
Back before the Internet, this could prove especially problematic since you were required to learn things the old fashioned way… you know… by trying them out yourself and seeing if they produced anything worthwhile. While this provided a bonus element of experimentation and improvisation it was also very time-consuming, and for better or worse it isn’t really the way things work anymore. Now we have the whole Internet to test out methods and tell us what does and doesn’t work.
If you’re smart you’re probably already knee-deep in tutorials on a regular basis, learning new things left and right. However, if you haven’t yet dug in, allow me to offer some of my favorite tutorials for a few fun projects that will help refine and sharpen your most essential photography skills.
So what projects should you be trying? Well, regardless of your skill level, if you’ve never given time-lapses a go I’d say they’re by far one of the best places to start. Simply put, they’re great for pretty much everybody. As long as you’re not trying to shoot a months-long nature sequence, they’re fairly fast, high-concept projects that offer nearly immediate satisfaction.
If you’re fresh to the world of photography and the concept of time-lapses or just need a quick refresher on the basics, I highly recommend this tutorial from Vimeo’s Video School (a great resource for tutorials in general) by Philip Bloom. It’s short, basic, and plays loose with the tone, allowing itself to be a little lighthearted, which prevents it from being a bore to watch… always a plus.
If you have a few notches in your time lapse-belt or simply want to up your game, Tom Baurain offers a fantastic in-depth rundown on his workflow for RAW time-lapses. For a long time I had avoided shooting RAW time-lapses for multiple reasons — mainly the file size and sheer amount of time editing could potentially take — but this video was easy to follow and walked me through every step of my first RAW time-lapse experience.
After following Tom’s instructions I successfully shot my first RAW time-lapse, which was later deemed good enough to be used as packaging on national television. So like I said, he does a pretty good job explaining things.
On top of that, learning how to do a RAW time-lapse will increase your future time-lapse options exponentially. For instance, the company that used my time-lapse was able to later manipulate it into a trippy abstract thing that didn’t look anything like the original. The possibilities quickly become endless, all from one short online lesson.
And if traditional time-lapses never interested you or you’ve just become bored with them. Give a tilt-shift time-lapse a try! Thanks to yet another great tutorial from Philip Bloom, shooting a tilt-shift time-lapse doesn’t even require a tilt-shift lens anymore! This is another tutorial I can speak on from experience as I’ve produced several competent time-lapses from watching this.
But lets move away from time-lapses and on to other, more adventurous projects. Another genre that I’ve become increasingly fond of thanks to tutorials is light painting. I’ll forgo the basic light painting tutorials since they’re easy to find (basically leave your shutter open and start moving a light around in the dark) and go straight to something a bit more challenging. Perhaps you’ve seen the video below?
If you have, you may be wondering how they achieved that effect, especially since the creators played coy when asked how they did it in the comments. Lucky for you, we live in the Internet age and as a result it wasn’t very long before somebody figured it out and showed the rest of the world just how to get in on the fun.
While this video involves way more computer work than camera work, it’s a fantastic example of the infinite possibilities your camera has once you pair it with today’s technology. And if you’ve ever wanted to learn how to do light painting in a video (as opposed to stills that is) then this tutorial is a great place to start.
Fair warning: it does assume you’re somewhat familiar with After Effects and Photoshop. So if you’re not up to snuff on the basics like masks and key frames then you may need to brush up before tackling the project they outline in the video. But if you’re fairly familiar with those concepts then the video is easy to follow and has been the best example in my searches of how to do animated light painting.
Now, maybe all of the above videos are a bit too involved for you. You want to expand your photography but you’re not trying to learn some gimmick, you just want to try something new. If this is the case then I highly recommend you look for unique shooting opportunities in your everyday life and learn the best ways to adapt to them.
For instance, family vacations and even work trips provide fantastic opportunities to branch out and try new things (besides, what feels better than snapping a couple of shots while on the clock, right?).
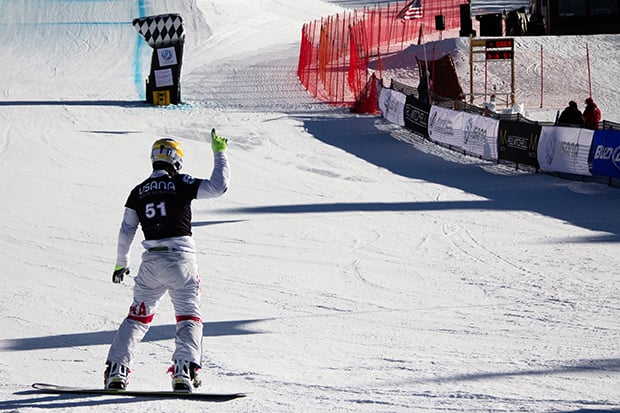
Personally, I live in a rather large city in the south and thus don’t get to shoot in snowy conditions very often. As a result I’m always excited at the opportunity, but when I was first confronted by it on a trip out west, I had no idea what I was doing.
Fortunately, Jimmy Chin had a helpful guide for shooting in the snow that was just basic enough to get me started while providing some really insightful tips that I would have otherwise been lost without.
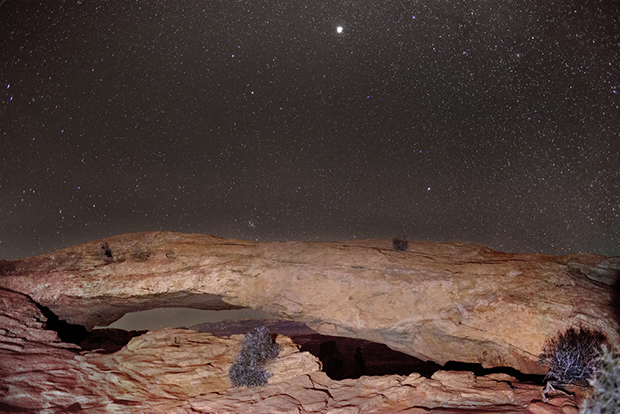
Traveling can also take you to more remote locales, and thus give you the prime opportunity to shoot a gorgeous night sky. If you’re like me and don’t normally have that option, you may be clueless as to how you’re supposed to achieve it, but (go figure) the internet has you covered.
There are a slew of other interesting and informative tutorials out there but I feel like I’ve been long-winded enough. Hopefully these have provided a good start and you start scratching that experimentation itch soon. Also, since I’m far from omniscient, feel free to post links to your own favorite videos or guides in the comments below.
Image credits: Stars and Arch by John Fowler