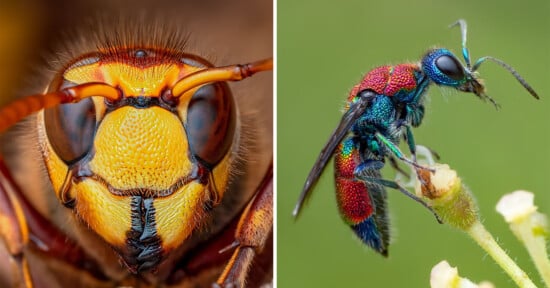
My Process for Creating Insect Portraits with Macro Photography
Each print that I create is a composite of hundreds (sometimes thousands) of individual photos digitally stitched together. Using a method of macro photography called “photo stacking” it’s possible to create images with an incredible amount of detail, even when printed on a very large scale.
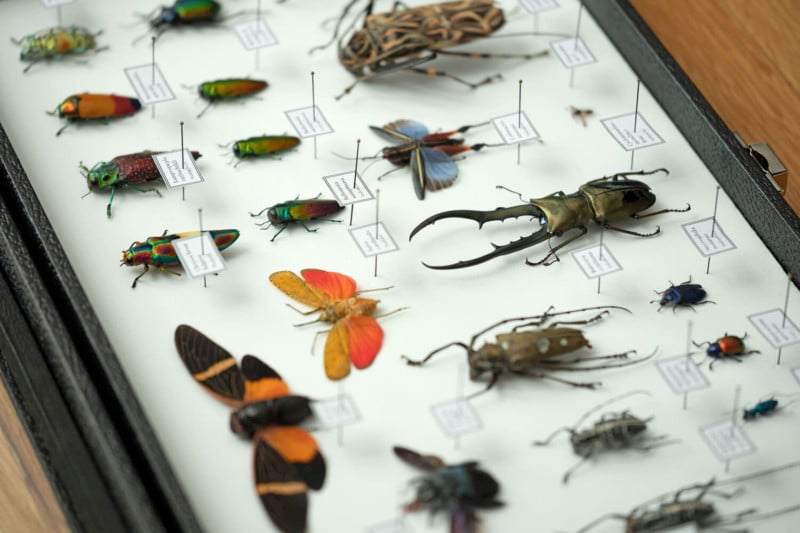
1. Order the Insects from a Sustainable Source
The first of many questions that I usually get is where do I get all of these bugs to photograph? The short answer is I buy them online. And no, I don’t mean the dark web. Selling insects online is a legitimate full-time business for some people just like anything else.
I’d like to point out that all of the insects I photograph are raised from ethical and sustainable sources. This means different things to different people, and I’ve written a separate blog post about it if that interests you. My most common sources at this time include Insect Art, Bic Bugs, and BizzareBugs.
2. Clean Them Without Breaking Them
If people aren’t already concerned about my mental health when I tell them I buy dead insects online, this next step usually does it. The insects arrive tightly wrapped to small cards using cellophane, and I carefully remove the packaging to inspect them. They usually look fairly clean to the naked eye, but if you were to scale them up to 40 times their actual size (which I do), you’d see that’s the farthest thing from the truth.
There is any number of ways to clean the insects, and different insects take better to different methods. In my arsenal of tools I have some paint brushes, tweezers, cotton swabs, soap, alcohol, and even an ultrasonic jewelry cleaner. I often start with a test photo of the bug to get an understanding of what I’m working with and go from there. Crazy? Probably. I really had no idea what I was getting into when I started this.
3. Rehydrate the Insect for Flexibility
In the hobby, this is what’s referred to as a “relaxation chamber”. It’s basically any container with high humidity that’s used to rehydrate the insects. When the insects arrive they are dry, very brittle, break easily, and impossible to adjust into a more desirable position. Hydration solves this problem (though they’re still extremely delicate).
I use an old sushi take-out tray. I put damp paper towels in the bottom, some tupperware lids as stands, and rest some thick card stock on top. This way I can place the insects on the card stock in the container without having them come into contact with water, and simply let them sit for one to a few days until they’re “relaxed”. Sometimes this step can be avoided if the insect was cleaned using water and is already flexible.
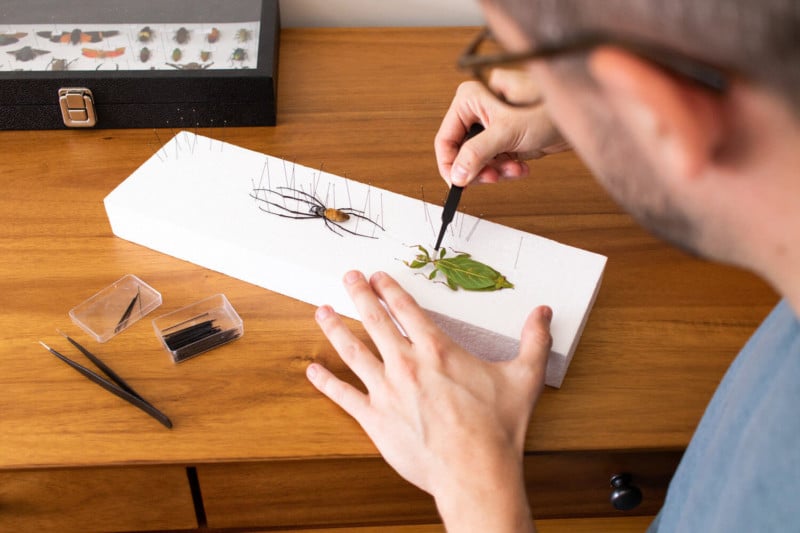
4. Get the Insect into Position Using “Pinning”
Positioning the insect uses a process that entomologists call pinning or spreading. While the bug is hydrated and malleable, it is laid on a styrofoam block and small pins are strategically placed around it to hold the arms, legs, and other body parts in a desirable position. For these types of prints, trying to make the insect look as symmetrical as possible is important. Then it’s time to let them dry for a couple of days in preparation for the photo shoot.
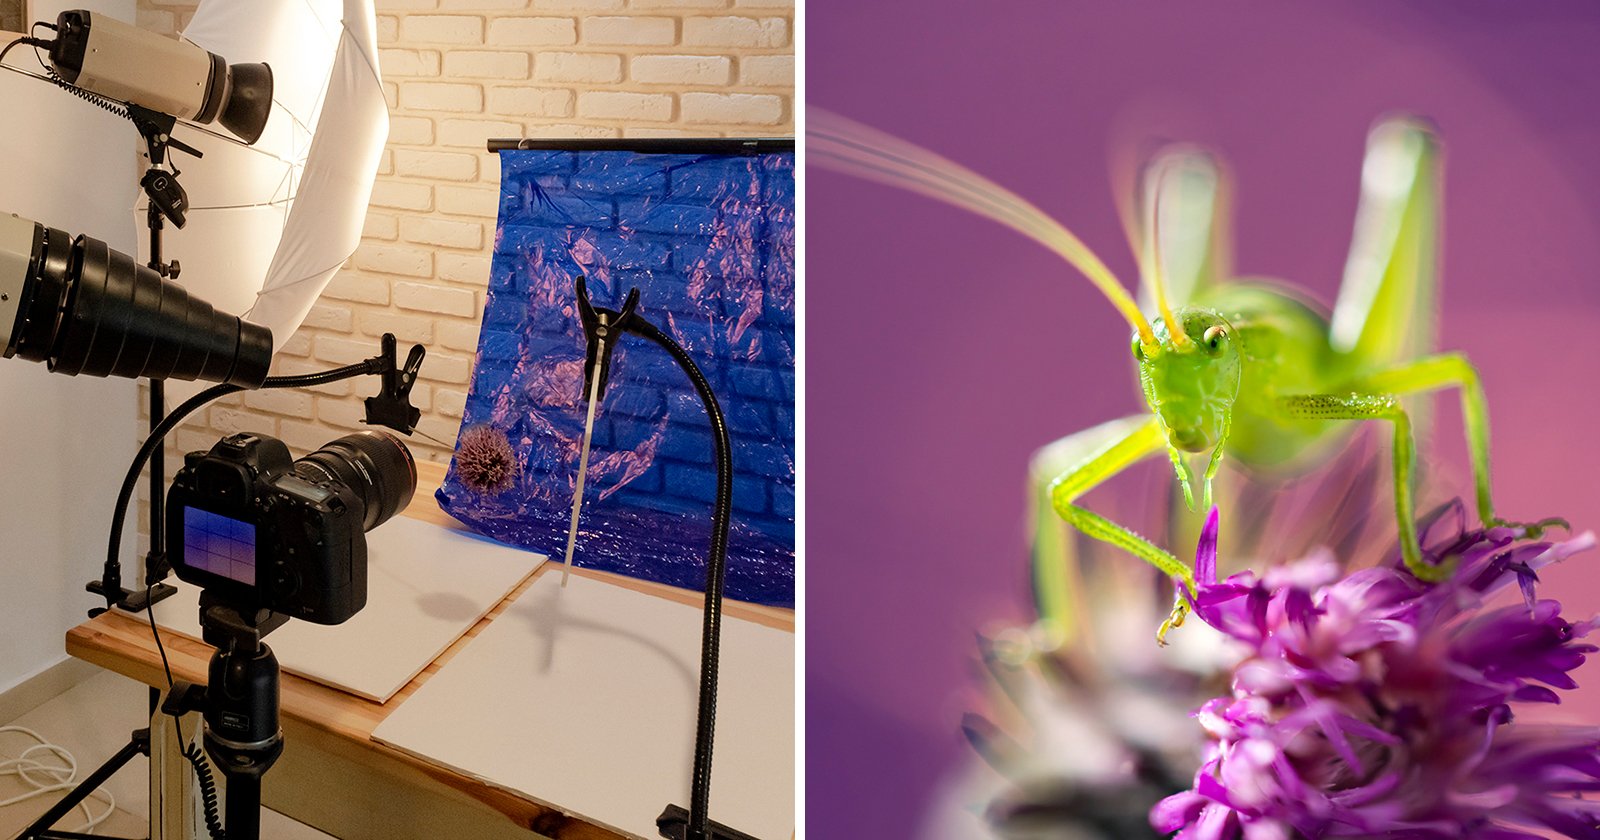
5. Take a Whole Bunch of Photos
One of the great things about macro photography is that it doesn’t have to take up a ton of space. I live in a studio apartment and my entire setup fits along my kitchen bar top. The challenge, though, is that when taking photographs at such close distances, only a little slice of each photo is actually in focus. Since I want the entire bug to be in focus, I use a technique I call “micro panoramas”.
The objective is to walk away with a sharp photo of every nook and cranny of the insect. This means dividing the insect into several sections to photograph, and taking dozens of photos of each section to ensure every detail is in focus. Afterward, I’ll combine them all together to have one large, sharp image. This print contained a total of 635 photos.
Note: If you’re curious about my equipment and setup, make sure to check out this article.
6. Combine the Images with Photo Stacking Software
How do I go about combining hundreds of photos? Thankfully it’s not a manual process, and there are several programs that help automate this. I can’t imagine how long something like this would take otherwise, if it would even be possible. I’ve found that the stacking software works great 98% of the time, but there are still manual tweaks and revisions that will be needed in post-processing.
7. Clean and Adjust the Insect (Again) Digitally
This step is where things really get tedious (in case you didn’t think this was tedious enough already). It’s also the most time-consuming part of the process. If everything has gone according to plan, we now have a large, detailed, and in-focus image. I’ll usually start by making any final adjustments to body part positions to make it as symmetrical as possible.
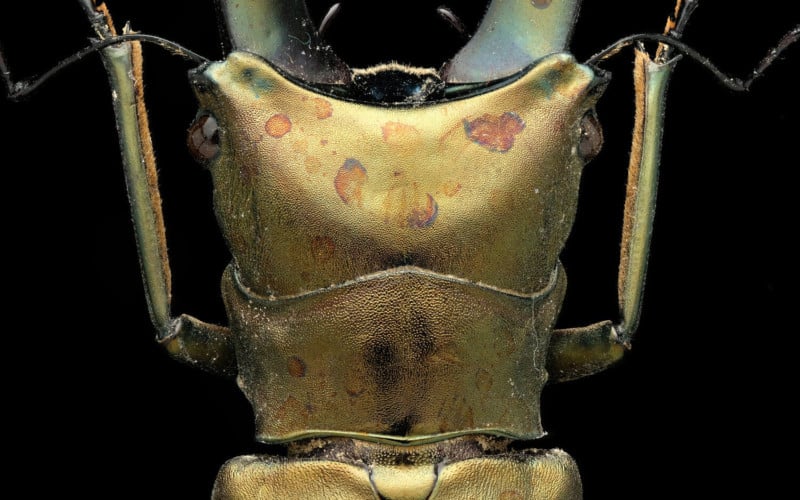
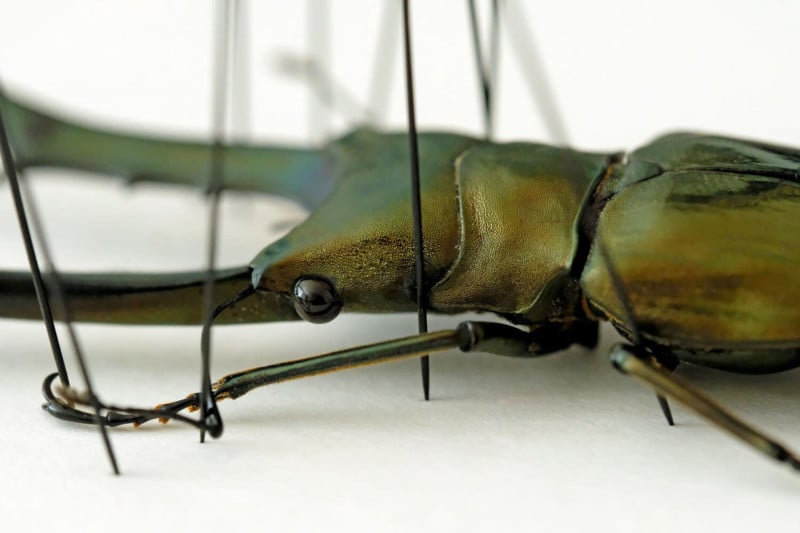
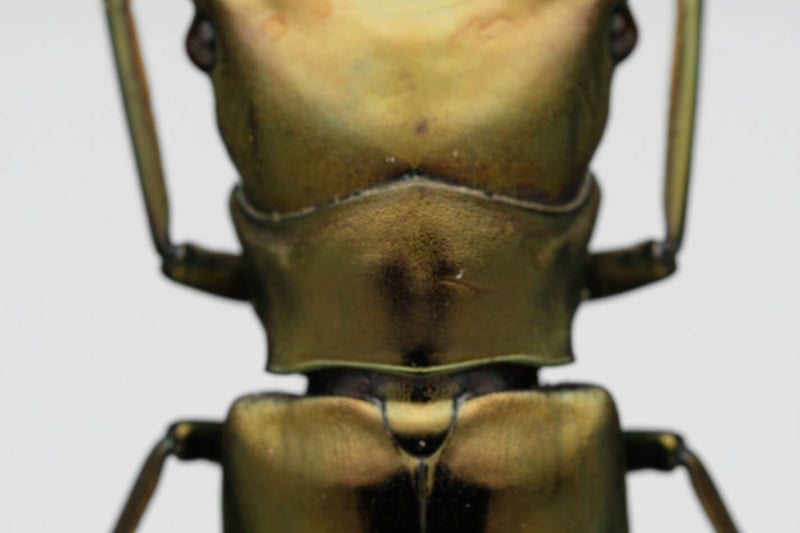
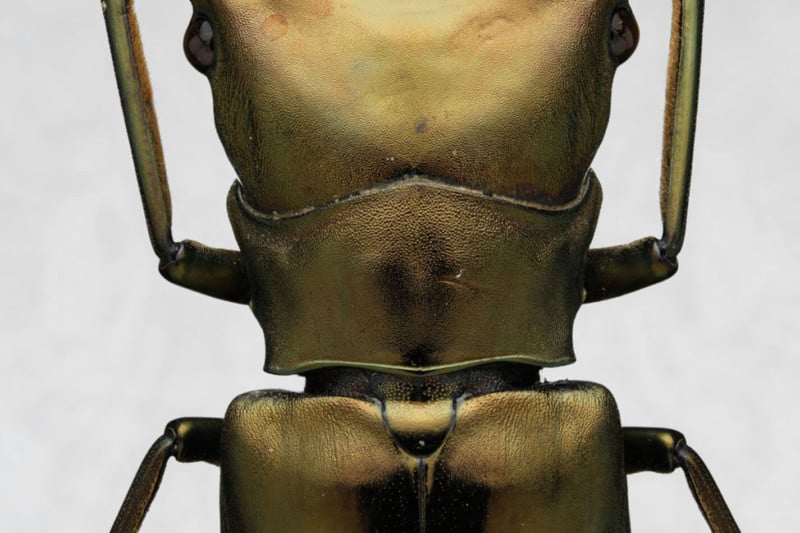
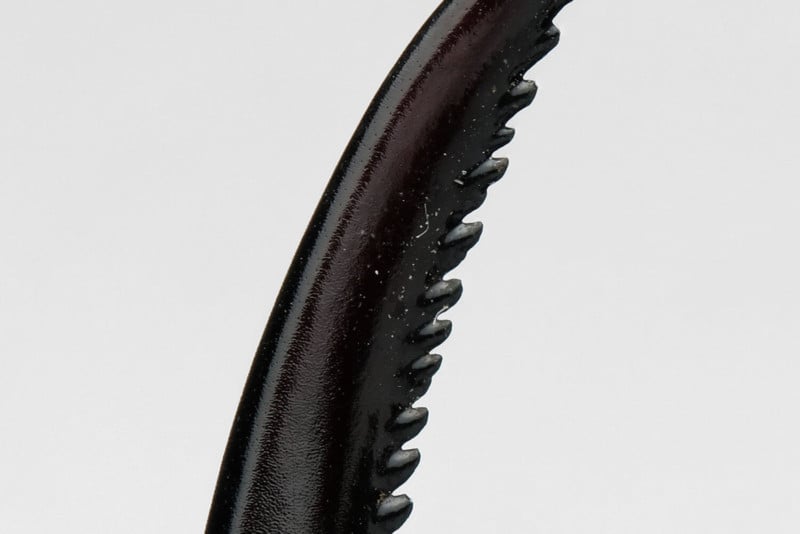
This step also reveals a whole new level of dirt and dust! At this point, we have no choice but to open Photoshop and meticulously remove thousands of individual particles one at a time. It’s a crucial step as you can see by looking at our giant stag beetle’s mandibles below. With all of the dirt, dust, and oil stains out of the way, the entire focus of the photo can now be on the natural beauty of the insect.
Here is a comparison of the beetle in his original condition compared to the completed image. With all of the dirt, dust, and oil stains out of the way, the entire focus of the photo can now be on the natural beauty of the insect.

Look at the difference a nice digital scrub can make.
Here’s the final image compared to the beetle’s first unpacking. What a transformation.
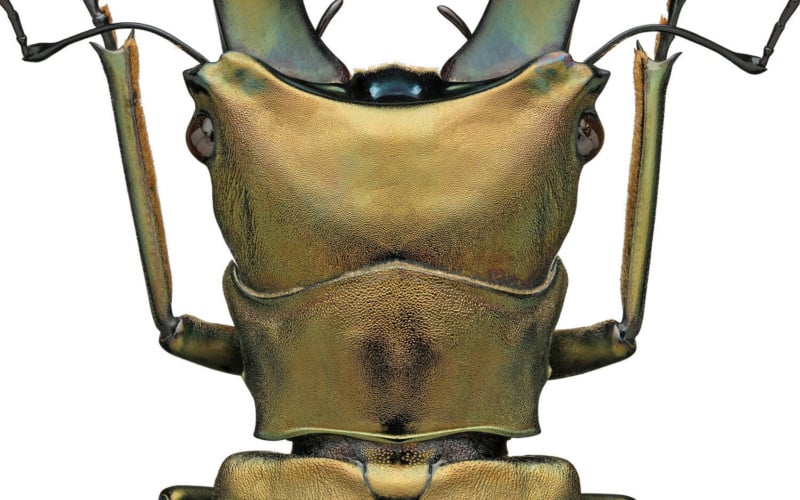
To truly appreciate the details of these insects, it really helps to look at a larger image. I uploaded a higher-resolution version of the final beetle for you to see his full detail.
8. Send it to the Printer!
That sums up the “making of” portion of these prints. The entire process to this point may take anywhere from 10 to 20 hours per specimen. That doesn’t include the countless hours I spent researching and learning, with plenty of failed attempts along the way (I easily took tens of thousands of photos before arriving at my first image I finally thought was good enough to print).
P.S. I hope that in seeing these images, you’re as blown away by these magnificent creatures as I am. I would love to share these insects with the world and sell prints in boutiques, or even display them in a gallery someday, so please let me know if you know of anybody that might be interested.
Want more content like this? Make sure to join the Micro Marvels newsletter.
About the author: Adam Mann is a macro photography enthusiast and nature lover based in Phoenix, Arizona. The opinions expressed in this article are solely those of the author. You can find more of Mann’s work on his website and Instagram. This article was also published here.