Three ‘Foolproof’ Beauty Lighting Setups Using a Beauty Dish
Lindsay Adler is an accomplished portrait photographer and educator, and in this 11.5-minute video she explains three different, versatile, and easy-to-master lighting setups using a beauty dish as the key light.
With all beauty images, Adler makes a point that to get an outstanding result, you need to have great lighting, makeup, model choice, and retouching. All four of those factors are important, but in this video, Lindsay shows how to specifically manage the lighting aspect.
Portrait and beauty photographers often utilize a beauty dish because of the style of light it produces on skin. It works by reflecting light off an interior plate and back out onto a reflective, curved dish and onto your subject. When properly employed, it projects a soft, enveloping light that also has a fair level of contrast to it: a soft look that also has, as Adler says, some “pop.”
Below are detailed explanations for three different looks made possible by the beauty dish as a key light.
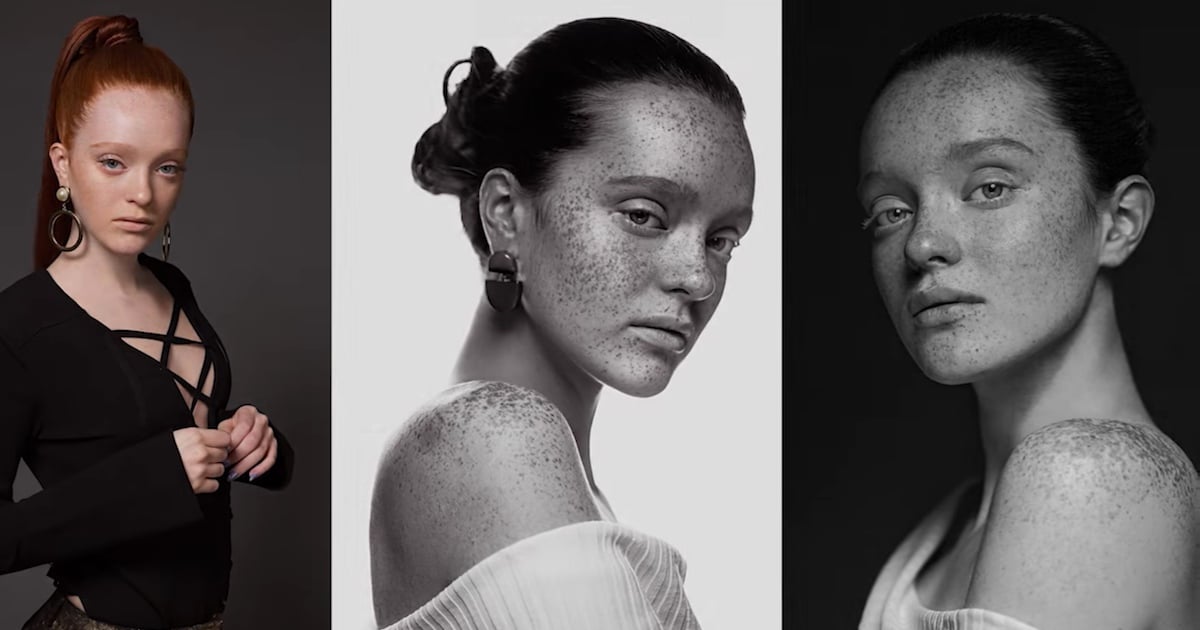
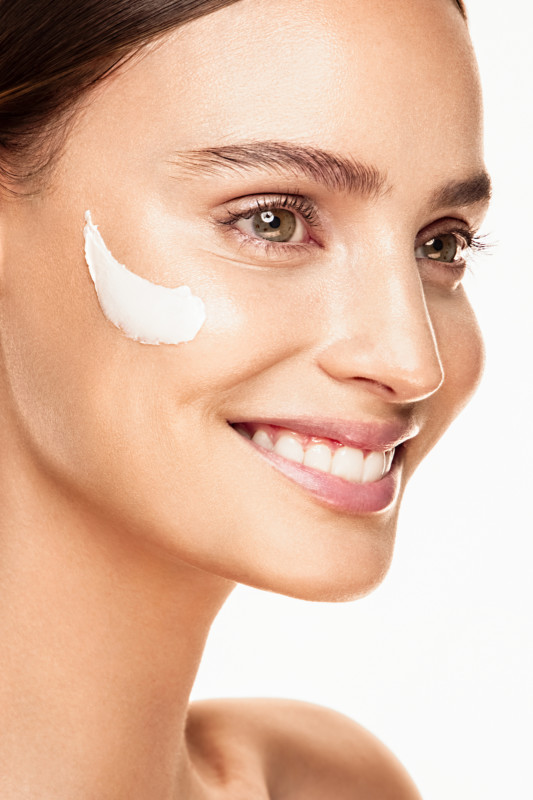
Clean Beauty
Adler says that this setup is her go-to for creating a glowing, high key image that sue utilizes for showcasing skincare. To mimic this setup, you are going to need three strobes.
Step 1: Begin by placing a 3×4 foot softbox directly behind your subject. This gives you a high key white background and creates rim lights that wrap around your subject and beautifully flatters their jawline and cheekbones.
Step 2: Add your main light (a white beauty dish) on a C-stand so it is centered in front of your subject.
Step 3: Put a 1×4 foot strip softbox underneath your subject’s chin to fill the shadows. This is called clamshell lighting.
Adler makes a note that this particular photo uses understated makeup to highlight the “fresh” and “glowing” nature of the image.

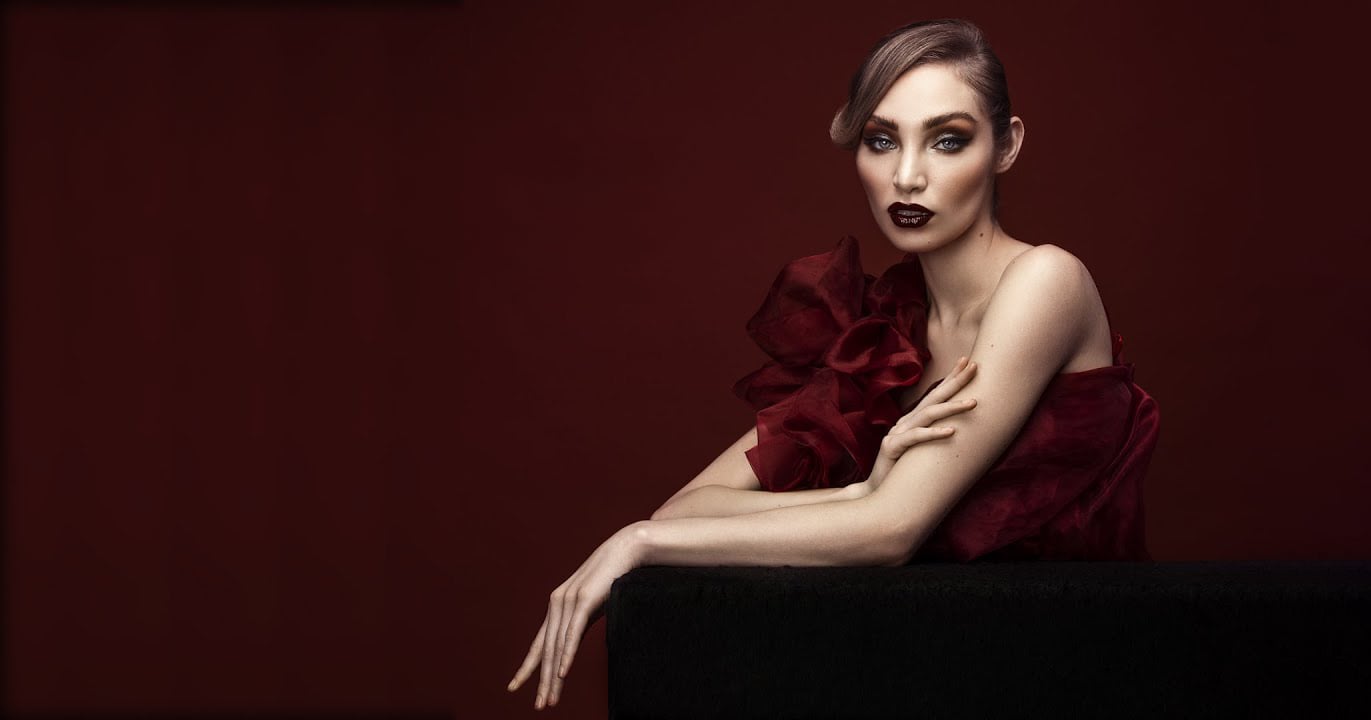
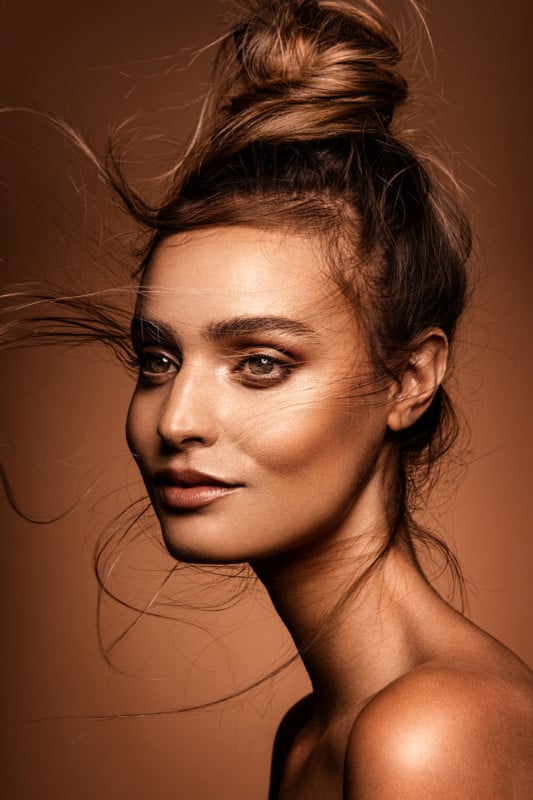
Warm Skin Look
In this setup, Adler says her goal is to create a warm image with a focus on healthy-looking skin and hair. She typically uses a beige or cocoa-colored seamless paper background based on the model’s skin tones. To replicate this look, you only will need two strobes.
Step 1: Set up a white beauty dish as your main light. It can be centered or slightly to the right of the frame.
Step 2: Add a strobe with a 20-degree grid to light the background.
Step 3: Bow or move the model’s hair to create energy or interest.
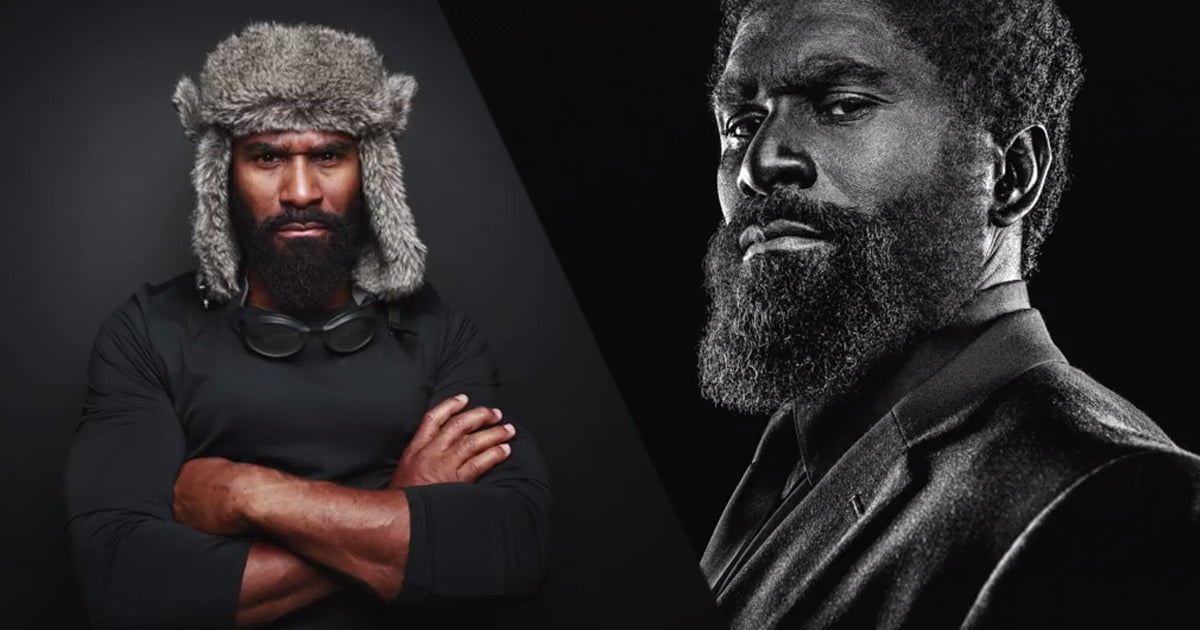
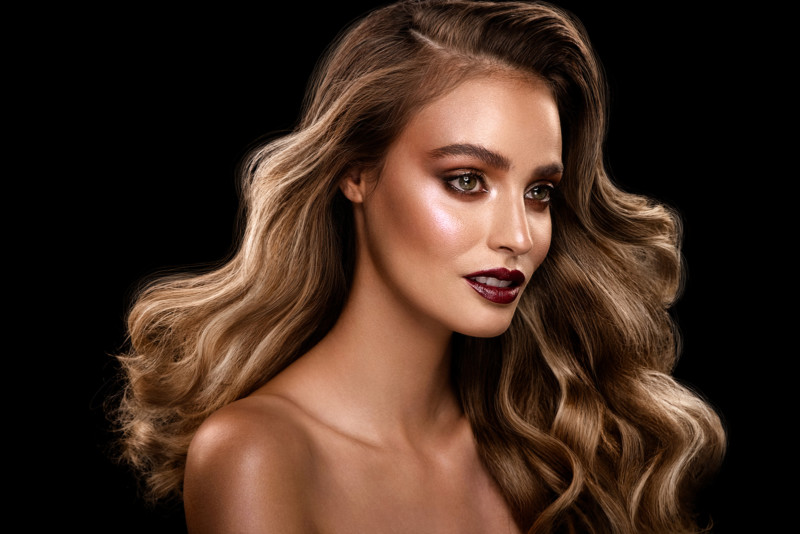
Luxurious Hair
Adler says that this look is meant to portray a darker, more dramatic look that has an element of luxury to it. She recommends a darker background, like black, for “richer” results. The focus here is on cosmetics, and making the image look expensive. To replicate this setup, you’re going to need three or four strobes
Step 1: Use a centered silver beauty dish for a bit more contrast. Switching to silver adds more contrast than the white does.
Step 2: Add two strip softboxes (1×4 feet) on either side of the frame as rim lights. Raise them up tall so they illuminate the top the hair.
Step 3: Place a silver bounce reflector under the chin to brighten the shadows or consider a fourth strobe if you have one.

You can see more from Lindsay Adler on her Instagram, and subscribe to her YouTube Channel for more video tutorials like this one.
(via SLR Lounge)
Image Credits: Lindsay Adler and used with permission.