Akaka Falls by Moonlight: How I Got the Shot

Summer and Fall are wonderful for photographing the Milky Way here in Hawai’i. We have many locations with dark skies and breathtaking scenery too. In October, the brightest part of the Milky Way (galactic core) is near the horizon at sunset; by November it’ll be below the horizon when it gets dark.
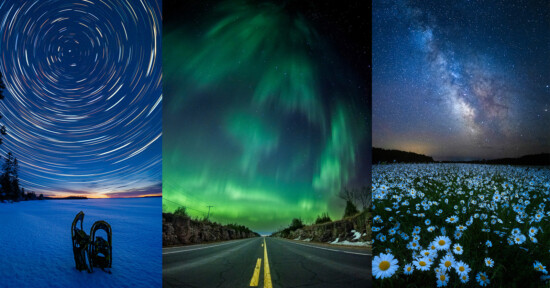
I also like to think about the opportunities the moonlight offers. Sometimes I like to shoot with no moon at all and with only the stars to light the landscape. The star light comes from all directions and shadows are hard to make out. This gives images a magical feel, but not much sense of depth.
Akaka Falls State Park
I wanted to go to South Point. I got a great photo at South Point a year ago and wanted to try some new techniques to get an even better one. The weather maps looked like 20-25mph winds down there, and part of what I wanted was the reflection of the stars in the tidepools. If it’s windy the stars in the tidepools would look blurry.
My wife, Mouse, suggested Akaka Falls. The moonlight would be behind me and the falls are closer and less windy too.
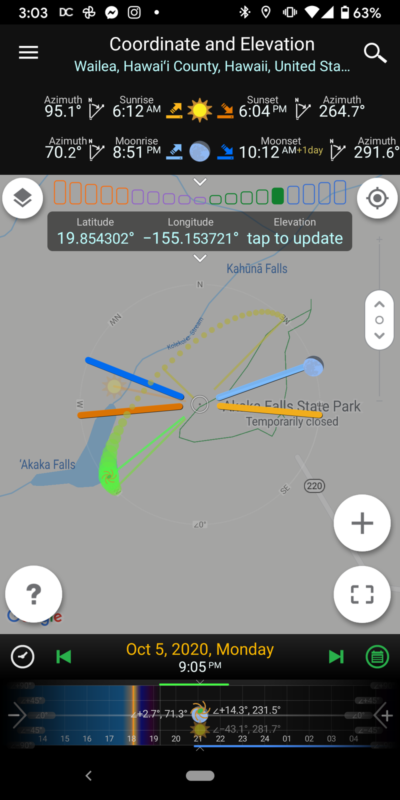
Mouse and I got to the park soon after it closed at 6pm. This gave me time to scout around before dark. The moon comes up at 8:12pm on Sunday. At 8pm the Milky Way is still pretty far to the left of the waterfall. But I needed to come a day early to get my idea together for Monday night.
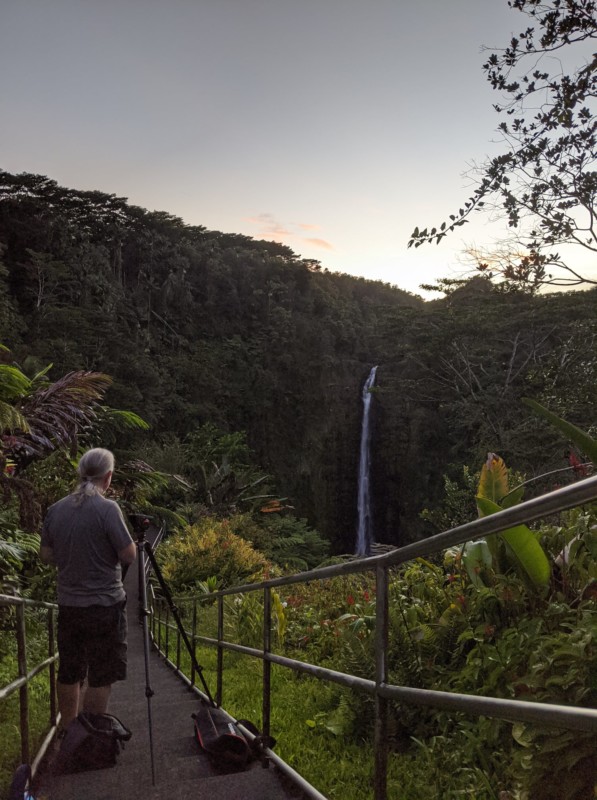
I usually find myself down at the “lookout”, but wanted to include more of the environment this time. So I started up the stairs in search of something that caught my eye. The view changes each time I go because the plants grow higher, then fall or are trimmed by the parks crew.
I found a nice spot that felt like the waterfall was wrapped in a blanket of lush tropical jungle.
First Attempt: September 4th, 7:12pm
The Milky Way was still far to the left as the moon started to light the valley. I used a stack of 7 frames for the sky to reduce noise and was lucky enough to catch a stray shooting star in one of them.
This was a 3 image vertical panorama with a 20mm lens. That’s as wide as I could go and still keep the darkening at the corners in check. This vignetting is not as much of an issue with single frame shots, but in a panorama, the flatter the light field the easier the stitching.
With flowers in the foreground and the stars far away, this required focus stacking too. I used 4 fields of view to get as much as I could in focus and still finish up the set before the lighting changed much.
All the frames were shot with a Tokina 20mm f/2 lens on a Sony a7S body. All the frames were shot wide open at ISO 5000. I processed the RAW images in Lightroom and used PTGui for the stitching. Denoise and some processing using Topaz tools. Cleanup in Photoshop, then final processing in Darktable.
All in all I like the view, but wanted a wider feeling. Next night… more frames!
Season Finale – September 6th, 9:06pm
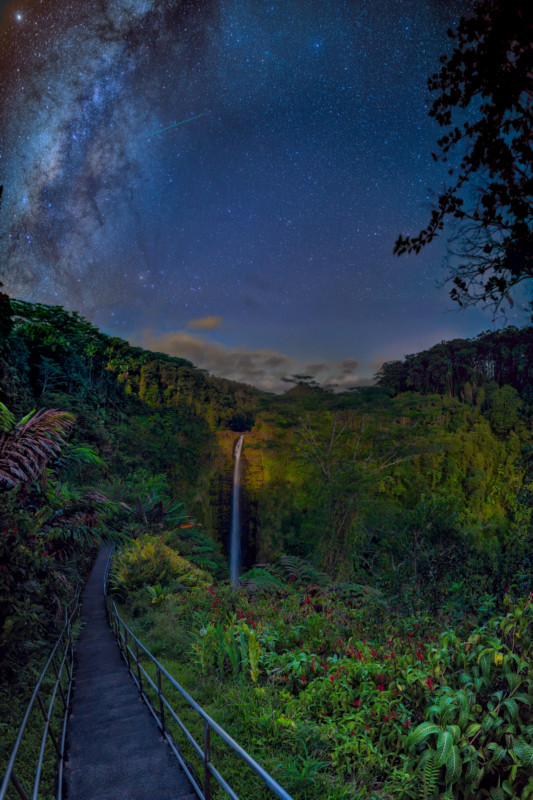
Monday night’s the night. The moon waits until 8:51pm to rise allowing the Milky Way to be very near the top of the falls, but not dipping below the horizon yet. This is it, my best night of the year.
I was looking for a similar setup to the scene from the night before, but some Monstera leaves to the left on the trail really caught my eye and I decided to do what I could to include them in the shot.
About 30 minutes before the show was going to begin, and I’m taking practice shots to make sure my plan will work out. That’s when the clouds moved in. 15 minutes later, and it’s completely overcast… uh- oh. 5 minutes after that and I can see some stars out over the ocean… feeling hopeful. Another few minutes and it’s stars all the way to the top of the waterfall, and I’m taking photographs as fast as I can.
Tonight I’m using my Sigma 35mm f/1.4 lens. It is maybe the best star lens in the world. Wide open it lets in a lot of light, but has a pretty narrow field of focus. That means I need to really plan the sequence of my shooting because I need to overlap panorama shots for the wider angle view I want, but I also need to focus stack.
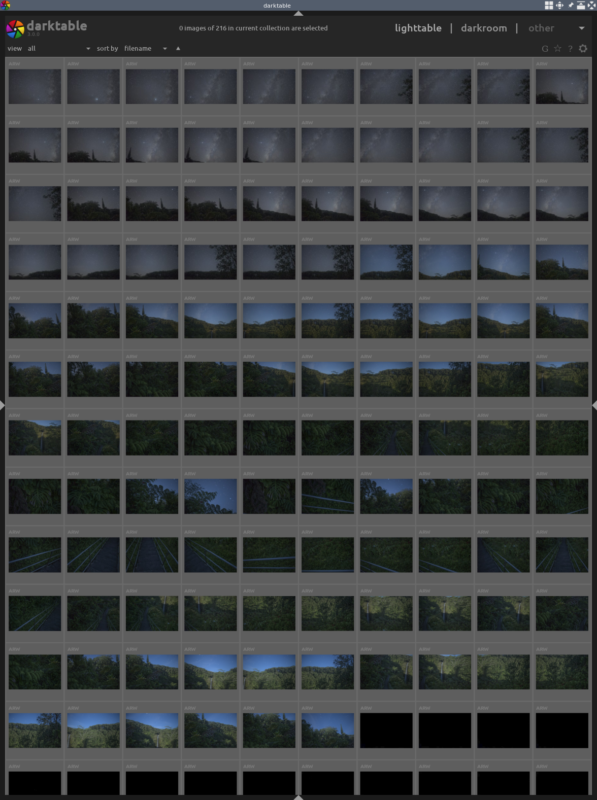
I opted to shoot the sky first, then focus in on the waterfall and complete a panorama at that distance, then focus in closer and another set of panorama shots. I repeated this a few times focusing in closer each time. This is really scary to do, because if I miss one of the frames, that part of the image will not be in focus… yikes. All in all about 60 frames.
Once again I shot all the images wide open, at f/1.4 this time instead of f/2 last time. The sky frames I shot at ISO 5000 and 10 seconds. Due to the narrower focal length I couldn’t use 15 seconds like I did with the 20mm lens.
I did 3 shots each for the sky so I could stack them to reduce noise. I also shot 90 dark frames on the way home. Dark frames are frames you shoot with the lens cover on, but at the same settings as the original shots. The average of these 90 dark frames are subtracted from the stacked images to reduce sensor noise. All in all, you end up with very little noise at ISO 5000. Pretty cool.
The foreground I shot at ISO 640 and 30 seconds. Since I started the sky panorama about 10 minutes before the moon’s light hit the jungle, there was a ton more light and the lower ISO worked out great. The whole 60 frames took around 20 minutes to get working as fast as I could.
Computer Time – Lots and Lots of Frames
First I’ve got to stack those star frames and remove the dark frame data. There are multiple options for converting from RAW to TIFF. Lightroom is the easiest and does a pretty good job with hot pixels and chromatic aberration corrections. Darktable is also an excellent choice and it sports multiple options for the demosaic process—that’s where the 1 red, 2 green and 1 blue photo receptor sites are merged into an RGB value at each pixel location.
Starry sky stacker also supports RAW files and it seems their demosaicing schema is optimized for astrophotography since the results were excellent, so I decided to go in that direction.
After using Starry Sky stacker to create TIFs of the sky images, I used Darktable for all the foreground images. I did this because I could select the AMaZE operator for the brightest frames the VNG4 operator for the frames that included deep shadows. Darktable also allows me to use parametric masks on all the modules, which gives me fantastic results for tone equalization.
I wanted to process all these images the same way so they would stitch together with good tonal blending.
In Darktable I used the tone mapper, lowpass with bilateral filter and LAB tone curve. The tone mapping was applied to only the very darkest portions of the frames using parametric masking. The lowpass filter was used for tonal equalization and was set to a very large radius, negative contrast, no saturation and a “vivid light” blend mode. The tone curve was used to deepen the colors using the subtract blend mode on the brightest portions of the frame, again using the parametric mask options.
I exported as 16 bit TIFS, keeping my workflow in Adobe RGB colorspace all along.
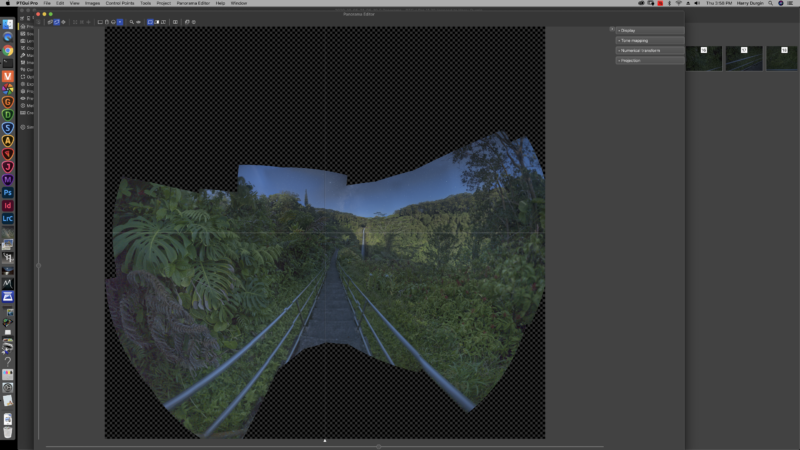
Bringing It Together – Stitching in 2 Steps
My first attempt was to throw all the files into a folder and see what PTGui would come up with. Well, it found control points for all the images and adjacent pairs, but the projections were horrible. The total view from left to right is around 190 degrees and from top to bottom around 100 degrees. The waterfall looked super tiny—far, far in the distance—and the plants were huge.
Best to try it in 2 steps… stitching the sky first. That worked well. I ended up using the cylindrical projection and setting my overlap blend to its lowest setting to eliminate star duplicates. The landscape also stitched better without the sky. I found the mercator projection worked best for the landscape.
I imported both the sky panorama and the foreground panorama as layers into Photoshop, using the warp module, pushed and pulled on each until I got them lined up super well and hand blended the 2. Had to clean up some parallax errors on the handrails and leaves, but mostly got a good blend.
I used Topaz DeNoise for some parts of this image and their Studio program for its intelligent masking tools. Final editing was in Darktable.
The final, full-res image is 19,000 x 12,000 pixels, so there was plenty of resolution for a vertical crop too. Have a look at both versions below (click to enlarge):


Conclusion – Plan, Plan, and Plan Some More
Final thoughts are, plan, plan, plan. When the light is just right, you’re going to be super busy, so get everything set up well beforehand. Also, when using the moon to light the foreground, I like to get the very first 10-15 minutes, so the light is coming through more of the atmosphere when the blue scattering means the light that reaches your subject has a nice warm tone.
Thanks for reading along, I hope you enjoyed this. Feel free to reach out to me on Facebook or email at [email protected], and of course, prints are available.
About the author: Harry Durgin is a professional photographer in Hawaii who specializes in landscape astrophotography. His work during the 2018 volcanic eruption on the Big Island has been published in magazines and newspapers around the country. He and his wife have a print shop and studio in Pahoa, Hawaii.
You can find more of his work on his website or by following him on Facebook. This article was also published here.