A Simple and Inexpensive Schlieren Optical System Using a Fresnel Lens
Schlieren imaging is a fairly standard optical technique for visualizing heat, sound, or pressure differences in air. Technically, a schlieren system is able to see clear disturbances in air due to slight differences in the speed of light in the air. The technique can be sensitive enough to see the heat rising off a human hand at room temperature.
This simple design uses a plastic Fresnel lens. A Fresnel lens is a flat lens that is most commonly found in overhead projectors. Historical Fresnel lenses were used for light gathering applications in which an image was not dependent on the quality of the lens. The first Fresnel lens was designed for a lighthouse.
In recent years, the Fresnel optics have improved so it was time to see if a Fresnel lens could be used in a schlieren system. The real interest in a Fresnel lens is that the lens has a large clear aperture — this means that relatively large objects can be tested in this area. High-quality lenses with a 250 mm clear aperture are very expensive.
The ideal lens for a simple schlieren system is between /4 and /8. The -number of the lens is simply the ratio of the focal length of the lens divided by the clear aperture of the lens. Most Fresnel lenses have a very low f-number and are not desirable for schlieren systems. Modern manufacturers offer /4 lenses.
To test out some of these lenses I ordered one from a Chinese manufacturer that was selling surplus optics on a popular on-line auction. I was unable to find a US source of a similar optic.- (if you find one please drop a note in the comments below). My price for a 250mm diameter lens with a focal length of 1,000 mm was only $20. This /4 Fresnel lens would be perfect to test in a simple schlieren system.
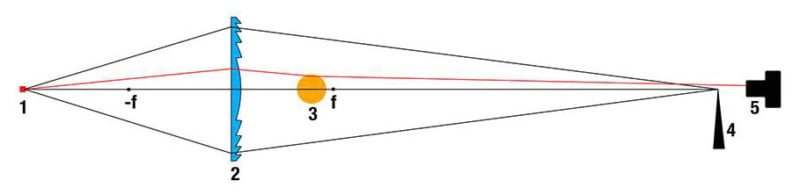
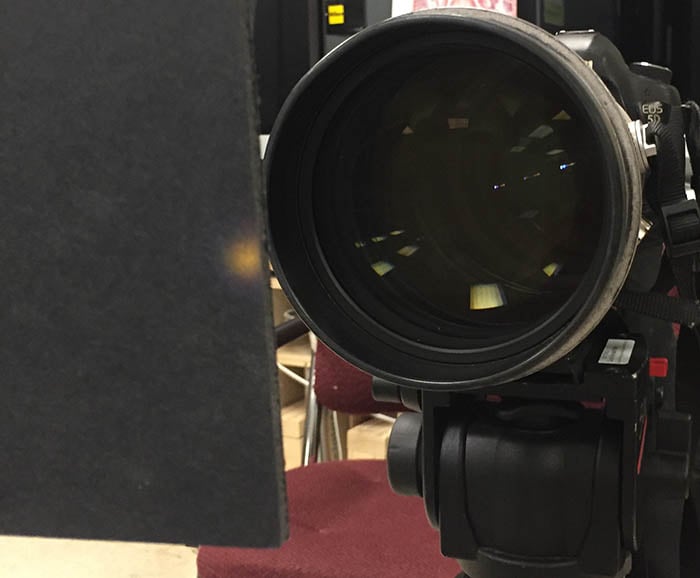
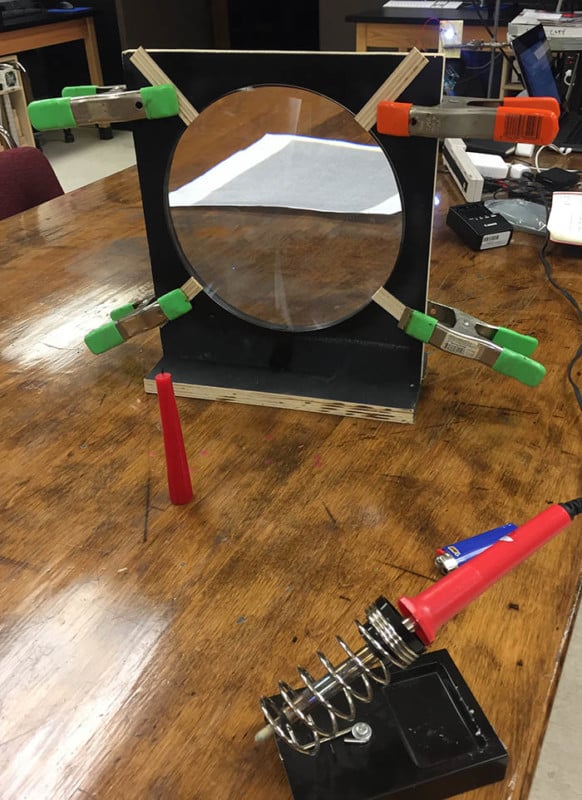
This particular design is called Toepler’s single-field-lens schlieren arrangement and is considered a basic schlieren set up to build. The equipment needed is: 1 is the light source, 2 is the Fresnel lens, 3 is a heat source (hot soldering iron works well), 4 is a knife edge, 5 is the camera and lens.
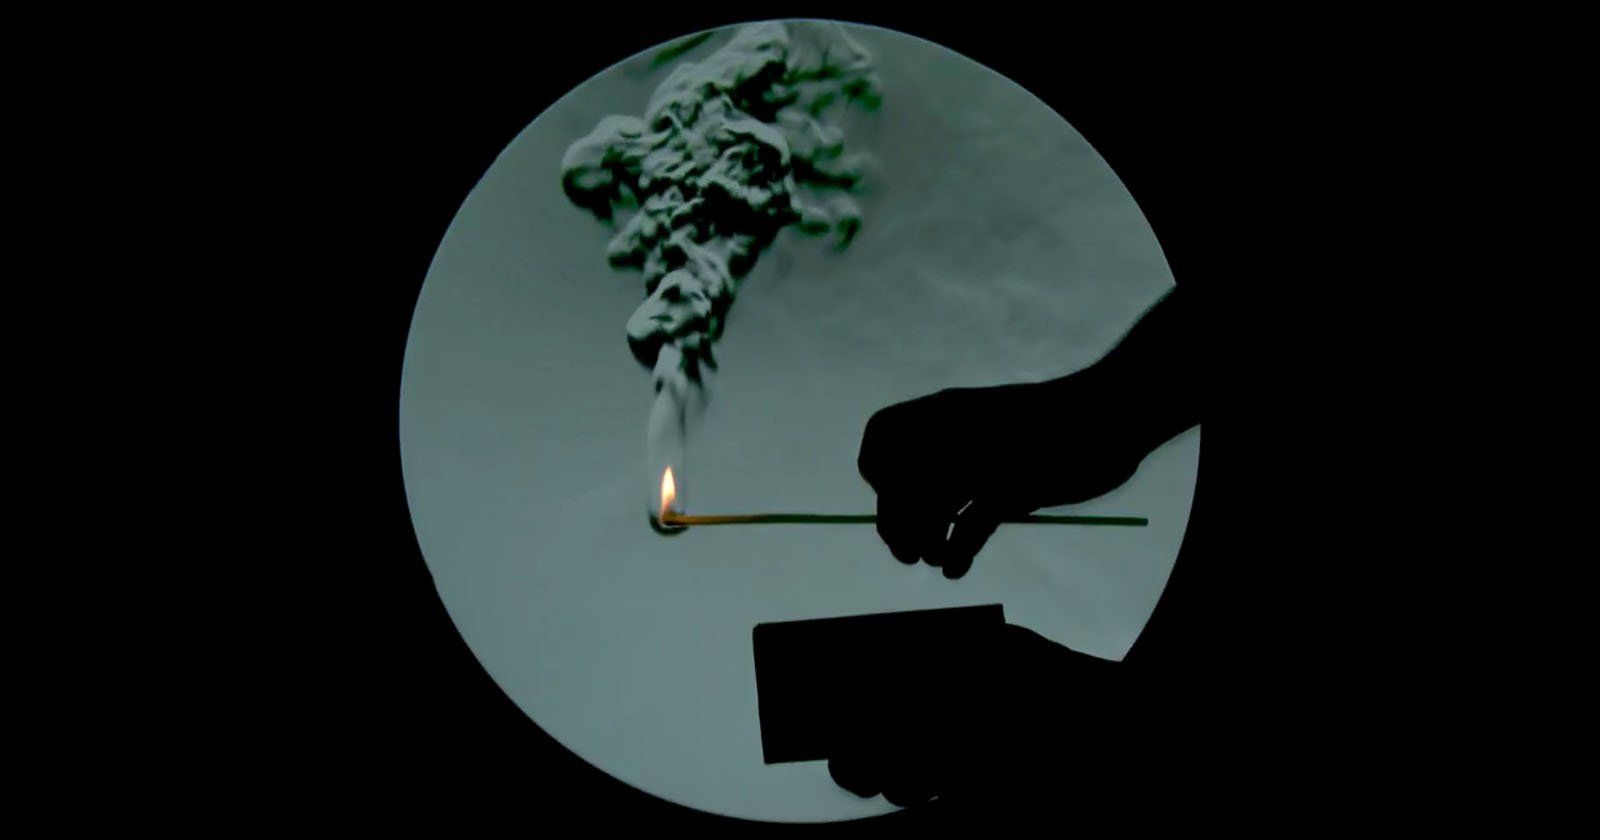
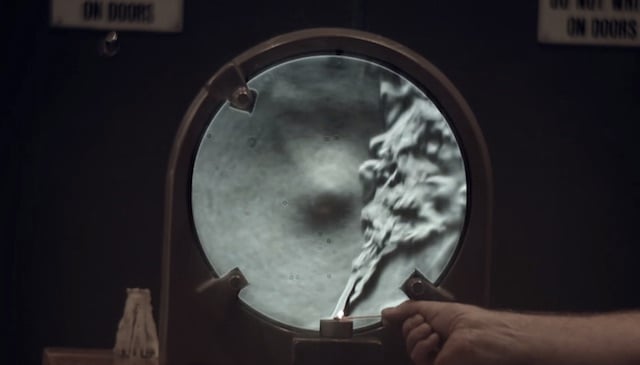
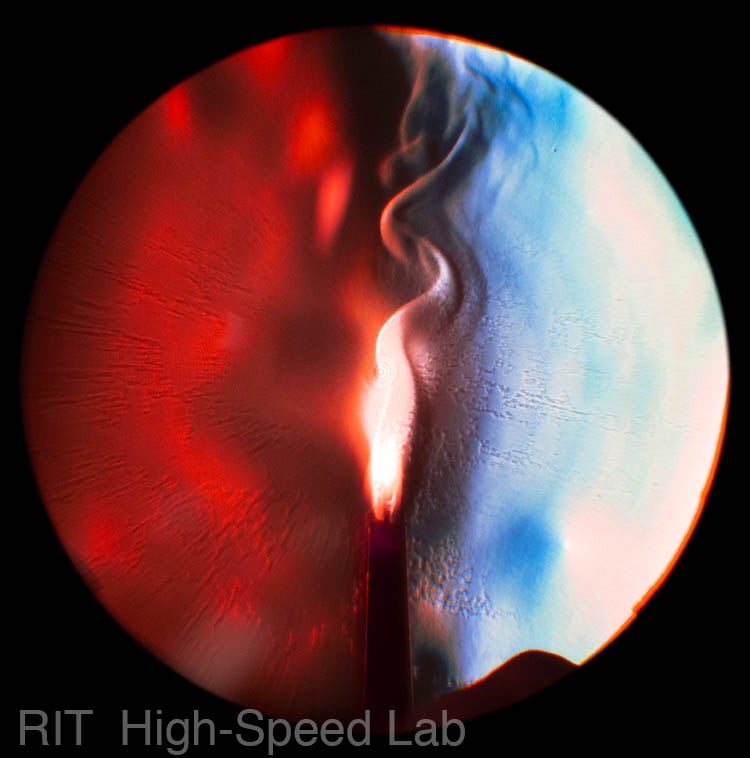
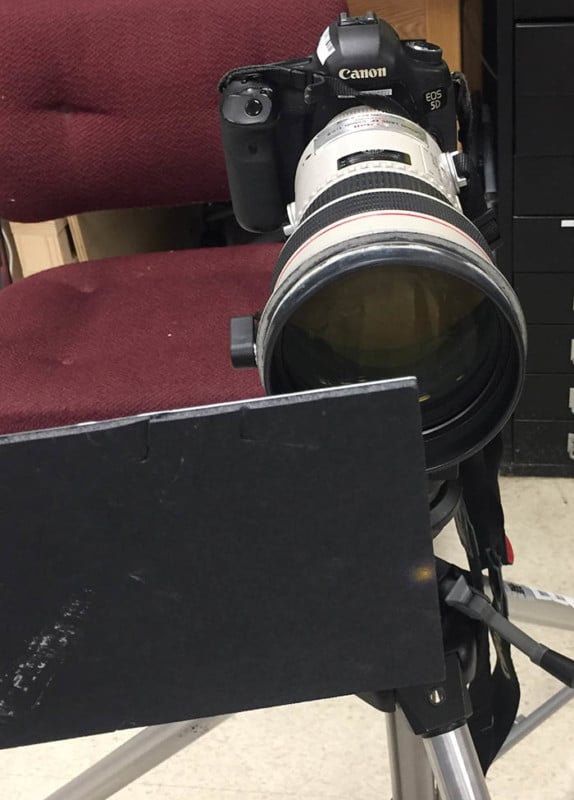
The black rays in the diagram above represent rays from the light source that do not interact with any heat source and are blocked by the knife edge. The red ray represents rays of light that have been bent by the heat source and are seen by the camera. The knife edge does not have to be a sharp edge – a sheet of black paper works well and is probably safer for students to use in a dark room. The camera lens for my test was a 300 mm Canon lens and was focused on the hot object. For the images for this article, I used a candle. In this setup, the hot object is on the same side of the lens as the camera, so the lens can easily be focused on the hot object.
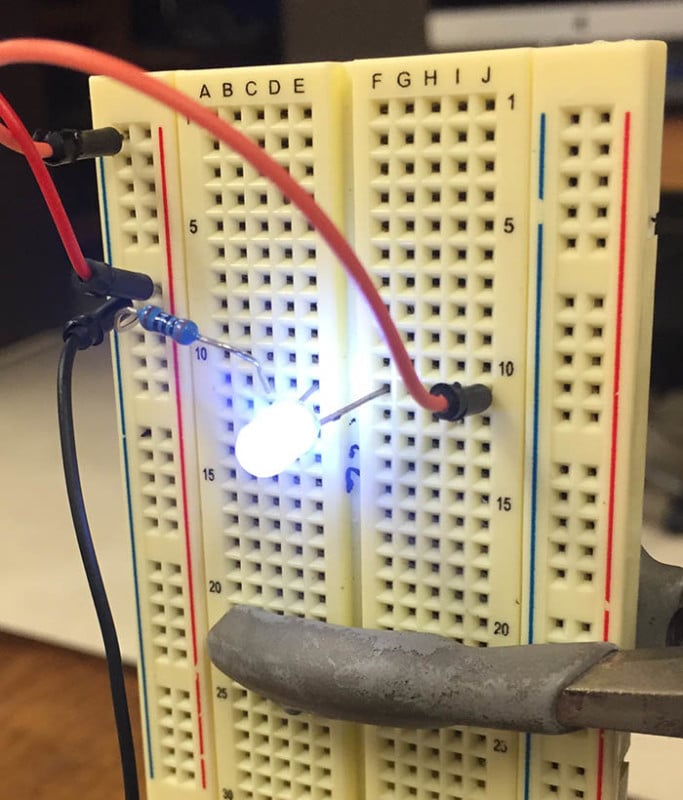
The light source is a simple white LED run from a 5 VDC lab power supply. To keep the LED from burning out, I used a 330-ohm resistor in series to limit the current.
The larger the interaction distance of the heat source in the schlieren system, the larger the sensitivity of the system. This location is a good compromise between image quality and sensitivity. A student should test the best location of the heat source in the system for themselves. Moving the heat source to different parts of the system and testing the results is a great way to familiarize yourself with the sensitivity of the system
The Parts


The Results


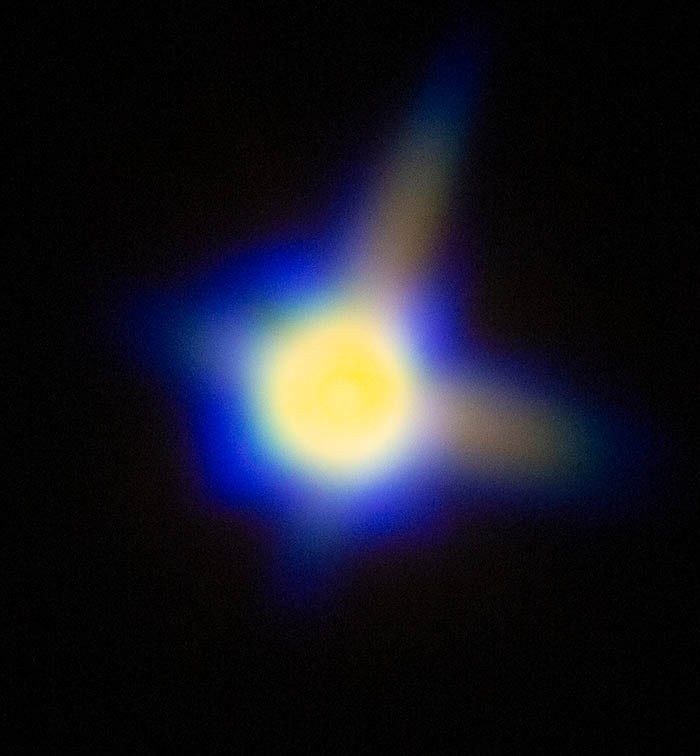
These images were taken with a 300mm Canon lens at /2.8 the shutter speed was 1/3200th of a second at ISO 1600. The fast shutter speed is important to stop the motion. The camera used here was a Canon 5D MK III. The speckles seen in the images above are due to manufacturing defects in the lens. This Fresnel lens has hundreds of very fine positioned surfaces that make up the lens – some of the surfaces are not quite pointing in the right direction.
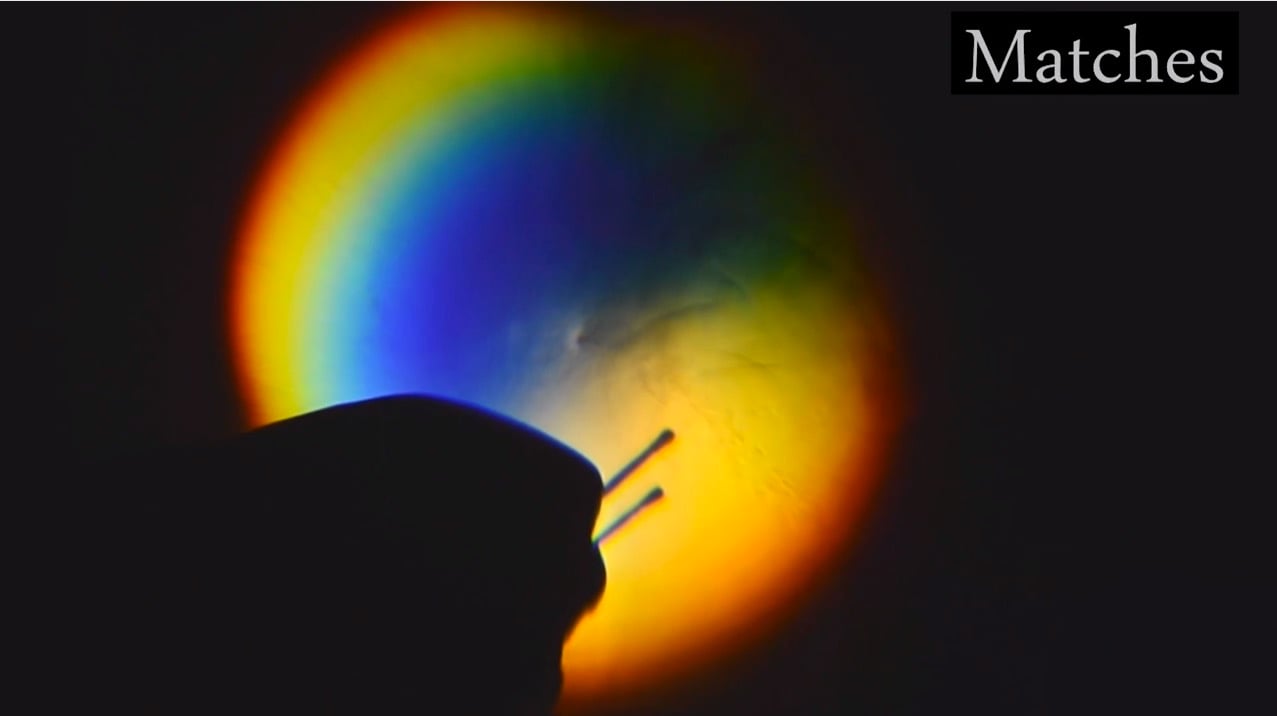
The results of the Fresnel lens are quite good for the price. If you are looking for an inexpensive schlieren system for teaching, or need a system with a large clear aperture, this system will definitely work. I was unable to see heat rising from a human hand. This shows that the system does not have the sensitivity to visualize small amounts of heat. This is a good system for students to learn the technique. The schlieren effects from a candle, a soldering iron, a lighter, and caned air were all easy to observe and photograph with this system.
A Bit Deeper into the Optics
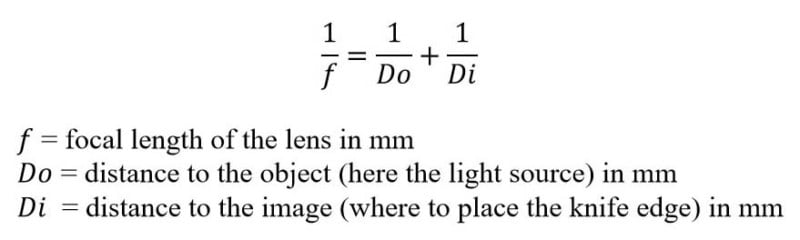
The optics thin lens formula can be used to determine where the light will focus, as well as figure out if the experiment will fit in your lab space.
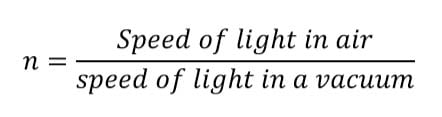
Schlieren systems are a great way to visualize small changes in the index of refraction (n) of air. The index of refraction of a material is the ratio of the speed of light in a material (air) to the speed of light in a vacuum.
The bigger the value of the easier it is for a schlieren system to detect the difference. The index of refraction of room temperature air is about 1.0003 and changes to 1.0002 when the temperature is increased by 100°C. The velocity of light is about 0.01% greater in the hot air compared to the room temperature air.
If a schlieren system can see the heat from a human hand, then the system is considered very sensitive and well-aligned. Different gasses will also have a different index of refraction than air, gasses like carbon dioxide and helium are easy to detect in air with a simple schlieren system.
References: Schlieren & Shadowgraph Techniques by G.S. Settles.
About the author: Ted Kinsman is the 2019 recipient of the Schmidt Laureate or outstanding contributions to the progress of biocommunications. Kinsman has worked as an optical engineer, a physicist, and a physics instructor before joining the Photographic Sciences Dept. at RIT. His work has appeared on The Discovery Channel, Crime Scene Investigations (CSI), The X-Files, South Park, The Tyra Banks Show, and The Frozen Planet series. Kinsman is currently an Associate Professor in the school of Photographic Arts and Sciences (SPAS) where he teaches Photographic Instrumentation, Scanning Electron Microscopy, and High-Speed Imaging. His most recent book is Cannabis: Marijuana under the microscope.