10 Life Hacks for Your Photo Studio
Having a photography studio is fun, but it is even more fun when you start applying simple and cheap solutions plus common sense to make your shooting experience (and your clients’ experience) smoother.
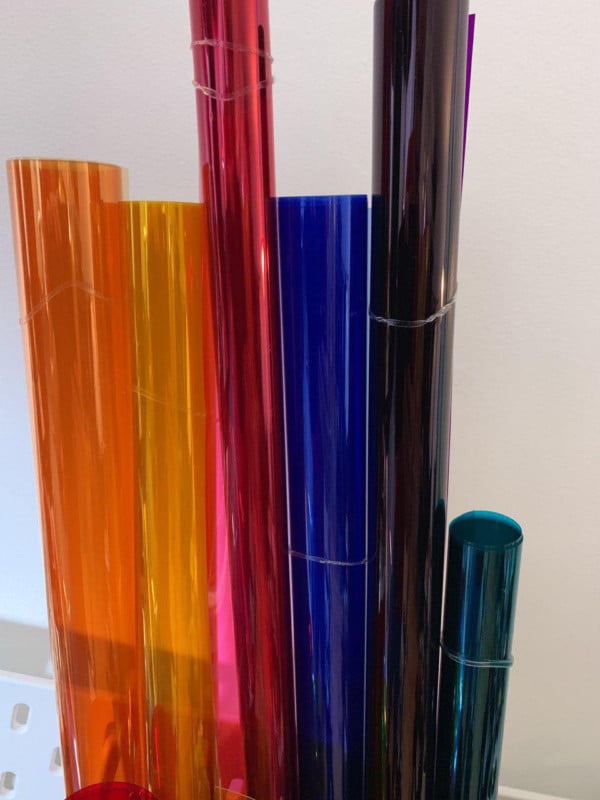
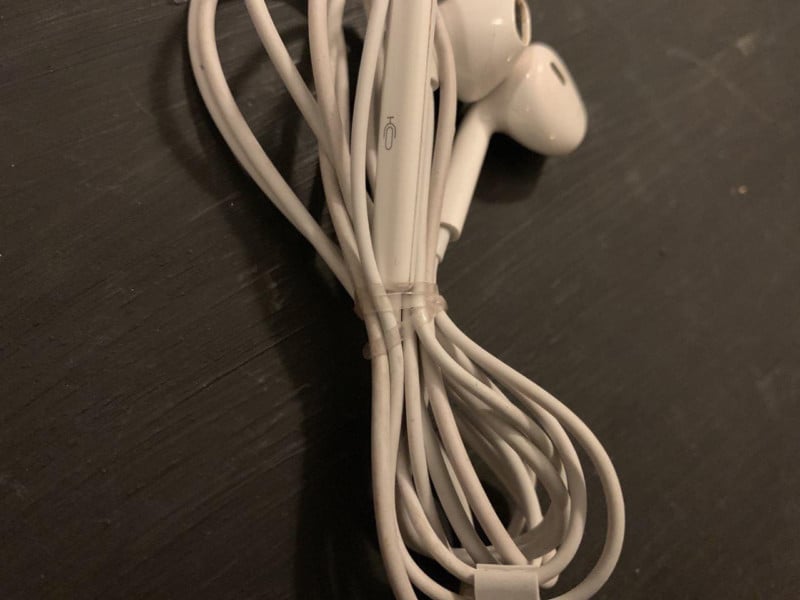
#1. Transparent Rubber Hairbands
![]()
These little guys are a life saver for those who enjoy having a tidy studio (me included). Apart from having hundreds of these in the make up station, they have become a daily resource when tidying up gel rolls and cables.
#2. Wine Boxes
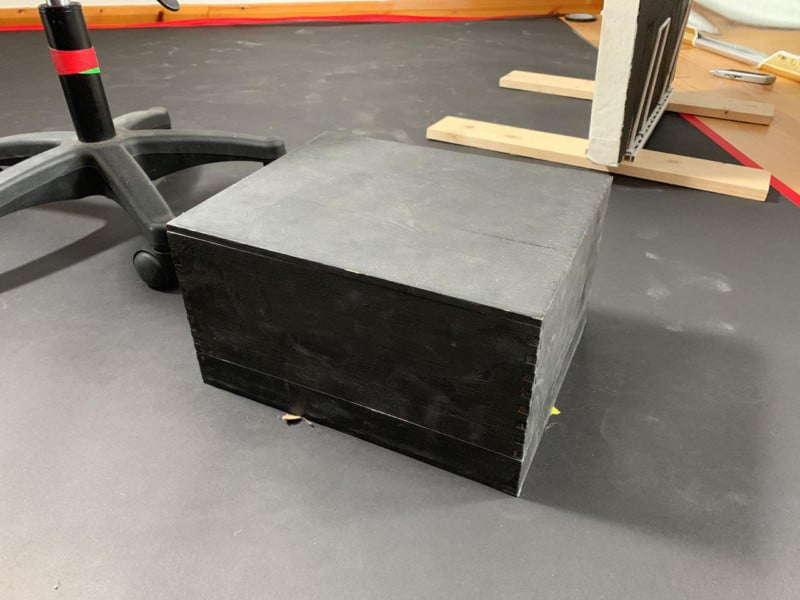
If I had to choose between an apple box and a wine box… I’ll take the wine one!
Apple boxes are enormously useful in a studio. You can use them to sit your subject down, make someone taller, or level-up a C-stand, among other things. But these precious boxes are expensive. The solution? What about asking that friend-who-works-in-a-restaurant (we all have one) to get you one of those spare wooden wine boxes that otherwise his manager is going to throw away, right? (Shoutout to my friend Mattia Laurenti.)
After a bit of painting, it has become a staple on my headshot work, as I use it for the clients to step on them a lean forward in order to engage with the camera.
This solution is not as versatile nor sturdy as an apple box, but hey, it’s free!
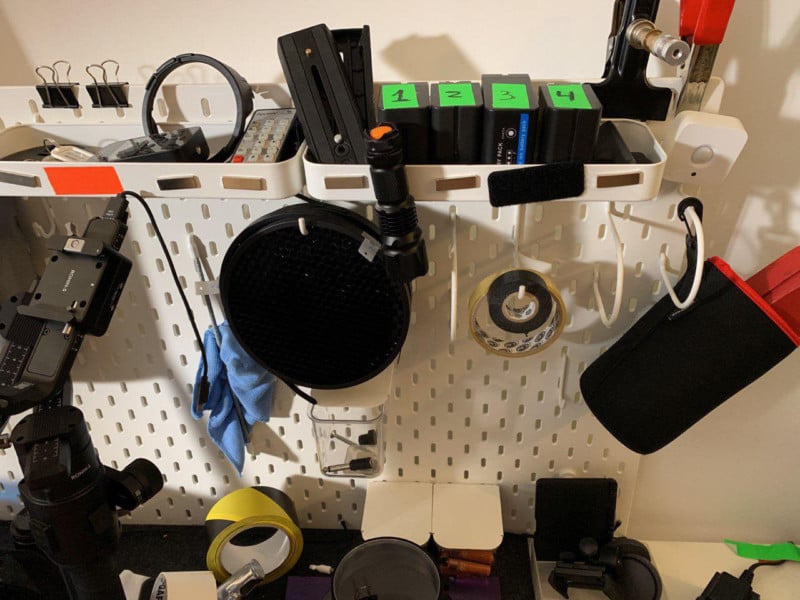
#3. IKEA Pegboard
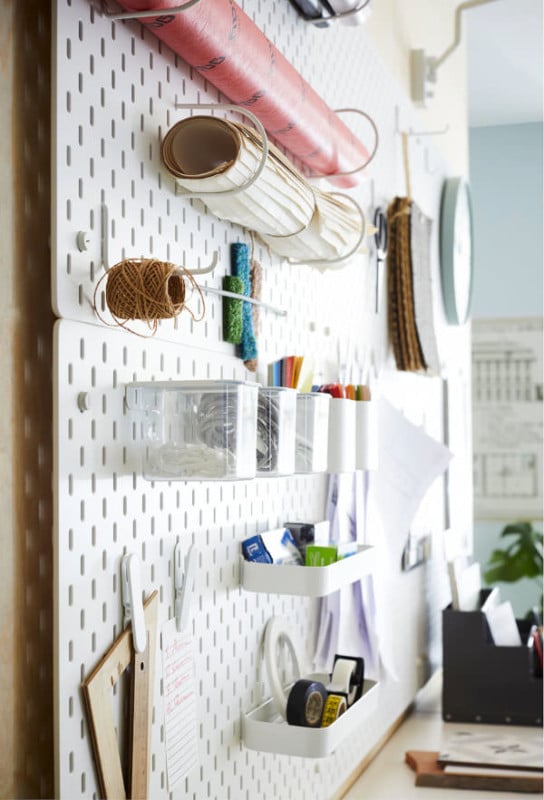
A photo studio wouldn’t be complete without having a space to put all your gear, adapters, connectors, screws, tapes, etc. IKEA has this pegboard solution that works wonders for the studio, a bag to roll the gels in, hooks for the gaffer tape, compartments for screws, etc. Really handy!
The downside is that if you overload it, it will start bending forward and the little drawer compartments will slide off causing a lot of trouble.
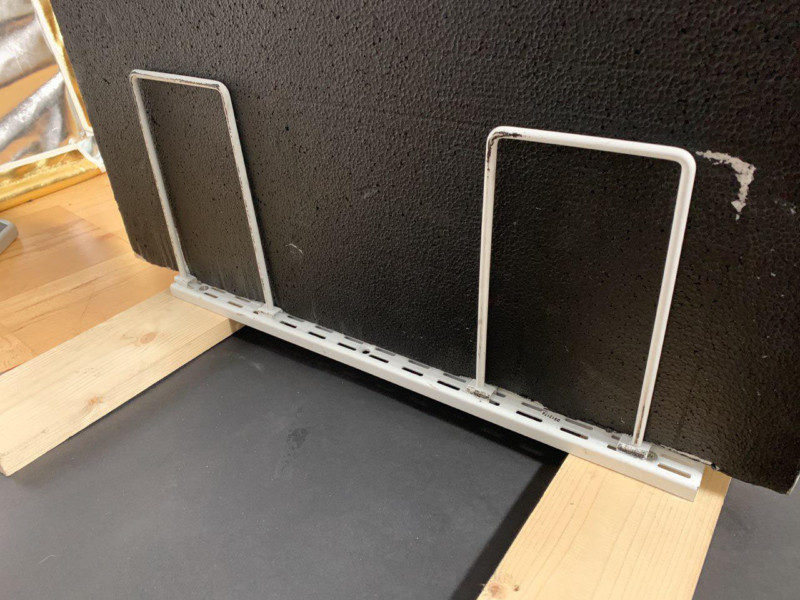
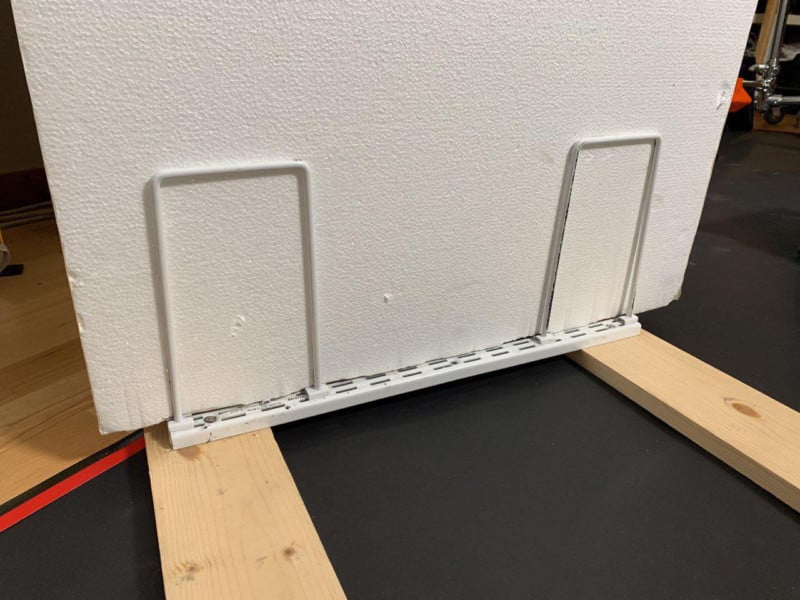
#4. Shelf Rails and Wood
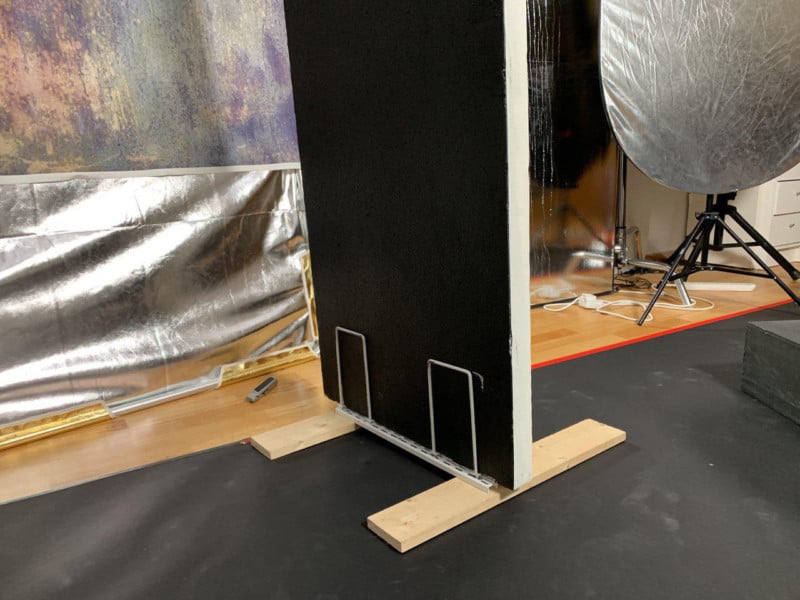
This one is a bit of a DIY but fun to make and tremendously useful. Other similar solutions are bike stands. This one, in particular, is perfect for holding a 2-inch polyboard with a tire width of 53mm. Ideal for polyboards and for less than $30.
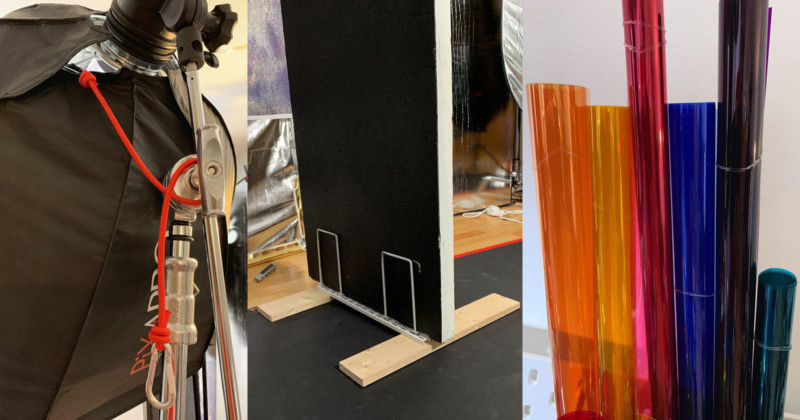
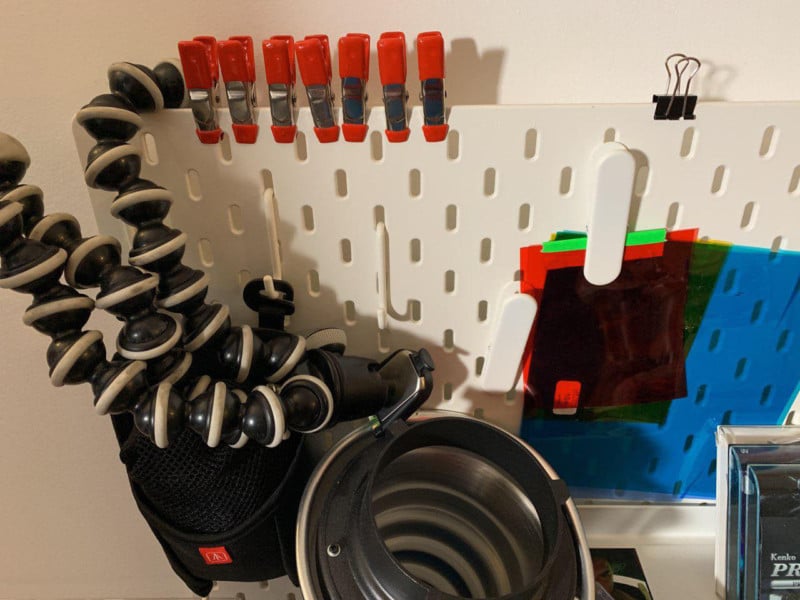
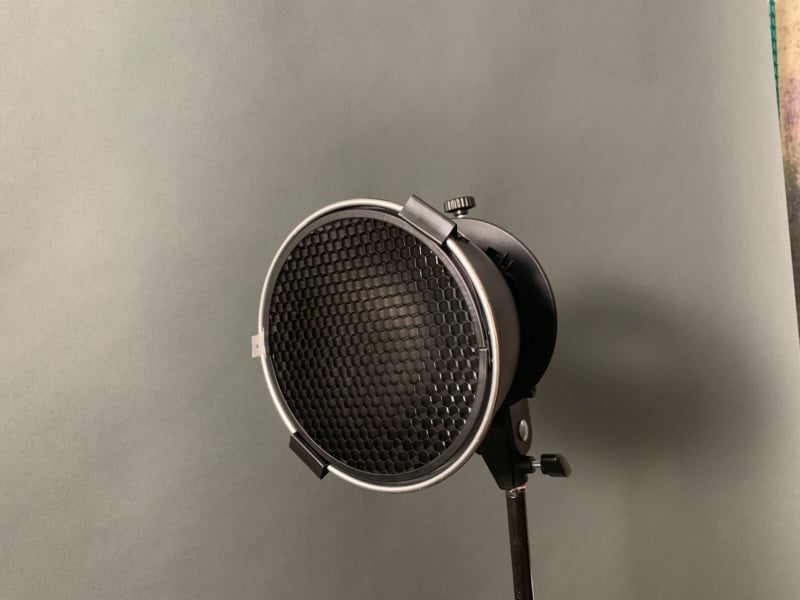
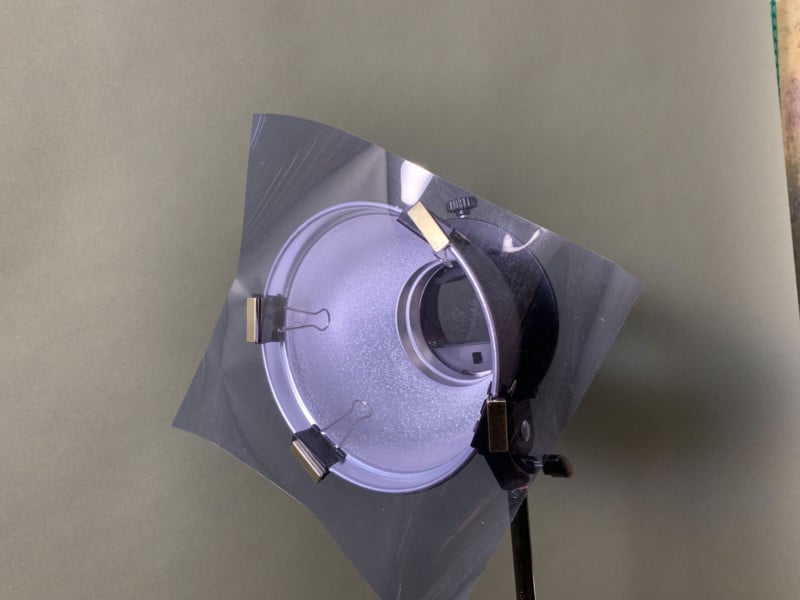
#5. Metal Clips and Magnets
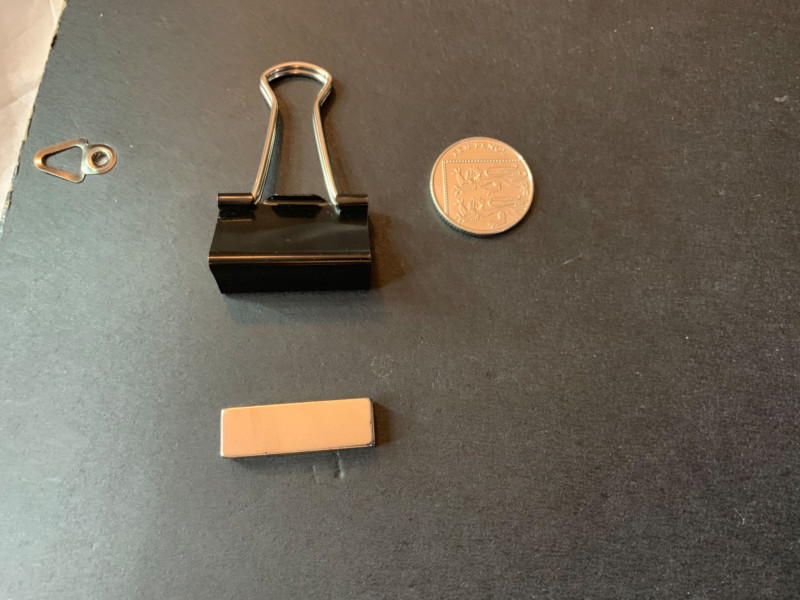
This is by far the most useful studio life hack of all. As studio photographers, we have all been there trying to stick gaffer tape into a dish or modifier. The results more than often are not what I would call “neat.”
Gel lighting master Jake Hicks comes to the rescue (once again) and gives us this splendid tip. For an in-depth post on this tip please visit his original article.


#6. Shoe Rack
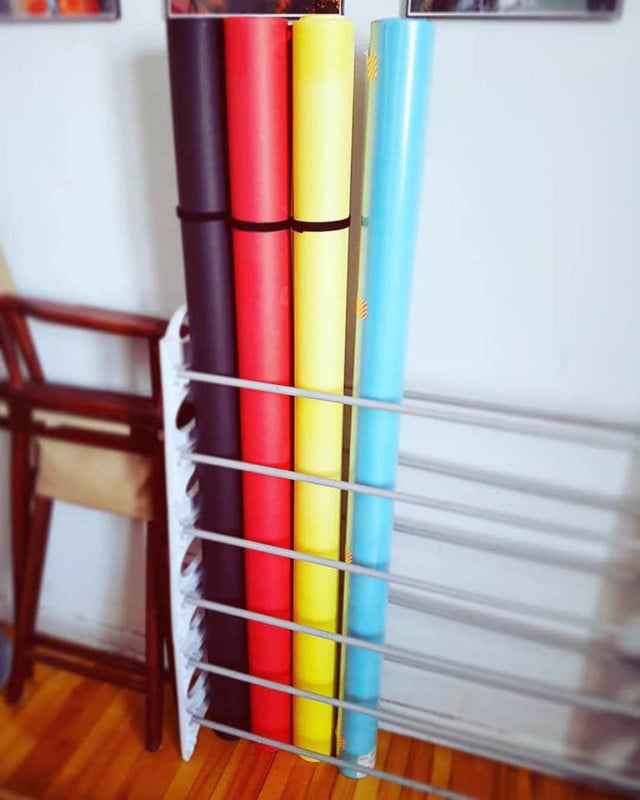
As someone who shoots a considerable amount of in-studio portrait sessions, I have obtained a number of rolls of seamless paper through the years. This rolls take up a lot of space and becomes unorganized quickly. What started as an organized system for 2-3 rolls, suddenly turned into a big pile of rolls of paper leaning up against a wall.
The idea is that you want to keep your seamless paper sitting upright, to prevent warping and color inconsistencies over time. In order to keep the seamless vertical and tidy, SLR Lounge a great solution by using a small shoe rack. Using the metal frame of a shoe rack, seamless rolls seem to fit perfectly into the system, allowing you a space-saving option that can be had for around $20 or less.
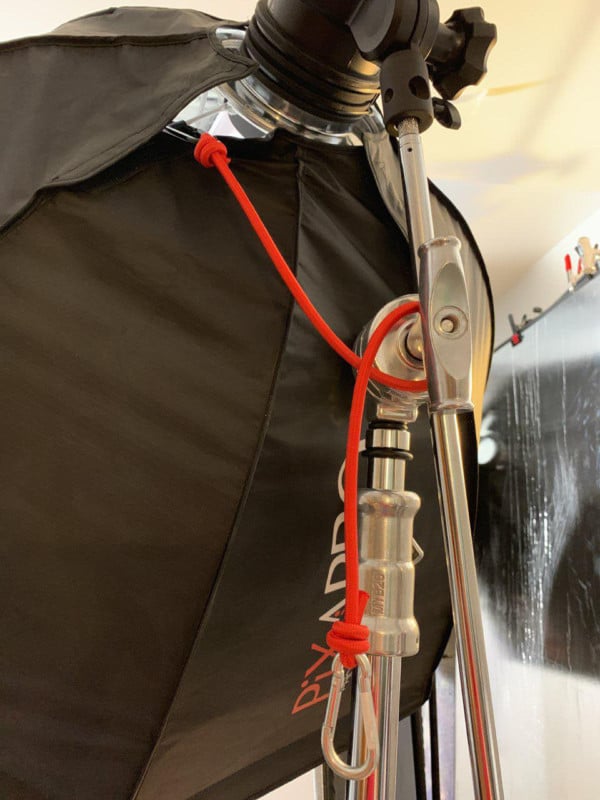
#7. Elastic Ropes and Clips
Another great studio life hack to keep your softboxes out of the way is to attach elastic ropes with clips on both ends, this way you can leave the softboxes hanging from the ceiling instead of being around in the studio.
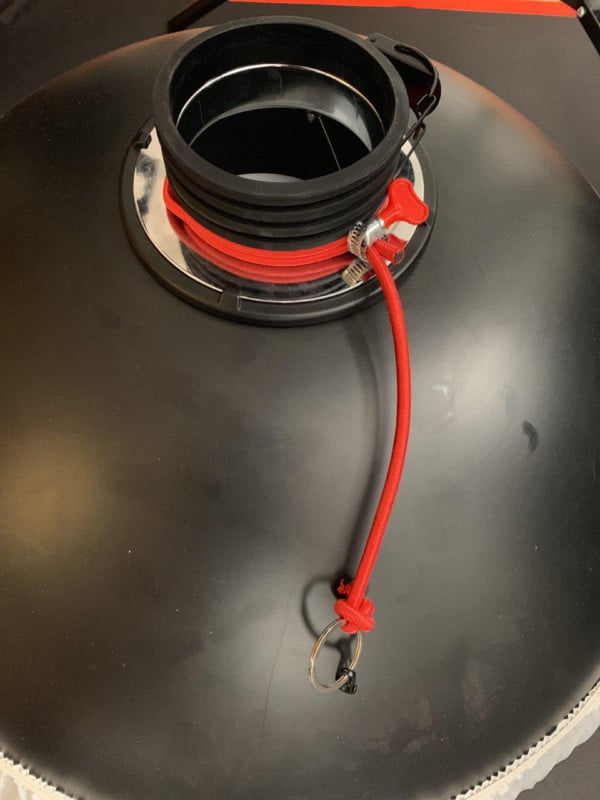
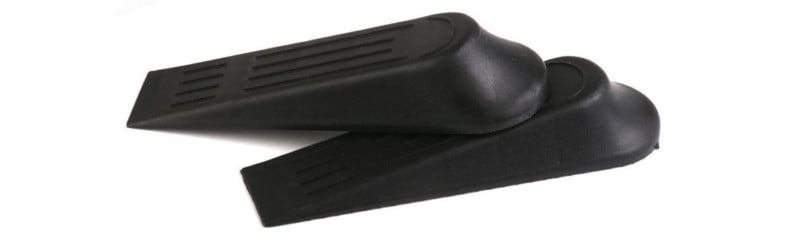
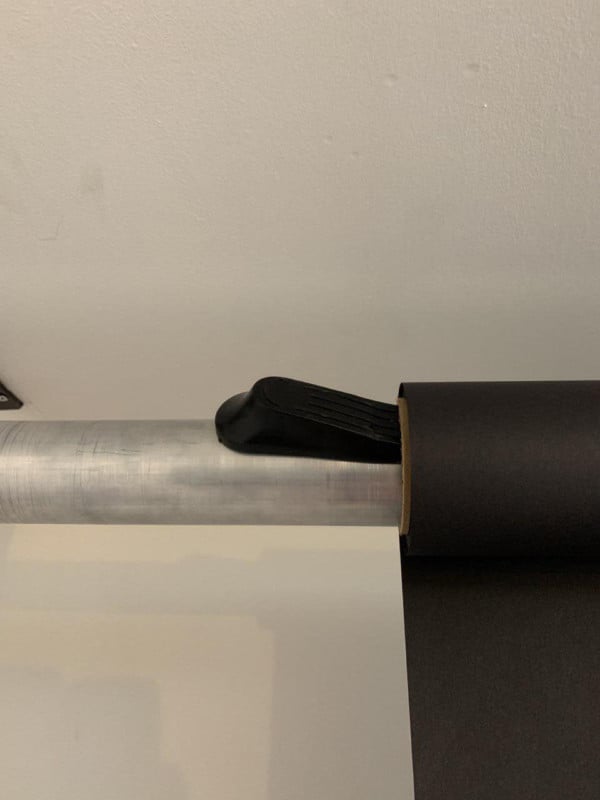
#8. Door Stopper
As a photographer, there is no most annoying thing like a backdrop that doesn’t stay in place. While using these multi background solution that attaches the paper roll to an aluminum cylinder.
I tried so many things, from pieces of cardboard to small pins but door stoppers have become the studio life hack final solution. They look great when they are in place and they are easy to stick in between background roll and cylinder. Problem solved!
#9. Silver Reflector Backdrop
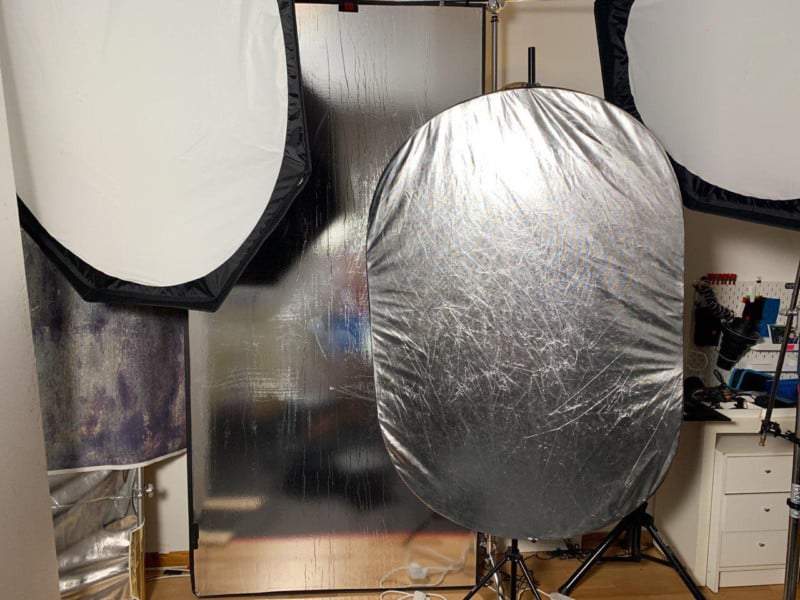
Studio reflectors are a must have in every photography studio for obvious reasons. I have plenty of them on different sizes and shapes depending on whether I’m shooting headshots, commercial or something else. Also, depending on the skin tones of the subject and quality of bounce you’d like to achieve, you might use silver, golden, white or black side. (I’ll tackle that in another article).
But what about using them as backdrops of your scene? As they catch and bounce the light with its slightly irregular textured surface they are perfect for this modern outdoors-hallway-studio effect. Its corrugated surface will give you a nice texture with some reflections of the strobes in it.
Sometimes even your subject will cast some lights and shadows within the reflector if you place him/her close enough.
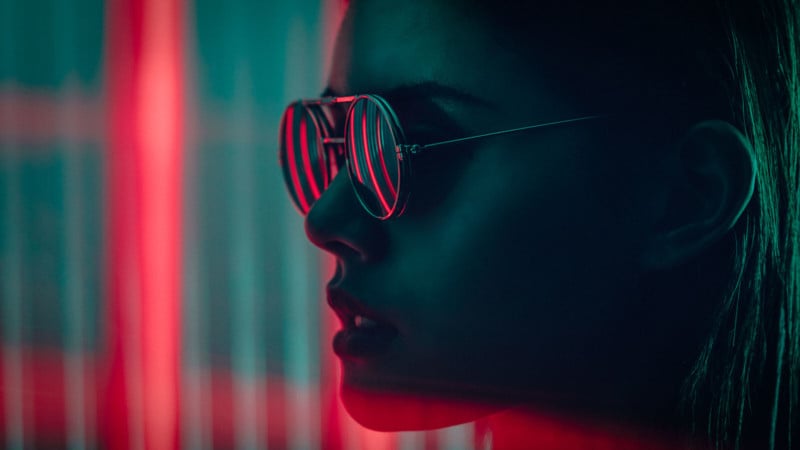
#10. Neon Tubes and PVC Corrugated Roofing Sheets
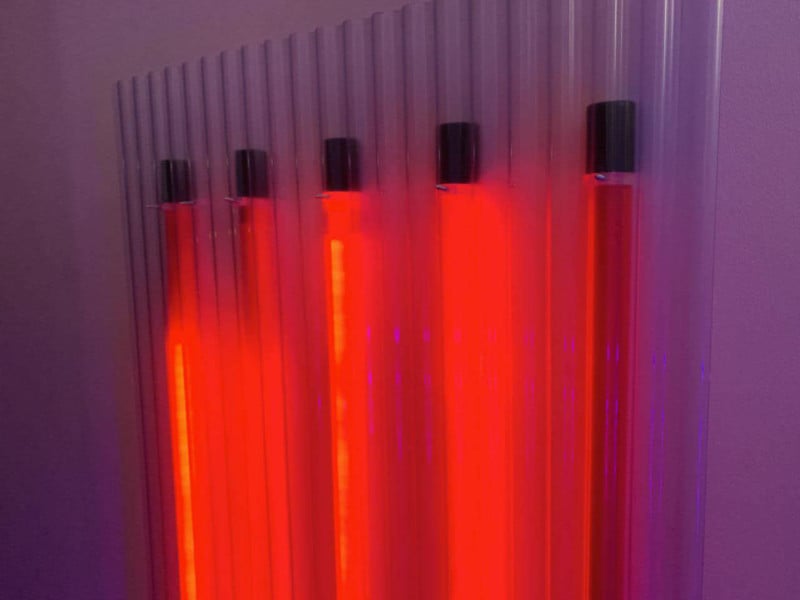
This was an idea I had for a long time as a DIY project that I got from strolling down Regent Street and checking the shops (I think it was the Top Man storefront). I decided to build a small replica myself.
Using this corrugated PVC roofing sheet you can get from any DIY shop (I got mine from Wickes) and attaching a series of neon fluorescent tubes to it. It makes the perfect neon sci-fi background for your portraits or headshots.

And this concludes my list of 10 photo studio life hacks. Some of the solutions are very cheap and straight forward and others require a bit of “do it yourself” But I hope you found these tips useful.
About the author: Roberto Vivancos is an internationally published photographer and actor with over fifteen years of experience specializing in the areas of headshot and commercial photography. The opinions expressed in this article are solely those of the author. Whether shooting in his own London studio environment or on location worldwide, Vivancos’s clients range from models, actors, singers, bands, and dancers. His bold cinematic style inherited from 80’s films, Japanese anime and superhero comics uses dramatic lighting techniques to bring his subjects to life. You can find more of his work on his website, Facebook, Twitter, and Instagram. This article was also published here.