Subject Isolation: Finding Innovative Ways to Draw Attention to Subjects
I have no idea where I first heard this, but it’s extremely true: “the main difference between painting and photography is that the painters need to work hard to put things into their images, whereas photographers have to work hard to take things out of their images.”
This is by far the hardest and most important thing about photography these days. Forget about all of those technical-sounding terms like aperture, shutter speed, and ISO. It seems like everyone I talk to is mostly scared these fancy-sounding terms and their counterintuitive numbering systems, but really, you can learn those things in a day, and get pretty good within a week. It’s not like you have to deal with messy chemicals, narrow temperature ranges, or fumble around in a darkroom. It’s not rocket science, and computers can do a lot of the hard work these days. There’s no shame in relying on them. Your job is only to know enough about the system to take control and make artistic decisions.
Camera settings are just tools for your toolbox, and they are only the first in an endless list of techniques and tricks that you use to do the real, hard work of photography—which is figuring out how to remove or de-emphasize distracting elements in the frame and place emphasis on your subject.
How do we do this? Well for starters, there’s always the nuclear option: you can just blur distractions into oblivion with a really big aperture. There’s nothing wrong with this approach, just be careful not to rely on it too much, and don’t forget that there are so many more options out there. A photographer should always be curious about expanding his or her palette. Here are a few ideas that I’ve been tinkering with lately. I’m sure that there are many more.
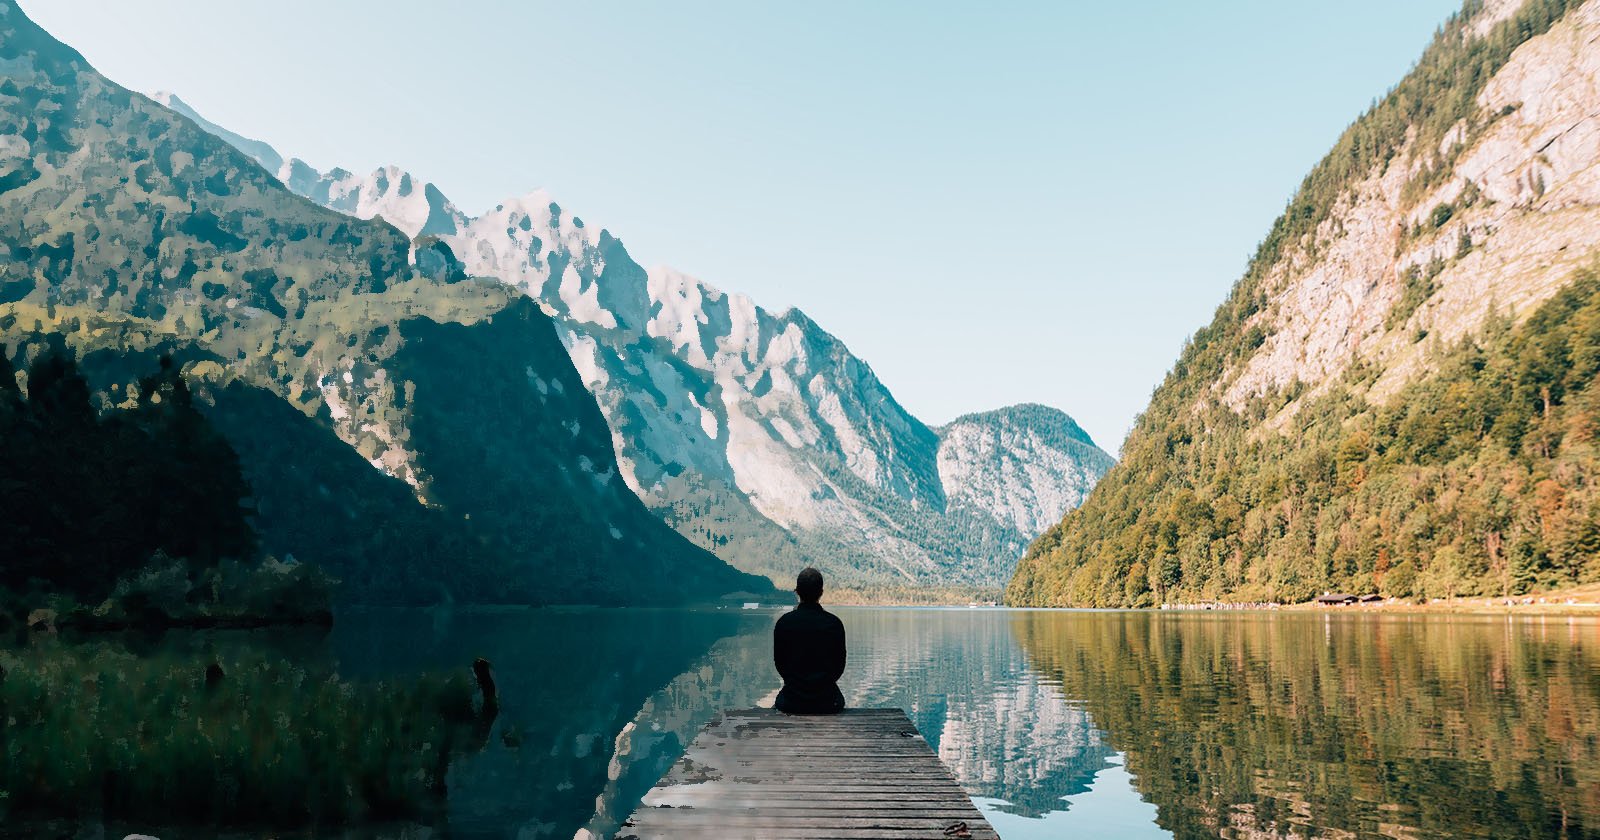
Use the Sun
Letting the perfect amount of too much sun into your frame can blow out highlights in distracting areas, and bring attention to your subject.

You should keep the sun behind you or a little off to the side—this is one of those basic rules of thumb that you learn in any introductory photography course, and as is the case with most introductory rules, it is completely correct. Keeping the sun behind you results in the best contrast and color rendition, and it eliminates lens flares. But it is also fun to find reasons to break the rules. Sometimes lens flares are fun, and sometimes I’m even OK with slightly washed out images, reduced contrast, or weak colors. It’s a stylistic choice, and as it turns out, you use the sun to selectively overwhelm unwanted details—if you’re careful.
The trick is to block out only part of the sun’s disk. If you leave the whole thing in there, it’ll completely overexpose even the best digital sensors, and it won’t leave you with very many details to work with. But if you move around and adjust your perspective so that the sun is just barely peeking over the edge of something—say someone’s shoulder or maybe an adjacent building—then the sensor can still preserve color and details despite blowing out the highlights in much of the frame.
You have to be very careful about how much of the sun you let into the frame. Even a millimeter or two difference in your position can drastically change the way the light behaves, and that can be the difference between a worthless, overexposed image, and one that looks interesting. This is also a technique that works best toward the end of the day when the sun is low on the horizon and its light is not quite as intense. The last thing to note is that you should underexpose the subject as much as reasonably possible so that details are preserved in areas that are close to the light source.
If you get it just right, you should be able to completely eliminate details in large swaths of the frame, simplifying the overall composition of the image and giving it a fairly unique, ethereal look. Keep in mind that the precise outcome is highly dependent on the lens that you are using—each is unique, and each is a little unpredictable. But the chaos is half the fun.
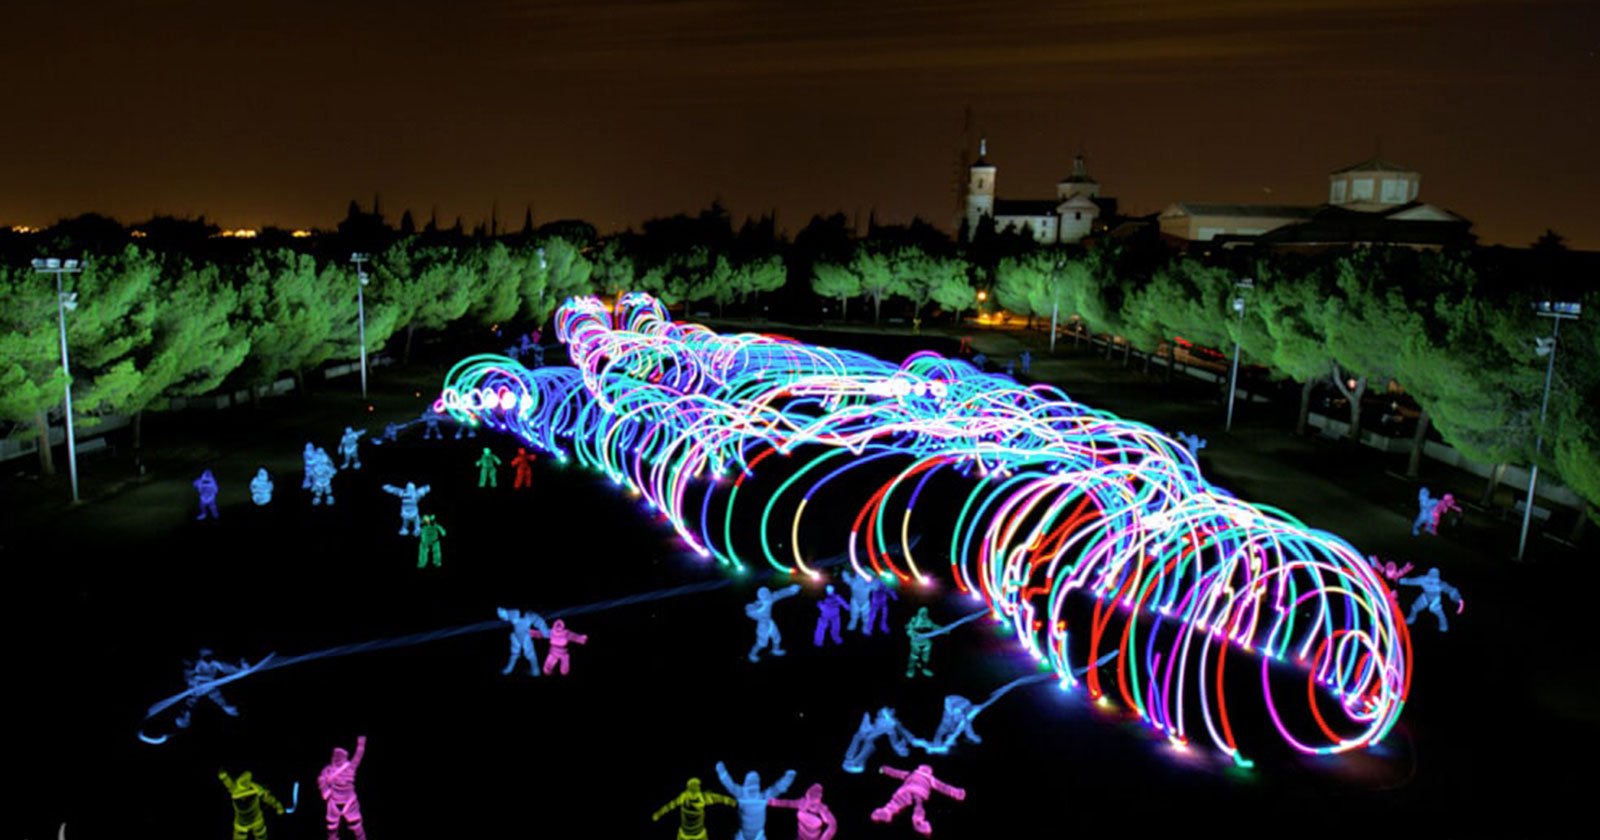
Use Motion
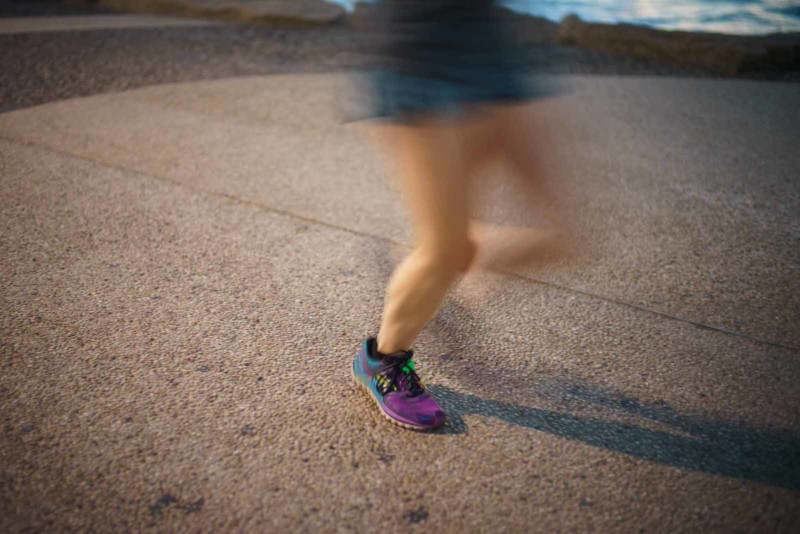
Exploit subtle differences between the how your subject does or doesn’t move relative to the background.

Some things remain still while everything else is moving. That may sound somewhat obvious, but I first noticed its usefulness in photography when I was trying to figure out an interesting way to take pictures of people running along a beachside boardwalk. As it turns out, every time a runner takes a step, their shoe is pretty much locked into place for a brief moment while the rest of their body is propelled forward in the stride. If you can get the timing right, you can isolate the foot while everything else is blurred a little.
The trick is to tune the shutter speed so that it lasts exactly as long as the subject remains stationary. It takes a keen eye to even notice instances where this is even useful. So keep your eyes peeled, and pay careful attention to patterns in movement—you’re bound to find things that work.
The other version of this is to track along with something that is moving, while everything else remains still. This one is probably the most difficult techniques to achieve in a street photography setting, and a lot of it just comes down to luck—you could probably control all of the variables in a studio setting and do a much better job.
The way it works is you set the You have to track along with the subject perfectly while maintaining focus. If you get it just right, the object or person that you are tracking will remain sharp while everything else is smudged a little. It’s best to set the shutter speed to about a tenth of a second for this one, as it is nearly impossible to track an object for much longer than that.
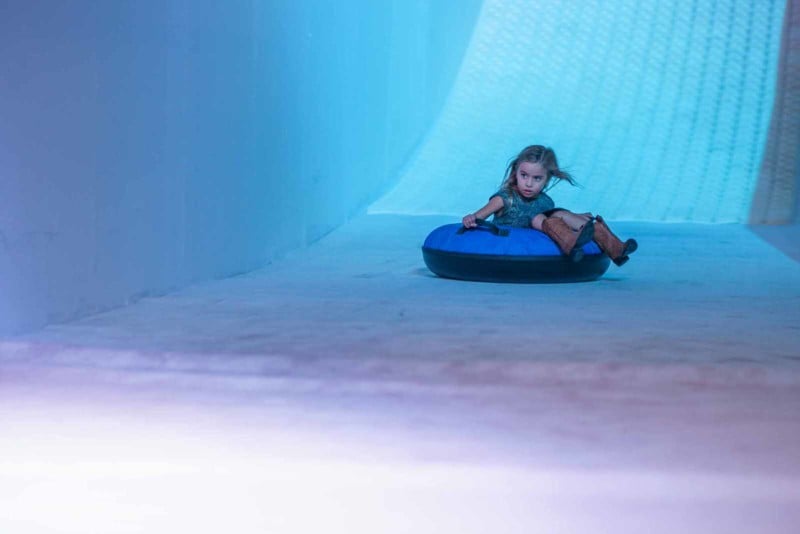
Use Light Splashes

Cities at night are full of spotlights that you can use to focus attention on your subjects.
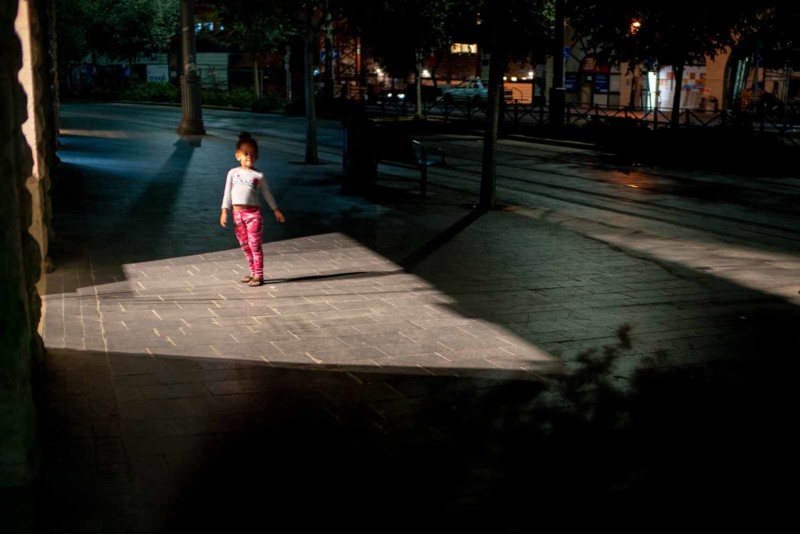
You don’t necessarily need a flash or a camera that can operate in extremely low light conditions in order to do great street photography at night. A city at night has plenty of light to work with. It’s teeming with all sorts of light-splashes that emanate from storefronts, car headlights, lampposts (of course), and so much more. But using this light does require a different approach, and it does open up different possibilities in terms of technique.
These light-splashes work in more or less the same as spotlights, and just like spotlights, you can use the contrast between these illuminated areas and the darkness around it to your advantage. Set your exposure to emphasize the areas illuminated by the light, and everything else will fall away into blackness.
At least with street photography, the trick is to set up next to a light-source that gets regular traffic and wait for your subject to move into the illuminated area. If you’re paying attention, you can also catch fleeting moments that are a little more spontaneous, but in my experience, it usually takes a few tries to get the moment to line up with the light. Finally, don’t forget that there is an endless list of sources available — I’ve had luck with things like cell phone screens and lighters. Keep your eyes peeled for where the light naturally falls, and try to position yourself to take advantage of it.
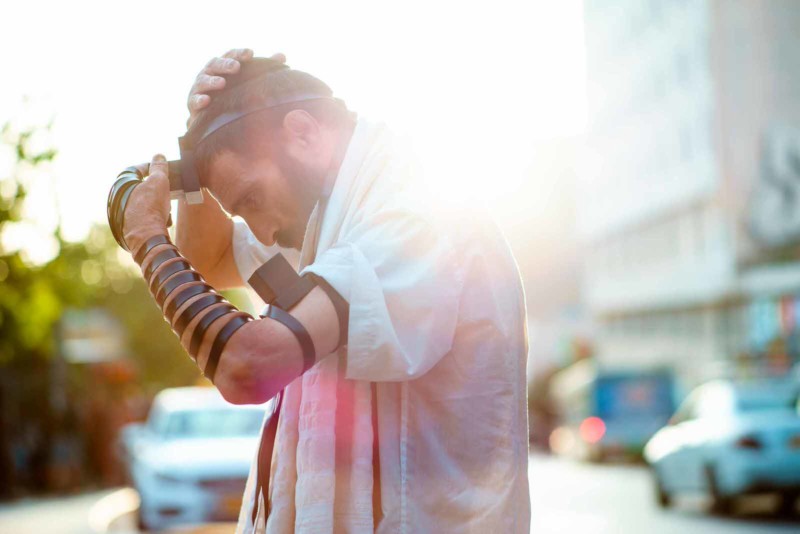
Use Themes

Use repetition and contrasts between the nature of objects or phenomena in order to bring attention to your subject.
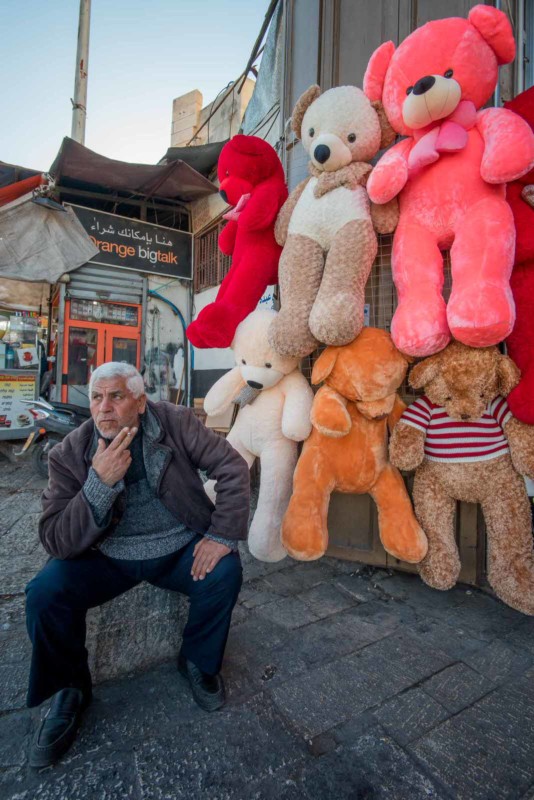
Humans are really good at categorizing things, and not merely based on their physical appearance. All it takes is a glance, and we can sort all manner of items according to complex themes, inherent qualities, and even just based on our individual opinions, biases, or previous experiences with those items. Similarities or differences between persons, places, and things are instantly — often subconsciously — noted, and this tendency can shape the way we interact with a photograph. This is a human tendency that is extremely useful for photographers. When used properly, playing off of these differences can be no different than using actual, physical contrast in your images.
Some of the most iconic images ever taken make good use of this technique. Iconic examples include “The Ultimate Confrontation” by Jan Rose Kasmir, where the beauty of flowers is pitted up against the faceless authority of the riot police. “Earthrise,” taken by astronaut Bill Anders during the Apollo 8 mission gains its power by completely inverting our usual view of the world, and literally putting everything on this planet into perspective. Even that Einstein photo where he is sticking out is tongue builds its power from contrasts.
So take a note from these examples. Play with irony. Play with our preexisting biases. Play with expectations. The possibilities are endless.
Clean Up Your Backgrounds
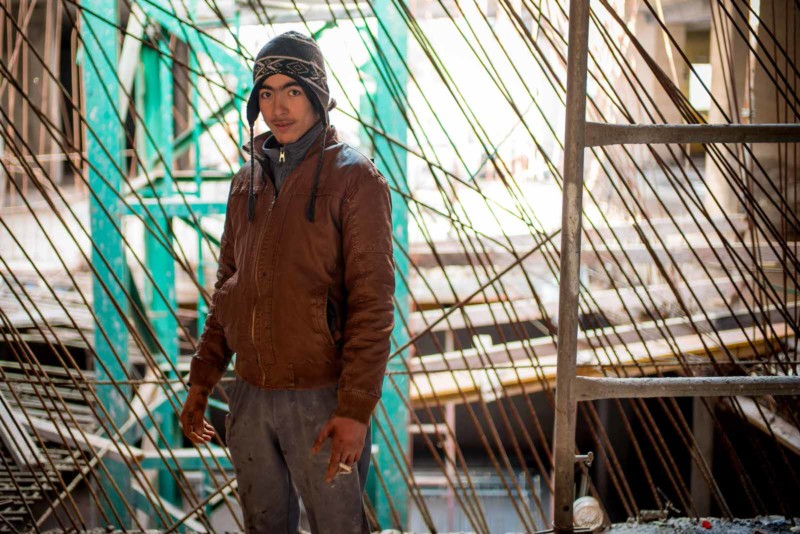
Even the smallest differences in perspective can have a drastic effect on the end result.

This last bit of advice is extremely versatile, and if you think about it, it is really the fundamental technique that underlies most of the aforementioned examples: you need to be paying very close attention not only to your subject but also to what appears in the background of your photographs.
Although your final image is two-dimensional, the act of framing it is actually an extremely three-dimensional process. Even slight differences in positioning on your part can make for drastic differences in what appears in your background. It is altogether too easy to forget this, and many only try to get the focus right and properly distribute all of the subjects in the photograph according to the rule of thirds; at best, we people might rely on zoom lenses to take care of composition — no need to move around all that much.
But you’re not always in a studio, and you can’t always just pull the perfect backdrop out of a roll that hangs from the ceiling. Most of the time you will have to choose your backdrops by hustling around on your feet. You’ll have to move about in every direction until you background is as simple as you want it to be; until you’ve removed anything that shouldn’t be there. This is how you get the sun in the perfect spot, this is how you emphasize the motion of your subject, this is how you get into the right position to take advantage of light-splashes, and this is how you make sure that only certain themes end up in your frame.
It’s amazing how much your background can change, even if only move even an inch or two. So don’t be lazy about it. Small changes can mean the difference between placing your subject right in the middle of the horizon line, or it can place it in front of something benign and simple. You can also take it a step further place it in relation to something important and related.
Figuring out how to control your background is probably one of the most important and overarching skills that you can develop as a photographer. Developing a style that makes good use of it will set you apart from the rest, but you will never become a master of it; there are endless possibilities. So keep tinkering, and don’t forget to have fun.
About the author: Aaron Cederberg is a Middle East-based documentary photographer and founder of Arc Moment Magazine (@arcmoment on Instagram). The opinions expressed in this article are solely those of the author. You can also follow his personal work on Instagram at @arcederberg. This article was also published here.