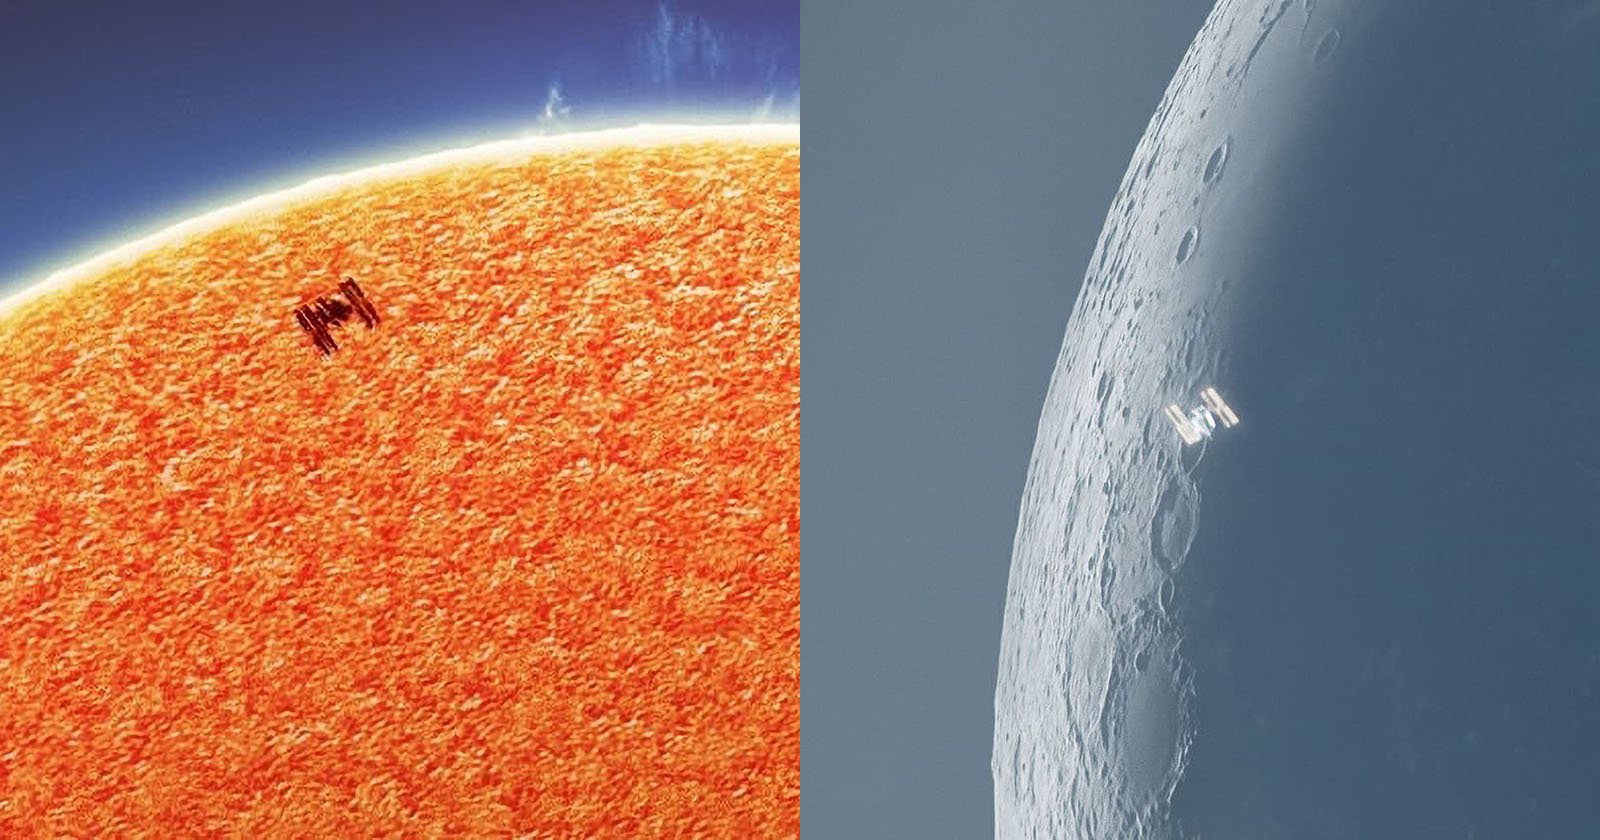
How to Shoot the ISS Flying Across the Face of the Moon
I’ve always been fascinated by the night sky, and one of my favorite things to look out for is the International Space Station when it passes overhead. It still boggles my mind that there are people up there, 200 miles into space. Perhaps they are looking down too. In this tutorial I’m going to show you how to photograph an ISS transit – in other words, photographing the ISS as it flies in front of the moon!
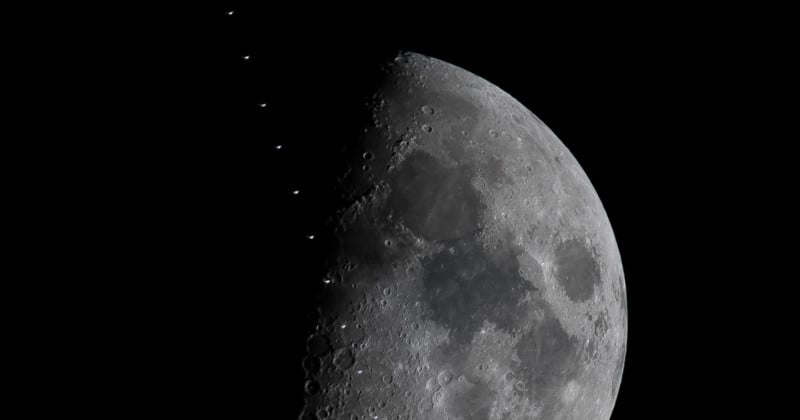
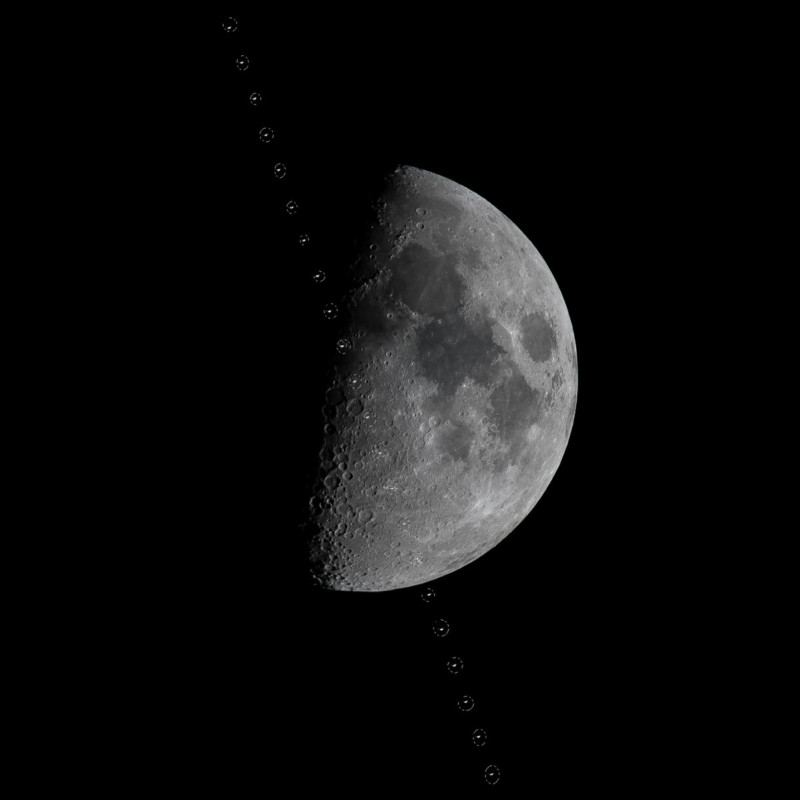
The photo you see here is a composite of 22 consecutive frames illustrating the movement of the ISS across the face of the moon:
This whole sequence spanned just 5 seconds!
Viewing The ISS
The International Space Station orbits 200 miles above Earth at a speed of 17,500 miles per hour. When the sun is below the horizon and the angle of reflection is just right, it is visible to the naked eye as a bright pinpoint of light moving across the sky.
You can check when the ISS is visible using one of these websites
Viewing the ISS does not require a telescope or any other specialist equipment. Just look up!
Items You Need
- A DSLR. I use the Nikon D850 but really, any DSLR will do the job.
- A zoom lens (the longer the better). I was using the Sigma 150-600mm F5-6.3 lens.
- A very sturdy tripod. My current setup is the Benro TGP17C carbon fibre tripod. (Note: This served me well for this particular shooting sequence, but longer exposures using this combination of camera and lens tend to suffer – a larger tripod would be recommended. However, for smaller DSLRs and lenses, a tripod of this spec is ample.)
- A shutter release cable or shutter remote control. It is important to keep vibration to a minimum when using a zoom lens.
- The fastest card you have. You will be shooting in burst mode / continuous shooting. A slow card will cause a bottleneck and you risk missing the magic moment
- A fully charged battery. If you have one, take a spare too, just in case.
Finding When An ISS Transit Will Happen
Thanks to the incredible work of Transit Finder it is easier than ever to find out when the ISS transits the moon or sun at a viewing location near you. Choose your location from the map, define an acceptable radius (the default is set to 80km) and it will generate a list of passes.
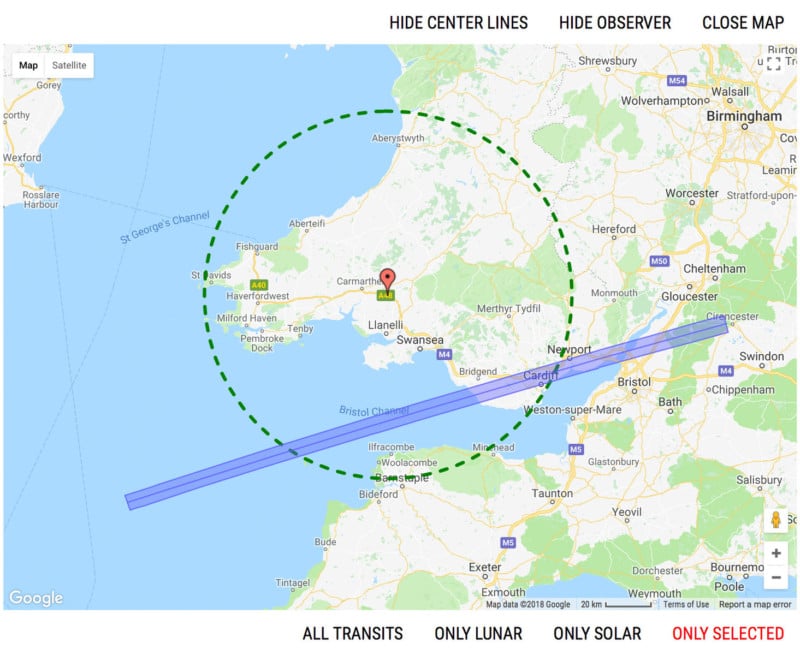
On May 22, 2018, there was a lunar pass which would be visible across the Vale of Glamorgan, Cardiff, and Newport in Wales. This is around one hour’s drive from my home, the weather forecast was clear, so I decided to attempt a shoot.
I arrived 45 minutes early to ensure I had ample time to find a quiet spot to set up where I was unlikely to be disturbed, to take some test shots and have a quick practice run of the real shoot.
Taking The Shot
Firstly, double check the predicted transit time, and ensure the clocks on your camera and smartphone are properly synced. You don’t want to be scrambling to set up the shot because your timing was a minute off!
Make sure your camera is set up for continuous shooting, or “burst mode”. Plug in your shutter release cable or remote control.
Find your focus on the moon’s surface, then once you’re happy, turn off autofocus. Be careful as you move your camera or lens not to accidentally move the focus ring. One tip is to use a strip of electrical tape to hold the focus ring in place once you have manually focused.
The moon moves quickly throughout the frame, so position it off-center, such that it will be moving into the center of the frame when the ISS arrives.
Finally, decide upon your settings. This will vary from camera to camera and lens to lens, but it’s important to have a very fast shutter speed otherwise the ISS will be nothing but a white smudge. 1/1600 seconds is the minimum I’d recommend. Ultimately, the settings I used were: f/8, 1/2000 seconds, ISO 800.
Though I advocate shooting RAW over JPG wherever possible, if you find your camera’s burst mode isn’t very quick, switching to JPG should yield far quicker results.
Putting It All Together With Photoshop
Though it seems daunting at first, it’s really simple to put your images together using Photoshop. Go to
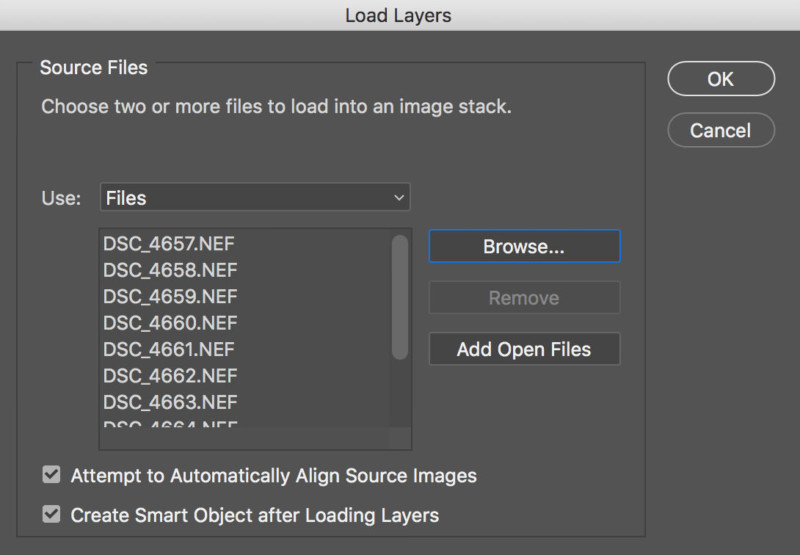
File > Scripts > Load Files Into Stack
Select all the images, and ensure the following boxes are checked:
Attempt to automatically align source images
Convert to smart object after loading layers
Reducing Noise
Once complete you will have a stack of images grouped into a smart object. The last image of the series will be on top. Highlight this smart object in the layers panel, then click on
Layer > Smart Objects > Stack Mode > Median
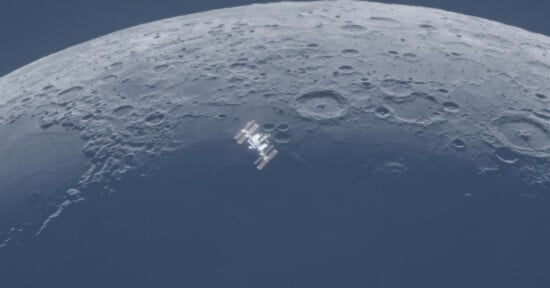
This will drastically reduce the noise in your image and make your moon much crisper and detailed – check out this before and after comparison:

Compositing The ISS
Duplicate your smart object in the Layers panel, ensure it is the topmost layer, then click on
Layer > Smart Objects > Stack Mode > Maximum
This stack mode selects the brightest pixel from each layer in the stack and therefore shows the ISS most brightly. However it also carries through noise and hot pixels, so we need to mask those out.
Masking For The ISS
There are a few ways to do this, but here is my preferred method.
Click on your ISS layer in the Layers panel.
Next, select the lasso tool from the toolbox. Set the feather to 4px. Holding down the shift key, which allows you to make multiple selections, lasso around each of the ISS spots in that layer. Once complete, it should look something like this:
Click Select > Inverse then finally click the Add Layer Mask button at bottom of the Layers panel.
This creates a mask that only shows the ISS image data, which is overlaid on top of the noise-reduced, sharp moon image that we already created.
Job done!
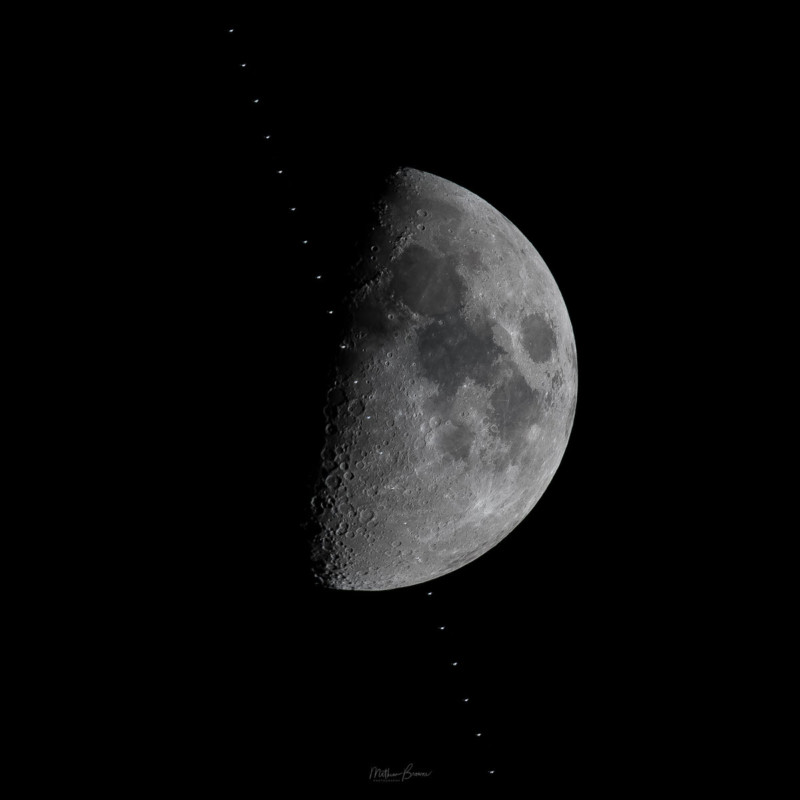
The Finished Product
I’m so pleased with how this photo turned out. Capturing an ISS transit has been high on my photography “bucket list” for some time but for all the effort and preparation, you still have to rely on a little bit of luck for the image to truly work. As I have learned before, a stray cloud at the wrong time can ruin the shoot, and it’s a huge disappointment to travel a long distance only to return without the photo you wanted.
All those failed attempts fade in my memory though, as I’ve now bagged the image I’ve wanted for months if not years!
About the author: Mathew Browne is a travel photographer from south Wales who also teaches fellow photographers via workshops, seminars and 1-to-1 tuition. He is also the co-founder of PhotoHound, an online community for travel photographers. You can find more of Browne’s work on his website, Facebook, Twitter, Instagram, Flickr, and 500px. This article was also published here.