How to Shoot and Edit Beer Can Photos
Here’s a 6-minute video from Andrew Mikhaylov that looks at how you can easily shoot beer can photos using 4 light sources for that signatory reflection on the can.
Mikhaylov uses two sheets of white cardboard, held using grips on stands, to create highlights on the can. He then takes a test shot, continually tweaking the light source until he’s happy with the reflection he’s achieving.
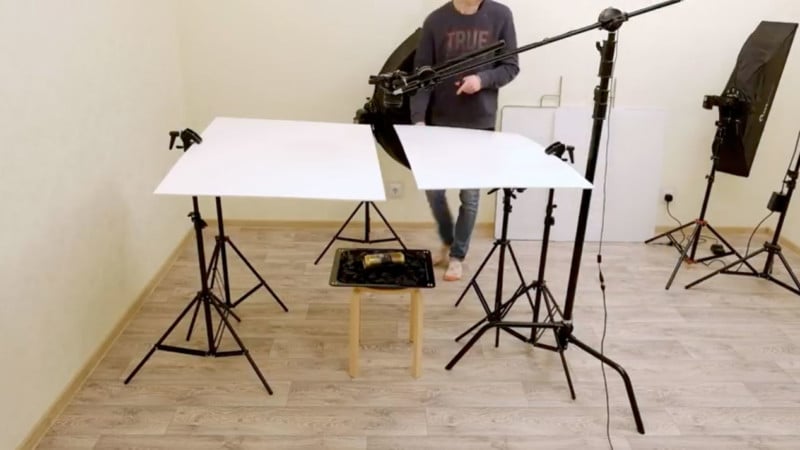
Once that’s done, it’s time to bring in some more strobes to properly light the scene. Using a small diffusion panel, Mikhaylov ensures that the whole beer can will be covered by the light.
He puts a strip box behind the diffusion panel, creating the ideal gradient by placing it close to the panel.
Throughout the video you can see his entire process, experimenting with the angles and positioning of his 4 light sources to achieve the ideal lighting. He suggests even using small reflective materials to reveal details in darker areas, producing images which can then be composited into the final image at the end.
Mikhaylov also made this 9-minute video showing how he post-processed the photo. It has four parts: (1) creating a background, (2) compiling different elements of a can, (3) retouching, and (4) color correction:
(via Andrew Mikhaylov via Photigy)