
How to Create a Focus Stack in Photoshop
Did you know that Photoshop has a built-in focus stacking function? This article explains about how it works and how to make the most of it.
Did you know that Photoshop has a built-in focus stacking function? This article explains about how it works and how to make the most of it.
Talented landscape photographer Michael Shainblum has put together a helpful tutorial that shows you two ways to dodge and burn your landscape photos depending on how selective you want to be.

One of the greatest challenges in macro photography is the depth of field, or DOF for short. Not only does the zone of sharpness drastically fall off as we get closer to our subjects, other factors such as the lack of light and diffraction softening make it tricky to use narrow apertures on top of that.

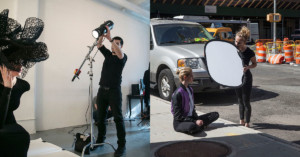
Commercial photographer, director, and artist Isaac Alvarez of Unplug Productions recently set out to see if he could capture professional-grade commercial product photography with a single LED panel for light, and a junkyard as his "studio." It seems the answer is yes...

Photographer Neil van Niekerk recently invited his friend Marco Leibetseder into his NYC studio for a photo challenge: rather than using flash, Niekerk and Leibetseder set themselves the challenge to capture some creative portraits that showcased "depth" in-studio using only continuous lighting.

There are all sorts of tools out there for making cinemagraphs and "plotagraphs" by animating certain parts of your still photos, but you don't need any of them. This short tutorial shows you how to create these animations using Adobe Photoshop.
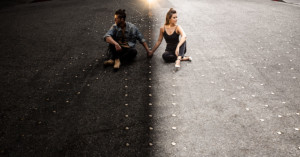
It's more and more difficult these days to photograph places without crowds or cars. One of the strategies that can help achieve that is to wake up early and be there at sunrise, but in very popular places, there will be other photographers with the same idea as you. So, how can we take a picture of a scene without this crowd?

YouTube channel KINETEK has released an extremely informative video by Director and Cinematographer Matthew Rosen, in which Rosen explains how to achieve and utilize color balance, and why it's important to avoid balancing everything.
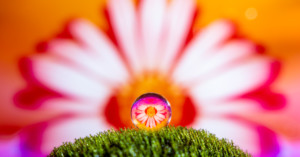
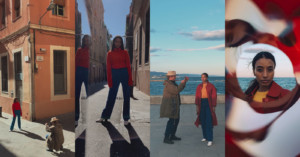
Refraction photography is an exciting subject that has been enjoying increasing popularity amongst photographers. You've probably seen refraction photos before: where an out-of-focus background appears sharply defined inside a crystal ball or a dew drop for example. In today’s post, we will examine this phenomenon and learn how to take beautiful photos by taking advantage of this effect.

Are you looking for an affordable but also electronic macro lens? Or maybe you have an old kit lens that's just sitting around, collecting dust since your last upgrade? Well then read on, because in this article I am going to share one cool hack that will allow you to transform almost any kit or standard zoom lens into a capable macro lens!
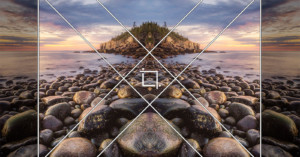
How many times have you returned from what you felt was a productive photography trip only to find that some of the compositions of your favorite images weren't exactly what you expected? This happens to me rather frequently, but fortunately for us, we have access to one of the best Lightroom tools for improving composition in our photos: the Crop tool!

I will start with a warning: Digital Infrared Photography is not easy, and this will get technical fast.
Here's a creative technique to add to your bag of tricks. In this 9.5-minute video, we’ll show you from start to finish how we took an ordinary scene and turned it into to go from day to night in one single exposure, in-camera.
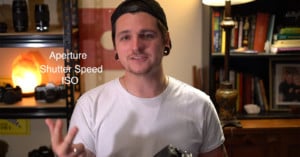
Just starting out in photography and want to learn the basics of shooting in full manual mode? Photographer Josh Collins made this helpful basic 11.5-minute tutorial that discusses the three corners of the Exposure Triangle -- aperture, shutter speed, and ISO.
I have often wanted to carry out global adjustments in Lightroom which target specific luminosity values in an image. Lately, I have discovered a way of achieving this. It is not as precise as, for instance, luminosity masking or blend-if masking in Photoshop, but yet it has the power to give an image that extra punch many of us are looking for in our editing.

In this short tutorial, Unmesh Dinda of PiXimperfect lays out his "Sharpening Separation" technique: a more advanced sharpening technique that allows you to sharpen your images as much as you like without creating those dreaded halos.

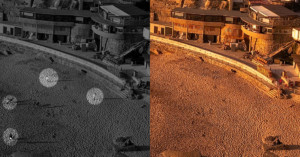
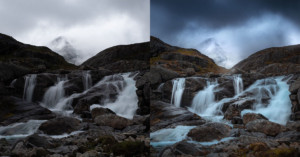
Perhaps one of the more difficult aspects of landscape photography is determining how to properly expose your scene under less-than-ideal lighting conditions. These types of situations are a common occurrence with outdoor photography as it’s often a struggle trying to properly expose an image consisting of a bright sky and a dark foreground in a single image.

Each year, someone new comes along to try and demystify bit depth for the masses. In 2017 it was Tutvid, in 2018 Greg Benz did a great job in this article, and now StyleMyPic has created a comprehensive and easy-to-follow video that explains exactly what bit depth is, how it works, and debunks a common myth.

In all honesty, I only use single-key shortcuts as opposed to multi-key for the simple reason that I can’t remember much beyond a single keystroke. I thought about printing every shortcut and hanging it on my office wall for reference, but that would defeat the purpose of using shortcuts in the first place as I’d have to spend additional time scanning the printout to locate what I’m looking for.

Back button focusing involves decoupling a camera's autofocus from the shutter button and moving it to a button under the right thumb on the back. Here's a helpful 4.5-minute video by Canon Australia showing how you can get started with this next-level focusing technique on your Canon DSLR or mirrorless camera.
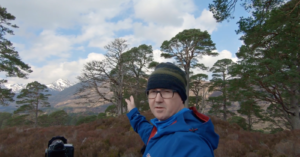
Scottish landscape and wildlife photographer Wayne Robertson recently shared what he's calling "4 Landscape Photography Tips to Last a Lifetime." These aren't "tricks" or "hacks" or "secrets," because Robertson doesn't believe there are any secrets when it comes to great landscape photography. Just tried and true advice that all landscape shooters could benefit from.
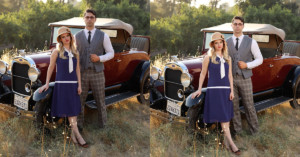
My name is Jay P. Morgan from The Slanted Lens, and in this 6.5-minute video and article, I'll illustrate the balance of strobes with ambient light. Whether it’s inside or outside, you’re going to have to learn the formula to balance strobes with ambient light. It’s not that hard, so let’s go back to 1930 and learn the formula!
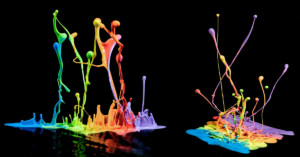
Photographer Steve Kazemir made this 4-minute video showing how he shoots beautiful photos of paint splashes frozen in time using an old speaker in his garage.
Want to get creative with shooting portraits using just your smartphone? Apple made this 3-minute video with advice and inspiration for shooting iPhone portraits from award-winning Magnum photographer Christopher Anderson.
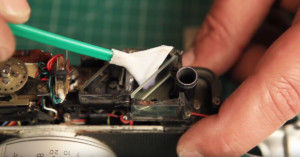
I recently collaborated with Chris from filmismorefun and made a video about how to clean the beam splitter in your rangefinder camera as well as how to improve the rangefinder patch too. This is an advanced tutorial with great results.

Shooting professional-quality portraits with artificial lighting doesn't have to weigh heavily on your bank account. Here's a 22-minute video in which photographer Sean Tucker shares how to shoot great portraits using a single speedlight and a cheap modifier.
Photographer Eric Floberg made this 10-minute video showing how he creates in-camera double-exposure photos using a tilt-shift lens, a technique he calls his "creative bread and butter."
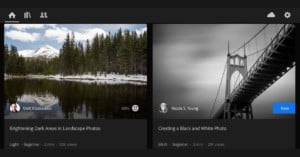
Adobe has announced the May 2019 release of Lightroom CC, and two of the more notable additions to the app are built-in interactive tutorials and a new Defringe tool.
Living in St. Louis almost my entire life, I was lead to believe the lights of the bustling city were too bright to make seeing stars anywhere nearby impossible. As I grew older and started getting serious about photography, I realized that was correct... kinda.
The popular YouTube channel Mango Street has released this free video that's a crash course on Adobe Lightroom. The masterclass will train you in the basics in less than 30 minutes (it's 28 minutes and 49 seconds, to be exact).
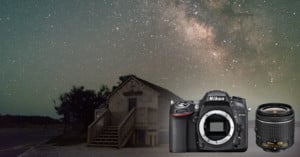
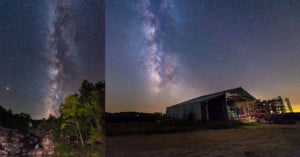
Can you shoot Milky Way photos using an entry-level crop-sensor DSLR and a basic kit lens? Yes, you can, but there are some tips, tricks, and techniques you can use to improve your results. Photographer Michael Ver Sprill (AKA Milky Way Mike) made this 16-minute video tutorial as a basic guide to doing this.
I firmly believe that assisting a photographer whose work you admire is one of the greatest learning opportunities available to us and can provide invaluable experience.

When you purchase a new camera, how much time do you spend reading the manual? I find most camera manuals rather difficult to follow along with, and I for one very rarely use them. What’s interesting is that camera manuals only describe the technical “how to” side of things, like how to turn on your camera or how to attach a lens, but it doesn’t tell you how to truly become comfortable with your camera.
If you need to make a complex selection in Photoshop that involves hair or fur on a background, the powerful Refine Edge Brush is ready to help. Here's a 1-minute Photoshop Magic Minute video by Adobe that will show you how to get started with the tool.

Making selections is one of the most basic things that you do in Photoshop, but there are many handy features and tricks that can help you work with selections. Here's a 2-minute video by Adobe with 7 helpful tricks, some of which you may not have known before.

Over the past couple of years, smoke bombs have become a popular photography accessory that adds a colorful new twist to portraits. They are being used for street portraiture, gender reveals, engagement shoots, and so much more. We found the best smoke bomb for photography usage and in this 6.5-minute video and article, we are going to give you 5 tips on how to use them safely and creatively.

This article is for all of the new photographers new to lighting and to all who think they are limited by their lack of gear! I will show you how you can create this whiskey image with just one light, in-camera, and with no editing.

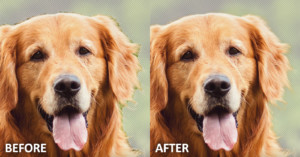
By carefully applying blur to a portrait, you can make it look like it was shot with a shallow depth-of-field using a fast (and expensive) lens. Here's a 12-minute tutorial by PiXimperfect that teaches the key to creating this faux blur in a realistic way.

What is the best way to light glass? Glass doesn’t look good when you shine light directly at it. It soaks up the light it doesn’t define it. It just gives you specular highlights little pinpoints that don’t photograph well.
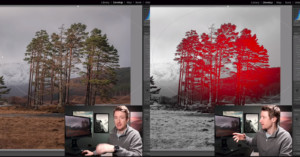
Lightroom has a powerful tool called Range Mask that can transform the way you post-process your photos, but photographers are often unaware that the tool even exists. Landscape photographer Thomas Heaton decided to make this 12-minute video to show how the tool can be invaluable for improving your photos.