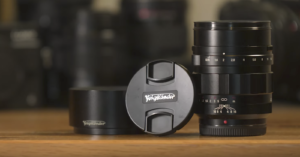
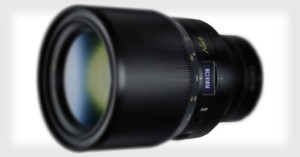
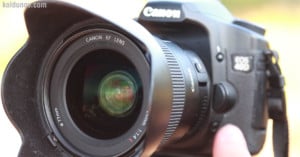
Photographer Nicolas Reusens has always been interested in insects, so when he purchased his first DSLR three years ago, he immediately dove into the art of macro photography. By using the technique known as focus stacking — combining several images taken at different depths of field — he’s generated some truly eye-popping photos of creepy crawlies from all over the world. Read more…
Photographer Benjamin Von Wong shot the portrait above a couple of days ago using a Nikon D4, a $9,000 Nikon 400mm f/2.8G lens, and a few iPhones for lighting. The extremely shallow depth-of-field was achieved using 36 separate exposures and the Brenizer Method. Read more…
The Canon 50mm f/1.0 was the fastest SLR lens in production before it was discontinued in 2000 and replaced with the f/1.2. There aren’t too many copies of this lens floating around on the used market, so photographers who want to use the ridiculous aperture it offers must pay a hefty premium in order to purchase one; the lenses commonly sell for two or three times the original retail value.
When reader Bryan Soderlind switched from film to digital a while back, he decided to splurge and go “all the way” by buying a 50mm f/1.0 for a little over $3,000 — a relative bargain. The lens was in “impeccable shape” and was in focus even when using the razor sharp depth of field at f/1.0. Here are some of his thoughts on what it’s like to use the lens, and some sample photos from his shoots. Read more…
Really more useful for landscape and macro photographers who are going to be shooting through very small apertures (f/22 and above), this video from FStoppers explains what diffraction is and how it can affect your shots. The trade off, as they explain in the video, is between a large depth of field and a sharp image; and the trick is to find your “sweet-spot.”
The difference isn’t as obvious on the video even at 1080p, so if you want to see full resolution examples be sure to head over to the original post.
Photoshop CS6 will have a new Iris Blur tool that lets you quickly add blur to an image that fakes a shallow depth of field. It’s a one tool-process that eschews the traditional methods of using masks, layers or depth maps.
You probably know that stopping down (i.e. increasing your f-stop number) can increase the sharpness of your subject, but how much should you stop down to boost resolution without losing that nice, creamy bokeh? Roger Cicala did some research on this question and writes:
For those lenses that do benefit, stopping down just to f/2.0 provides the majority of resolution improvement. The difference between wide open and f/2.0 is generally much greater than the difference between f/2.0 and the maximum resolution.
Getting the edges and corners sharp requires stopping down to at least f/4 for most wide-aperture primes, and some really need f/5.6. Stopping down to f/2.8 may maximize center sharpness but often makes only a slight difference in the corners, at least on a full-frame camera.
None of the lenses performed any better after f/5.6 (for the center) or f/8 for the corners. Most were clearly getting softer at f/11.
If you’re using a wide-aperture lens, stopping down to just f/2.0 will reap big gains in sharpness while still keeping the depth-of-field narrow. Furthermore, for some lenses you don’t really even need to worry about stopping down for sharpness, since it hasn’t a relatively negligible effect on the outcome.
Google scientist Sam Hasinoff has come up with a technique called “light-efficient photography” that uses focus-stacking to reduce the amount of time exposures require. In traditional photography, increasing the depth of field in a scene requires reducing the size of the aperture, which reduces the amount of light hitting the sensor and increases the amount of time required to properly expose the photo. This can cause a problem in some situations, such as when a longer exposure would lead to motion blur in the scene.
Hasinoff’s technique allows a camera to capture a photo of equal exposure and equivalent depth of field in a much shorter amount of time. He proposes using a wide aperture to capture as much light as possible, and using software to compensate for the shallow depth of field by stacking multiple exposures. In the example shown above, the camera captures an identical photograph twice as fast by simply stacking two photos taken with larger apertures.
Cell phone cameras have pretty poor image quality when compared with point-and-shoot cameras due to their small sensors, but one advantage they have over compact cameras is a naturally deep depth of field. That was particularly useful for this YouTube user in capturing some sharp video of his new motorcycle — something that would have been much more difficult using a standard point-and-shoot.
A compact camera probably isn’t the first thing someone would grab when looking to make a photo with an extremely shallow depth-of-field, since the small aperture and small sensor limit it in this regard. That might soon be different: a recently published patent application by Samsung shows that the company is looking into producing achieving shallow depth of fields with compact cameras by using a second lens to create a depth map for each photo. Read more…