Recreating the Look of 1850s Tintypes in Digital with Math and Science
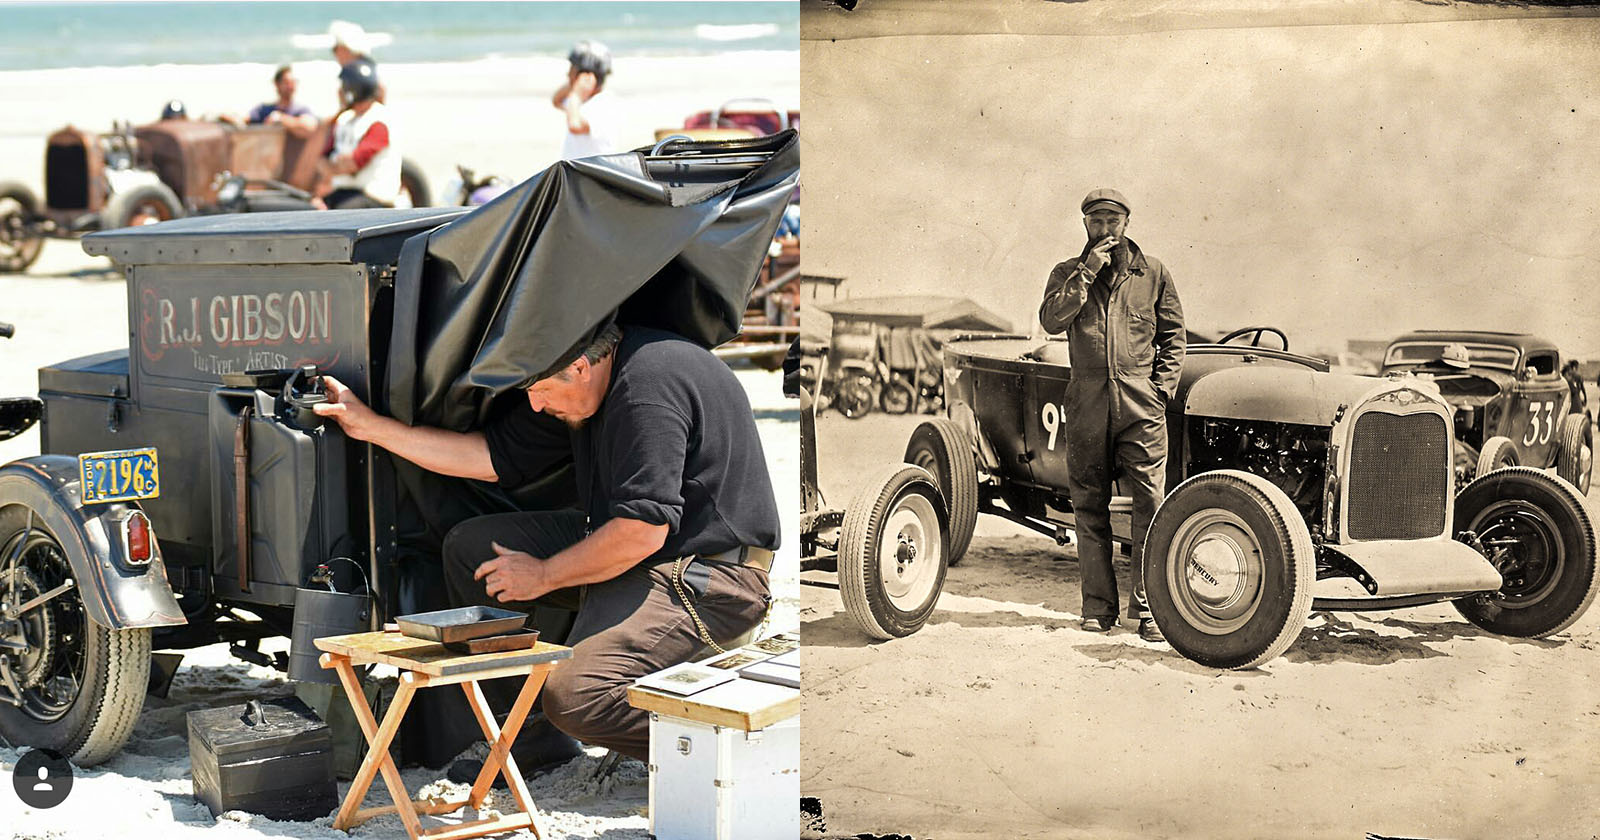
While I was visiting San Francisco, Kristy Headley, a dear friend and fellow engineer, showed me her studio. There I was lucky enough to sit for her while she did some vintage tintyping. Tintyping was one of the earliest forms of photography, popular in the 1850s.
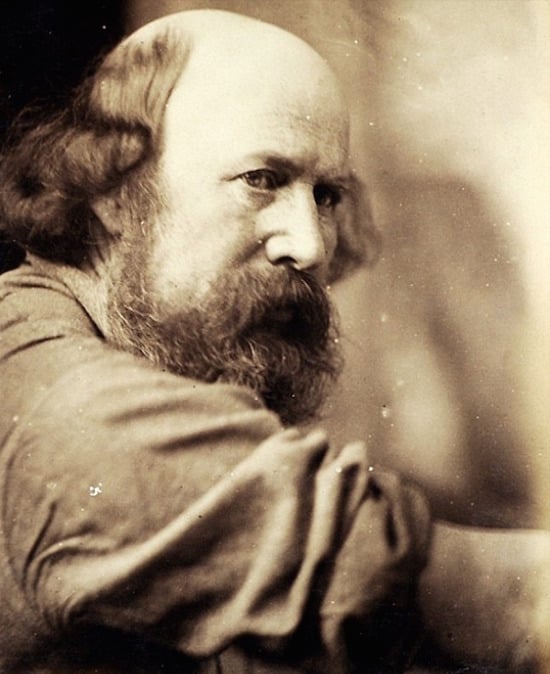
Kristy showed me each painstaking step, and I was enamored with the result. With her mastery of lighting techniques, she’d produced tintype photographs where every detail popped — every freckle, hair, and eyelash seemed to stand out. Yet, these looked very different from modern photography. There was a certain, seemingly unquantifiable trait to them. Why?
I sought out to quantify this ol’ timey look and the fashion by which one could reproduce it with a digital camera. Perhaps I could share in this delight without keeping jugs of volatile chemicals in my room.
Look to the Spectrum!
Kristy had told me that her exposure plates were only sensitive to certain colors: UV, blue, and some green. There was a specific range of wavelengths this collodion emulsion was sensitive to — one that doesn’t match human vision.
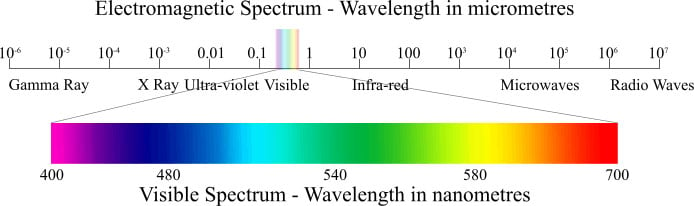
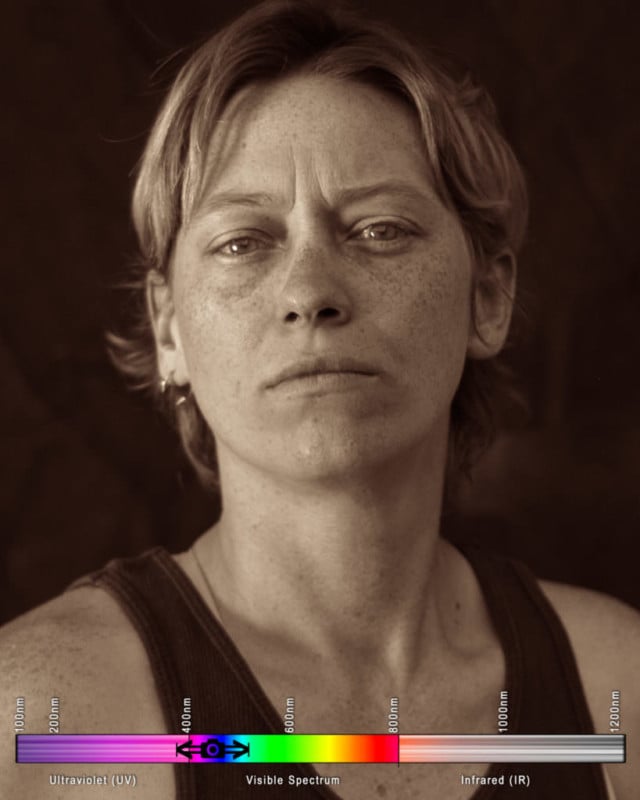
Human vision, as we can see above, is a sensitivity to the electromagnetic spectrum. Electromagnetic waves between about 400 and 700 nanometers will be perceived as light to us — the seven colors of the rainbow! (Interesting article about this to come later) If we dip to wavelengths shorter than 400, we get imperceivable ultraviolet (UV) light; rise to wavelengths above 700, we get imperceivable infrared (IR) light.
But What Do Vintage Photographic Emulsion Surfaces See?
Engineer Niles Lund seems to be the only person who has researched the spectral sensitivity of collodion, the emulsion chemical stew used to make wet-plate and tintype photographs in the mid-1800s. After exchanging a few emails, Niles sent me this updated spectral chart.
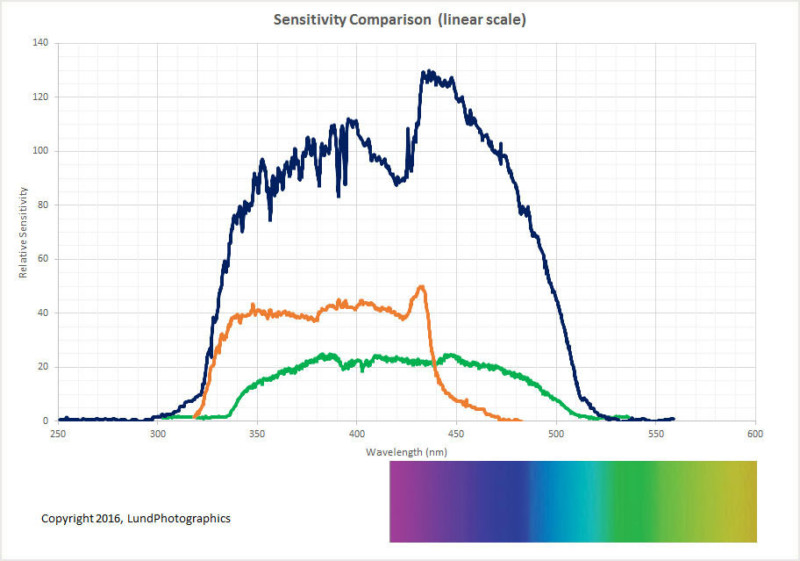
So now we know what to recreate if we want “digital collodion”! We need to cut out the upper half of the visible spectrum allowing nothing above about 520 nanometers into the camera.
I’ve done much work in this field, so I thought this would be a great time to blend science and art to explore this concept and compare it to other hyper-spectral imagery!
Setting Up an Experiment
Now we invite some friends and models to come sit for us! I asked the models to avoid skin-concealing makeup and zinc-oxide sunscreen, which is the only sunscreen to obstruct UV-A rays. They were asked to model under a broad-spectrum light source (the sun), with an additional light source of a silver reflector, and maintain a pose for a few minutes while I photograph each under the following conditions:
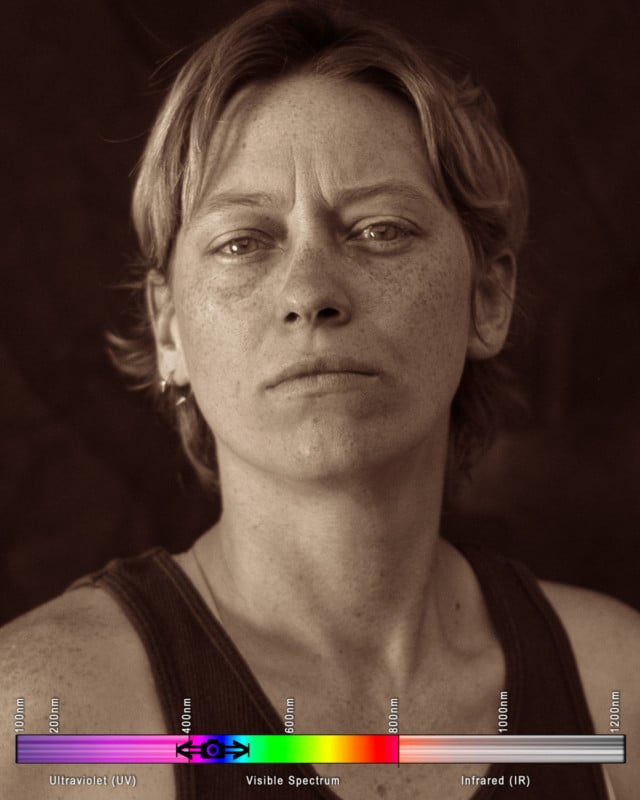
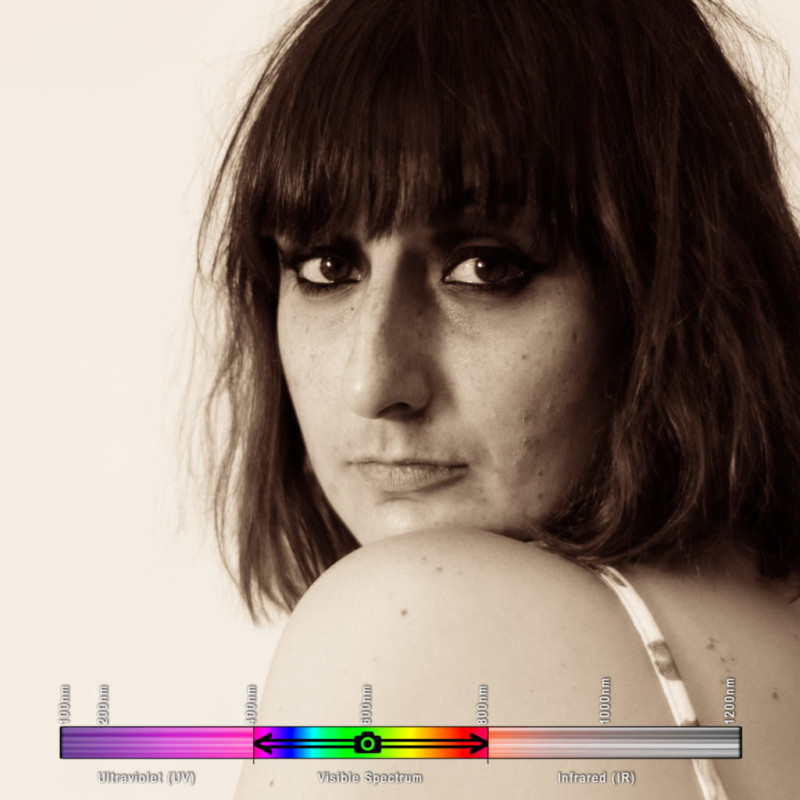
Visible Spectrum
This is what humans see (obviously). Using three cones, sensitive to three different ranges of wavelengths, which loosely map to red-green-blue, we see everything from violet to red. Violet is the shortest wavelength. Red is the longest. Not surprisingly, this is what digital cameras see, as well. Silicon photovoltaic sensors, whether CCD or CMOS, can take in a theoretical 290nm to 1100nm. However, it would be maddening to have your photography overexposed, blooming, and flaring due to lightwaves you cannot see, to say nothing of threats of overheating, so sensors are limited by optical filters placed directly over the sensor to only photograph, more-or-less, in the human visible spectrum. Photons that don’t play nice in this range are either bounced back out of the lens or absorbed and destroyed.
Here’s what our model Kayla looked like in the visible spectrum:

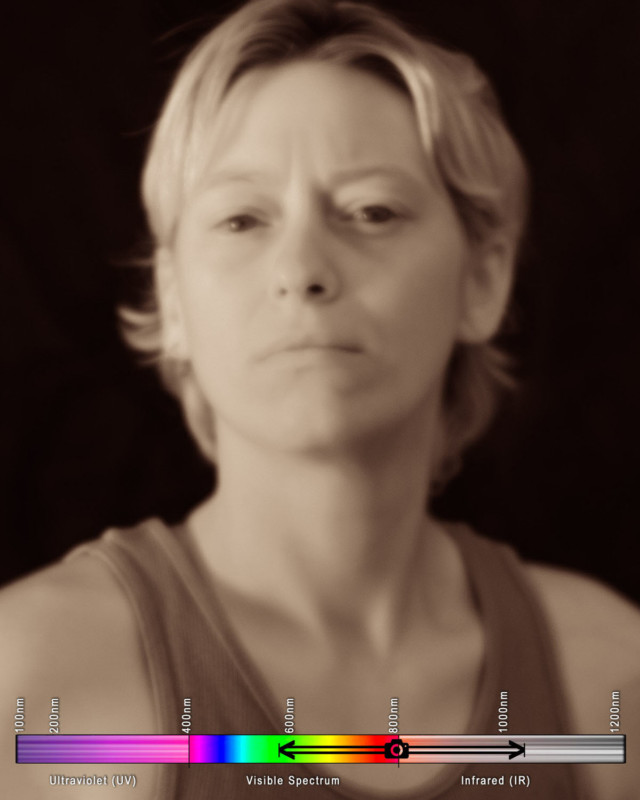
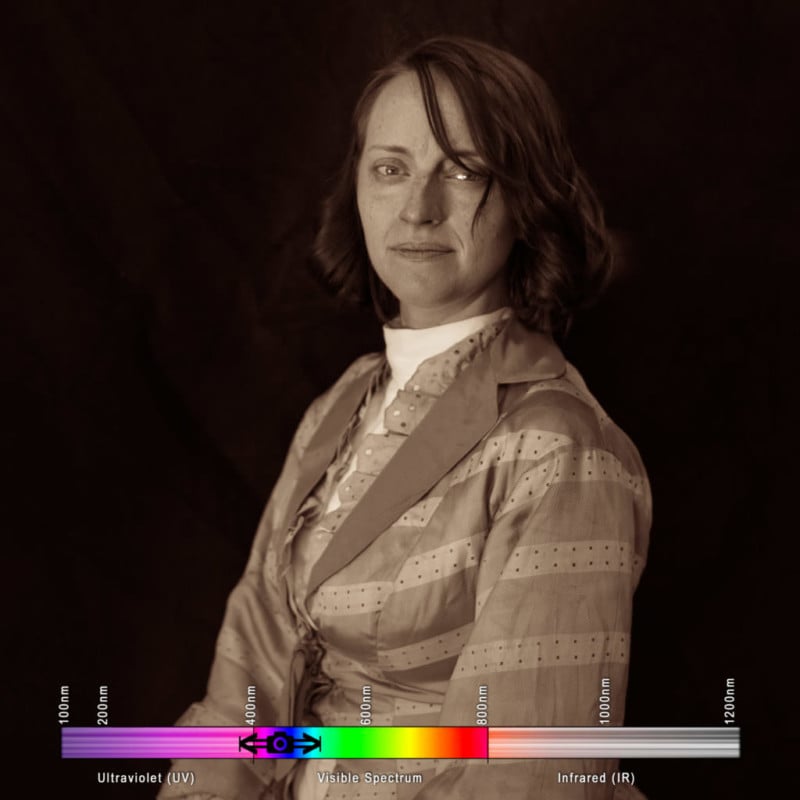
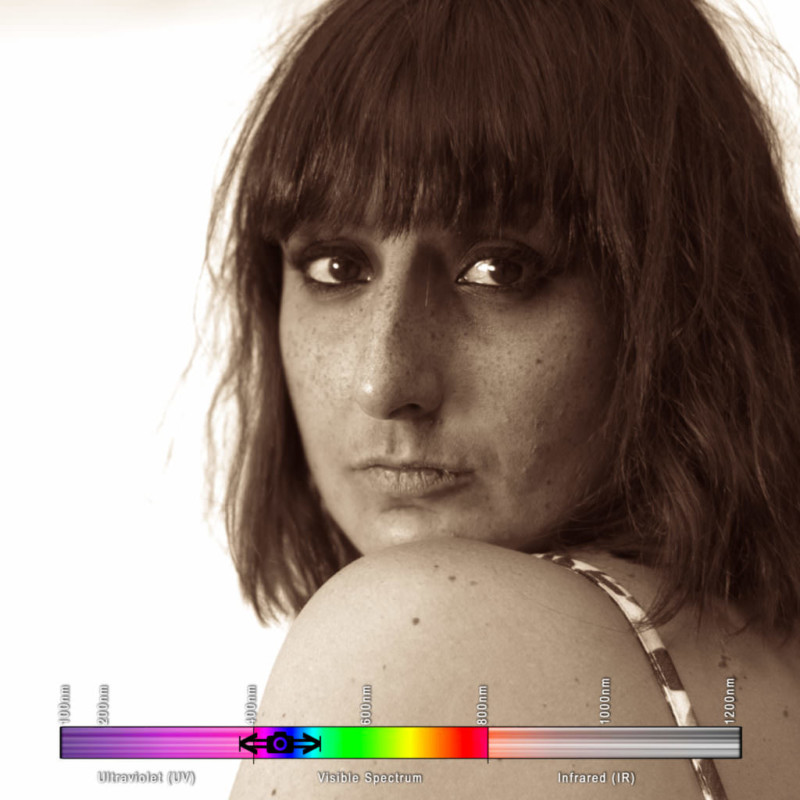
Orthochromatic Blue (Collodion AND Squid Vision)
This could be seen as the same spectrum that octopus and squid might view in. Humans, except for rare and awesome mutants and the colorblind, are “trichromatic”, with three cones that allow for three different ranges of wavelengths in. Cephalopods only have one, the S cone, which is sensitive in almost the exact fashion of the spectral curve of the 1850’s collodion (except for UV). Though they might have a different mechanical use of their eyes, which could allow for more color vision, but I digress…
By using Schott BG25 bandpass glass, bought off a gentleman who fits esoteric german glass into filters, on a lens that cuts UV (any normal lens) on any unmodified camera, we get a theoretical spectral sensitivity that looks like:

Of course, all the photons that this can transmit that the camera can’t capture become irrelevant, so on an unmodified camera, we will get a spectral response that looks like:

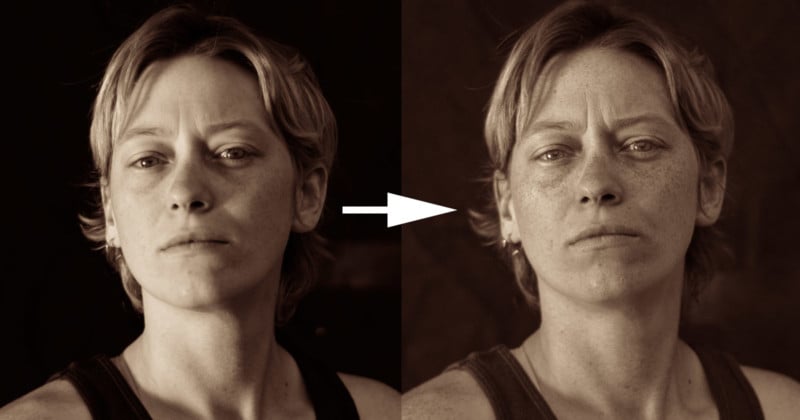
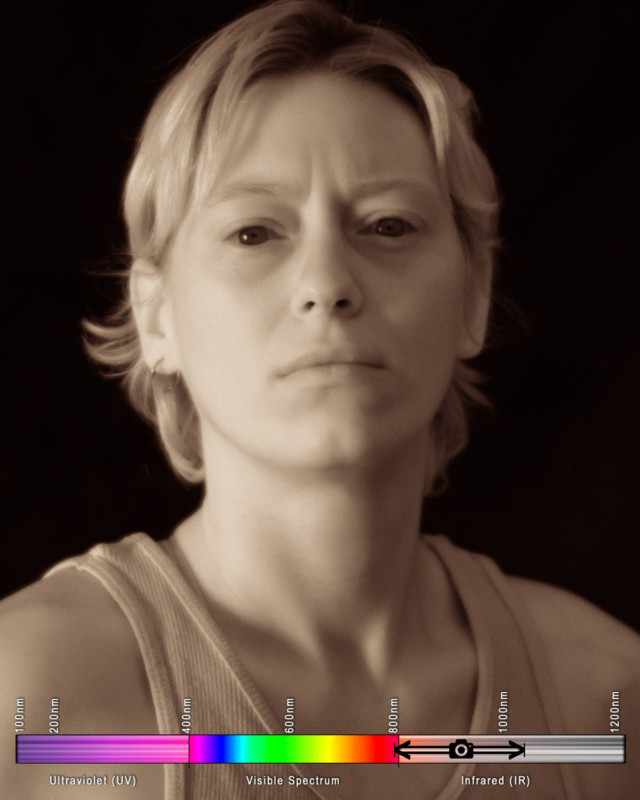
This means that on an unmodified camera, using a lens that doesn’t block UV, we’re going to get an image where the focus is going to be more on near-UV damage to the skin — concentrations of freckles and blemishes are going to much more pronounced. There’s going to be a light leak of very red photons, and we’ll be missing much of the UV range, but we’re very close to vintage emulsion now.
Our model, under the same lighting conditions (with an exposure compensation of +.7, calibrated from an 18% gray card):
By gum, we’ve done it! With that nanty narking, I think we can say we’ve captured the ol’ timey feel of collodion!
…but it is not scientifically accurate. This is about the best we can do on an unmodified camera, as we need some expensive modifications to allow UV to extend into the sensor. More on that later.
Let’s see what she looks like in some other, more bizarre wavelengths!
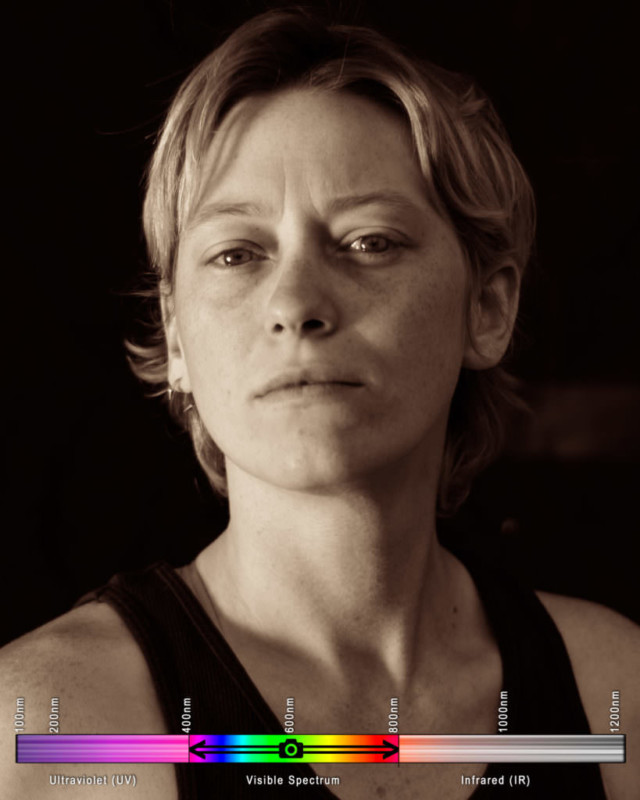
Near Infrared and Short Wave Infrared (Snake Vision)
This is, likely, what snakes see. This is the orange-and-red human-visible spectrum (near infrared, or NIR) and the infrared waves closer to the human spectrum. This is what I like to photograph foliage in because it can be false-colored and remapped using the color channels that your camera knows how to deliver data in. I have a Nikon D80 that has been modified to shoot in this wavelength, with an upper infrared spectrum bound (unmeasured) limited only by the physical limitations of a silicon CCD.
For some reason, for the duration of this experiment, this setup absolutely refused to focus properly. This camera does not have live-view, and it is very difficult to assess these images until they’ve been processed on a computer. Nonetheless, these blurry images were interesting…
Short Wave Infrared
I don’t think anything “sees” solely in this spectrum, though it is a difficult concept to explore, so perhaps time will tell. To capture the full breadth of short wave infrared, or to move into longer wave infrared, we would have to use a special sensor made out of indium gallium arsenide. It’s interesting to see that any sun damage and melanin deposits, such as freckles and tans, will not appear in this wavelength. The IR photons do a good deal more sub-surface scattering in the skin than visible light, rendering each person as a waxen figure.
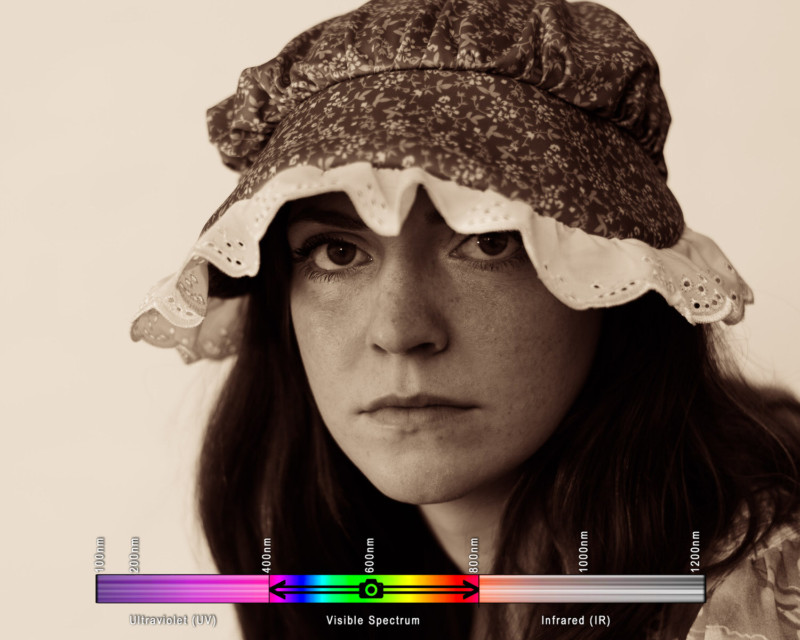
Polishing these photos up a bit in a vintage style split-toning
You might have noticed these are not delivered in monochromatic black and white, as in the style of a silver gelatin process. Instead, I chose to render them out with a bit of split-toning. Since the birth of photography, this was a common practice, using various methods to bring color to the highlights and to the shadows.
In this case, I made the highlights gold to mimic the flame-gilding of the mid-1800s, which “fixed” the highlights of a photograph using a gold chloride solution and an open flame. As ambrotypes caught on in the 1860s, “ruby” hued backs became more common in photography, so I enjoy using a red tint in my lowlights.
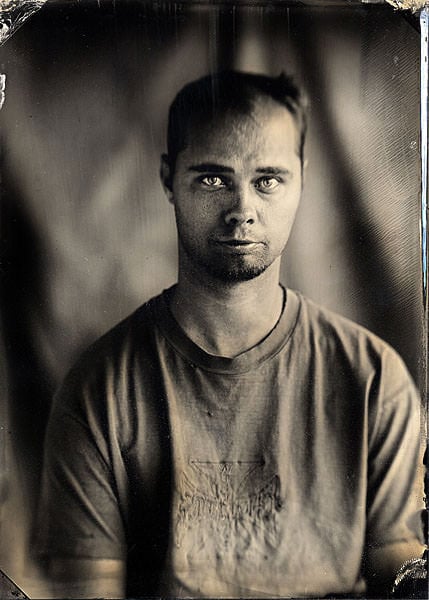
Photo Results
Kaitlin
Kevin


Christine
Xach


Caitlin
Kayla
Next Steps to Take it Further
In order to fully and accurately capture the collodion sensitivity range, I need to not only use a lens that allows ultraviolet photons to pass, as used in this experiment, but also a camera with a sensor modified to receive UV light. Because this is not a fast or cheap prospect, I’ve been dragging my feet to see if this could be done in conjunction with another modification…
As photographing humans draws no benefit from presenting false color, hyperspectral photography (such as UV) is best delivered in black and white. Having a color sensor actually hurts collodion-spectrum portraiture — if the construction of the image relies on a missing red channel, then we need to have a monochromatic sensor to gather an image using the filters described in this process with due sharpness.
We have different options: Buy a monochromatic camera, which can run between 3,000 and 50,000 dollars, or do a “mono-mod” to scrape the Bayer filter off of an existing camera. Conversion shops have assured me this is impossible on the Nikon cameras that I like to use, but I hold out hope for a “full spectrum” monochromatic modification. Alternatively, I can also look into intelligent upscaling, possibly using AI to regain resolution lost in the process.
Final Thoughts
As I used attractive models in this experiment, instead of the lab tools one should use to characterize optics, the spectral range of each photograph is an educated guess at best, based on theoretical readings. Lab characterizations will follow.
Trust the math. I know things look underexposed and incorrect, but if you’ve set your exposure compensation based off an 18% gray card — or, realistically, ignored that and just set it to +.7, then you can trust your lightmeter shooting in “orthochromatic blue”.
Sometimes, there’s no substitute for the real thing — recreating wet-plate collodion and tintypes is severely limited by digital consideration — but limitation is the mother of invention!
Editor’s note: A longer and more comprehensive version of this article can be found on Warren’s website. In it, Warren also discusses challenges he encountered with Bayer filters and how he wrote his own demosaic algorithm script to overcome them.
About the author: Phil Warren is a photographer, engineer, explorer, and adventurer. The opinions expressed in this article are solely those of the author. You can find more of Warren’s work and writing on his website and Instagram.