How I Manage My Data as a Pro Photographer
When I first started in photography, there was no method to my data management madness. When shooting on location, I downloaded my cards onto my laptop and upon my return home I copied everything onto my computer. Every now and then I would make a backup on an external hard drive that I kept in my office.
It obviously didn’t take long for my computer’s hard drive to fill up, so I moved everything to another external drive. The capacity of those external drives seemed massive when I bought them, but it didn’t take long for those to fill up as well. So I bought two extra to give me two external drives for my images and two as a backup.
A couple of years later my data management system consisted of many external hard drives with different sizes, capacity, and connections. Add to that the fact that my images were not properly organized on those drives and you understand that this eventually resulted in complete and utter chaos.
On the photo tours I run, I meet many photographers who are in that same phase — some of them are not yet aware of the impending doom, and those who are often don’t know what to do. This is why many of the questions I get asked have to do with data management: how do you download, organize and backup your images?
In this article, I will explain exactly that: how I manage my data from taking the shots to the final backups. Please note that this will not be the Holy Grail of data management — there are many ways to manage your data. This article will only be about how I prefer to do things. If you don’t agree because you have a different strategy, that’s fine — whatever works for you.
On the Road and in the Field
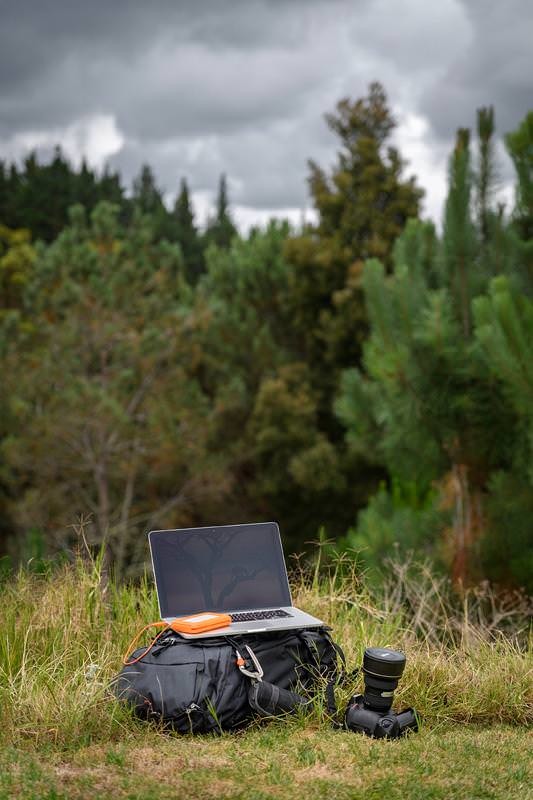
On every trip, I will bring my MacBook Pro and at least three external hard disks. Two of those are mirrored and contain all the images from that trip. The third drive contains all my processed files in case I need to access them while on the road. After a shoot, this is what I do:
1. I connect hard disk #1 to my MacBook and I create a folder on it named after the country I’m in. Inside this folder, I create another folder named ‘Transport’.
2. Now I start downloading all my cards into that Transport folder – I just dump everything in there. Later, I will use Lightroom to rename and organize everything for me, but I find that that process is terribly slow when you download straight into Lightroom. This is why I collect everything in one folder first.
3. Next, I open Lightroom and click on the Import button. I select the Transport folder and tell Lightroom to move the photos to a new location by clicking on ‘Move’ and then I select the destination in the top right corner – in this case, that’s the parent folder named after the country I’m in.
4. I check the ‘Rename Files’ box and use my custom settings. My file names all start with the first two or three letters of the country, followed by the first two or three letters of the location, followed by the date (starting with the year), followed by a sequential number. This enables me to, without even opening the file, see when and where the image was shot. Example: CHI_HUA_190315_666.NEF (shot in Huangshan, China, on the 15th of March, 2019).
5. During this stage, I often try to add general keywords that apply to all the images I’m importing. More specific keywording has to be done at a later stage.
6. After hitting Import again, all the files are very quickly renamed and moved into the destination folder, nicely organized by date.
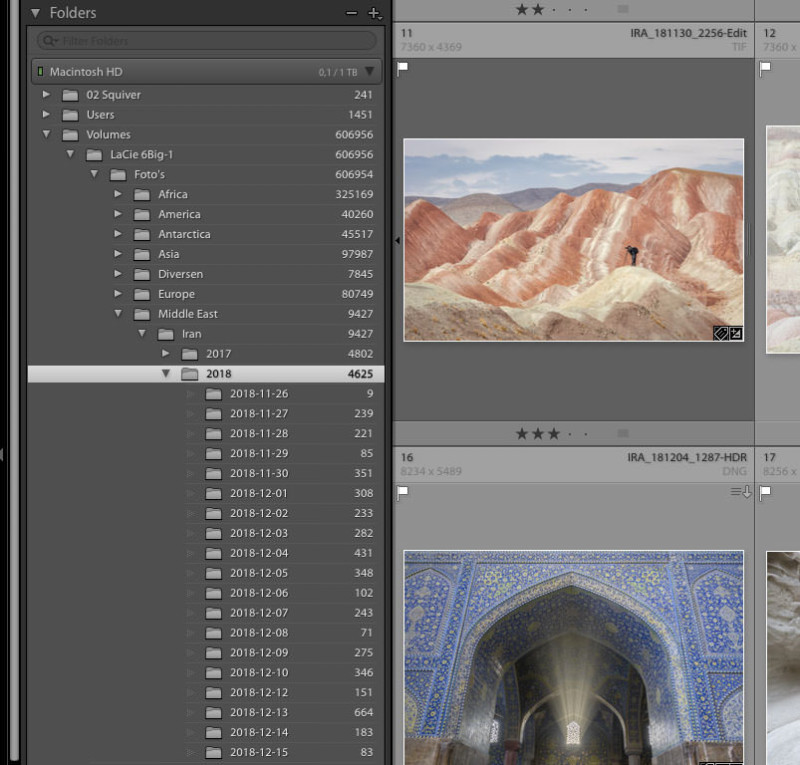
Below, you can see what my Lightroom library looks like. I have created folders for each continent, and in those are all the country folders. In each country folder, there are several year folders — depending on how many times I have visited the country. I find this to be the best way to organize my images.
Now that all my images have been downloaded, renamed, and organized, I connect hard disk #2 to make a backup. This is a critical step, and I can’t stress this enough: back up your work. You can lose a hard disk, it can get stolen, it can crash – I’ve seen it all happen multiple times on our photo tours.
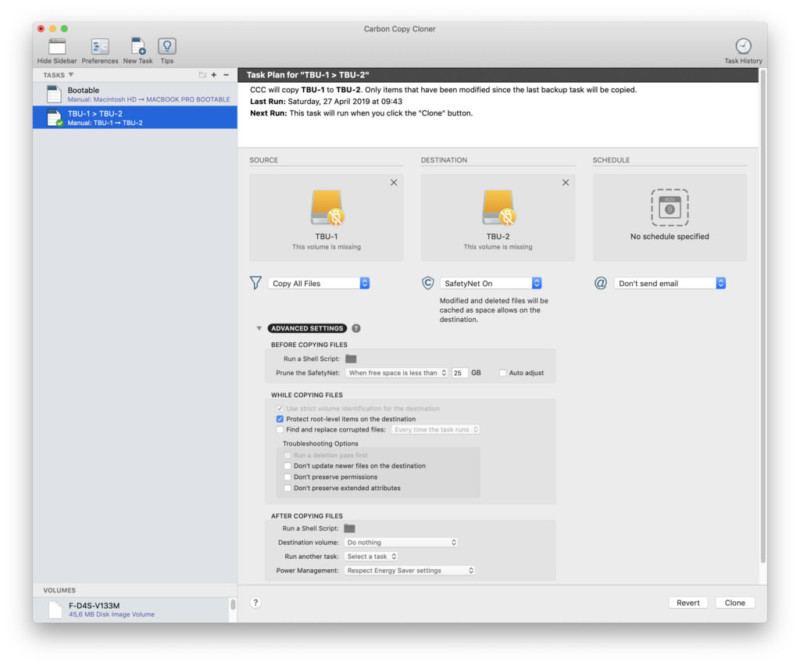
There are many ways to make a backup, I personally prefer to create an exact clone by using backup software like Carbon Copy Cloner. That way, it doesn’t matter which one gets stolen or trampled by an elephant – they’re both the same.
Below you see an example of the user interface of Carbon Copy Cloner. Note that if you just drag and drop files (especially large batches), you might get corrupted files. Before I started to use CCC for data transfer, I simply dragged and dropped everything. Every now and then I’d get a file with a horizontal band in it, basically ruining the image. This has never happened since I started using CCC.
A couple of years ago, the camera bag of one our guests was stolen on the very last day of our tour. Inside her bag was not only all her camera gear but also her laptop and backup drives. She lost everything. A harsh lesson learned: always separate your backup drives. I prefer to keep one backup drive in my laptop bag and one in my camera bag. Depending on the location, I sometimes carry one drive on my body when I leave my bags in my hotel room: if my hotel room gets burglarized, at least I will still have all my images.
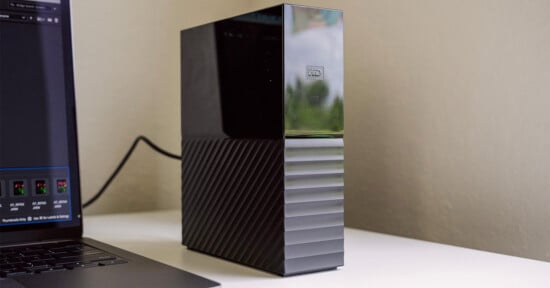
There are many hard disks to choose from. I like the LaCie Rugged hard disks because, well, they’re very rugged. More often than not I’m shooting in conditions that are not friendly to electronics: dust, sand, humidity, extreme temperatures, rocky terrain. These drives are built like a tank and are very reliable. And if you’re a wildlife photographer, be careful: the wildlife seems to like ’em too!

During a trip, I already try to do some culling and flagging in Lightroom. I leave all the serious processing for when I’m home where I can work on my calibrated EIZO monitor. On the very last day of a trip, I go into Lightroom and export the trip folder as a catalog, which will be saved on one of the external drives. Once home, I can import this catalog into my main Lightroom library, saving all the flags, stars, and adjustments I have made on the trip.
More Megapixels, More Data
It seems that with every new camera we get more megapixels. This is great for creating large prints or if you want to do some serious cropping, but it generates a lot of extra data that you need to manage. A layered tiff or PSD created from a single Nikon D850 image can easily grow to a whopping 4GB file, and panoramas are even worse. A couple of hundred of those and you need another terabyte of storage.
A couple of years ago I wrote a lengthy review of the LaCie 5big Thunderbolt 2 RAID system. My opening paragraph was about how many images I had shot that year, with what cameras, and the resulting amount of data. I will do the same thing again now because it will explain everything that follows.
In 2018, I shot 72,028 images with these cameras:
Nikon D5: 8,873
Nikon D850: 41,173
Nikon Z7: 8,638
Nikon D500: 5,600
Nikon D810: 7,360
Total: 3.9TB
Back in 2016, I shot 76,328 images totaling little over 2TB of data. Two years later, with some 4,000 images less, I shot almost double the amount of data. Thank you very much high megapixel cameras! Now that I also use the Nikon Z7, another 48MP camera, I expect to add even more data in 2019. And so on and so on.
Technology develops fast and files keep getting larger – whatever kind of storage you are planning to buy, make sure it’s double that what you think you need. If you’re just a casual shooter who only shoots during holidays and the odd weekends, you can probably get away with a single hard drive of several terabytes, and another one for backup. But if you’re a more serious shooter, and especially if you photograph wildlife, birds or sports, you might need something more.
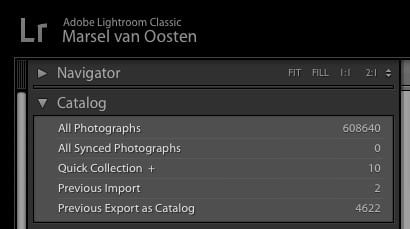
As I’m writing this, I have collected some 25TB of data. How does one manage that?
Years ago, I decided to work with a so-called RAID system. I started with the LaCie 5big, then upgraded to the 6big, and I recently upgraded to the 6big Thunderbolt 3.
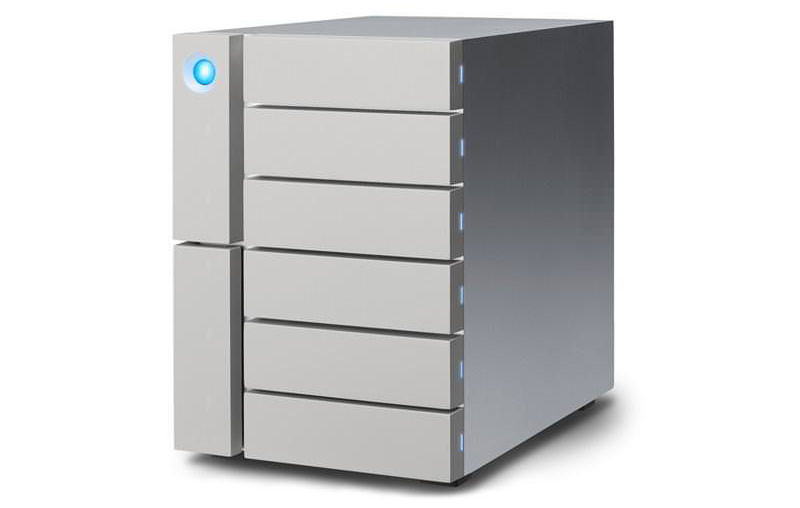
So What is it and What Does it Do?
The LaCie 6big Thunderbolt 3 is a so-called DAS: Direct Attached Storage. It’s basically an external hard drive that holds 6 drives and connects directly to your computer. It comes in several different capacities: 12TB, 24TB, 36TB, 48TB, 60TB, and 84TB. But it’s not like any normal external hard drive – the 6big TB3 comes with many features that transform it into a smart storage device. An onboard RAID controller powers the system and provides several user-adjustable settings and modes. That allows you to select the best performance for your workload.
I will dive into the details now, so what follows is basically both a RAID explanation and a review of the LaCie 6big combined. How’s that for efficiency?
Who is it For?
For those who need a larger, super speedy, flexible storage solution with a high level of reliability.
Most photographers start with just one hard drive, and when that one fills up, they buy a second one. And a third. And a fourth, etc. Sound familiar? This data storage system is also known as JBOD: “Just a Bunch Of Disks.” It can get very confusing very quickly, and what is worse: there is no protection from data loss.
The question is not if one of your hard drives will fail, but it’s when. And when one fails, you may lose a lot of important data.
This is why it’s better to work with a DAS or a NAS (Network Attached Storage – like a DAS, but connected to a computer network) with RAID. RAID stands for ‘Redundant Array of Independent Disks,’ and it’s a data protection technology used in external hard drives. Generally speaking, the higher the RAID level, the safer your data is. A RAID-enabled system uses two or more hard disks to provide some level of fault tolerance, and higher RAID levels require more independent disk drives. The idea is to provide a safety net for failed hardware by ensuring that the machine with the failed component, usually a hard drive, can still operate.
Most serious photographers have insurance for their camera gear, but they have no insurance for what’s much more important than cameras and lenses: their images. This is another reason why you need a reliable RAID system – as an insurance policy for your images.
RAID Levels
There are several RAID levels – each level provides a certain level of redundancy (or none), and each level affects the speed at which you can work. The short version: zero redundancy means maximum speed, maximum redundancy means the slowest speed. Depending on the type of work that you do, you can choose the RAID level that suits you best. Here’s an overview of the most common RAID levels.

RAID 0 is used to boost performance. It’s also known as “disk striping.” With RAID 0, data is written across multiple disks. This means the work that the computer is doing is handled by multiple disks rather than just one, increasing performance because multiple drives are reading and writing data. A minimum of two disks is required. The downside is that there is no fault tolerance. If one disk fails, then that affects the entire array and the chances for data loss or corruption increases.
RAID 1 is a fault-tolerance configuration known as “disk mirroring.” With RAID 1, data is copied seamlessly and simultaneously, from one disk to another, creating a replica, or mirror. If one disk gets fried, the other can keep working. It’s the simplest way to implement fault tolerance and it’s relatively low cost. The downside is that RAID 1 causes a slight drag on performance. A minimum of two disks is required for RAID 1 hardware implementations. One additional point to remember is that RAID 1 cuts total disk capacity in half.
RAID 5 is by far the most common RAID configuration. This RAID level provides better performance than mirroring as well as fault tolerance. With RAID 5, data and parity (which is additional data used for recovery) are striped across three or more disks. If a disk gets an error or starts to fail, data is recreated from this distributed data and parity block— seamlessly and automatically. Essentially, the system is still operational even when one disk kicks the bucket and until you can replace the failed drive. Another benefit of RAID 5 is that it allows drives to be “hot-swappable” meaning in case a drive in the array fails, that drive can be swapped with a new drive without shutting down your DAS or NAS. It’s a great solution for fault tolerance because as drives fail (and they eventually will), the data can be rebuilt to new disks as failing disks are replaced. RAID 5 offers performance that can approach RAID 0.
RAID 6 is identical to RAID 5, except it’s an even more robust solution because it uses one more parity block than RAID 5. You can have two disks die and still have a system be operational. A minimum of four disks is required to create a RAID 6 array.
RAID 10 is a so-called ‘nested RAID level’. It combines the protection of RAID 1 with the performance of RAID 0. It’s the RAID level that gives the best performance, but it is also costly, requiring twice as many disks as other RAID levels, for a minimum of four.
RAID 50 RAID combines RAID 0 striping with RAID 5 parity. Due to the speed of RAID 0 striping, RAID 50 improves upon RAID 5 performance, especially during writes. It also offers more protection than a single RAID level. Use RAID 50 when you need improved fault tolerance, high capacity, and impressive write speeds. A minimum of six hard drives is required for a RAID 50 array. A RAID 50 array with a high number of hard drives increases the time to initialize and rebuild data due to the large storage capacity.
Since RAID 5 automatically balances between storage space, performance and data safety, it’s generally the recommended setup for any storage device that houses three internal drives or more. You get both a high level of protection and great performance, while still keeping 80% of usable disk space. Even in the case of disk failure, hot-swappable disks mean zero data loss or downtime.
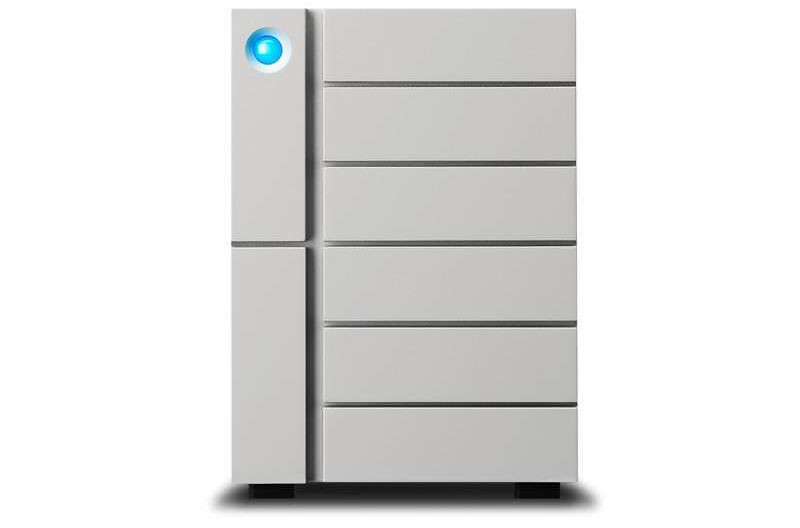
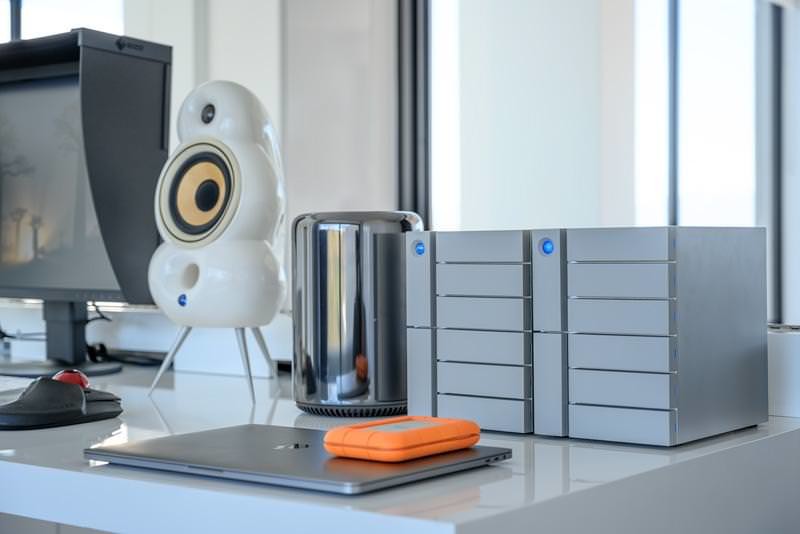
Design and Features
I know, it shouldn’t matter what it looks like, but that brushed aluminum exterior is very sleek and matches my MacBook Pro perfectly. But I’m also a professional so I will choose reliability over anything else. Having used LaCie hard disks for over two decades, I know they’re not only beautifully designed, but they’re also very reliable.
The drives are stacked horizontally and they’re accessed from the front. Those lines you see on the outside are not just pretty design elements, they are formed by the 6 drive bays that have been moved to the front of the device: conveniently and quickly remove and replace drives from the front of the product.
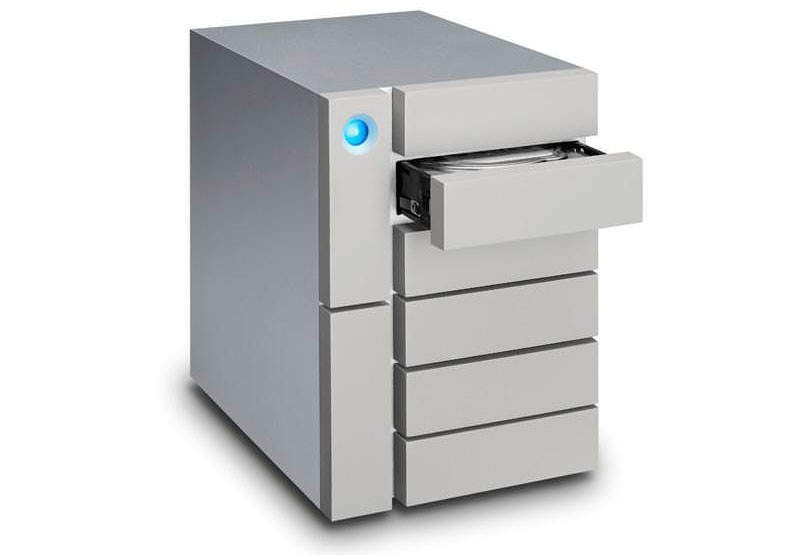
The 6big comes installed with drives, so there’s no need to open any of those drive bays. The only time you’ll open them, is when you want to upgrade to larger drives or if you need to replace one. As I mentioned earlier, hard drives can crash – that’s the main reason for building a device like this. And even though at RAID 5 there will be no data loss when one drive crashes, and at RAID 6 you can even have two drives crash at the same time without losing any data, we would still all like our drives to stay spinning for eternity.
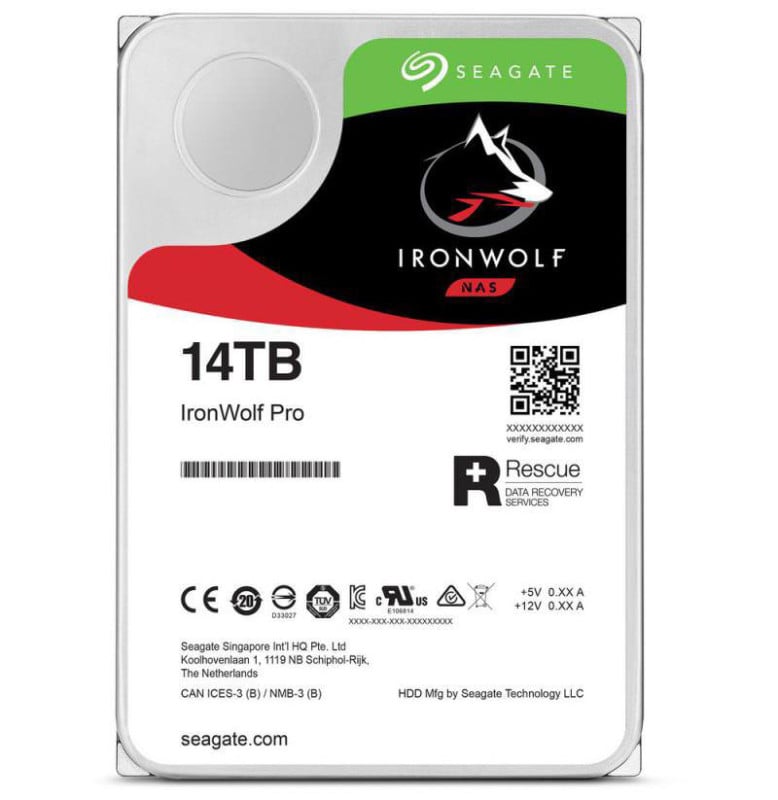
While that may not happen, LaCie has made sure that you get the very best drives on the market today: the Seagate IronWolf Pro drives. These are so-called Enterprise-Class drives, serious stuff. LaCie is so confident about the quality of these drives, that they are covered with a 5-year limited warranty that includes Rescue Data Recovery Services. If something goes wrong, they will replace your drive and recover your files with one in-lab data recovery service at no additional cost.
One of the reasons I decided to upgrade my storage system was because I needed more space. At the same time though, an upgrade would let me benefit from the latest developments in computer technology, such as the introduction of Thunderbolt 3, which, as you already suspected, is faster than Thunderbolt 2. Larger files not only take up more space, but they also need more computing power.
Inside my 6big are six IronWolf Pro drives, 14TB each, totaling 84TB. That may sound excessive, but here’s my reasoning.
As I currently have some 25TB of data, I could get myself a 36TB (6x6TB) 6big. Selecting the standard RAID level 5 means that one disk will be used for redundancy, resulting in 30TB available to storage (5x6TB). That leaves only 5TB of free space, what I would probably fill within two years. Not only that, RAID level 5 may be very common, it is by no means the safest option, nor is it particularly fast. As my files are getting larger and I find myself shooting more video with the Nikon Z7, I’m really noticing the effects on the performance of my setup. There are other RAID levels that offer better safety and better performance, and that’s why I opted for the 84TB version and RAID level 10 – the RAID level that offers the best performance and more redundancy than level 5.
Initial Setup and Operation
For my job, I need to use all kinds of technology, but I don’t particularly enjoy the technical part of my work. For me it’s all about the creativity – the cameras, computers and other devices I use are merely tools to get me the results I’m after. I don’t like spending money on a RAID system, nor do I like the whole process of setting it all up, but it’s simply necessary. Luckily, LaCie uses the same philosophy for the operation of the 6big as for its design: simplicity rules.
Getting the 6big up and running couldn’t be easier. First, you have to install the Lacie RAID Manager on your computer. This is the control room for the 6big. Once you’re in there, there are only a few decisions you have to make to customize your RAID setup, which will take you 5 minutes max.
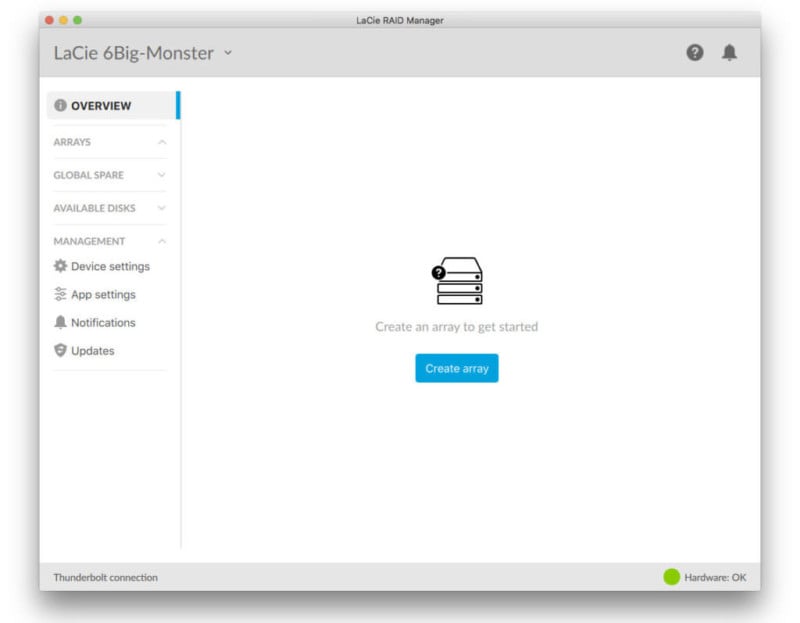
First, you have to create an array (a row of hard drives) that will later appear as one (or more, if you choose so) volume on your desktop. Clicking on the Create Array button will start the process.
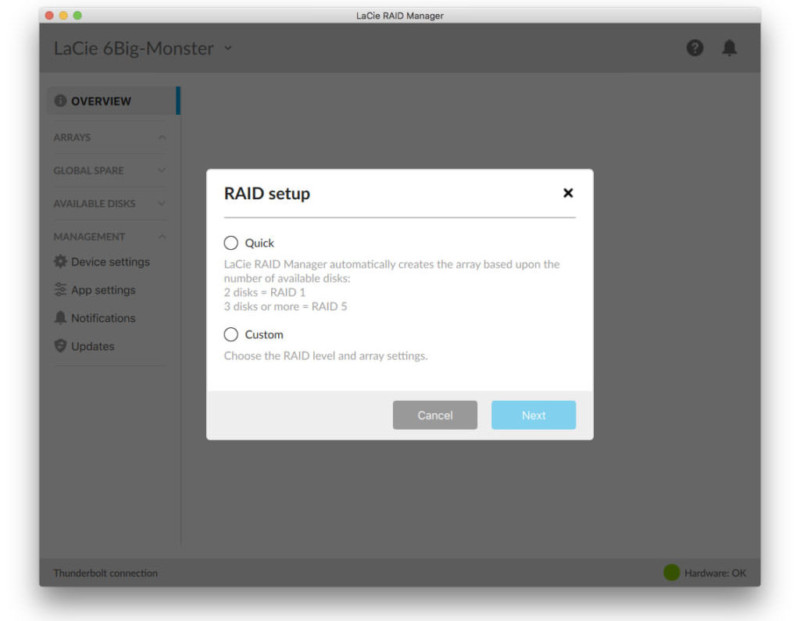
You have the option to let the LaCie RAID Manager automatically create an array for you, based on the number of available disks. There are 6 disks in the 6big, so that means that RAID 5 will be selected. If you want a different RAID level, you can click ‘Custom’.
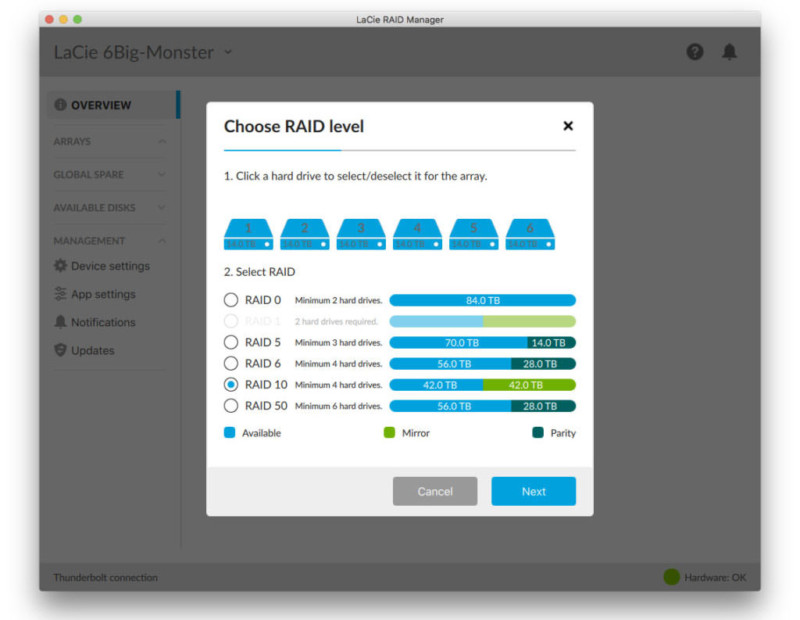
In my case, I clicked on ‘Custom’ to select my preferred RAID level. This window shows what I love so much about LaCie products: everything is so simple. I literally did not have to read a manual to get it all up and running. Here you see the different RAID levels I could choose from. As I mentioned earlier, I selected RAID 10 resulting in 42TB available for storage.
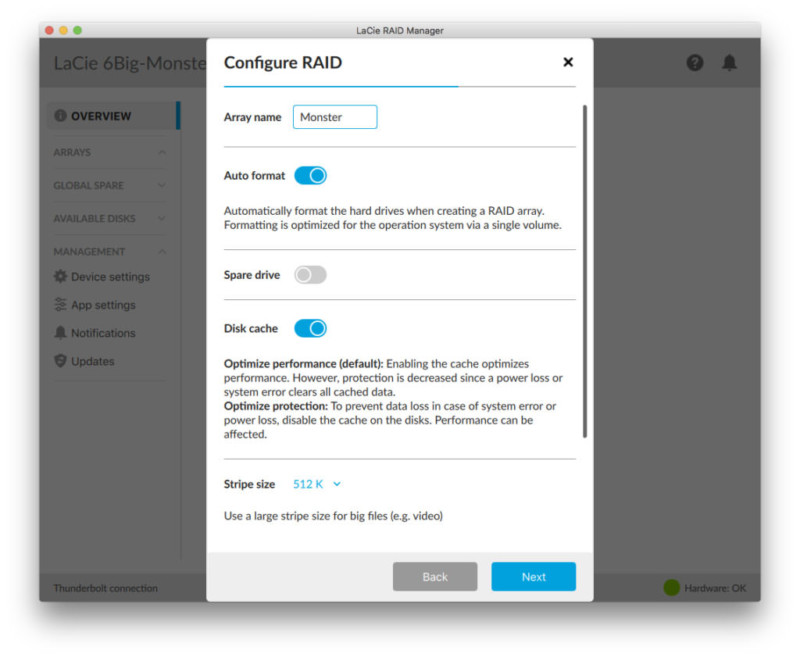
Next thing is giving your array a name and set a few other things, all well explained on screen. I appropriately called my array ‘Monster’. Because that’s what it is.
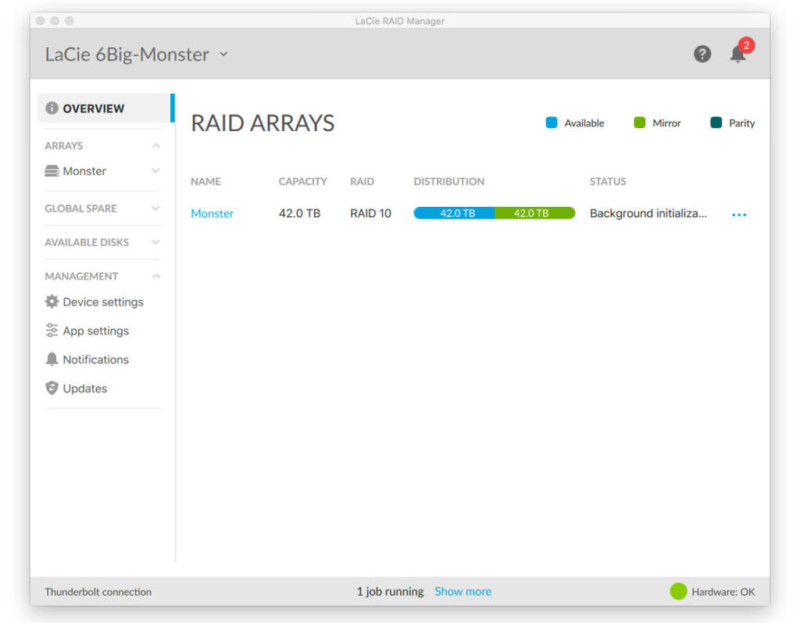
Five clicks and you’re basically done. The main window of the LaCie RAID Manager now shows my newly created array ‘Monster’, as well as its capacity and RAID level. At this stage, you can already start using your RAID system.
There’s a couple of things you can further customize, like setting email alerts for failure and warning events. I hardly ever have to go into the RAID Manager, only every now and then to check whether there are any updates.
Performance
So how does it perform? My 5big Thunderbolt 2 has a RAID 0 performance of 1050MB/s and 5 drive bays, the 6big Thunderbolt 3 eats those megapixels at 1400MB/s using 6 drive bays. Both the read and write speeds of the 6big are considerably higher than that of the 5big, which is really nice now that my average processed layered TIFF is 2-4GB.
When I return from a trip, transferring all my images to the 6big takes very little time, but what’s even more important is that I can work on my images in Photoshop straight from the 6big without any lag. When I’m processing an image in Photoshop and save it, I can continue to work on it without having to wait for it to finish the save. Opening files is just as smooth.
The main reason for the increase in speed is Thunderbolt 3.
Thunderbolt 3 has a transfer rate ability of 40Gbps, which is double that of Thunderbolt 2, and 4x that of Thunderbolt and USB 3.1, which translates into being able to carry audio, video, data, and power through a single cable. And that means a LaCie 6big Thunderbolt 3 can daisy-chain up to two 4K monitors, numerous other peripherals, power your laptop, or even charge a camera!
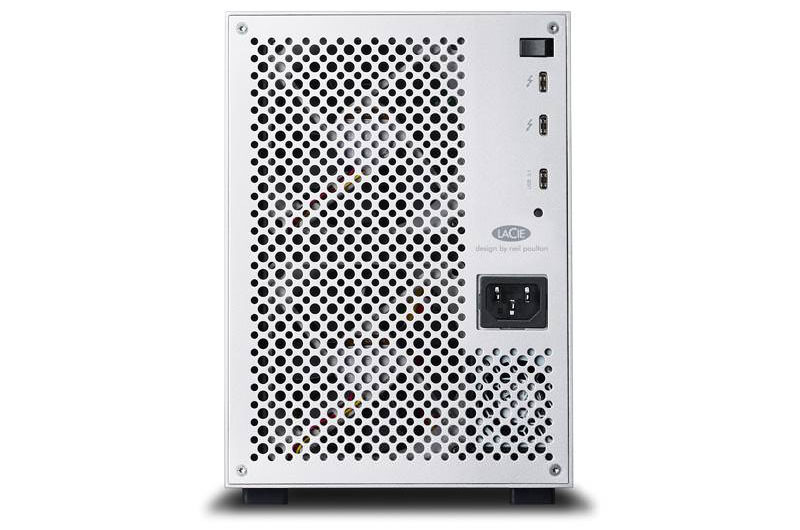
Thunderbolt 3 uses a USB-C connector specially labeled with a Thunderbolt icon. Since Thunderbolt 3 is protocol agnostic, it supports connections from the following interfaces: USB 2.0, USB 3.0 and USB 3.1, DisplayPort 1.1 and 1.2a, Thunderbolt 20Gb/s and Thunderbolt 40Gb/s, and Ethernet (with adapter).
This device is backward compatible. You can use USB 3.1 into your computer, but you obviously won’t be seeing the speeds like using Thunderbolt 3. However, you can get Apple’s Thunderbolt 3 (USB-C) to Thunderbolt 2 adapter, which makes for easy connection to older Macs with much faster performance. If you don’t have a USB-C/Thunderbolt 3 computer, don’t let that hold you back from integrating a 6Big, just get the adapter.
What’s more, if you’re using a laptop computer when connected to the 6big, it will not only give you access to the array and anything connected via daisy chain, it will also charge your laptop simultaneously – so cool.
I have not done any serious measurements in nanoseconds so there will not be a confusing chart below. If you’re interested in those, you can find them online.
All I care about is my own personal user experience – does it do what I want and as fast as I need? Yes and yes.
Lightning-Fast Video Workflow
With the amazing video performance of the Nikon D850 and Z7, I find myself shooting more video. Editing and processing 4K video can be a challenge for any computer, and Thunderbolt 3 will give you a serious speed boost. I expect that the 6big is going to be particularly popular amongst videographers and filmmakers who will significantly improve their video workflow. With double the video bandwidth of the 5big, Thunderbolt 3 lets you daisy chain dual 4K displays or a single 5K display to the LaCie 6big. With two 4K displays, you can spread out your workspace by dedicating one display to your timeline and the other to previewing 4K footage, for example. I haven’t pushed the 6big to its limits yet, but expect to do that later this year.
RAID is NOT backup
Working with a RAID system is a much more reliable way to manage your valuable data than JBOD (just a bunch of disks). But it’s important to remember that RAID is not backup, nor does it replace a backup strategy. However fast, reliable and gorgeous looking the 6big is, it won’t protect you from a burglary or a fire. Backing up a RAID device should still be part of your data management. RAID can be a great way to quickly recover from hardware failure, but it’s only part of an overall disaster-recovery solution.
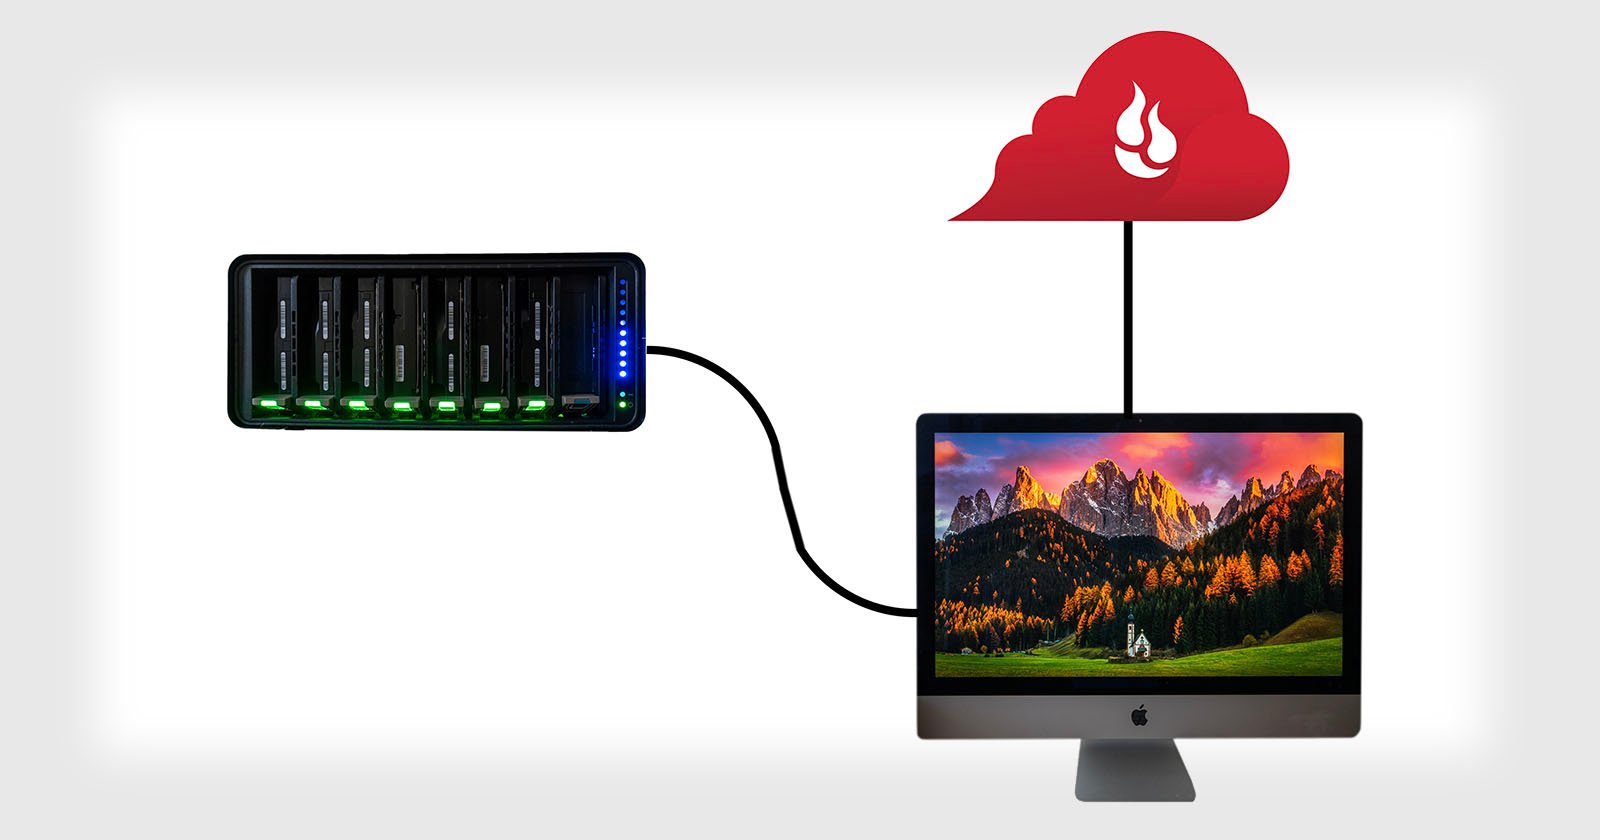
For this very reason, I have a second 6big stored off-site. Every now and then I get that second 6big and I sync the two. Burglaries are quite common with photographers who travel often and are active on social media – everyone can see exactly when you’re not going to be at home. And only two years ago we had some major fires in this region and many of our neighbors lost their houses and all their possessions. With the right insurance, you will probably get most of it back, but your images will be gone forever. Any backup is better than no backup, but an off-site backup is better than an onsite one. So what about cloud storage then?
Cloud storage is a good backup solution for many, but not for me. It works if you don’t shoot a lot of photographs, only take photographs with your iPhone, and/or spend plenty of time in places with fast internet. This does not apply to me. I shoot a ton of images every year, all with high megapixel full frame cameras, and I always find myself in places with very poor internet. Uploading my images to the cloud is totally out of the question.
So for people like me, the bad news is that you also need to invest in a backup. I chose to work with a second 6big and make that a clone of my master.
You Do What?!
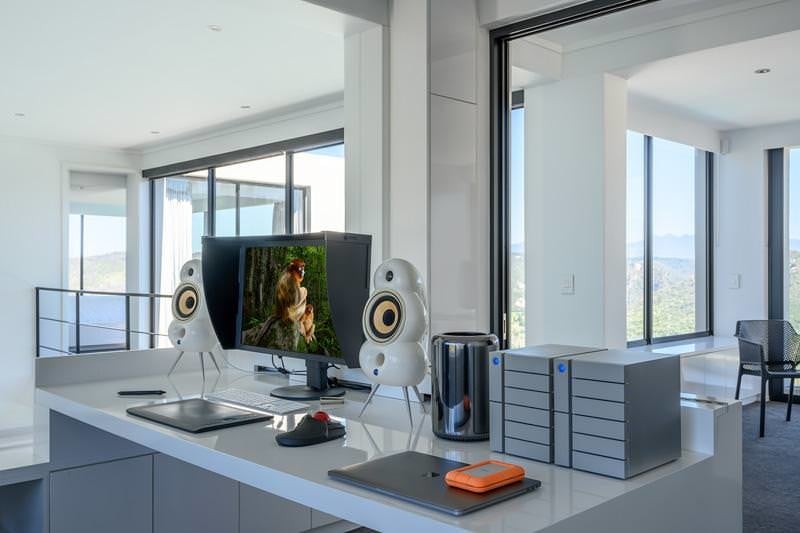
Most people will put their RAID system on their desk and that’s where it’s gonna stay for the rest of its life. In my case though, things are a bit different. My main office is in South Africa, but when I’m in The Netherlands, I also work on my images there. It’s not an ideal situation and quite the logistical challenge, but it’s something that I’ve been doing for many years now and have gotten used to.
In South Africa, I work on a Mac Pro and an EIZO CG2730 monitor, and I have two 6bigs – one 84TB and one 48TB. The Monster is my master, the other is the off-site clone that regularly connects to the master to run a backup. If I then fly to The Netherlands again and plan on working on my images there, I bring my 6big with me. Apparently, I’m not as strange as I thought I was, because LaCie actually designed a 6big case for people like me.
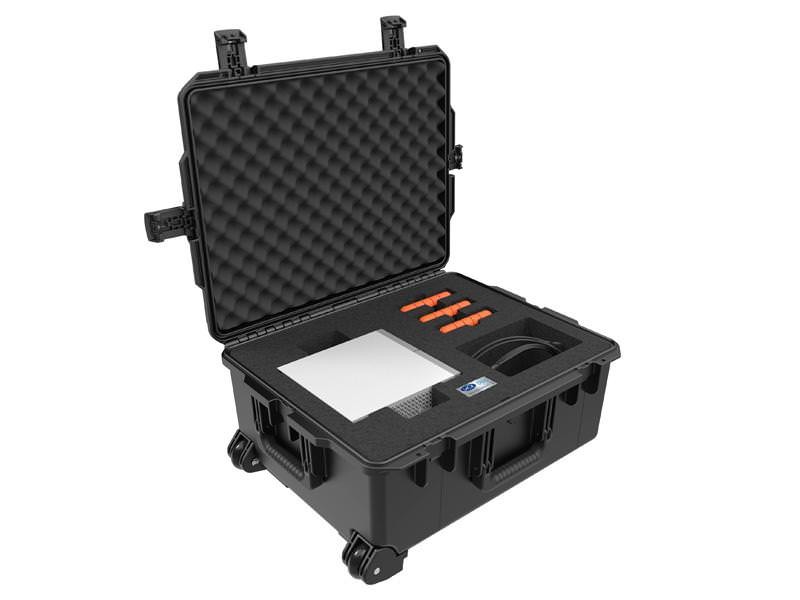
The case is made by Pelican so it’s virtually indestructible, watertight, dustproof, and it’s resistant to dents, shatter, and temperatures as low as -20°F. The foam-lined interior is also able to fit device cabling, as well as up to three LaCie Rugged portable drives. If you check this in at the airport, you don’t have to worry about it getting destroyed because it won’t.
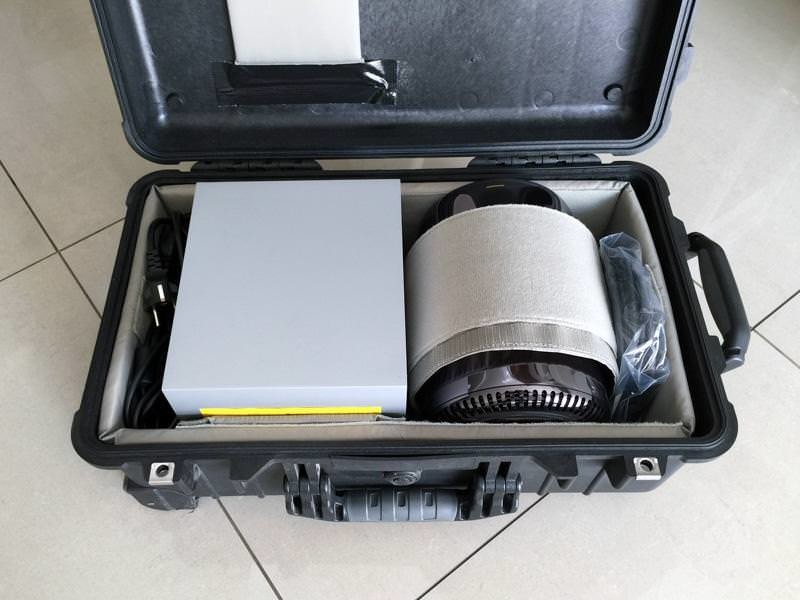
However, this case is very large and heavy so checking it in is actually your only option. I don’t like checking in my 6big, not because I’m worried that it might break but because I’m worried it might get ‘lost’. Luggage gets lost all the time, and this is not the kind of luggage I’d like to lose. So my strategy is different: I use a much smaller Pelican case that’s within maximum cabin size limits and I take it with me as cabin luggage.
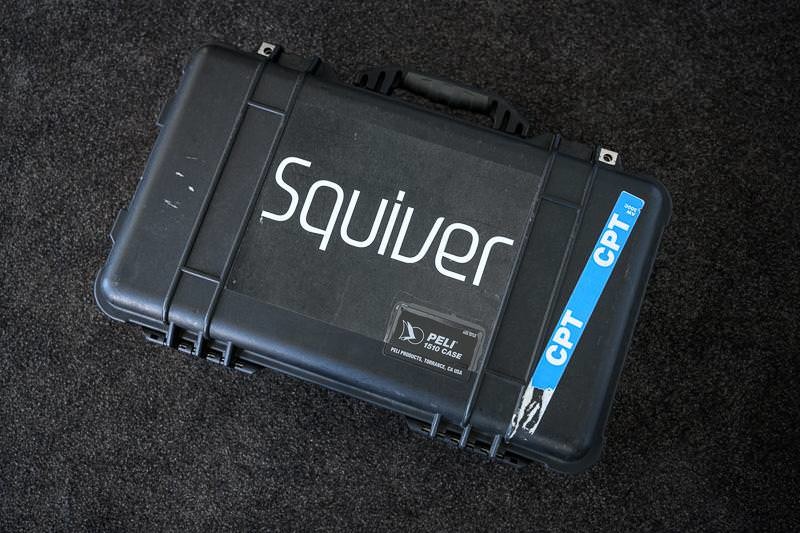
What’s great about this case, is that I can not only fit the 6big in there but also my Mac Pro. I won’t lie: when it’s full, this is a very heavy case. When the airport personnel gives me a hard time about it, I simply show them what’s inside and explain what the value is. Any reasonable human being understands that you will not want to check in something like this.
In The Netherlands, I have another off-site 6big that I collect upon my return, and the next step is to clone the master to that backup. I then continue working on my files using my Mac Pro and an EIZO CG247X. I’ve been doing the same thing with my 5big for years, and it’s good to know that it can stand the many miles I’ve walked with it, bouncing over curbs and cobblestones.
Negatives
Is it all rainbows and unicorns then? No, there is one negative about the 6big. It is a very serious machine, but it has an equally serious price tag. You can get a 12TB version for $1,899 (SRP), but if you triple the capacity you’re looking at $3,199.
When some photographers see products like the 6big, they don’t understand why anyone would spend $3,000+ on storage. They will say that you can build your own arrays for much less and that you’re just paying for the brand name. While it is true that you can build an array yourself, this is not something I would ever like to try. I don’t have the knowledge nor the desire to build it myself, nor do I want to miss out on the 5-year warranty or the disk management software. Not only that, but LaCie also includes 5-year Rescue and Data Recovery Services – if something goes wrong, they will replace your drive and recover your files with one in-lab data recovery service free of charge. And if your system fails, you’ll get a replacement unit within a few days. That hefty price tag comes with truckloads of peace of mind.

Conclusion
If you’re serious about your photography, you should be serious about protecting your images. It makes little sense to spend thousands of dollars on cameras and lenses, and not think about how you’re going to safely store and access your photographs.
The LaCie 6big is a powerful machine for people who are serious about managing and protecting their data. The 6big is lightning fast, sleek, simple and elegantly designed, it’s very easy to use, robust, quiet, and built for the future. Instead of buying a new storage device every time you need more space, you should consider investing in a future-proof RAID system. If you need more storage, you simply replace the drives for bigger ones. The 6big offers a lot of flexibility and it can grow with you. If there’s one thing you can be certain of, it’s that digital files will continue to grow in the future, possibly even faster than before. Only a few years ago, 4K video was an oddity and now it’s mainstream. Several cameras now have 45+ megapixel sensors, and the end is nowhere in sight.
My images are my most valuable possession, and I treat them accordingly. On our photo tours, I very often see guests who have spent $5,000+ on a camera and $10,000+ on a lens/lenses. Just like I encourage them to invest in a professional quality tripod to support that $15,000 camera setup, I encourage them to invest in a proper data management solution that will save you time, that will professionalize your workflow, and that will offer you the next level of protection for your images. You can start small and go from there.
A couple of years ago I highly recommended the 5big. The 6big is an improvement in every aspect, so I can only praise it even more now.
About the author: Marsel van Oosten is a professional nature photographer from The Netherlands. The opinions expressed in this article are solely those of the author. Together with his wife Daniella he runs Squiver, a company that organizes specialized nature photography tours for small international groups of all experience levels to destinations worldwide. He is the current Wildlife Photographer of the Year, and he previously won the grand titles Travel Photographer of the Year and International Nature Photographer of the Year.