How to Create 3 Distinct Looks with a Single Reflective Umbrella
Fashion and portrait photographer Jeff Rojas is back with another simple, incredibly useful lighting tip. This time, he’s showing how to use a single reflective umbrella to create three distinct looks by simply moving your light source around your subject.
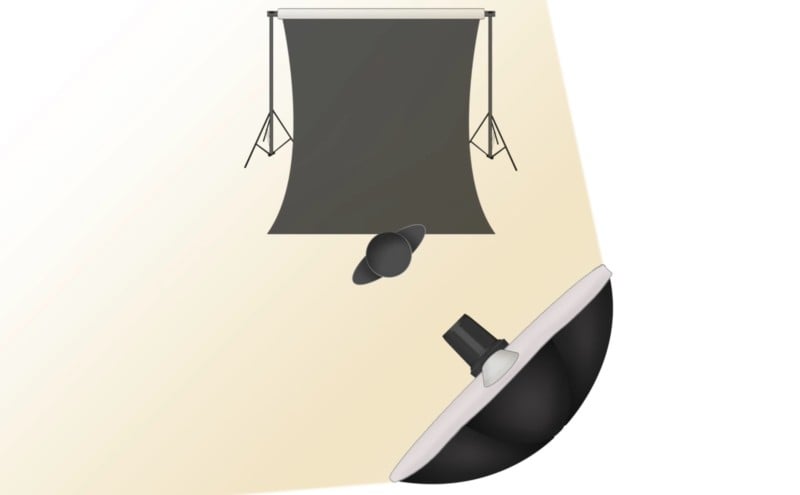
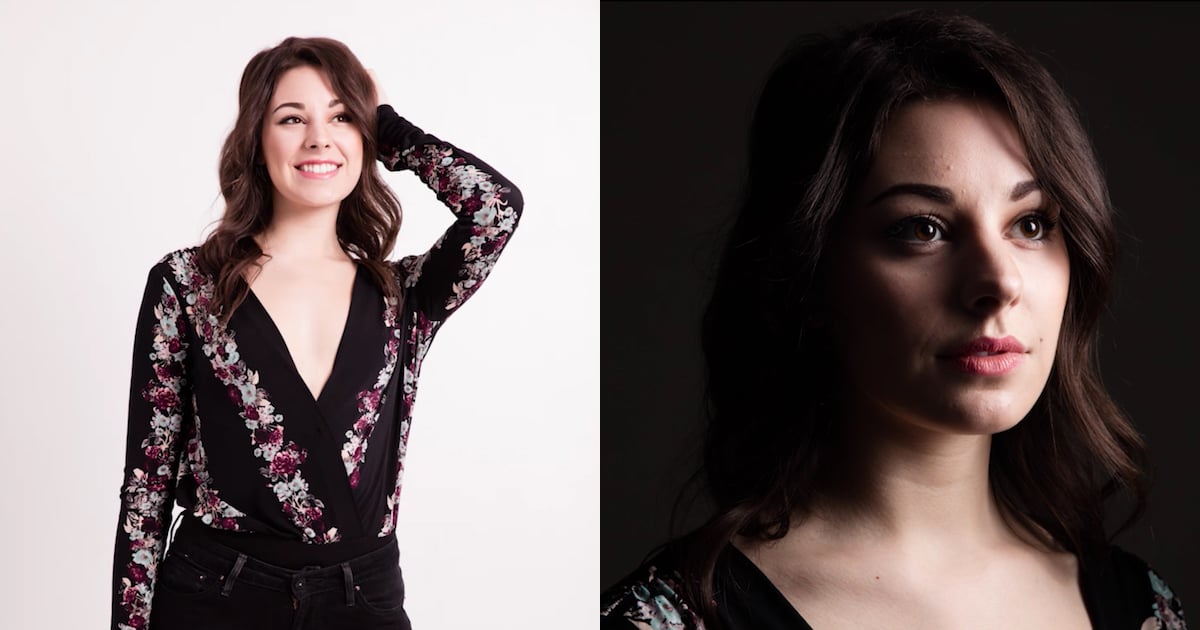
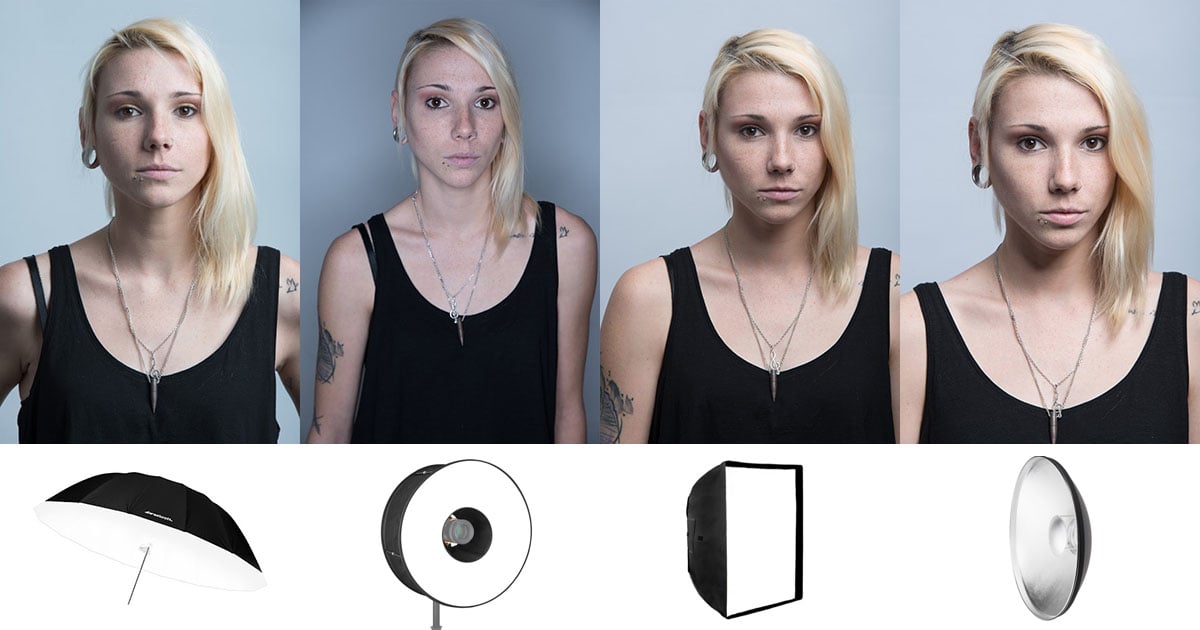
1. Set the light at a 45° angled slightly down towards your subject
This setup allows Rojas to accentuate his subject’s cheekbones and jaw line. In this case, Rojas suggests working with a larger umbrella, as the larger modifier will ensure the light wraps around your subject and softens their shadow.
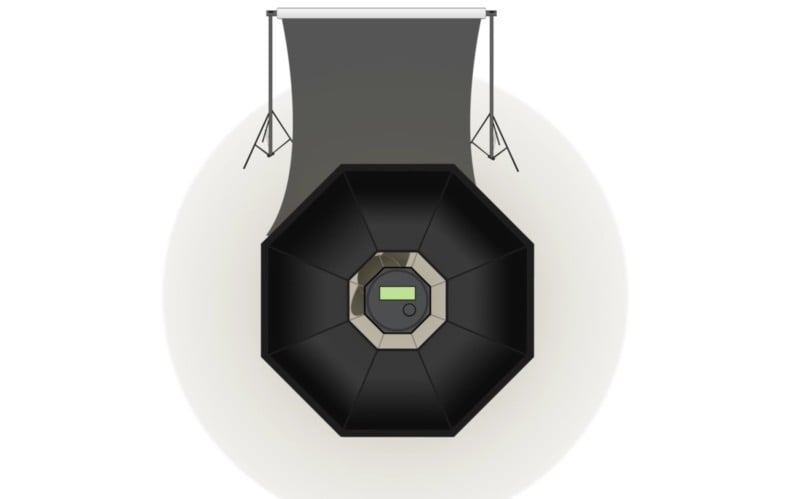
2. Set your light about 2 feet above and slightly in front of your subject, pointing downwards.
One of Rojas favorite setups, he discusses this one in more detail at this link. Basically, by setting the light above and pointing down at your subject, he creates dramatic portraits and (thanks to the large modifier) soft shadows.
If you’re using a smaller reflective umbrella, consider filling in some of those shadows with a reflector, since your light will be harder and shadows darker.
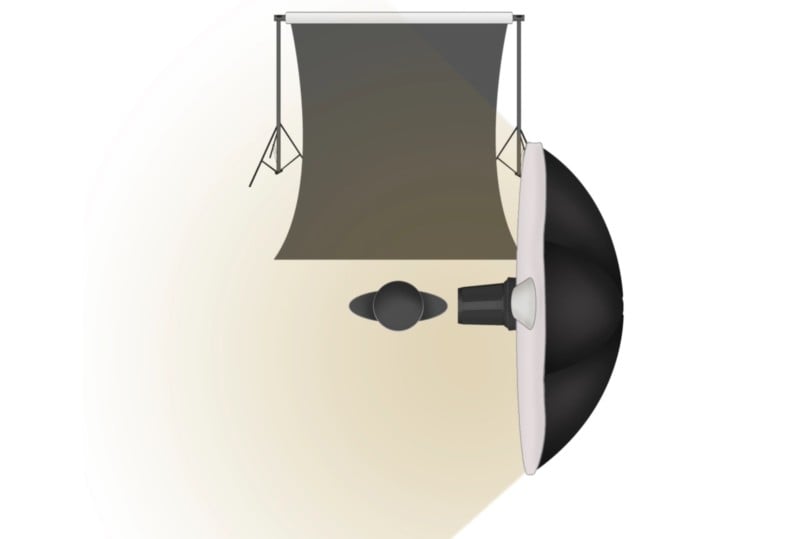
3. Set your light at 90° to the subject’s face, parallel to their profile.
Finally, this last setup will allow you to capture some split or profile light portraits. Placing the modifier to one side of your subject’s face will cast half of their face in shadow. A large modifier will help here too—unless you’re trying to cast very harsh shadows—as will raising the umbrella up to better accentuate your subject’s cheek bones.