My Ever-Evolving Workflow as a Music Photographer on Tour
I’ve been touring with bands for about 4 years now, and my workflow has changed nearly every tour, allowing me to spend less and less time editing, and ending up with an organized, easy to manage body of work after each tour is done. I think this is crucial to not only the quality of work you can put out on tour, but also your sanity.
I have heard of multiple photographers being fired from tour gigs because artists either never see photos, or they take way too long to deliver them. 99% of tour photos have a 24-hour lifespan. A photo from last night’s show is relevant, a photo from 3 shows ago really isn’t.
Since posting my tour photography workflow nearly 2 years ago, I’ve changed a few things about my process and wanted to share an updated version of what I do, as it’s always improving.
What You Need
- 2x 1-2 Terabyte portable hard drives
- Adobe Lightroom
- Dropbox (or another cloud storage system for delivery
Pre-tour Prep
Setting Up File Structures
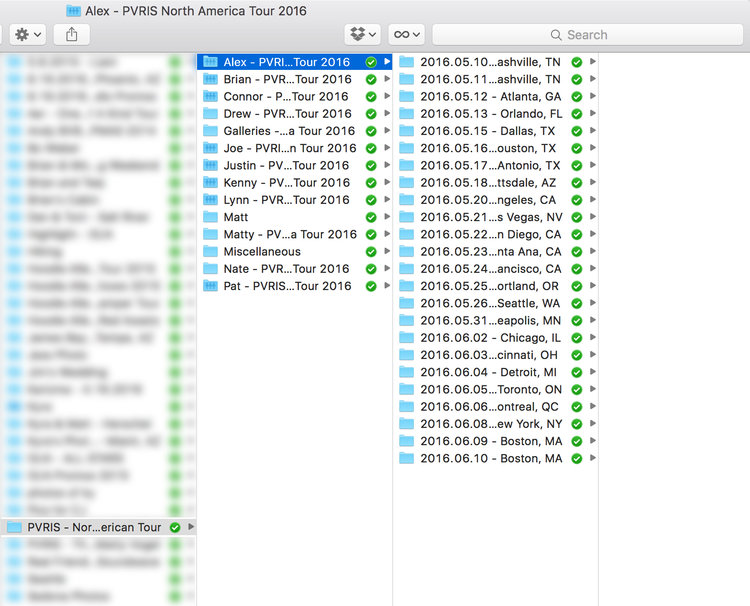
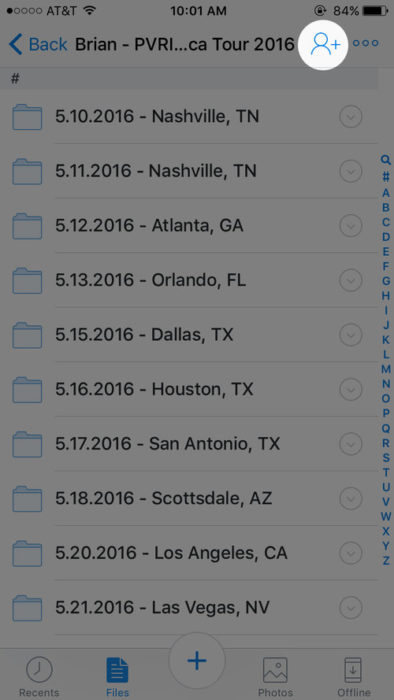
Create a parent folder for the tour, and then sub-folders for each date. Here’s an example below.
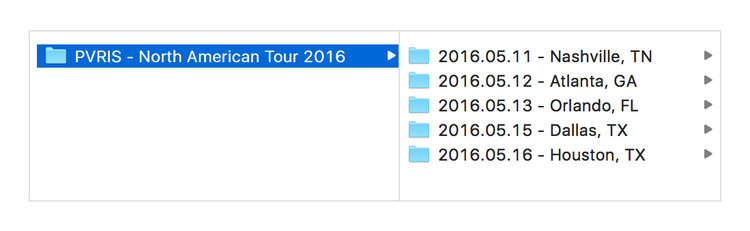
You can leave the sub-folders empty for now, folders will be created within them daily. I like to use the yyyy-mm-dd date format personally. When searching for specific folders I have archived the right year is the biggest indicator for me that I have the correct one, so it makes sense to see it first.
Preparing Lightroom Catalog
One big change I’ve made is migrating from daily Lightroom catalogs to one for the entire tour.
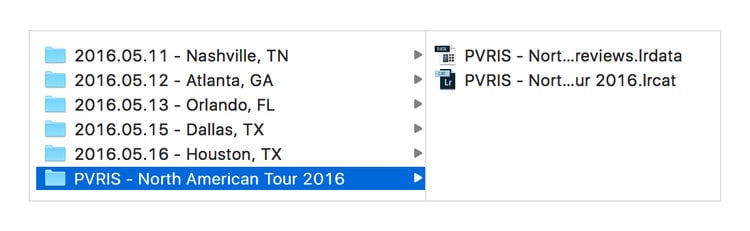
First, create another sub-folder within the above parent folder to house your Lightroom Catalog, name it whatever you’d like. Create a new Lightroom catalog and store it within that folder.
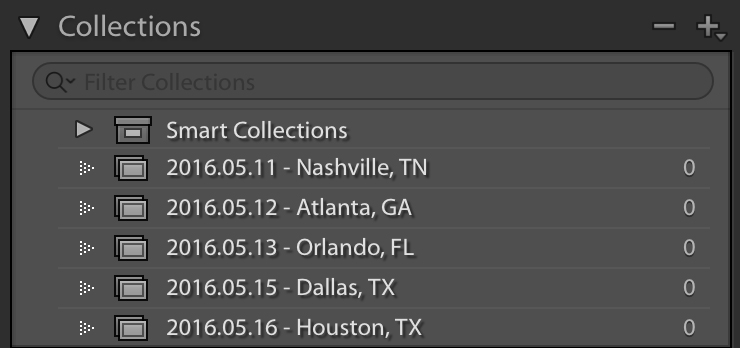
Mimic your folders you just created as new collections within this Lightroom Catalog. If you haven’t used collections in LR before, take a minute to do a quick Google search, as you’ll find plenty of information on this very simple system.
This is the biggest change to my workflow since last year. I used to work off a different Lightroom catalog each day.
Some of the biggest benefits of switching to one catalog are quicker access to photos from the whole tour, fewer concerns about duplicate photos, more consistent editing, and more effective file management.
The downside of a single catalog is that if you’re making a daily backup of your files (and you should be), you have to make sure you overwrite the old catalog, otherwise your day’s edits won’t be saved. Also, if the catalog is corrupted, deleted, or damaged somehow you would have a big problem. Thankfully if you are regularly backing up this shouldn’t be an issue.
Dropbox Folders for Delivery
Create a folder for the tour in Dropbox (or whatever cloud storage service you use), and then folders for each person on the tour. Within those, copy and paste your full list of folders for each date within these so you don’t have to do it later:
Day One
Day one has a little extra preparation to make your workflow the rest of the tour go smoothly. Depending on the size of the tour you’re on, the lights will likely be the same each day. Even if it’s a smaller tour without its own lights, you will want a consistent look across your work for the whole tour.
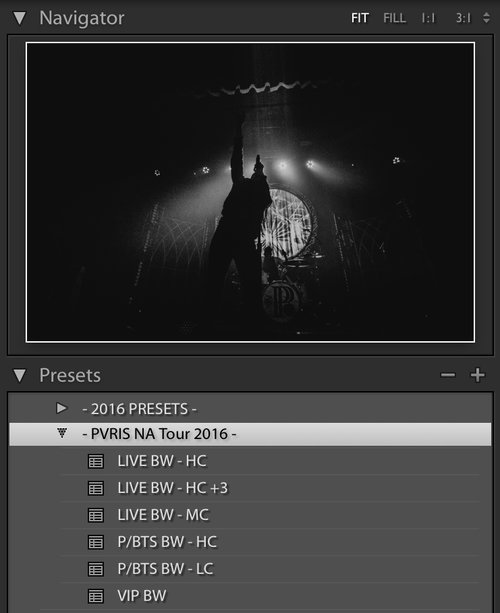
I have my own presets that I generally work off of as a base, and I create a new set for each tour. I use my own shorthand for naming these… name them however you want so you know the difference by looking at them super quickly. Here’s a little key to my shorthand:
- LIVE BW – HC = Use for live photos (too contrasty for other types), black & white, high contrast
- LIVE BW – HC +3 = Use for live photos, black & white, high contrast +3 on exposure slider (for very dark photos)
- P/BTS BW – LC = Use for portraits/behind the scenes, black & white, low contrast
As you can see, I usually create about 6 basic presets per tour, one to cover each common editing situation that I come across on a daily basis.
Daily Workflow
Okay, my workflow process usually starts at the end of the day. It’s 11:00pm or so and the show is done, and I’ve packed up most of my gear. I can usually finish this entire process in 60 minutes or less.
- I import everything into Lightroom, usually 1,000-1,500 photos on the day.
- The very first thing I do is select all my imported photos in Library view, and add them all to my collection for the current date. This is crucial for organization.
- I apply my tour presets in bulk, for example selecting all of my portrait/BTS stuff and applying the appropriate preset, then the same with my live photos.
Culling Process
I go through photos one-by-one, usually giving them about 1/2 of a second to determine if it’s trash. If it is, I keep going. If it looks redeemable, or it’s too dark to see well, I’ll up the exposure or other settings quickly to determine if it’s worth keeping.
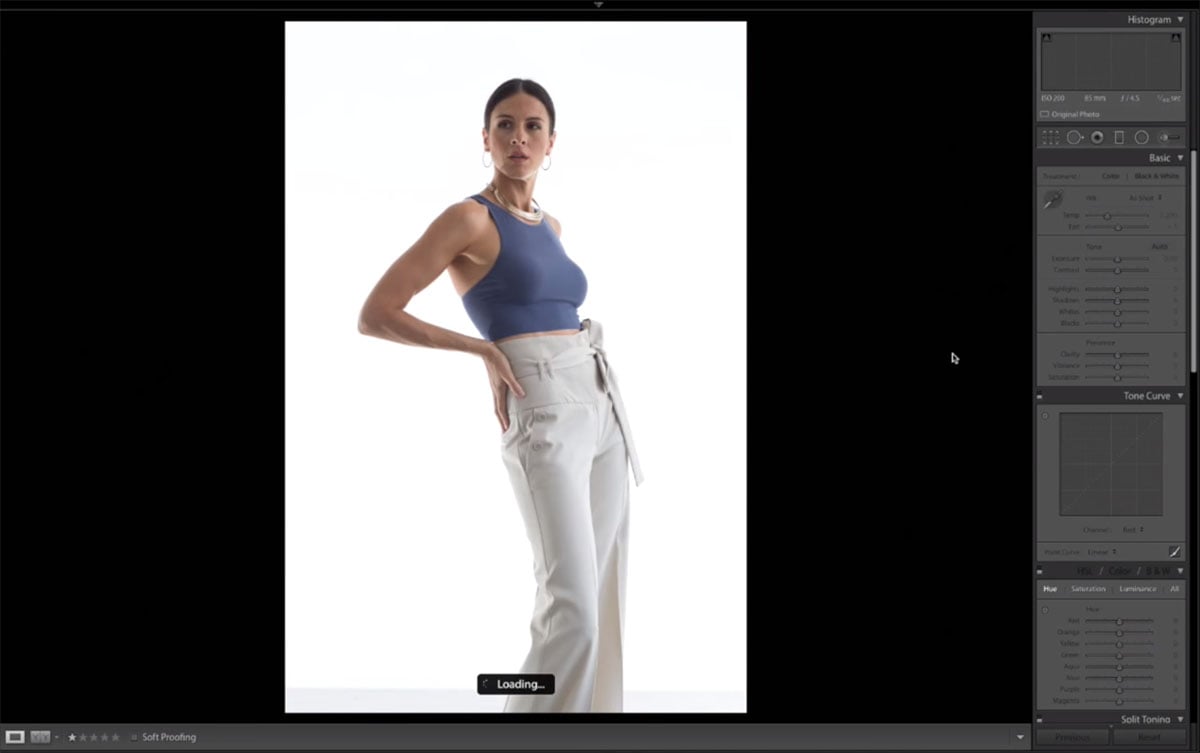
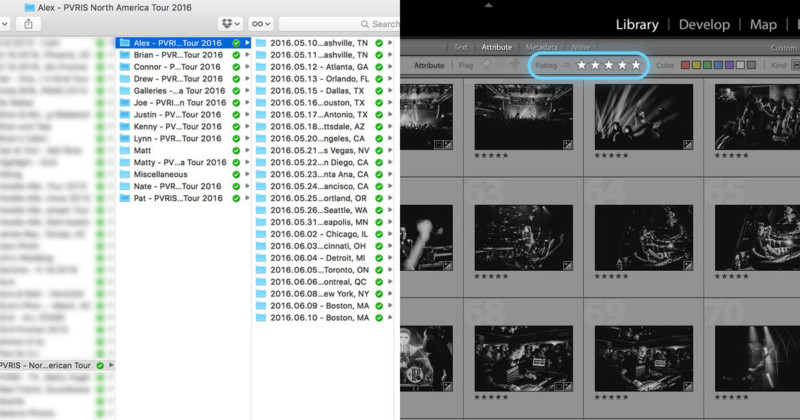
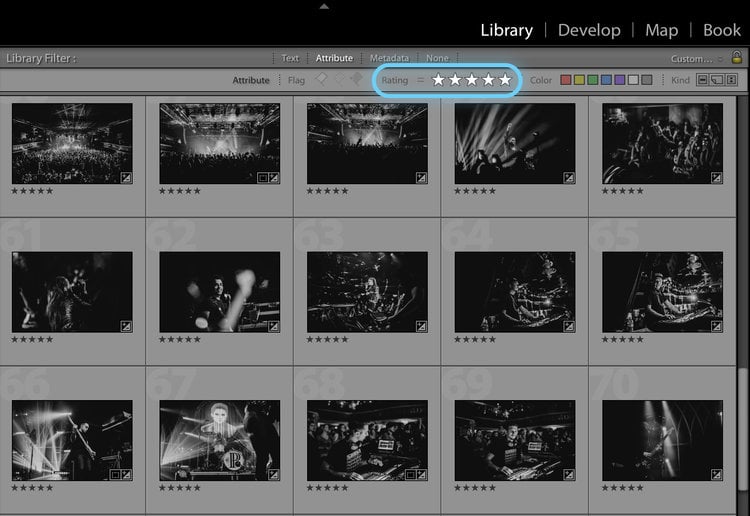
If I think it’s acceptable, I’ll mark it 5 stars by simply pressing “5” on the keyboard. I’ll then edit it quickly, until I’m happy with the product. When I’m done my loupe looks like a little like this:

Once I’ve gone through everything once, I’ll go to Library view and filter by attribute > 5 star rating. Now I’m only working with all my keepers.
I select everything, and export into my yyyy.mm.dd – city, state folder for the day, making a subfolder “Web” like so:
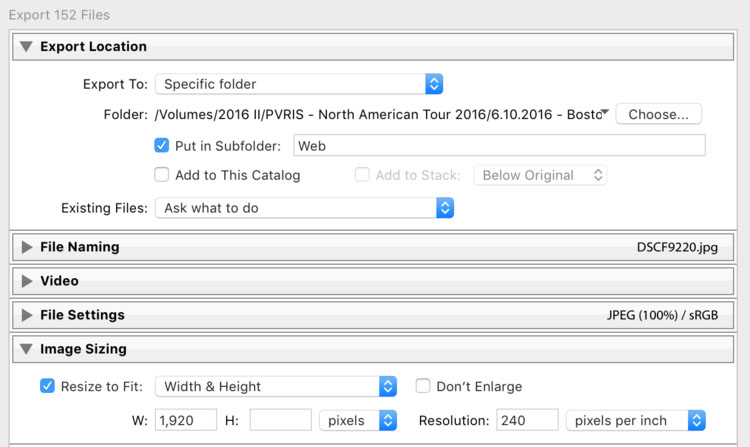
The main export settings relevant here are creating the subfolder, and I always resize to 1920px, it’s a high enough resolution for the band to post on social media without any quality degradation, and the file sizes are managable
Delivering Photos
I use Dropbox because I find it’s the easiest for delivery, most musicians I work with already have it set up, and know how to use it. The last they thing should have to worry about is figuring out how to access the pictures I’m hired to take for them.
I often deal with some band or crew members not having enough space on their Dropbox account for all the photos – there is an easy workaround! You’re storing them all on your plan anyway, so the only space you need is your own. I’ll show you how.
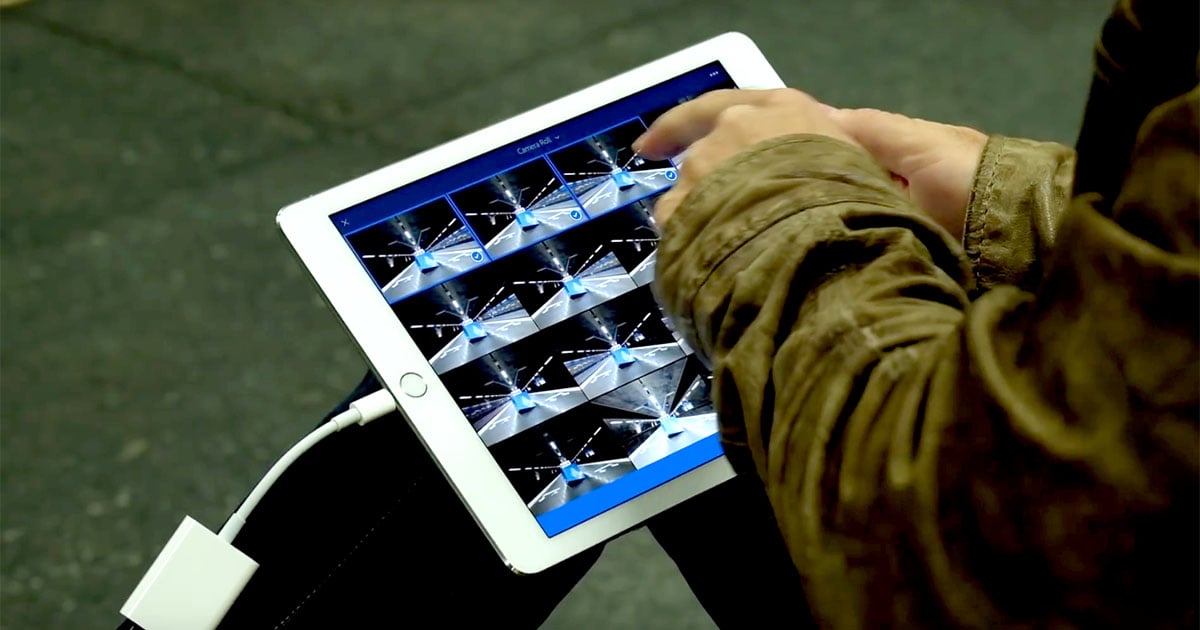
Access the folder you want to share via the Dropbox App, click the highlighted icon.
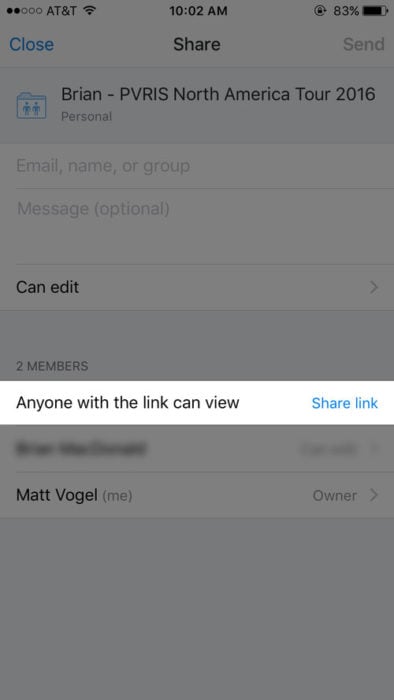
Click the blue “Share link” button on this page.
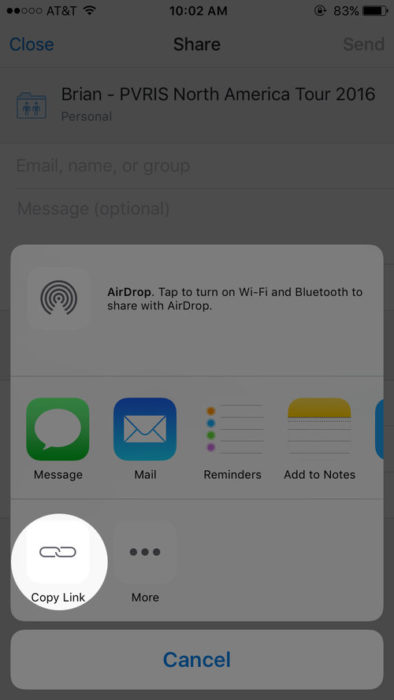
Copy the link, and deliver to the person via text, email/etc.
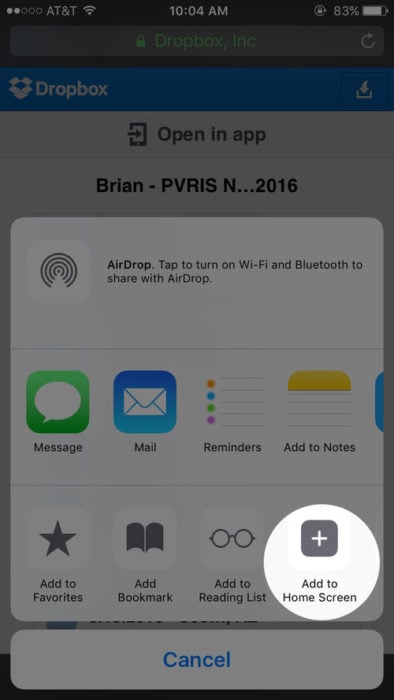
They will see this screen when they access that link. Have them click middle bottom share button.
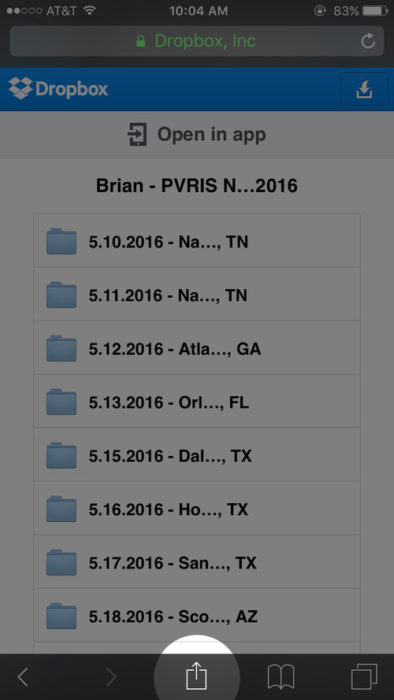
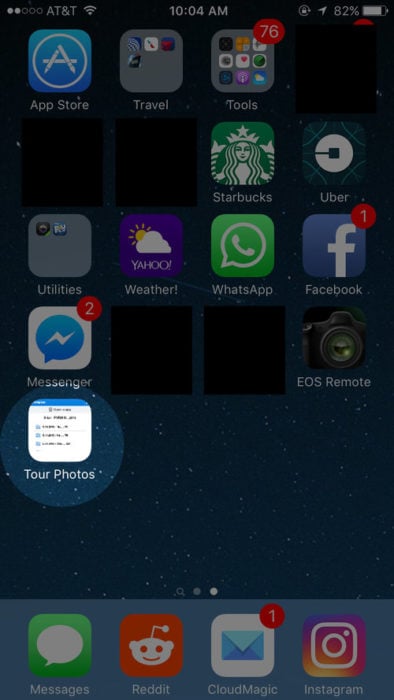
Click “Add to Home Screen” button, and name the link.
They can now access the link from their home screen without needing a Dropbox plan at all.
I open up my just created “Web” folder for the day, filled with the images I just exported. I copy and paste photos of each person into their own folder.
Managing Data
I usually shoot 1,000 – 1,500 photos every day. This means my RAW files alone from one day can amount to 40gb or more. Each tour’s backups can amount to over 1tb each. That adds up quick on physical drives, especially when keeping redundant copies.
I used to keep every RAW file that I shot, but I have stopped doing this on tour. I’ve realized that when I reach into my archives, I’m only accessing photos I’ve delivered in the past. I’ve kept them in case of ever needing to pull more images or options for certain shows, but I trust my culling and eye to find the best images when I go through them each day. Clients will never ask for an image from the past that they haven’t seen, so what’s the point in keeping them all?
After I deliver photos each day, I go into Lightroom again, and sort by Attribute > Rating = 0. I select all of these images, and since they’re my throwaways I delete them, including “Delete from Disk” to get rid of the original RAW files.
(Note that you cannot be looking at the photos within a collection when you try to delete them, otherwise you just remove them from that collection.)
I don’t have an internal hard drive big enough to keep all of my work locally on my computer, so after I back up on both of my hard drives, I will delete old daily folders to open up space.
Backing Up Your Work
Don’t skip this step! It’s important. Many things can happen to your data, especially on tour. I’ve seen people drop hard drives from their bunks, bags get stolen, and drives just straight-up stop working. Don’t let something like that cause you to lose all your work, you can prevent it. I’ve never had consistent enough good internet to make cloud backups on tour a reality, so I rely on portable hard drives.
- Back up your work every 2-3 days
- Overwrite your Lightroom Catalog folder on your drives with the one you have been working off of locally
- Back up on at least 2 separate drives, and store them apart.
I often keep one in my computer bag and another in my bunk. Things get stolen, stuff gets lost, hard drives get dropped, it happens. You need at least two backups.
Since I’ve started deleting my throwaway RAW files on tour, backing up has become even easier. Transfer rates and space issues are much easier than they used to be for me.
My most recent 30-day tour resulted in the folder’s total size, including high resolution exports, RAW images, and a Lightroom Catalog as 162gb, which is entirely manageable.
Post-Tour
As soon as I get home, I go through my full-tour Lightroom catalog and export everything into a “High Res” sub-folder. These are full-size jpgs at the highest resolution possible.
These “High Res” sub-folders are used for pulling images from my archives down the line for magazines, prints, merch designs, my portfolio, or anything else my clients need them for.
I then do a cloud storage backup of all my tour files, an exact mirror of what is on my hard drives.
That’s It! Now Be Consistent
Your Lightroom catalog, backups, and access to your archives will be manageable if you’re diligent about your workflow and are consistent every day. It’s a lot of work but your photos are important, not only to your client but to you as well, so take care of them!
About the author: Matty Vogel is a music photographer based out of Philadelphia, Pennsylvania. You can find out more about him and his work through his website and his blog. This article was also published here.