How to Build a Bear-Proof DSLR Camera Trap Housing
Looking to make your own DSLR camera trap housing? You’ve come to the right place. Camera trapping is an increasingly popular technique, and it’s rather addictive too. The ability to leave your DSLR camera out for days or weeks at a time, watching and waiting 24 hours a day, has revolutionized the wildlife photography field.
Now it is possible to take photos of rare animals, such as jaguars or leopards, at night. But it doesn’t need to be a big cat, as camera trapping can be used even in your own back garden with the likes of foxes and badgers.
But if you’re going to leave your camera out and exposed to the elements, then you need to build yourself a DSLR camera housing. This tutorial will look at the best way, trusted by almost all camera trapping photographers to date, to build your housing. Watch our video tutorial below, and refer to the rest of the article for more specific guidance.
Equipment You’ll Need
This camera trap will cost you about £140 to build ($190 USD) in both equipment and hardware. Use the links below to find and purchase each item, as these are exactly what is used in the video tutorial above.
You’ll need the following photography gear to bring together and create your housing:
The following are essential hardware tools for building the camera trap housing:
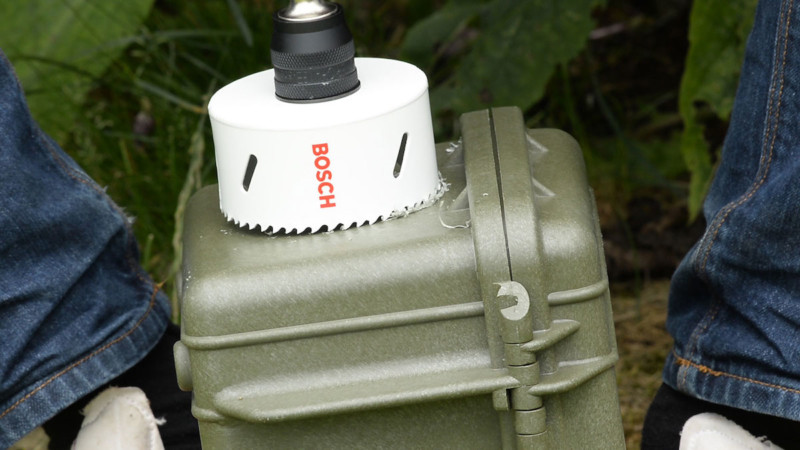
- Bosch 86mm Hole Saw
- Bosch Hole Saw Adaptor
- Tiger Seal
- Sealant Dispensing Gun
- Drill and basic drill attachments
- 25mm long bolts of appropriate diameter (5-7mm)
Introduction
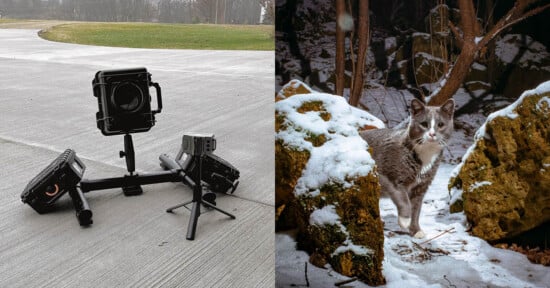
Camera trapping is a specialist photography technique. Leaving your camera wired to an infrared sensor, you are able to have your DSLR triggered automatically when something passes through a beam. By wiring your camera to flashes (or using wireless triggers, at the expensive of battery life) you are able to capture photos through day and night.
A DSLR camera uses little battery when not in use, but still switched on, and combining this with flashes that have a standby mode give you enough battery life to last for weeks without the need to revisit. This is why we need a camera housing, to protect your expensive equipment from not only the weather, but also any curious animals.
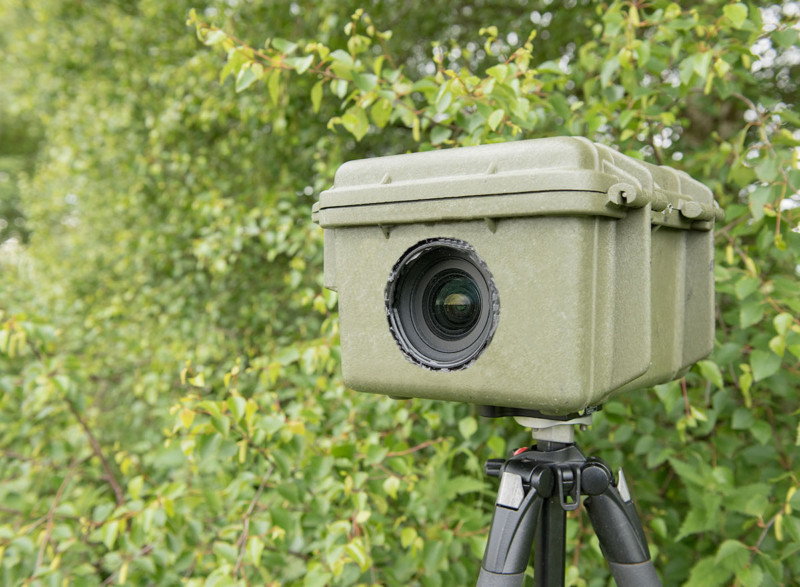
By the end of this tutorial, you’ll know how to build yourself a professional DSLR housing for camera trapping. The Pelican case will render the housing waterproof, shockproof, and pretty much bombproof. We’ll be creating a window for the camera to see out of, a tripod mount on the underside, and holes for wires to escape through. There are also some optional details you can add, which will be addressed at the end of this tutorial.
What camera you put inside your housing is up to you. It needs to be able to fit though, so a camera without a battery grip is recommended (that means goodbye to flagship DSLRs, but they aren’t necessarily the best choice). Personally, I use a Nikon D7000 with a Nikon 18-35mm f/3.5-4.5 lens.
Step 1: Make the Window
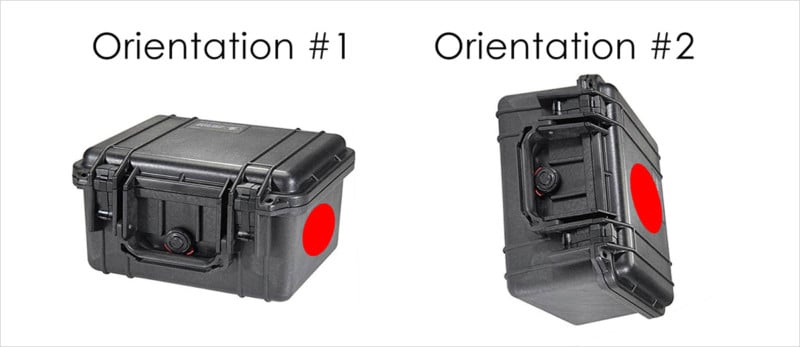
There are two orientations in which you can create your camera trap housing. As shown in the diagram below, the first will give ample room to your camera and you won’t need to worry about buying a lens that is small enough to fit inside.
The second orientation will allow you to open your housing and adjust settings on the LCD without having to move the camera, but you are limited on the length of the lens you can have inside and this can cause problems. I build my housings to the first orientation, and that’s what we’ll do in this tutorial. However, if you wish to work with the other option, then just adjust these instructions as necessary.
Cutting the window will take seconds. You’re going to cut the window at the end of the Pelican case. First, you need to mark the centre of the hole you will cut, as this is where the drill bit of the hole saw adaptor will make contact with the box. Measure 93mm from the side, and 64mm from the bottom, and mark where these two lines intersect. This should give you about 15-20mm of room between the bottom of the hole and the base of the box.
Next, attach the hole saw to your drill using the adaptor, and line up the pilot with the point you have just marked. Now is your chance to make sure the window is going to be exactly where you want, so check this before cutting – there’s no turning back from here. The hole saw is 86mm in diameter, so you’ll have a space around the UV filter to fill with sealant later on.
To cut the window for your camera trap housing successfully, run your drill fairly quickly and lightly press the hole saw to the plastic. It should start cutting through, allowing you to then increase the speed and push down to create the hole.
Step 2: Attach the Tripod Plate
This is how you are going to mount your camera trap housing to a tripod. I recommend the Manfrotto option for this, although there are other quick release plates available of course. Few are as large and stable as this option though. Separate the plate from the connector – you’re going to attach the plate, not the connector, to the box.
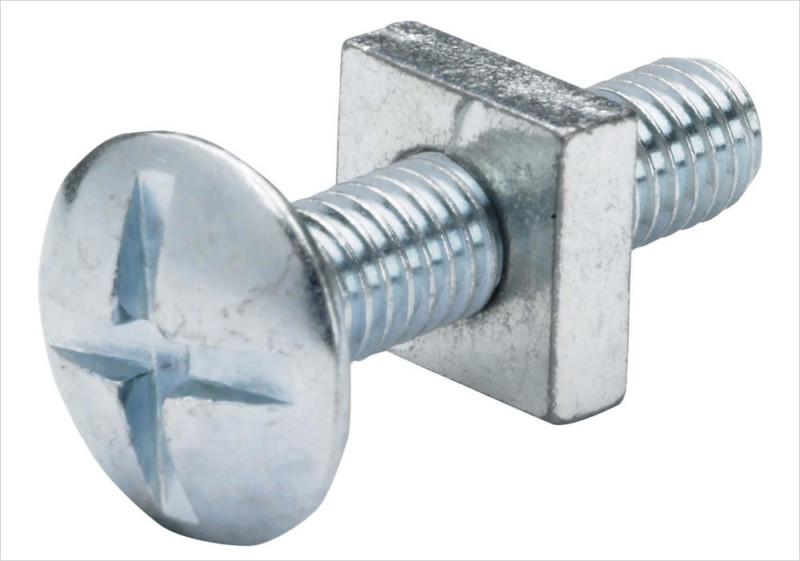
For this you will need two roofing bolts (flat ends for creating a flush finish between the plate and connector), each around 25mm in length. One bolt should be 5mm in diameter, and the other about 7mm. You can buy these from any DIY shop or hardware store. If you can’t locate one the right length, you can cut a longer bolt down to size with a good hacksaw.
Line up the plate on the base of the box, roughly in the centre. This should be at 119mm down the length, and 92mm across the width. In reality, you can judge this by eye easily enough. Position the plate so the the ‘Lens Down’ symbol is pointing away from the window you’ve just cut.
You’re going to be fixing the bolts through the gap in the plate where you would usually attach your camera. Pull out the rubber stopper, and take out the small bolts supplied with the plate (you should keep these, they come in handy for most tripod attachments). Use the drill bit with the matching diameter (or as close as possible) for each bolt to mark the plastic through the plate, at opposite ends of the gap.
It should ultimately look as follows:
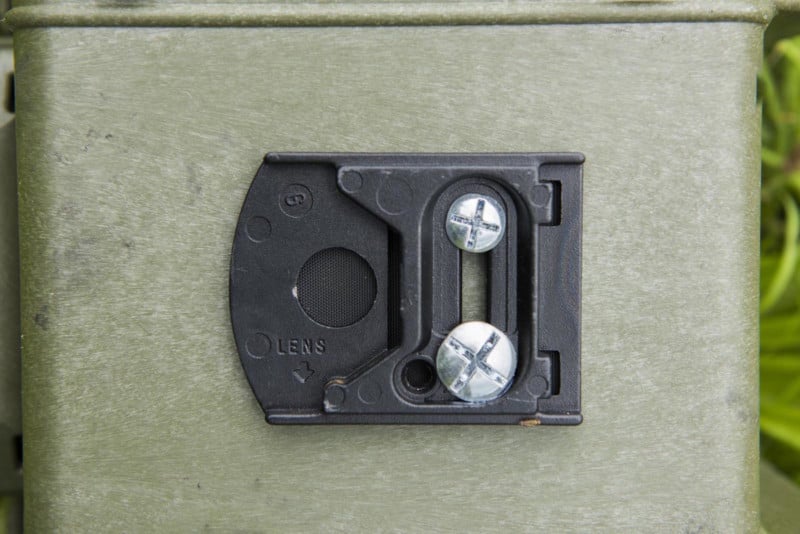
Remove the plate, and drill through the marked points. Put the plate back in position and push the first bolt through the larger hole in the plate. Open up the box and attach the bolt nut, using pliers to ensure it is as tight as possible. Do the same with the second bolt, although be aware you may need to screw it through the gap because it is narrower at the second point.
Your plate should now be fixed to the box, with no chance of it moving.
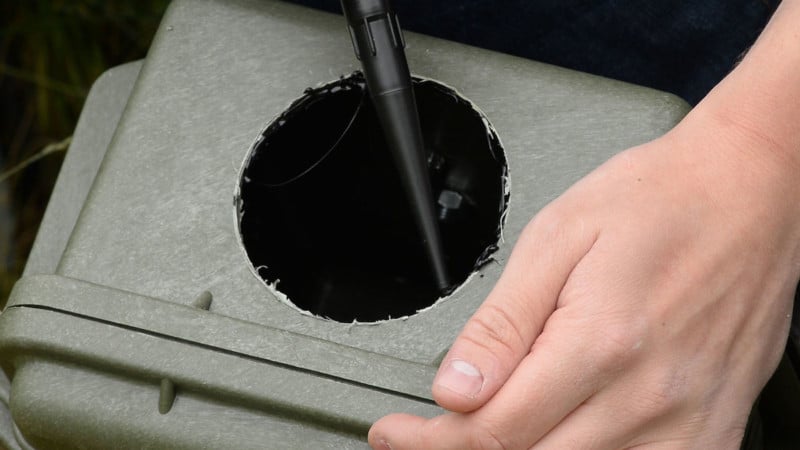
Step 3: Make Holes for Wires
If you’re using a wireless camera trap system, then you will only need to make one hole for the sensor’s wire. If you’re going to be wiring your flashes, then you’ll need more holes. The holes will go where the lid joins the main part of the box, allowing you to easily slot the wires into place.
Estimate the size of each wire’s diameter next to the drill bit to match. You’ll need to ensure it is a close fit, although choosing a very slightly larger diameter of drill bit will create a hole that will not bite too hard into the wire once the lid is closed. You may need to put your camera into the camera trap housing to visualize where the wires will be coming from. You’ll need to drill them on appropriate sides. For me, that’s 2 flash and 1 sensor cables coming from the left, and 1 flash cable coming from the right.
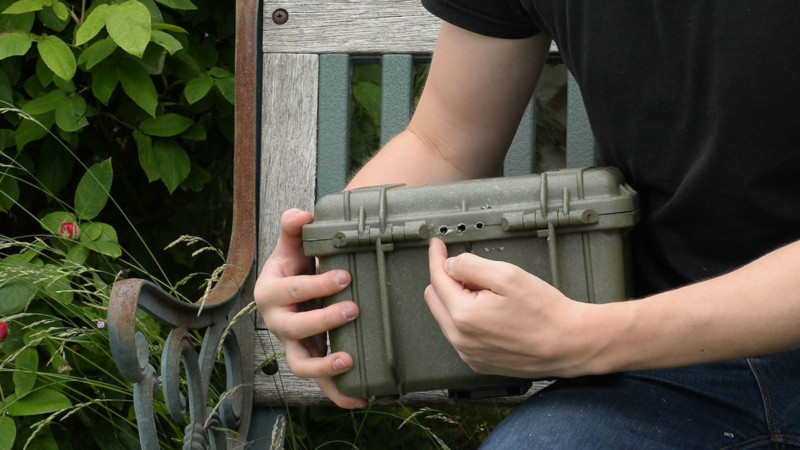
Now, close and lock the Pelican case lid. Line up your drill bit with the join, placing it not exactly in the centre but with the drill bit mainly on the lid, and just the bottom of it over the joining line. This isn’t an exact science, and an estimation is fine.
Drill straight down into the Pelican case, with a fair amount of pressure. Cut as many holes as required, but space them equally apart. They should be in the centre along the box’s length (between the clasps), not at the front or the back—remember where you wires are coming from when the camera is in position.
Now, open up the box. It is possible that you haven’t completely cut through all of the plastic if you weren’t lined up properly. No trouble, just cut away the top of the plastic covering the hole with a hacksaw or the drill.
Next, test your wires. Put one into the hole and close the Pelican case, locking it up. Open it up again and see that there is a bite on the wire (although not too much that it will damage it). If necessary, increase the size of the holes with another drill bit.
Step 4: Seal in the Filter
This is the tricky bit. To seal the window into position and maintain the weatherproof feature of the box, we’re going to need to use sealant. This is extremely messy stuff, and you’ll need disposable gloves to do it. Unfortunately, as you’ll see in the accompanying video, I forgot this step—and I still have black sealant on my hands a week after filming whilst writing this tutorial.
For this I recommend Tiger Seal—one tube is more than enough. First, unpack your 82mm filter and cover it in paper. Just draw around the filter on a piece of paper, cut out the circle and then stick it to the filter by folding a piece of tape back on itself. Make sure you do this on both sides, and ensure the the edges don’t lift up easily. You must not get any sealant on the filter—if you do then you’ll have to replace the filter.
Now, time is a factor here. Sealant dries over a long period, but it will begin to get rubbery fairly quickly. Using the nozzle, pipette sealant around the border of the window. You’re never going to make this neat, so don’t worry about going over the edges. But if you do want to try and keep it neat, you can stick masking tape on the areas you don’t want sealant to mark (such as around the window).
Next, put the filter in place. You’ll have to open the box and hold it as it won’t be solid yet. Fill the spaces around the filter with more sealant—you shouldn’t be able to see light through any gaps—and it will start to take hold. Once the sealant starts to go rubbery, you’ll be able to let go of the filter. Make sure that you put sealant in from both the outside and the inside of the box to ensure a proper seal.
Gently smooth out the sealant so it spreads over the edges of the case for a proper finish. Now all you need to do is leave it to dry in a cupboard (the sealant is quite pungent) for at least 12 hours. Once it has dried, remove the paper from the filter. If you need to clean the filter, you should support it from the opposite side so that you don’t accidentally push it out from rubbing it with a cloth.
Step 5: Final Touches
Put the foam back into the box. Pelican cases have famous pick ‘n’ pluck foam, making it easy to shape around equipment. Take out the foam in stages so that your camera sits on the bottom layer, whilst being protected and held into place on either side. The foam will protect the camera, as well as helping to soundproof the box to avoid spooking animals with the shutter. It’s a good idea to tape the foam into place with double-sided tape, to avoid it moving around whilst in use.
You can also create a hood to keep rain off your new DSLR camera trap housing. Just take two strips of velcro and attach them to the front of the box. Then, cut up some plastic (anything like a plastic folder will do) and fold it into a hood to cover the top and the sides. Then, attach the rest of the velcro strips to the hood. Easy—now you have a detachable hood to keep rain off.
Conclusion
Now that you’ve made your DSLR camera trap housing, you’ll be looking to go camera trapping. Check out more tutorials at Nature TTL. We’ll be publishing new content about how to wire and trigger a camera trap soon.
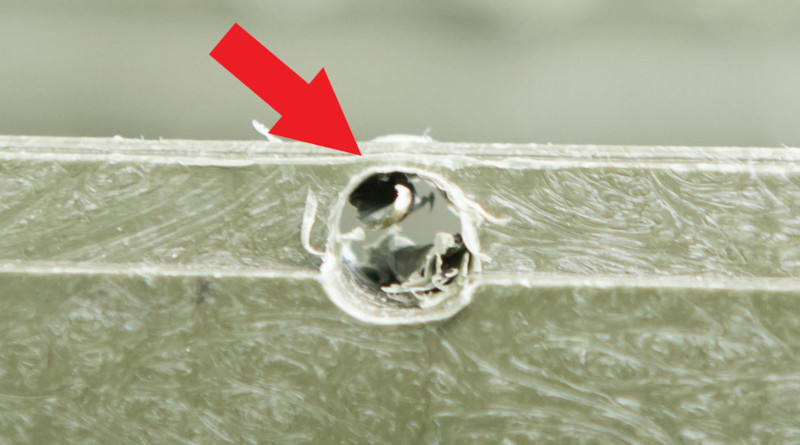
This camera trap will last you a long time. They’re super resilient and the very same housing made in this tutorial has just stood up against bears…

If you’ve followed this tutorial and created your own camera trap housing, please share a photo of it in the comments below—we’d love to see!
About the author: Will Nicholls is the founder of Nature TTL and a professional wildlife photographer and film-maker from England. You can visit Will’s website here, or follow his work on the Nature TTL website, Facebook, and Twitter. This tutorial was originally published here.