How to Plan and Capture a Perfectly Aligned Moonrise Photo

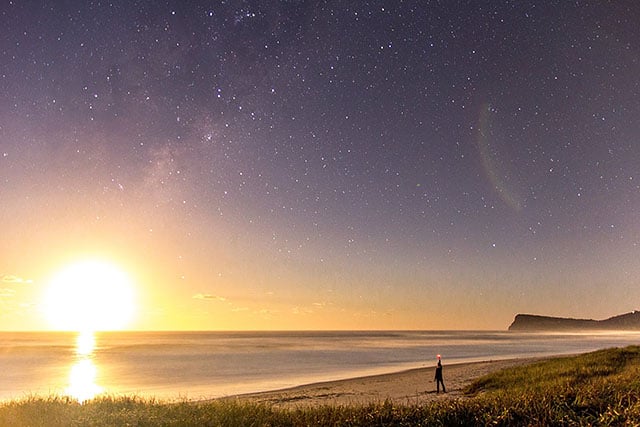
Photographing the moon can be spectacular—a rising full moon looks very big and is often red. And combining a spectacular moonrise shot with landscapes or objects in close-up can give really great results.
For close ups you obviously need a long lens. 150-600+ is recommended. For my own shots I have used the Sony A7RII with the Sigma 150-600 with Sigma MC-11 adapter. Sony doesn’t have really long native e-mount lenses hence the choice for the Sigma. In this guide I’ll explain how you can plan and make shots of moonrises and moonsets.
The Idea
When capturing photos, in general, the idea behind the photo is often as important as the execution of the shot. This is definitely the case when taking shots of a rising moon in combination with objects such as buildings and landscapes.
The moonrise (and moon set) happens very quick, so you don’t have much time to take your shot. Planning is crucial.
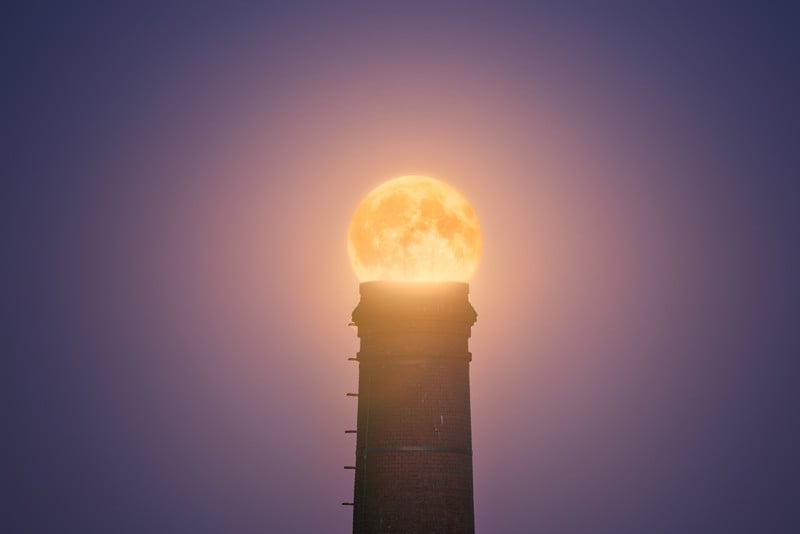
First, think of nice objects in your neighborhood that stand out above the tree line. Or look for higher vantage points to shoot from. Next, it’s important that you have a rough idea of where the moon is rising or setting. In this example we use my shot ‘Nine Fifty Five’ as an example in which the moon is rising next to a Church tower.
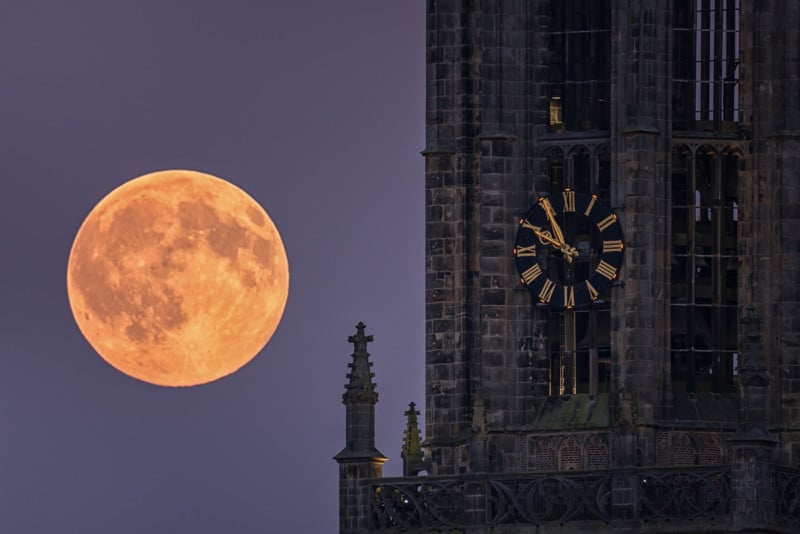
With your idea in mind, you also have to think about the distance where you’re standing in relation to an object and the moon. In the example shot my distance from the tower is not extreme, which gives me a lot of detail from the tower and the moon. If I was standing much farther, the moon would be much bigger in relation to the tower. This is important to realize when planning these shots.
Speaking of which…
Planning the Shot
So I had this idea of photographing the Amersfoort Church Tower with the moon right next to it. I wanted the moon ‘big,’ but not too big. I also wanted to try to get the moon right on top of the tower as a different composition.
To get the moon balanced with the tower, I obviously had to stand quite far away to make full use of my 600mm lens. There’s a great little website called www.mooncalc.org (I use the same for the sun, named suncalc.org) to plan these things ahead.
There are also smartphone apps. I recommend PhotoPills (iOS only for now). Photopills has a great augmented reality function, in which you can see there the moon/sun rises when you hold your phone in front of you at the location you’re shooting. This is great for planning and scouting ahead.
With mooncalc, I located the tower and checked where the moon would rise.
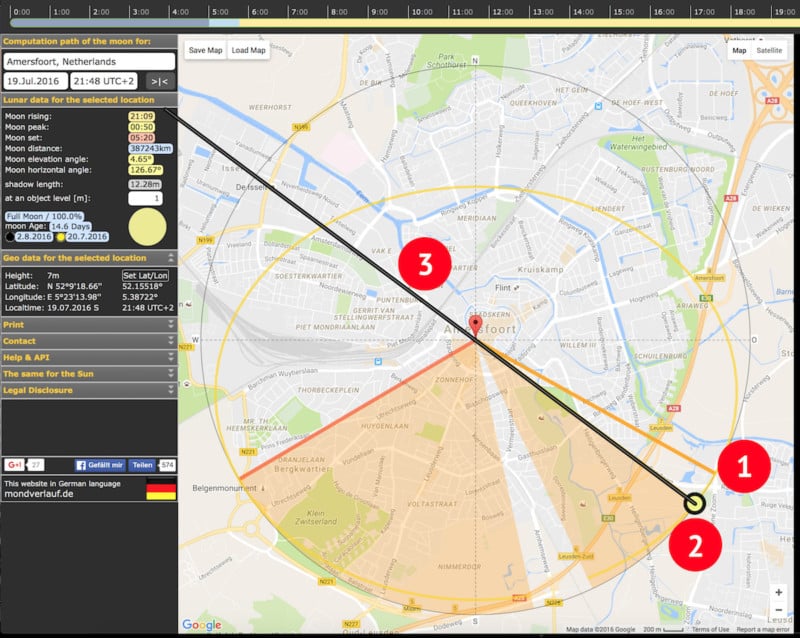
- Moonrise time: 21:09 PM
- Moon position 1 hour after moonrise time.
- My position at the roundabout.
I put the pin on the tower so I could see where the moon would rise from the right angle. I knew from earlier scouting that the moon would be at the right height around 1 to 1.5 hour after its initial rise. At the 19th of July, the moon was full right after sunset—that way, we would also have enough light to work with on the tower itself. Total darkness would make the contrast between the light of the moon and the tower too much, so timing was crucial.
With the sun setting close to 10 PM (yep, summertime in the Netherlands) the moon would be around the right spot at that exact same time (but of course, in the opposite direction).
With the tower pinned on the map I could see where exactly I had to stand. As most locations further away from the centre of town were blocked with buildings, I had to pick a spot that was a bit closer. The roundabout close to the city centre had an open view of the top of the tower and proved to be perfect for the shot I wanted to make.
From there, I also had enough room to move left and right to position the moon as I wanted to. I had to keep in mind that the moon moved to the right from the position I was standing compared to from where it initially rose. As you can see, taking a shot like this requires a lot of planning and there are a lot of variables you have to work with.
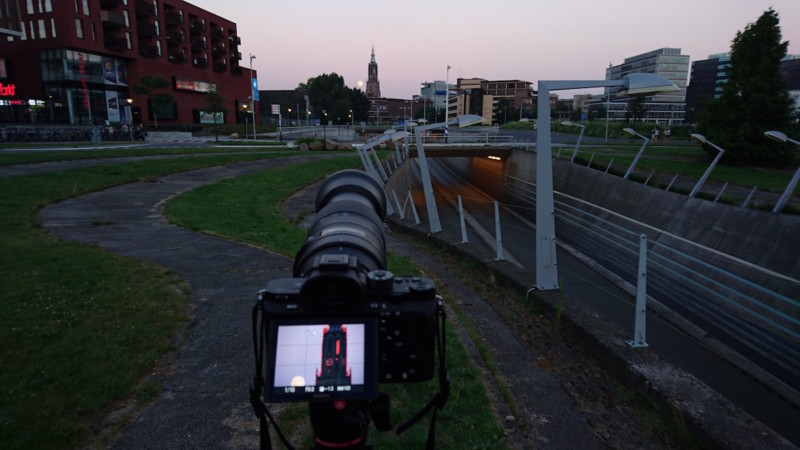
Taking the Shot
The work of these particular shots is mainly in the planning and testing of things. When taking the shot I positioned myself at the roundabout and just had to patiently wait until the moon reached a position that I found good for the shot.
I used my Sony A7RII mounted with the Sigma 150-600 with the Sigma MC-11 adapter. This all worked really well. I planned to take most shots at 600mm as the moon would be as big as possible with that focal length. Luckily, there wasn’t too much wind as the slightest vibrations could make your shots unsharp when using that extreme a focal length. As the moon wasn’t too bright 1 hour after initial rise, everything was pretty dark. The sun was also setting so I had to pick a lower shutter speed or raise my ISO. I chose to shoot with a lower shutter speed (1/10s)as I was working from a tripod anyway. Most of my shots came out sharp and I was very satisfied with the image quality this setup provided.
I noticed that when I tried different compositions I had to be really fast. The rising of the moon goes extremely fast and it’s high up in the sky in a matter of only around 2 hours. Shooting at 600mm you can almost see the moon moving if you watch closely. Working from a tripod, you only have around 30 seconds to shoot a composition as the moon is already at a different spot shortly after.
This proved to be challenging, especially when wanting the moon at a very exact spot (like exactly on top of the tower). Although these shots were be cool to try, I liked the full moon right next to the tower most. For me, it was the most atmospheric shot.
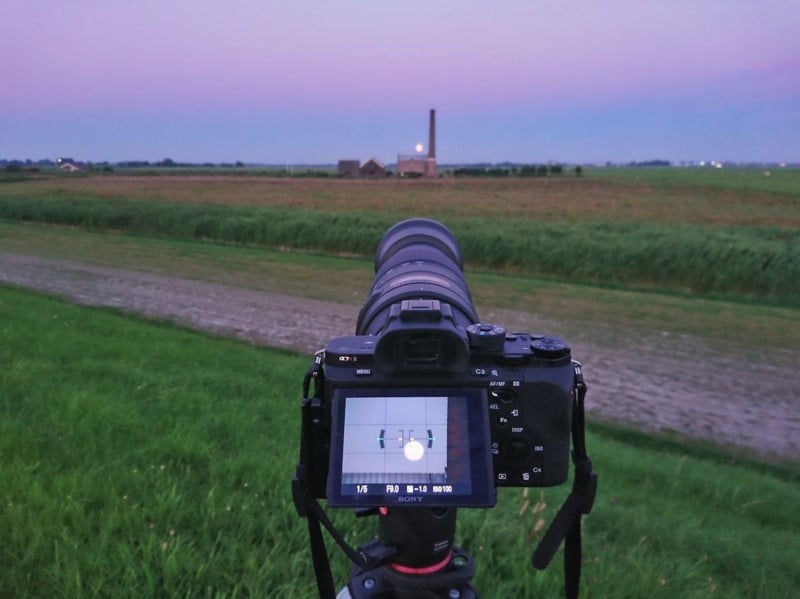
And with the same workflow and technique and gear I created the following shot 1 month later with the next moonrise:
Extra tip 1: When you’re capturing shots with very precise position of the moon, it may happen that you miss the shot because you only have a few seconds to take it before the moon moves out of position. What you can then do is very quickly lower your tripod so that the angle with the moon is slightly different. This makes for another try because the moon would be a bit lower in your frame, giving you another chance at catching that precise rising shot you were looking for.
Extra tip 2: You can also use this technique to shoot moonsets instead of rises. The workflow is similar. Use mooncalc.org to check when and where the moon sets. Make sure you arrive on time as the setting of the moon goes quite fast at the end!
About the author: Albert Dros is a photographer based in Amsterdam. You can find more of his work on his website, Facebook, Twitter, Instagram, and Flickr. A version of this article was also published here.