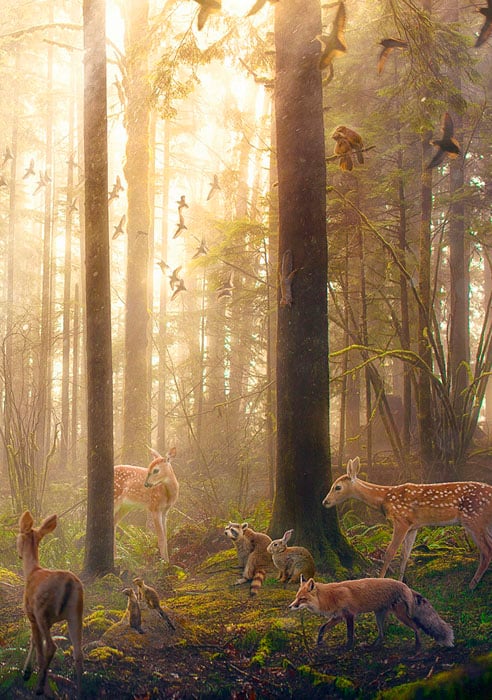
5 Steps to Making a Magical Animal-Filled Forest with Photoshop
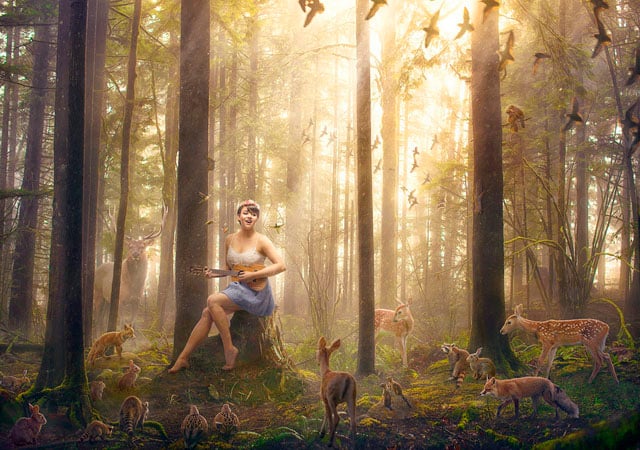
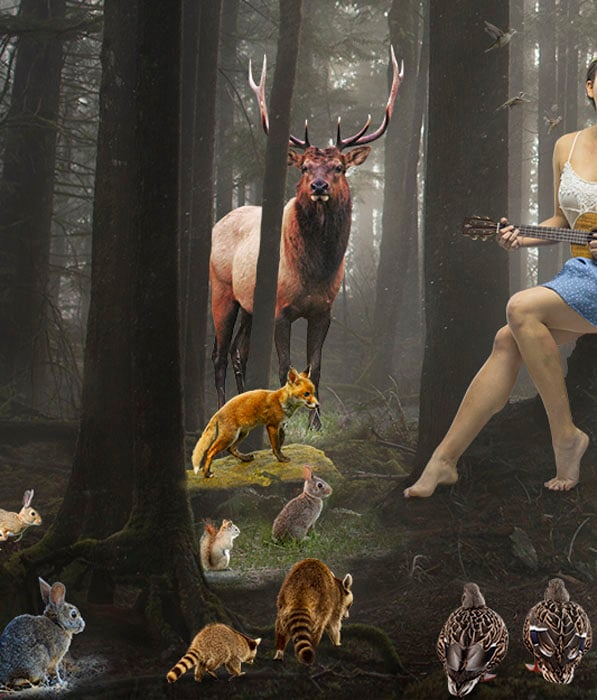
Before I get into the nitty gritty details of how this piece came together, I would just like you all to take a minute to appreciate how very talented Mackenzie Johnson is. (She is the model for this photo, and happens to be a YouTube-singer-songwriter in case you were unaware.) Not only did she do her own hair/makeup/wardrobe and model like boss, but she even actually played and sang for this photo.
The Background Image
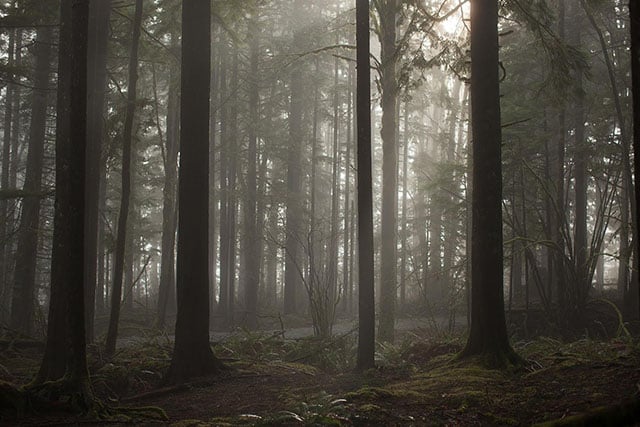
Obviously one of the most important pieces you’ll need when creating your own gorgeous woodsy wonderland is a top-notch image of a forest (or other natural setting of your choosing). Unfortunately, I have been crazy busy with life, work, vacations, and side projects, so I didn’t have the time to shoot my own background image. I thought I would turn to one of my photography friends to see if someone would be willing to donate an image to my cause.
The very first person that came to mind was none other than the spectacular human that is Sarah Anne Loreth. She was happy to oblige and boy did she deliver! She sent me a hefty handful of forest images, all of which were works of art on their own and any one of them could have worked perfectly. However, this one particular image had just the right quality of foggy light coming through the trees that I had been envisioning in my head.
Gathering Animals
Once you’ve acquired your ideal forest picture, the next step is to find some adorable animals to plop into your scene. I wanted this image to have a bit of a Snow White/Cinderella/Disney princess feel to it, with lots of wildlife gathering to hear the princess sing. Again (as is seemingly the norm for me), I didn’t have the time or resources to gather the images of all the different kinds of woodland critters I was hoping to have in my composite, so I began searching for stock images that would work.
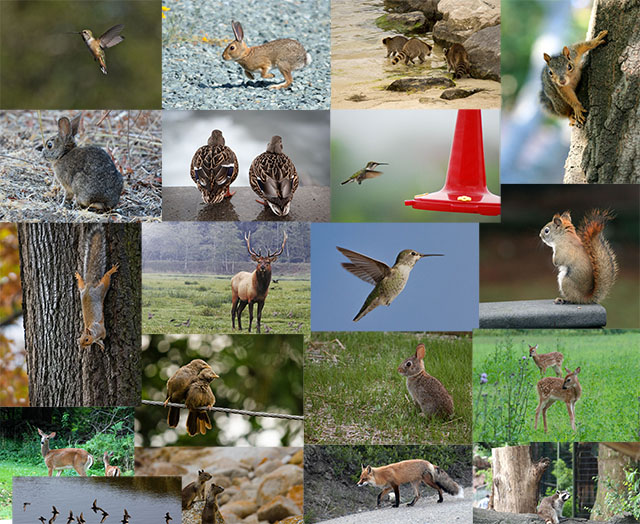
One of the most important things to keep an eye on while hunting for your animal images is the angle the picture was taken from, as well as the lighting. Obviously most everything can be altered (up to a point) in Photoshop, but it’s much easier if you find (or take) pictures with either flat-ish lighting, or ones that have a similar light source coming from a similar angle to that of your background image.
Since the light source in the forest I used was coming from above and slightly behind, I wanted to steer clear of any obviously side or front-lit images. Don’t worry too much about the backgrounds and/or overall color of these images, just go for the poses and angles that you think will meld well into your scene.
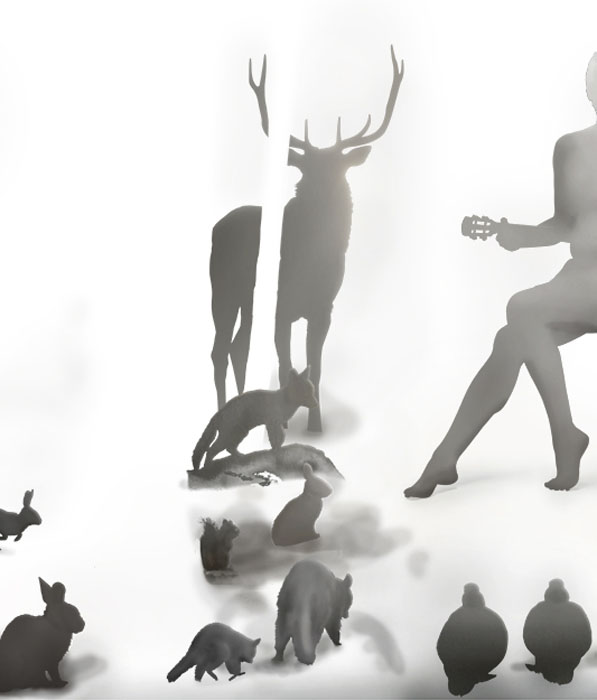
Cutting Out Critters and Figuring Out Fur
After you’ve gathered up a nice little library of vermin, the next step is to cut them off of their backgrounds. This can be quite tricky, seeing as most of the animals will have fur, which is usually rather difficult to mask out nicely. Oftentimes if they are on a solid enough background that is a different color than the fur, the “Refine Edge” tool can do a wonderful job of selecting the little strands of hair out. However, more often than not you will come across animals that are on some sort of complicated background.
Fortunately for you (and myself), I found a really great technique for achieving a good selection on furry animals even when they were on a somewhat complex background that would give “Refine Edge” a run for its money. What I did first was semi-roughly pen-tooled the edge of the animal, clicking kind of rapidly as I went around the animal, trying to go in a tight zig-zag line. Follow along some of the jagged points of fur, but definitely don’t get too detailed and tedious about this; we will be fixing this messy edge in the next step.
Once you have the entire animal pen-tooled out, right-click and select “Make Selection.” Set the feather to somewhere around 0.5 pixels, then add a layer mask. Next, grab the smudge tool and a grungy brush that has rough textured edges. Click on your layer mask and, using the smudge tool with a strength of around 40-60-ish, you can drag the edges out slightly with small sweeping movements and create the illusion of fur without having to actually select each individual little hairs.
So you are essentially feathering out your selection around the animal, and not smudging/blurring the actual pixels of the animal. (Check out the video at the bottom of this post and you’ll see me do this technique for almost every little forest friend.) Once in a while you can end up with a bit of a green glow if they were on a grassy background, for example; you can just add a new layer on top of your animal, set the blending mode to “color,” and paint where the unwanted color is with the color of the animal. It will blend the green tone right into the browns of the fur.
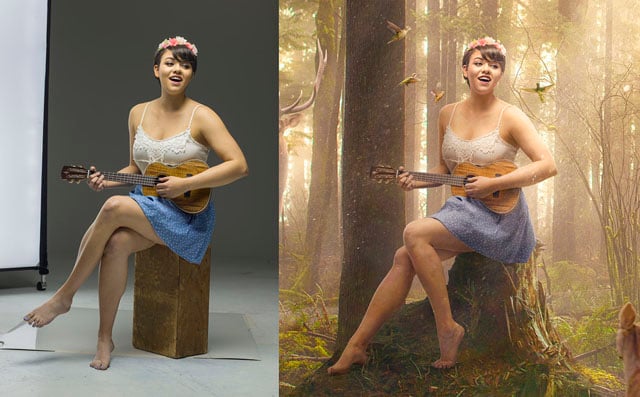
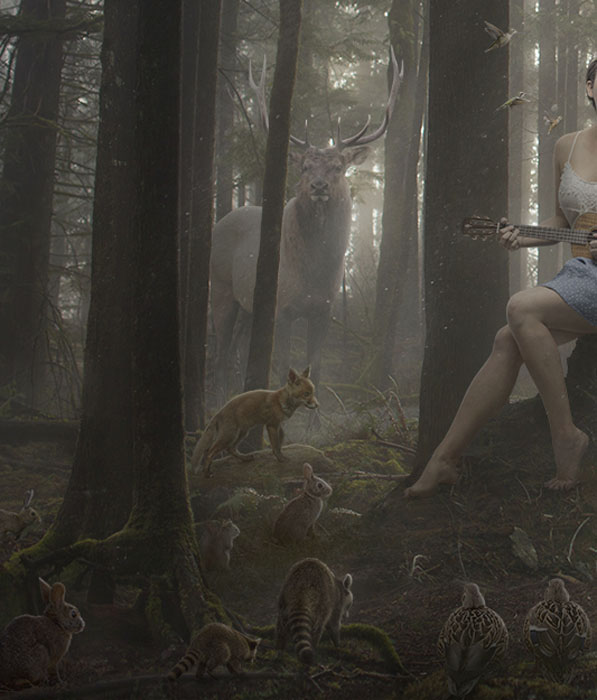
Blending and Color Matching
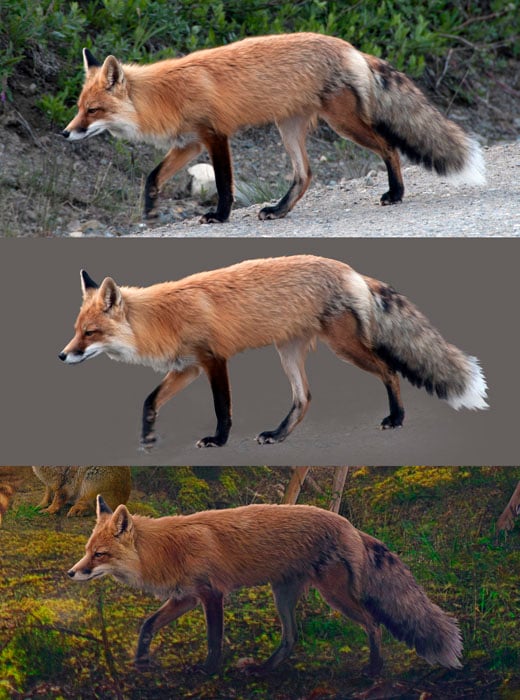
Since the animal images were taken in all kinds of different places with slightly different lighting scenarios, none of them matched the background or each other perfectly. They all looked very out of place since the background picture had a pretty neutral desaturated look to it. (I’m hoping you’ll have noticed this in the gif above.) All the animals appeared quite bright and overly saturated; this just wouldn’t do. I came up with a few different layers that, when added up on top of each other, made for a pretty convincing blend.
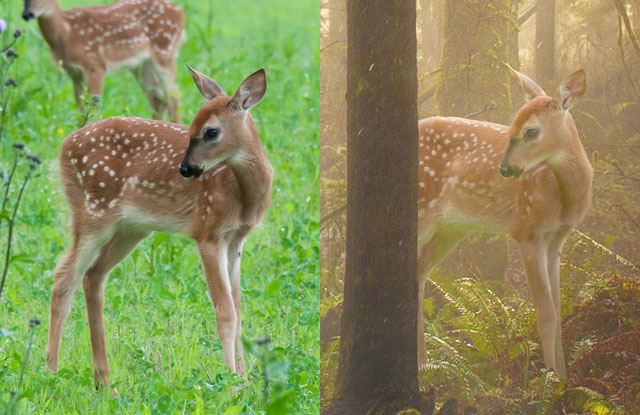
It was pretty easy to match all the animals to the more monochromatic color palette of the forest picture by desaturating each animal using a hue/saturation adjustment layer, and bringing the lightness down a couple of points on the bottom slider of that adjustment as well. If this didn’t match the color well enough right away, I would also add a color balance adjustment layer and either warm or cool the image as needed to better match the color temperature of the forest pic.
Next I’d add a brightness/contrast adjustment layer and bring the contrast slider almost all the way down, and the brightness down a bit also, until the animal matched fairly well. After that I’d make a new layer and grab a large-default-completely-soft-round-Photoshop-brush. I would select a color right from the background (if you hold down alt/option it brings up the color eye dropper) and paint with that color with an opacity of 10 or 20% right on top of the entire animal. This was the step that REALLY melded the animals more seamlessly into the image – it gave a soft, hazy, foggy effect in a way I rather liked.
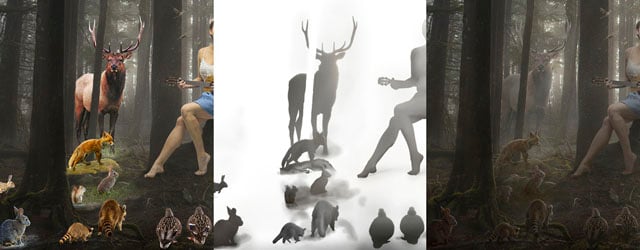
Coloring and Saturating
Once I’d added in all my animals and blended them into the background’s color palette (or lack thereof), they almost disappeared; you could hardly tell they were even there in some instances. (So possibly they were blended toooo well?) My next step was to saturate the whole image (with a hue/saturation adjustment layer). This immediately made the animals more noticeable and brought everything together in a nice way, starting to give it more of that magical Disney feel that I wanted. I added a color balance adjustment layer to play up the yellow and red tones in the highlights and a tiny bit of blue/cyan/green in the shadows.
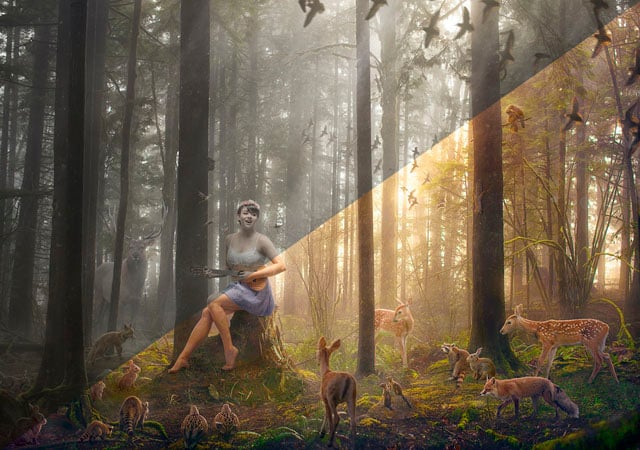
After I was happy with the overall color of the image, I added a new layer on top and set the blending mode to “Overlay.” I used this layer to click in some extra glowy highlights on areas where the light was peaking through the trees in the background, really making sure to exaggerate the main point of light at the top right.
So there you have it! If there is anything else you’d like to know about how this was created, you can probably glean some more knowledge by watching this 15-minute-long speed edit video:
About the author: Robert Cornelius is a photographer and an award-winning Photoshop guru based in Lebanon, Pennsylvania. You can find more of his work on his website and read more of his writing on his blog. This article was also published here.