Enlightening the Capture and Processing of Lightning

Living in the Southwest United States gives me a great opportunity to capture lighting. Every summer “Monsoon Season” arrives, officially June 15 through Sept 15th, in Arizona. Prevailing northwesterly winds carry humid air north out of Mexico where it meets the hot air of the desert, resulting in powerful thunderstorms nearly everyday. The thunderstorms often produce localized areas of heavy wind, thick blowing dust (Haboobs), rain, and most importantly, lightning. I regularly track the storms on the local Doppler radar feeds and try to guess where the best shooting will take place.
Compare the following photos:

Open sky above rooftops (Tungsten WB), boring.

Lightning behind saguaro cacti, more interesting.
Safety First
Thunderstorms are typically very localized events with ‘most’ lightning generated in the same area. However, it is random, and you should be very careful about watching weather conditions as it changes around you. I have occasionally shot from inside the car in order to remain protected from wind and rain. I have never had lighting hit within ¼th of a mile. Remember that rule of thumb which says that each second lag between seeing the lightning strike and hearing the thunder…one.. two… three…”boom” is three miles away? Wrong!
A little math will do:
Divide the number of seconds by 5 to calculate the distance in miles (or divide by 3 for kilometers). In other words if you counted 18 seconds from when you saw the lightning, the strike was 3.6 miles (6 kilometers) from your location. The delay between when you see lightning and when you hear thunder occurs because sound travels much, much more slowly than light. Sound travels through air at about 1100-1200 feet (330-350 meters) per second (depending on altitude, relative humidity, pressure, etc.), which is a little more than one mile per five seconds (one kilometer per three seconds) [via]
Late one night I was at the airport trying to shoot a T-38 jet over a fence as a distant storm was popping. I was standing on a small hill and was not quite above the fence line. I spotted an aluminum picnic table and decided to drag it to the top of the hill.
 I then climbed on top of it and extended my tripod all the way, using the live-view mode to focus (more on that below). So I finally had a shot of the plane over the fence. As I began taking pictures the airport police patrol slowly drove by on the other side of the fence. His car window was down and I heard him gasp as he observed my set-up.
He stopped, ““Sir, should I be concerned about this?” he asks.
“Not if you let me inside the fence for a few
shots..”
“Can’t do that”
“OK, well, I gotta get the shot!”
“OK, good luck, I’ll be back in awhile to check on you,” he said as he pulls away shaking his head.
Camera Setup
When I’ve spotted my storm and arrived at my scene, what then? Set your camera to manual. I typically use a wide angle zoom, the Canon 16-35L.
- ISO: Depending on the ambient (e.g. city) light I will go as low as possible so that I can run my shutter a long as possible
- Aperture: As high as you can go. If the storm is within a few miles, the lightning will be plenty bright, so you can use f/7-f/10. More distant storms will require you to open it up. You can.
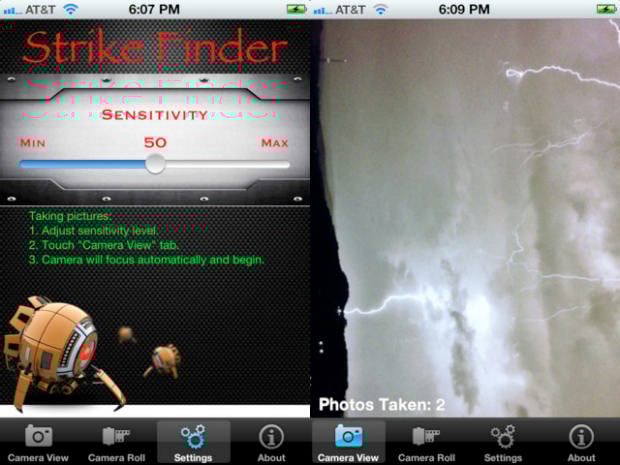
- Shutter: As slow as the scene will allow. Shooting at sunset with lots of ambient may only allow you a second or two per frame. Change it longer as the sky darkens. I also use an intervalometer shutter trigger, allowing me to set the camera and forget it. I recently also found a program which runs the camera from a laptop (DSLR Remote). Some photographers even wire up an Arduino Circiut which detects the feeler strike and trips the shutter just before the main strike(s).
- Tripod or other support is a must
- Focus. The latest cameras have “Live View” mode. Use it to find the infinity ‘sweet spot’, which may not correspond to the mark on the focus ring. I have found that most of my Canon L lenses it is about 1/8” to the right of the mark. Zoom your Live View screen and find some distant point of light (streetlamp or even bright star). Lock your focus on that point. And then don’t touch the lens. Yes, changing focal length of a zoom lens changes the focus!
- White balance: I usually shoot AWB, but if the scene is contaminated with city street lights, I have found that switching to Tungsten WB helps reduce the yellow color-cast.
- Take lots of shots. I sometimes will come home with several hundred images from one storm.

Canon 5D Mark II, 16-35L, Tungsten WB, 30sec @ ISO400
Post-processing
Arriving home from a storm session I am always excited to see what I captured. “Chimping” images on the back of the camera does not do them justice. I usually download and then do minor adjustments in Lightroom (color/saturation, crop, etc) and score them for quick sorting later.

If I have any lightning in given image, I score it a “3”. If I really like it I score it a “4”. I then can filter out any unwanted frames, shown below:

Layer Stacking
Depending on the number of strikes in frame you might want to help Mother Nature by layering images to increase the impact of the view.
To do this I take several frames from the same setup with lightning and import them into Photoshop. Choose the ‘best’ image to serve as the base (Not the background layer – this base image will actually end up being the top layer of the stacked images). Open the last image shot as the Background layer, and then progressively Copy and Paste other images as layers on that one.
So say I import all of the frames above: 5051 had the best saturated color in the sunset, so it will be my final layer (top of the layer stack in Photoshop). So I open #5071 first and then copy-paste #5065 on top of #5071. I then activate the Lighten Blend mode. Lighten blend mode compares the two layers and allows the lightest pixels from the layer below to show through to the layer above. This is the reason I normally work backwards in the sequence of images.
“But I don’t have Photoshop,” you might be tempted to say. This also works just fine using GIMP.


Once I have the frames stacked to my liking I check color matching. Sometimes, as the light changes, the camera will alter the White-balance ever so slightly resulting in each frame having a slightly different hue. I choose the offending layer and CTRL+B (Color Balance menu) to adjust it into harmony with the other layers. These adjustments done, I will save the stacked images as a PSD, then flatten to perform ‘global” adjustments such as Curves, spot removal, crop, etc).
Sounds complicated, but it usually only takes me 15-20 minutes to process to final image.

About the author: Norm Cooper has loved photography since he first took pictures with a Zenit 35mm camera several decades ago. He works with his wife and brother-in-law in their wedding photography business and is developing his own professional website Beyond The Norm Photo. His photos have been seen in numerous media, including calendars, news broadcasts, and commercial applications in print and on the web. He lives with his family near Phoenix, AZ.
Image credits: Photographs by Norm Cooper